
Related Manuals for Dillon SL 900

Summary of Contents for Dillon SL 900
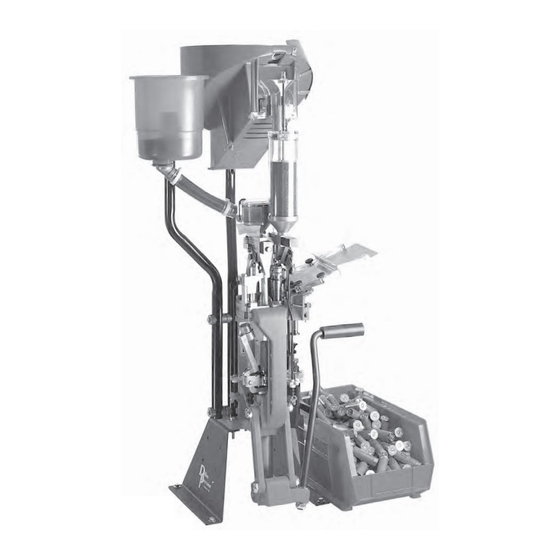
- Page 1 SL 900, May 2007 5/21/07 11:51 AM Page 1 Dillon SL 900 Instruction Manual May 2007 illon recision Products, Inc. Manufacturers of The World's Finest Loading Equipment...
-
Page 2: Table Of Contents
11:51 AM Page 2 Table of Contents Parts List, Schematics and Diagrams 3 - 15 SL 900 Machine Mounting Assembly Upper Machine Assembly Shot Container Assembly Casefeeder Assembly & Parts List Casefeeder Bowl Mount & Casefeed Assembly to Frame Lower Machine Assembly... -
Page 3: Parts List, Schematics And Diagrams
13958 1/4 Washer 16731 Spring (Bellcrank Assembly) 17839 P/M Slotted Bellcrank 13966 1/4-28 x 3/4 SHCS 16732 Pivot Pin 17843 SL 900 Foam Insert Set 13988 1/4-20 Nuts 16733 Shot Bar Return Rod 17899 Stem Screw 13989 10-24 x 5/8 SHCS... -
Page 4: Sl 900 Machine Mounting Assembly
SL 900, May 2007 5/21/07 11:51 AM Page 4 SL 900 Mounting Assembly Part # Description 13856 1/4 Washer SAE 13911 1/4-20 x 2 3/4 Bolts 13988 1/4-20 Nuts 16222 (4) 16065 650 Machine Mounts 16221 1/4 Fender Washer 13856 (4) -
Page 5: Upper Machine Assembly
13966 1/4-28 x 3/4 SHCS 13988 1/4-20 Nuts 13966 13989 10-24 x 5/8 SHCS 16675 Shellplate, 12 ga. 16676 Ejector Wire 16699 Spent Primer Cup 17123 SL 900 Casefeed Post 17124 Shot Post 13988 17637 1/4-20 x 4 1/2 Hex Head Screw 13667 13791... -
Page 6: Shot Container Assembly
SL 900, May 2007 5/21/07 11:51 AM Page 6 Shot Container Assembly Part # Description 16724 Shot Hopper 17139 Shot Dispenser Fitting 17202 Shot Fitting E-Clip 16724 17479 Clear Industrial Vinyl Tubing 17837 Tyton Clamp 17202 17139 17837 17202 17837... -
Page 7: Casefeeder Assembly & Parts List
SL 900, May 2007 5/21/07 11:51 AM Page 7 Casefeeder Assembly 13813 Part # Description 13400 Casefeed Bowl 13732 (4) 13473 Casefeed Motor - 4 RPM 13738 (2) 13539 Casefeed Cord Set 13632 12 Ga Plate 13540 Casefeed Motor Cover Assy. -
Page 8: Casefeeder Bowl Mount & Casefeed Assembly To Frame
16709 Camming Pin Part # Description 13685 1/4x20x5/8 Screw 17130 Casefeed Sleeve, 12 Ga. 17123 SL 900 Casefeed Post 17131 Casefeed Body 17124 Shot Post 17353 Phish Spring Socket 20536 SL 900 Casefeed Tube - white label 17472 #8 Washer .032 Thick... -
Page 9: Lower Machine Assembly
SL 900, May 2007 5/21/07 11:51 AM Page 9 Lower Machine Assembly Part # Description 13485 Mainshaft 13700 Link Arm Shoulder Pin 13789 1/4-28 Set Screw 13830 Mainshaft Pivot Pin 13841 Nylock Nuts 17182 13989 10-24 x 5/8 SHCS 14922 Link Arms... -
Page 10: Toolhead Assembly
SL 900, May 2007 5/21/07 11:51 AM Page 10 Toolhead Assembly Part # Description 10184 Crimp Die Spring 10185 Crimp Die Sleeve 14008 13901 11109 12 ga. Crimp Die 11110 12 ga. Seat Plug 12577 1/2-20 Jam Nut 17817 10185... -
Page 11: Platform Assembly
SL 900, May 2007 5/21/07 11:51 AM Page 11 Platform Assembly 16695 16684 16696 16694 16683 14574 13891 16753 (3) 13997 17126 (3) 13311 13937 13738 16697 14037 Part # Description 13311 Spring Pin 17944 13738 10 Stainless Washers 13789 1/4-28 Set Screw... -
Page 12: Primer Feed System Assembly
SL 900, May 2007 5/21/07 11:51 AM Page 12 Primer Feed System Assembly - #19201 Part # Description Part # Description 13773 8-32 Nut 16723 Primer Feed Body 13793 Collar Roller 17132 Primer Drop Tube 13856 1/4 Washer SAE 17134 Primer Bellcrank... -
Page 13: Automatic Powder Measure Assembly
SL 900, May 2007 5/21/07 11:51 AM Page 13 Automatic Powder Measure Assembly - #17817 17817 SL900 Powder Measure Assy 13882 Part # Description 13691 Powder Measure Tube Only 13793 Roller 13845 Collar Sleeve 13882 Powder Measure Lid 13921 Powder Measure Plug... -
Page 14: Shot Dispenser Assembly
SL 900, May 2007 5/21/07 11:51 AM Page 14 Shot Dispenser Assembly - #22134, 12 gauge shown 17138 17202 17143 17139 17142 17573 13701 14026 17476 14013 17146 16725 13996 13871 *16739 13817 16727 16740 13958 14041 13848 Failsafe Rod... -
Page 15: Wad Swing Arm Assembly
SL 900, May 2007 5/21/07 11:51 AM Page 15 Wad Guide/Swing Arm Finished Shotshell Dimensions Assembly #16802 - 12 gauge shown Here are some dimensions of a typical 12ga. shotshell. Always use a quality dial caliper when measuring your shotshells. Length may vary dependent upon shotshell manufacturer. -
Page 16: General Machine Information
• LOADS AND LENGTHS: Avoid maximum loads and General Machine Information pressures at all times. Use only recommended loads Based on our XL 650 machine frame, the SL 900 from manuals and information supplied by reliable comes to you with some great automated features. -
Page 17: Step-By-Step Preliminary Assembly
5/21/07 11:51 AM Page 17 Fig. 1 - A.) Dillon Bin B.) Shotshell Chute C.) Strong Mounts D.) H.) SL 900 Toolhead and Frame I.) Spent Primer Cup J.) powder Universal Mounting Kit and Hardware needed for Strong Mount measure K.) Roller Handle L.) Hardware for Shot Post and Casefeed installation E.) Shot Container and Post F.) Shot Dispenser Hardware... - Page 18 SL 900, May 2007 5/21/07 11:51 AM Page 18 Fig. 6 Fig. 3 Microswitch 5. Open the casefeeder box. Place the feeder on 2. Lift the machine up and fasten the machine your bench and plug it into a 110v AC outlet (220v for securely to the forward edge of the bench.
- Page 19 SL 900, May 2007 5/21/07 11:51 AM Page 19 Fig. 8 Fig. 10 13685 Be sure to secure the small, but important, screw located at the rear of the bowl at the base. This little screw (#13685) secures the entire bowl assembly to the casefeed post (17123).
- Page 20 Fig. 15 Fig. 15 10. Next we move to station three where the wad is seated and the shot is dispensed. The Dillon shot dispenser works similar to the powder measure (#17817). The shot dispenser is activated by the hull at this station.
- Page 21 Fig. 17 16. Finally, install the roller handle (#22183). Fig. Fig. 18 15. Position the Dillon bin (#17125) on the machine’s right side, then place the shotshell chute (#16672) between the machine and the Dillon bin...
-
Page 22: Factory Settings
11:51 AM Page 22 Factory Settings The SL 900 shotshell machine has been assembled The powder die has been adjusted to a height so and tested using Winchester AA hulls. A sample is that the powder measure bellcrank can make full included with the machine. - Page 23 SL 900, May 2007 5/21/07 11:51 AM Page 23 Incomplete Stroke Fig. 23A Fig. 23C Fig. 24 16739 16740 Remember: Loosen the bolt set screw before making any adjustments. 13943 16738 Fig. 25 13958 14041 Complete Stroke Fig. 23B the hull and may result in an incomplete stroke of the bellcrank.
-
Page 24: Filling The Machine With Components. What's First
Filling the Machine with Components. What’s First? Before you charge ahead and begin tossing Fig. 30 components into your new SL 900 shotshell machine, there is a routine we’d like you to follow. 1. Fill the powder hopper with the powder of your choice. - Page 25 The completed round will fall down the 6. Loosen the bolt set screw (#16740) 1/4 of a shotshell chute (#16672) and land in the Dillon bin turn. Then using a 7/16” wrench, rotate the bolt (#17125). Fig. 36 located on the end of the shot bar (#16738).
- Page 26 Fig. 37 5. Get one box of new shotshell primers. Fig. 40 1. Using a Dillon bin (#17125) or box, gather up 6. Slide the cardboard jacket back, exposing only to 80 empty, fired hulls. Fig. 37 half of the first row of primers. Fig. 40 7.
- Page 27 SL 900, May 2007 5/21/07 11:51 AM Page 27 handle (#22183) down and then back up to its full aft Fig. 43 position. A hull has been fed into the shellplate. Fig. Fig. 46 10. Lift the plastic primer tray straight off the primers.
- Page 28 SL 900, May 2007 5/21/07 11:51 AM Page 28 shellplate at station one. To ensure that you have fully Fig. 51 seated the primer into the hull, it is important to stroke the operating handle to its full aft position.
-
Page 29: Changes And Adjustments
Changes and Adjustments Fig. 54 Whenever you plan to make some changes or adjustments to your SL 900 machine, it’s important to have all the right tools. Fig. 56 Fig. 56 15. Move the roller handle (#22183) down. The first hull is at the last process. -
Page 30: Powder Die/Funnel Adjustments
Adjusting the Plastic Wad Depth – A sample simultaneously. Fig 59 Turning the powder die plastic wad was included with your SL 900 machine... -
Page 31: Adjusting The Starter Crimp Die
SL 900, May 2007 5/21/07 11:51 AM Page 31 when it was built and adjusted at the factory. If you We found that when we reloaded Remington hulls have selected a wad that uses a lighter or heavier load and wads, we would need to adjust the starter crimp of shot, you’ll need to readjust the position of the shot... -
Page 32: Removing The Toolhead
(#16667) allows you to convert from one hull brand to another hull brand or another caliber in a matter of minutes. Let’s use the following steps to remove and install a toolhead (#16667) on the SL 900 machine. 5. Remove the two toolhead pins (#14008) located 1. -
Page 33: Shellplate Removal
(powder and shot) and you’re ready to go again. Shellplate Removal When you service your SL 900 machine – cleaning, lubing, or switching to another caliber – please follow these steps to remove the shellplate. -
Page 34: Switching To Another Powder
SL 900, May 2007 5/21/07 11:51 AM Page 34 some of your ammo and it’s time to change to brand Fig. 75 Q. Let’s explain how to switch powder. 1. Remove the powder bar return rod (#17350) from the machine. Fig. 77 2. -
Page 35: The Primer System
Fig. 80 Fig. 81 The Primer System: The primer feed system on the SL 900 machine is a fully mechanical system. Every complete stroke of the roller handle (#22183) will feed a new shotshell primer into the machine. Fig. 80 Two very important but simple points: #1. -
Page 36: Gauge Conversion - 28 Ga
The following is a step by step routine to use for converting your machine to reload other gauges. Refer to your SL 900 reloading manual as needed. 1. Drain the shot via the shot dispenser drain. Hint, use an old coffee can, widemouth water jug or shot bag to catch the shot. - Page 37 SL 900, May 2007 5/21/07 11:51 AM Page 37 5. Return the roller handle to the up position. Fig. 5 6. Use a 1/4" Allen wrench to unscrew the shellplate bolt. Fig. 4 gauge) onto the Station 2 locator. Fig. 5 10.
- Page 38 SL 900, May 2007 5/21/07 11:51 AM Page 38 Fig. 7 Fig. 9 12 ga. 28 ga. Casefeed Assembly Conversion (Right-Rear of the Machine) Fig. 10 1. Remove the hulls and the clear casefeed tube from the machine. Fig. 8 Fig.
- Page 39 SL 900, May 2007 5/21/07 11:51 AM Page 39 and the powder measure. Fig. 12 4. Realign the shot hopper tube fitting with the shot dispenser. Insert the fitting and the e-clip into the dispenser top. 5. Cycle the roller handle two complete cycles to insure everything is free to move.
- Page 40 SL 900, May 2007 5/21/07 11:51 AM Page 40 13. Now that you have determined the powder 20. Once again, move the roller handle down. As charge, move to Station 3 for wad and shot insertion. you return the roller handle to its rest position, you'll see the completed round advance and move out of 14.
-
Page 41: Gauge Conversion - 20 Ga
The following is a step by step routine to use for converting your machine to reload other gauges. Refer to your SL 900 reloading manual as needed. 1. Drain the shot via the shot dispenser drain. Hint, use an old coffee can, widemouth water jug or shot bag to catch the shot. - Page 42 SL 900, May 2007 5/21/07 11:51 AM Page 42 5. Return the roller handle to the up position. Fig. 5 6. Use a 1/4" Allen wrench to unscrew the shellplate bolt. 7. Remove the shellplate from the machine. 8. Change the locator buttons. First, remove the locator buttons by pressing and holding the locator button down.
- Page 43 SL 900, May 2007 5/21/07 11:51 AM Page 43 10. Move the roller handle to the down position. 3. From the 20 gauge conversion box, retrieve the 20 gauge casefeed sleeve, Fig. 9, and place it on the 11. Place the 20 gauge shellplate on the casefeed body.
- Page 44 SL 900, May 2007 5/21/07 11:51 AM Page 44 8. Use a once-fired hull, place the hull in Station 2 Fig. 12 where the powder measure is located. Fig. 14 Fig. 14 the hulls have cycled through the machine. 9. Move the roller handle down and then back Toolhead Conversion up to its rest position.
- Page 45 SL 900, May 2007 5/21/07 11:51 AM Page 45 Fig. 18 Fig. 16 20. Once again, move the roller handle down. As you return the roller handle to its rest position, you'll 17. Repeat these steps 4 times to make sure you see the completed round advance and move out of are receiving a uniform shot charge.
-
Page 46: Primer System
Insert using the SL 900. Assure yourself that the primer is the stop block BETWEEN the primer feed body and fully seated into the shotshell. We’ve found that the the tray mounting bracket. -
Page 47: Troubleshooting Section
It may be that the primer is not fully seated designed to. into the shotshell. It’s important that you make complete, full strokes of the operating handle when NOTE: All electrical/electronic components in Dillon using the SL 900. equipment are covered by a one year warranty. Technical Support... -
Page 48: Lube Points
5/21/07 11:51 AM Page 48 Lube Points on the SL 900 Machine: Fig. 82 & Fig. 83 A.) Mainshaft: The most important lube point of H.) Powder Body Collar (rails, hole and roller, all. Use 30w motor oil to lube the mainshaft bellcrank) (#13485). -
Page 49: Suggested Settings
Page 49 Suggested Settings Here are some helpful adjustment settings for the SL 900 Shotshell Loader. These settings illustrate ideal adjustments for the starter crimp and the final crimp die. These settings can also be used to reset these dies if you get completely out of adjustment. -
Page 50: Manual
28 gauge conversion #22139 20/28 casefeed plate #97045 Machine Cover #13329 The Blue Press, Dillon’s monthly catalog, has a complete listing of accessories available for all machines. Dillon Precision Products, Inc. 8009 E. Dillon’s Way Scottsdale, AZ 85260 (480) 948-8009 FAX (480) 998-2786 Web Site: www.dillonprecision.com...
Need help?
Do you have a question about the SL 900 and is the answer not in the manual?
Questions and answers
I have a SL900 and can't locate my manual. I know I have is, just can't put my finger on it. The issue is I swear I read the stack height should be 3/8" from top of hull mouth. I mentioned that to a fellow reloader, and now I can't verify same. Many folks have dished crimp issues. I don't. But I can't verify my claim of that stack height as I can't find my manual. I've read completely through the online manual, and don't see this reference. Was this possibly only in older manuals, and is no longer a spec for loading?