
Summary of Contents for SVSi StreamView-LR
- Page 1 www.pce-iberica.es PCE Ibérica S.L. C/ Mayor, 53 - Bajo 02500 Tobarra Albacete-España Tel. : +34 967 543 548 Fax: +34 967 543 542 info@pce-iberica.es www.pce-iberica.es Manual Camara ultra rapida...
- Page 2 Software and all associated printed materials, retains no copies and the recipient agrees to the terms of this License. Trademarks and Logos. This License does not authorize Licensee to use any SVSi name, trademark or logo. Licensee acknowledges that SVSi owns the StreamView, MemView, iCi, and GigaView trademarks and all related trademarks, and logos and agrees to: (i) not do anything harmful to or inconsistent with SVSi’s rights;...
- Page 3 License by operation of this paragraph unreasonably compromises the rights or increase the liabilities of SVSi or its licensors, SVSi reserves the right to terminate the License and refund the fee paid by Licensee, if any, as Licensee's sole and exclusive remedy.
- Page 4 While every effort has been made to ensure that the information contained in these instructions is • accurate and complete, no liability can be accepted for any errors or omissions. SVSi reserves the right to change the specifications of the hardware and software described herein at any time without prior notice.
- Page 5 This equipment has been tested and found to comply with the limits for a Class A digital device, pursuant to Part 15 of the FCC Rules. Additionally, this equipment has successfully met all of the requirements for CE certification. These limits are designed to provide reasonable protection against harmful interference in a commercial installation.
-
Page 6: Table Of Contents
Figure 4 IP address incompatibility........................4 Figure 5 Setting StreamView-LR MTU size......................5 Figure 6 Setting the network interface MTU size to match StreamView-LR............5 Figure 7 Enabling jumbo frames on the network interface..................6 Figure 8 Optimize performance by disabling network connection settings............8 Figure 9 StreamView-LR 'Play"... -
Page 7: System Requirements
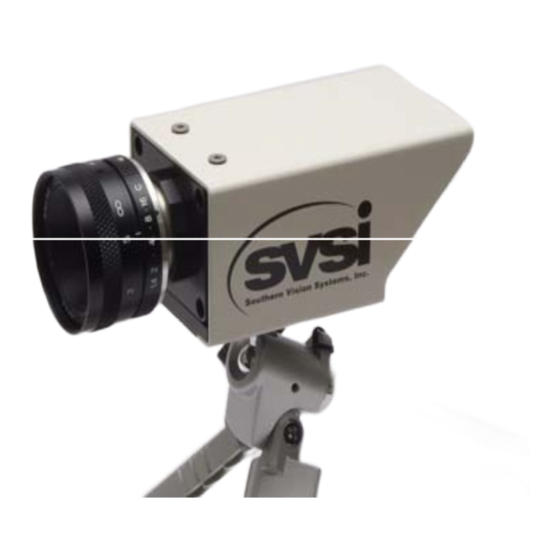
1” C-mount 35-mm (requires C-mount adapter) CAMERA CONNECTIONS Figure 1. StreamView-LR with lens and tripod. The front panel has only the 1”x32-tpi c-mount connector for attaching a lens to StreamView-LR. Back Panel Connection Function Power 400-mA @ +12V through supplied AC adapter Gigabit Ethernet RJ-45 connector –... -
Page 8: Quick-Start Guide
Default Gateway: 192.168. 1. 1 (Note: the IP addresses for StreamView-LR and for the host must be different. Do not use an IP address of 192.168.1.199 for the host computer since that is reserved for StreamView-LR.) 5. If you wish to change the camera IP address (e.g.-when a conflict exists on a local area network), double-click on the “StreamView-LR NetworkConfig”... -
Page 9: Figure 2 Streamview-Lr Network Configuration Auto-Discovery Window
Figure 2 StreamView-LR network configuration auto-discovery window. Once connected, the window below will appear allowing you to set a new IP address or to enable DHCP. Figure 3 Editing StreamView-LR IP configuration. -
Page 10: Figure 4 Ip Address Incompatibility
The device to which StreamView-LR is connected must have a DHCP server in order to enable DHCP. A network router will have this capability but a laptop or desktop computer typically does not. If you are directly connected to StreamView-LR, you must use a fixed IP address. The message below will appear if you try to use DHCP without a DHCP server. -
Page 11: Figure 5 Setting Streamview-Lr Mtu Size
To set the network interface MTU size, click on [My Network Places->View Network Connections] then select the interface to which StreamView-LR is connected. The window of Figure 6 will appear. Next click on the [Configure] button and then the [Advanced] tab. Figure 7 will appear with a list of attributes for that network interface. -
Page 12: Figure 7 Enabling Jumbo Frames On The Network Interface
Figure 7 Enabling jumbo frames on the network interface. The Buffered Frame Count of Figure 5 refers to the number of frames buffered inside StreamView-LR before transmission. Best performance is obtained with the gige filter driver installed and the Buffered Frame Count equal to 20. -
Page 13: Performance
The minimum system requirements are given in Section 1.0 and instructions on setting the MTU size are given in step 8 of the Quickstart Guide. SVSi can deliver a computer system along with StreamView-LR fully tested for no dropped frames. Please contact the factory for pricing and delivery. -
Page 14: Figure 8 Optimize Performance By Disabling Network Connection Settings
6. Disable Windows and all other firewalls (e.g.- McAfee, Symantec, Norton, …). To disable Windows firewall, select [My Network Places->View Network Connections] and right-click on StreamView-LR’s network connection to get the [Properties] menu. Click the [Advanced] tab then [Settings…] and select firewall off. -
Page 15: Streamview-Lr Operating Modes
INITIALIZATION When the StreamView-LR application is started, the default “Play” window appears as shown in Figure 2. Video files can be opened and played in this mode whether a camera is attached or not. AVI files must be 8-bit (monochrome) or 24-bit (color) and are limited to a 2-GB file size. -
Page 16: Capture Mode
*.mvw file format. This file format gives the fastest download times and smallest file sizes. SVSi’s StreamView-LR software is available for free and can be downloaded from our website for customers playing the default format. Once actual frames are identified for public dissemination, then AVIs, BMPs, or TIFFs can be generated from the “Play”... -
Page 17: Figure 10 Streamview-Lr Capture Window
MTU size and a sufficiently fast processor, no frames should be dropped at frame-rates as high as 200-fps. As soon as the “Capture” page appears, StreamView-LR starts capturing and displaying 640x480 frames at 200-Hz and 5-msec exposure time. User-adjustments are allowed to frame size, frame rate, exposure, and gain on this page only when stopped. -
Page 18: Figure 11 Gain Settings
10µsec-1msec 969-fps StreamView-LR has the option of adjusting the imager gain setting independent of exposure. Gain settings are accessed under the drop-down [Camera->Set Gain] menu item and are limited to +20dβ, +10dβ, and 0dβ. For low-light levels, the “+” dβ levels increase imager gain but at the expense of higher noise. Figure 7 below shows how to access these gain settings. -
Page 19: Streaming Video
(>2-GHz), no frames will be dropped even over several hours of recording. The StreamView-LR software reports the number of dropped frames per recording session but does not indicate where in the recording session the drops occurred. -
Page 20: Figure 13 Frame Rate Selection In The Stream Wizard
After selecting the appropriate exposure time, auto-exposure can be enabled through the window shown below. If enabled, StreamView-LR will evaluate every image as it is captured to determine if the exposure needs to be adjusted in order to keep the image histogram fixed at its current value. Auto-... -
Page 21: Figure 15 Auto-Exposure Window In The Stream Wizard
640x480 video at 200-fps. Longer recording times require the host computer to have a disk array. SVSi can provide disk arrays for up to 10-hours of high-resolution high-speed video. Please contact the factory for any custom storage requirements. -
Page 22: Streaming Video To Memory
RAM. To stop the recording process, click on the [Stop] button. Video is now preserved in host memory but has not been written to disk yet. StreamView-LR treats the available memory as a rolling buffer so that, even though only 6.5-secs of recording time was selected, you may record for several minutes until [Stop] is hit after which only the last 6.5-secs of video are stored in... -
Page 23: Streaming Video To Disk Array
Figure 18 Selecting destination and recording time for streaming to disk array. Although the destination disk does not have to be a RAID array, SVSi recommends this configuration as the only one that can achieve the sustained write rate required for 640x480 @ 200-fps. We also recommend against installing the operating system on the disk array intended for video recording. -
Page 24: Handheld Operation For Streamview-Lr Portable
TIFF, or raw images. 4.3.4 HANDHELD OPERATION FOR STREAMVIEW-LR PORTABLE StreamView-LR Portable is available with a rechargeable battery pack and trigger handle for portable applications. With this optional upgrade installed, high speed video at 200-fps is recorded to host RAM whenever the trigger is depressed. -
Page 25: Figure 20 Selecting [Handheld Option] For Streamview-Lr Portable
Figure 20 Selecting [Handheld Option] for StreamView-LR Portable. StreamView-LR is a versatile tool for high speed video capture and slow motion analysis. It is designed to be intuitive and provide trouble-free operation. Please contact Southern Vision Systems, Inc. at sales@southernvisionsystems.com or (256) 461-7143 for technical support or for custom image processing applications. -
Page 26: Appendix A Troubleshooting
Appendix A: Troubleshooting The following table describes problem conditions you may encounter with the StreamView-LR camera and suggested actions to resolve these problems. Problem Action StreamView-LR does not appear on the auto- -Check to see that power cable is connected to discovery page upon start-up.
Need help?
Do you have a question about the StreamView-LR and is the answer not in the manual?
Questions and answers