Table of Contents
Advertisement
Table of Contents
1
Read this First ...............................................................................................1
Safety...............................................................................................................1
Declaration of Conformity (EU only).................................................................1
About this manual............................................................................................1
2
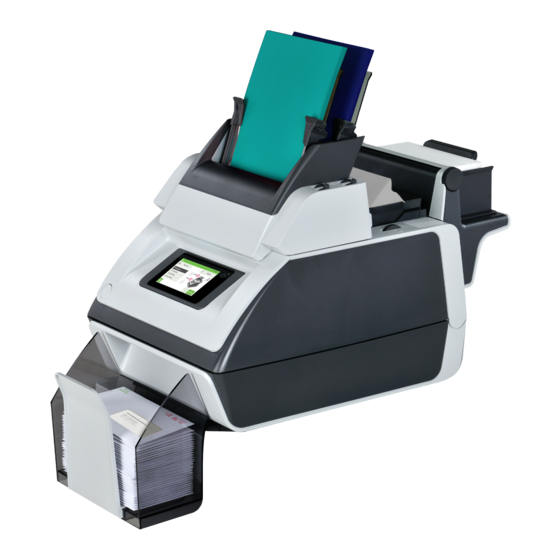
Meet your Document System ......................................................................3
Introduction......................................................................................................3
Operating Controls...........................................................................................5
Control Panel...................................................................................................6
Power Up..........................................................................................................7
Home screen....................................................................................................8
What is a Job?.................................................................................................8
Job overview....................................................................................................9
Settings menu................................................................................................10
Remote assistance (optional)........................................................................10
Tri-Fold option................................................................................................11
Shut Down the System...................................................................................12
3
Working with Jobs ......................................................................................13
Introduction....................................................................................................13
Use an existing job.........................................................................................13
Create a New Job..........................................................................................14
Job Settings...................................................................................................15
Save a Job.....................................................................................................18
Run a Job.......................................................................................................19
A Daily Mail job..............................................................................................20
A Tri-Fold job..................................................................................................21
4
Loading the System ...................................................................................24
Installing the Envelope Catch Tray.................................................................24
Advertisement
Table of Contents

Subscribe to Our Youtube Channel
Related Manuals for Formax DS-40i

Summary of Contents for Formax DS-40i
-
Page 1: Table Of Contents
Table of Contents Read this First ....................1 Safety.......................1 Declaration of Conformity (EU only)..............1 About this manual....................1 Meet your Document System ..............3 Introduction......................3 Operating Controls...................5 Control Panel....................6 Power Up......................7 Home screen....................8 What is a Job?....................8 Job overview....................9 Settings menu....................10 Remote assistance (optional)................10 Tri-Fold option....................11 Shut Down the System...................12 Working with Jobs ..................13... - Page 2 Document Orientation..................25 Document Feed Trays..................26 Loading Envelopes..................29 Filling the Sealing Liquid Reservoir..............31 Settings menu .....................32 Open the Settings Menu................32 Open the Supervisor menu................33 Supervisor Settings Menu................35 Operator Maintenance ................41 Maintenance....................41 Cleaning or Replacing Moistening Brushes...........42 Clean the system...................42 Fault finding ....................43 Fault Finding....................43 Clearing Stoppages..................44 Operator Troubleshooting................46...
-
Page 3: Read This First
Read this First Safety Ensure you have read and fully understood the safety requirements in the Safety Guide. Declaration of Conformity (EU only) The product presented in this guide meets the requirements of applicable directives. For more details refer to the Declaration of Conformity. Contact your authorized distributor for availability of this document. - Page 4 Symbols This manual uses the symbols listed below. This symbol... Indicates... WARNING: Indicates a human safety hazard. ATTENTION: A risk to the equipment or mail could result from an action you may perform. NOTE: A remark that explains different cases or specificities. TIP: Advice to help save you time when processing your mail.
-
Page 5: Meet Your Document System
Meet your Document System Introduction The system feeds, folds and inserts documents into envelopes and then seals and stacks the envelopes. Automatic monitoring ensures the correct number of inserts per envelope. The system is a sophisticated folding and inserting system which can process large quantities of mail rapidly and easily. - Page 6 Feeder Area (1) The system has a feeder block with two document feeders. The feeder block is equipped with feeder swap. This means that you can link both feeders as pairs. When the first feeder is empty, the system switches to the other feeder. Meanwhile you can refill the other empty feeder without stopping the system.
-
Page 7: Operating Controls
Operating Controls button to open the system thumb wheel to adjust side guides feeder 3 control panel with touch power inlet screen On/Off button power switch paper guides side guides envelope hopper document feeder 1 thumb wheel for adjusting side guides envelope hopper document feeder 2 locking levers for side guides (document feeder trays) -
Page 8: Control Panel
Control Panel On/Off (B): The touch sensitive button in the upper right corner of the display switches the system on or off. If after operation the system is not used for 15 minutes, the system switches to sleep mode. If you touch the screen the system will switch to operation mode again. -
Page 9: Power Up
Power Up To start up the system: Connect the system to the mains power supply. You can severely damage the machine if it is connected to the incorrect mains voltage. Before plugging in the machine, check if the local voltage is the same as the voltage mentioned on the type plate. -
Page 10: Home Screen
Home screen When you start up the system, the ‘Home screen’ appears. The LH side of the screen shows the job list. The RH side of the screen shows the selected/current job. Other things you can do here are: Create a new job Edit the selected/current job Start the selected/current job Open the settings menu bar *) -
Page 11: Job Overview
Job overview The job overview of the selected/current job is part of the 'home screen' and shown on the RH side. This job overview shows the following information of the selected job: • A picture of the system with symbols for the selected features. The following symbols can be used: Feeder is set for daily mail Envelope size and whether sealing is on/off... -
Page 12: Settings Menu
Settings menu When you open the settings menu bar, tap on the [Settings] symbol button to open the "Settings menu". This Settings menu shows the following possibilities: • Language settings: change the language of the user interface. • Supervisor Settings menu: For authorized personnel only. Via this menu it is a.o. possible to customize the envelope height, adjust the stop position etc. -
Page 13: Tri-Fold Option
(Online) Remote Assistance is a tool for help desk guidance. Add the support key supplied by the support assistant and follow the instructions as indicated by the support assistant. The remote assistance screen can be entered by tapping the second symbol in the settings bar. -
Page 14: Shut Down The System
Shut Down the System Press the [On/Off] button. The system completes and inserts the current set and stops, this results in a cleared system. After that the system switches off. In case the system is unresponsive or fails to switch off, press and hold the touch sensitive power button for 10 seconds to switch off the system. -
Page 15: Working With Jobs
Working with Jobs Introduction With the system you can process mail sets in the following ways: • Using an existing (saved) job: Existing jobs are shown in the Job list. These jobs have been saved via the job creation process. •... -
Page 16: Create A New Job
Create a New Job To create a new job: In the home screen, tap [New job]. The New job Wizard starts and helps you to choose; • Envelope type (size). Custom is only available if defined by the supervisor (see “Supervisor Menu on page 33”). -
Page 17: Job Settings
Job Settings Job Settings menu When you tap in the Home screen on the [Edit job] button, the "Job Settings" menu opens. This menu enables you to: • Edit a job (see ”Edit a Job” on page 15). • Delete a job (see ”Delete a Job”... - Page 18 Tap [Save] to save the job with the changed settings. Press the [1x] button to make sure that the address position is correct (see “Address Position”). Delete a Job To delete an existing job: From the home screen choose a job. Tap the [Edit job] button.
- Page 19 In the "Job Settings" screen tap the [Reset job counter] button. You will be asked if you want to reset the job counter. Tap [Yes] to reset the job counter. The job counter will be reset to zero. The "Job Settings" screens appears again. Feeder options For some applications it is preferred to switch the double feed control (DFC) off per feeder.
-
Page 20: Save A Job
Tap the [Feeder options] button. Select per feeder if you want to have the double feed control switched on or off. Tap the [Disk] button to save the settings. Save a Job When you have created a new job or edited a job, save the job as follows: After you have completed the job definition, tap the [Save] button. -
Page 21: Run A Job
Tap [OK] to save the job. The job is added to the job list. Run a Job Before you run a job where sealing is required, make sure the sealing liquid reservoir is filled. From the home menu choose a job. The job information appears (see “Job Overview on page 9"). -
Page 22: A Daily Mail Job
Address position The address on the document set should be positioned in a way that you can read it from the envelope window. If it is not readable, adjust the address position as follows: Choose a job and tap the [1x] button. Use the arrow buttons up/down to adjust the address position. -
Page 23: A Tri-Fold Job
Tap the [1x] button to start a test run. If you tap the [1x] button, the system helps you to adjust the address position (see ”Address Position” on page 20). Tap the [Start] button to start the job. The document or document set will be folded and inserted into the envelope as defined in the selected job. - Page 24 Remove the sealing liquid reservoir with the blue handles A carefully out of the system. Place the Tri-Fold transportation unit into the system in exact the same way as when placing the sealing liquid reservoir. Choose a job that has been programmed for the Tri-Fold option or program a new job in which the Tri-Fold option has been selected.
- Page 25 Run the job.
-
Page 26: Loading The System
Loading the System Installing the Envelope Catch Tray To install the envelope catch tray: Move the catch tray until the clamps hold the feet of the system. Adjust the catch tray to the correct envelope size. -
Page 27: Document Orientation
Document Orientation The touch screen shows how to load documents and envelopes into the feeders. The table shows the meaning of the symbols: Address carrier face up and trailing (top address) Enclosure face up... -
Page 28: Document Feed Trays
Document Feed Trays Adjusting the Side Guides of the Document Feeder To adjust the side guides of the document feeder trays: Pull lever C. Move the side guides A apart as far as possible with thumb wheel B. Put a small stack of documents between the side guides. Move the side guides towards the documents with thumb wheel B. - Page 29 Loading the Document Feeder Tray To load the document feeder tray: Pull lever C. Place a stack of documents between the side guides. Feed the documents (depending on the type of documents) as shown in "Document Orientation". Return lever C to its original position.
- Page 30 Adjusting the Side Guides of Feeder 3 To adjust the side guides of feeder 3: Move the side guides C apart as far as possible with thumb wheel D. Pull back support B. Put a small stack of enclosures A between the side guides. Release support B.
-
Page 31: Loading Envelopes
Pull back support B. Place a stack of documents or BREs between the side guides. Place documents with trailing edge down. Place BREs with leading edge down and the flap at the support side. Release support B. Loading Envelopes If the distance between the side guides is too large, the envelopes will skew, when transported into the system. - Page 32 To load the envelopes: Move the side guides B apart as far as possible with thumb wheel A. Place an envelope C in the envelope hopper flap down and trailing (bottom side of envelope pointing to the system). Fan a stack of envelopes and place them, also flap down and trailing, between the side guides on top of the first envelope.
-
Page 33: Filling The Sealing Liquid Reservoir
Filling the Sealing Liquid Reservoir When you want to seal envelopes, the sealing liquid reservoir must be filled. Press the button to open the system (see “Operating Controls” ). Lift the sealing liquid reservoir D with the blue handles A carefully out of the system. Remove the strip C from the reservoir. -
Page 34: Settings Menu
Settings menu Open the Settings Menu In the settings menu for the operator it is possible to set the language. It is also possible to open the Supervisor menu (locked with a PIN code). If you want to view or edit any of the Operator Settings: From the home screen open the settings menu bar and tap the [Settings] symbol. -
Page 35: Open The Supervisor Menu
Tap [Supervisor menu] to open the login screen for accessing the Supervisor menu. Tap [Key click] to open the "Key click" setting screen. Tap "On" to switch the key click sound on or tap "Off" to switch the key click sound off. Save the setting by tapping the disk symbol button. - Page 36 Tap [Supervisor menu] to open the login screen. Login as Supervisor with pin code 2546.
-
Page 37: Supervisor Settings Menu
Tap the relevant button to edit or change the settings. Supervisor Settings Menu Customize the envelope height It is possible to customize the height of the envelope if the default envelope height settings do not meet the specification of the envelope. To customize the height: Go to the supervisor menu. - Page 38 Envelope Position To make a good insert of the document set into the envelope, the envelope should be positioned correctly. To verify the envelope position: Go to the supervisor menu. Tap [Adjust stop position]. Choose the envelope type to setup and tap the arrow button. Tap the [1x] button.
- Page 39 Moistening position If the moistening area of the envelope is not correctly moistened, adjust the moistening position as follows: Go to the supervisor menu. Tap [Adjust moistening position]. Choose the envelope type to setup and tap the arrow button. Use the arrow buttons up/down to adjust the moistening position. Tap the [1x] button to test the new position.
- Page 40 Select one of the available WiFi networks and tap the [>] button. Enter the password of the WiFi network and tap "OK". Connection with the WiFi network will be established. In the upper left corner of the Home screen a WiFi symbol will appear showing that the system is connected to a WiFi network.
- Page 41 Calibrate FE1/2 clutches Go to the supervisor menu. Tap [Calibrate FE1/2 clutches]. Follow the instructions as indicated on the touchscreen. PopUp options Go to the supervisor menu. Tap [PopUp options]. Select [Yes] if you want the system to show Popup messages. Select [No] if you don't want the system to show Popup messages.
- Page 42 Versions The "Versions" screen shows the serial number of the system and information about the installed software.
-
Page 43: Operator Maintenance
Operator Maintenance Maintenance Disconnect the mains power supply before performing any maintenance. The user must not attempt to service the system beyond that described in this operator manual. All other servicing must be carried out by qualified service personnel only. Please contact your authorized distributor. -
Page 44: Cleaning Or Replacing Moistening Brushes
Cleaning or Replacing Moistening Brushes “Filling the Sealing Liquid Reservoir” on page 31 for the location of the brushes. Open the system. Lift the sealing liquid reservoir with the blue handles carefully out of the system. Remove the three brushes. Clean the brushes with a small amount of water. -
Page 45: Fault Finding
Fault finding Fault Finding When an error occurs the touch screen shows a screen with the following information: • An indication of the area in which the error occurred. • An error description. • A suggested solution. Special Errors • Technical errors.The touch screen shows a message. The error cannot be solved by operating personnel and assistance of the service support is needed. -
Page 46: Clearing Stoppages
Clearing Stoppages Clearing Stoppages Stoppages can occur in the following area’s: • Document feeders. • Document path. • BRE feeder. • Envelope feeder. Document Feeders When a stoppage occurs in the document feeders, remove the documents as follows: Pull the feeder block forward (see figure). If necessary lift the feeder block out of the system. - Page 47 Document path When a stoppage occurs somewhere in the document path, remove the documents as follows: Press the button to open the system. If necessary lift flap [A], or rotate [B] or roller [E] to transport the document. Remove the documents. Close the System.
-
Page 48: Operator Troubleshooting
Envelope Hopper When a stoppage occurs in the envelope hopper, remove the envelopes as follows: Press the button to open the system. Remove the envelope. If this is not possible, try to remove it from the top of the hopper: •... - Page 49 Startup Problems Symptom Possible cause Remedy Reference The system System not Connect the system cannot be started connected to mains. to the mains. after switching You switched off the Switch the system system accidentally. You did not press the Press the power power button next to button next to the the touch screen.
- Page 50 Envelope contents Sealing position is In the supervisor “Sealing position” is wet. not correctly set. menu change the settings of the applicable envelope. Exit roller is wet. Clean the exit roller. “Clean the System” Flap not Water level low. Check water level, “Filling the Sealing sufficiently refill if needed.
- Page 51 Envelope Feeding Problems Symptom Possible cause Remedy Reference Envelopes are Envelopes not placed Check and replace if “Loading Envelopes” double fed. properly in the needed. hopper. Envelope stops Side guides of the Check side guides “Loading Envelopes” skewed. envelope hopper are and adjust if needed.
- Page 52 Document feeding Problems Symptom Possible cause Remedy Reference No document fed. Feeder empty. Refill feeder. “Loading the Docu- ment Feeder Tray” Side guides set too Adjust the side “Adjusting the Side narrow. guides. Guides of the Docu- ment Feeder” Feeder trays are not Push the lever to lock “Loading Documents”...
- Page 53 Insert Problems Symptom Possible cause Remedy Reference System stops with Envelopes stacked Check envelope feed “Loading Envelopes” envelope at insert reversed in the adjustments. Place position (flap not hopper. envelopes correctly open). in hopper. Envelope flap sticks. Store envelopes “Envelope and Insert according to Specifications”...
- Page 54 Address not Address position not Check address “Address Position” readable from correctly defined. position. window...
-
Page 55: Specifications
Specifications Technical Specifications Model DS-40i, FPi 700, FD 6104, TSI-2.0s/TSI-2.5s, C400i Type Folder and inserter system for small office use. Theoretical 1350 inserts per hour, depending on application max. speed Power con- 100-240 VAC/ 50-60 Hz / 1,3 - 0,6A... -
Page 56: Dimensions And Weight
Dimensions and weight with Catch Tray without Catch Tray Height 680 mm (26.8") 540 mm (21.3") Width 420 mm (16.5") 420 mm (16.5") Length 793 mm (31.2") 658 mm (25.9") Weight 37,9 kg (83.6 lb) 37 kg (81.6 lb) Hopper and Feeder Capacity Envelope hopper 100 envelopes (80 g/m²... -
Page 57: Document Specifications
Document Specifications Paper quality minimum 60 g/m² (16 lb bond) maximum 120 g/m² (32 lb bond) Paper size Minimum width: 142 mm (5.6") Maximum width: 225 mm (8.9") Minimum length: 90 mm (3.5") Maximum length: 356 mm (14.0") Folding capacity V-fold - 5 sheets (max. -
Page 58: Envelope And Insert Specifications
Envelope and Insert Specifications Envelope quality Minimum: 75 g/m² (20 lb bond) Maximum: 120 g/m² (32 lb bond) Min. size 229 mm 105 mm 32 mm 10 mm 142 mm 90 mm* 70 g/m2 Max. size 241 mm 162 mm 54 mm 35 mm A-12... - Page 59 of the paper handling equipment is often wider than that of the envelopes and documents handled. The condition of material handled will limit the specified environmental conditions. We recommend that materials to be handled are stored at a temperature of 20 C (68 F) with a relative humidity factor of 50%.
-
Page 60: Terminology
Terminology Terminology description Term Description Address carrier The address carrier is the document that carries the address of the person for who the mail set is meant. The address carrier can consist of one or more sheets, from which at least the first sheet must contain the address. - Page 61 Daily Mail Capability of an inserting system to manually insert mail sets one by one into the system, which are then inserted into an envelope. Optionally, depending on settings, additional enclosures can be added and the mail set can be folded. This function is intended for small amounts of mail that each can have a different build-up.
- Page 62 Term Description Double V-fold The double V-fold is a type of fold where the document is first folded halfway and the resulting folded set is again folded halfway. This fold is illustrated in the picture below. The position of both folds is ad- justable.
- Page 63 Insert • An insert is the action of inserting a document set into an envel- ope. • For native English speaking customers an insert is also a short, not to be folded document, usually an enclosure. Inserter An inserter is the module where the document set is inserted into the envelope, the envelope is closed and if necessary sealed.
- Page 64 Term Description Inserting system The system of all the modules that cooperate to perform the inserting function (accumulate document set, fold and insert) and have a single point of control. A job is an actually produced collection of mail sets based on a certain job definition at a certain point in time for a specific purpose.
Need help?
Do you have a question about the DS-40i and is the answer not in the manual?
Questions and answers