Table of Contents
Advertisement
Advertisement
Table of Contents

Summary of Contents for Evermed xPRO
- Page 1 USER INSTRUCTION REFRIGERATED CABINET xPRO VERS. 0517...
-
Page 3: Table Of Contents
Ver. 0517 ENGLISH Content 8 USER INSTRUCTIONS 8.1 CONTROLS 8.1.1 DESCRIPTION OF CONTROLS AND TOUCH-BUTTONS OF THE xPRO CONTROL PANEL ..........8.1.2 THE DISPLAY AND THE FUNCTIONING INDICATIONS ......................8.1.3 AUTOMATIC/MANUAL TOUCH-BUTTONS SAFETY LOCKING PROTECTION AND UNLOCKING CODE ......8.2 OPERATION OF THE xPRO CONTROL PANEL 8.2.1... -
Page 5: Controls
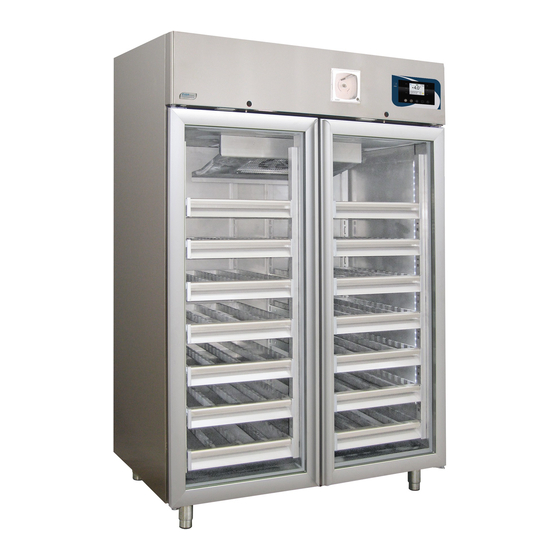
8.1 CONTROLS According to the models, the appliance is equipped of different types of controls: - xPRO control panel (Fig.10) - Temperature chart recorder (Fig.22) 8.1.1 Description of controls and touch-buttons of the xPRO control panel (Fig.10) (10) (11) (12) Fig.10... -
Page 6: Automatic/Manual Touch-Buttons Safety Locking Protection And Unlocking Code
Perform preliminary cleaning of the unit as described in sub-heading 5.2.1 “Instruction and Maintenance Manual”. At the starting, when the xPRO control panel is powered, it will appear a screen-shot with the EVERmed logo for approx. 10 seconds. Immediately after, the display will show the STAND-BY condition with the date and time with white indications on a black back-ground. -
Page 7: General Information Of The Xpro Control Panel Functioning
8.2.5 General information of the xPRO control panel functioning The xPRO control panel surveys and has the control of all the appliance functioning parameters and devices. The PRO control panel is provided with a back-up battery that grants its operations even in case of power failure, for about 48 (depending from the charge status). -
Page 8: Datas Menu
Ver. 0517 8.3.2 Datas Menu (touch-button (3) Fig.12) From the main menu screen-shot (Fig.12), press the touch-button (3) to access to the Datas Menu. The Datas Menu appears as follow (Fig.13) Door Temperature openings chart Battery Defrosting level Functioning Sensors timers Fig.13 8.3.2.1 Temperature chart (touch-button (2) Fig.13) -
Page 9: Defrosting
Ver. 0517 8.3.2.5 Defrosting (touch-button (6) Fig.13) All the appliance defrosting are recorded in the defrosting log; on the display are shown the following details: • date and time of the defrost starting • the duration of the defrost • the type of defrost, which is indicated from one of the following codes: 01 - defrost started manually from the specific menu 02 - defrost started after 1 hour from the appliance switch-ON 03 - defrost started after a pre-fix working time of the appliance... -
Page 10: Setting Menu
Ver. 0517 - press the touch-button (4) in the TEST screen-shot (Fig.14) to activate the GENERAL test. Through this procedure will be checked automatically the correct functioning of the battery and battery relay. The buzzer sounds during all the test (6 seconds). If the test has a positive result, the display shows TEST OK, otherwise the display switch off for a few seconds and automatically re-starts. -
Page 11: Alarm Setting
Ver. 0517 8.3.6.2 Alarm setting (touch-button (4) Fig.15) With this menu is possible to set the desired alarm limits for both the Chamber alarm limits (air temperature into the appliance) and the Product simulation alarm limits (temperature of the products stored into the appliance simulated with a ballasting of 250 ml of water or anti-freezing liquid). -
Page 12: Ventilation Setting
(with .csv extension) on the USB memory-stick, that can be opened with MICROSOFT EXCEL ® or whatever equivalent software compatible with the file extension. If present, the functionality, at the side of the xPRO control panel, there is a USB port. -
Page 13: Door Ajar Alarm Activation Delay
Ver. 0517 8.3.6.7 Door ajar alarm activation delay (touch-button (4) Fig.16) To access to the DELAY OF ACTIVATION OF DOOR AJAR ALARM, press the touch-button (4) while the display shows the second page of the setting menu (Fig.16). - press the touch-button (4)- and (7)+ to set the desired value (expressed In seconds, max. 600) that has to pass from the open- ing of the door till its signalling on the display and through the buzzer - press the ENTER touch-button (12) to confirm the new setting and the ESC touch-button (11) to return back to the previous menu or HOME touch-button (10) to return back to the main screen-shot... -
Page 14: Operation Of The Temperature Chart Recorder
Ver. 0517 8.4 OPERATION OF THE TEMPERATURE CHART RECORDER 8.4.1 Description of the temperature chart recorder (Fig.22) Fig.22 The appliance may be fitted (present if ordered is some series), with the tempera- ture chart recorder, recording on paper charts the appliance internal temperature. The temperature recorder is available in different temperature ranges according to the model on which it is installed: - Range : -10°C / +40°C... -
Page 15: Operation Of The Digital Printer
Ver. 0517 8.5 OPERATION OF THE DIGITAL PRINTER 8.5.1 Description of the digital printer The appliance may be fitted (present if ordered in some series), with the temperature digital printer. The digital printer records the temperature in an internal non-volatile memory the temperature of the appliance. The recording periods and intervals are fully adjustable and can be easily set through the printer soft-touchpads and the wide display (with clear written indications). - Page 16 EVERmed Srl: Via Galileo Galilei, n° 2 - 46020 Motteggiana (MN) ITALY Tel. +39 0376 550828 - Fax +39 0376 550831 www.evermed.it - e-mail: evermed@evermed.it...
Need help?
Do you have a question about the xPRO and is the answer not in the manual?
Questions and answers