Table of Contents
Advertisement
Advertisement
Table of Contents

Summary of Contents for Wi-Tek WI-AC150
- Page 1 WI-AC150 AC Controller User Manual...
-
Page 2: Table Of Contents
This manual is subject to guide users on how to use this Network Gateway and WLAN Controller properly, suit for those familiar with basic networking knowledge and terminology, It including the product main features such as packing content, hardware introduce and AC Controller, Routing, Firewall, Management,VLAN Setting and VPN Setting. - Page 3 11.3. Firmware Upgrade.................29 11.4 Modify Password................29 11.5 Maintenance.................30 11.6 Reboot Device................30 11.7 System time..................31 Chapter 12: Cloud......................32 Chapter 13: DDNS......................32...
-
Page 4: Chapter 1: Product Instruction, Default Data, Packing
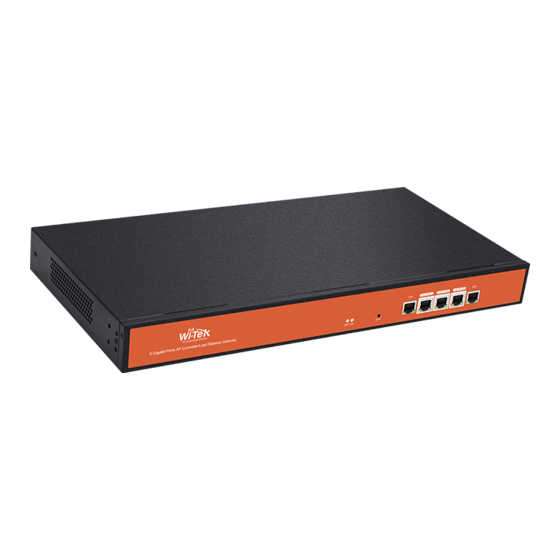
Chapter 1: Product Instruction, Default Data, Packing 1.1 Product Instruction: WI-AC150 is an SMB Gateway and WLAN Controller, With main function of Router, AC Controller, Management, VLAN Management functions; Work as a router, it can access into 500 end users, to do advertisement and captive portal authentication。... -
Page 5: Chapter 4: Web Gui Configuration
3.2 Open IE browser, input AC Controller’s IP address 192.168.10.1, Enter to log in AC controller’s WEB GUI. 3.3 Input login password, the default password is admin, then click on Login button. Chapter 4: WEB GUI Configuration When login this AC controller, the following home page will pop up as follow:... -
Page 6: Device List
Hardware Info: Mean the CPU, Memory usage status RealTime Users: Mean the QTY of end users access into it when it work as Gateway. Link Count: Mean the QTY of internet link. Auth User count: The QTY of authentication users. Network Port Status: Show the WAN/LAN Ports connect status;... -
Page 7: Server Config
Batch Set: Set Channel, TX Power, Time to restart, Max users, device login password in batch. Delete: Delete the choosed wireless AP from this device list. Reboot: Restart this wireless AP Reset: return to factory default Upgrade: Upgrade firmware. : if tick it, mean select all the wireless AP; If tick here, mean select this wireless AP;... -
Page 8: Zero Config
Refresh: to refresh the wireless AP’s IP address Function: Enable/Disable, default is Enable Server IP address: default is 192.168.200.1; can change to anyone you like, but pls note, if server IP is 192.168.200.1, then wireless AP’s IP address will be one from 192.168.200.2 to 192.168.200.254, to 192.168.201.X, to 192.168.202.X... - Page 9 Wireless Basic: to setup wireless AP’s SSID, password, Tag VLAN Device List: Wlan Device 1 and Wlan Device 2; Wlan Device 1 mean 2.4G Radio mainly; Wlan Device 2 mean 2.4G or 5.8G radio, based on wireless AP. Main AP Configuration: setup the wireless AP’s main SSID, Tag VLAN, Configure Password.
-
Page 10: Device Group
Channel: Auto in default, but recommend to setup channel by manual based on environment. RF Output Power: 100%, 75%, 50%, 25%, 12.5%, can adjust it based on application. More RF Power, mean more WiFi Range; Coverage Threshold: This make end users to connect the outdoor CPE with stronger signal strength;... -
Page 11: Device Log
Add AP to Group: 4.1.5: Device Log Device Log is keeping the operation record of this WLAN controller. -
Page 12: Lan
4.2 LAN This including LAN setting and Static DHCP 4.2.1 LAN Setting: IP address: mean AC controller’s IP address Subnet Mask: to set the subnet of LAN Spanning Tree: Enable to show the assigned IP list in DHCP list; Disable mean will not show it. -
Page 13: Static Dhcp
DHCP allocation number: QTY of IP address that DHCP assigned. 4.2.2 Static DHCP Static DHCP: Banding certain users with certain IP address by scan MAC address and IP address; 4.3. WAN If AC controller work as Gateway also in the whole networking, then we should click WAN, which including WAN setting, Load Balance, Policy Routing 4.3.1 WAN Setting: WAN1 is WAN port in default;... - Page 14 In connect method, it including Dynamic IP, PPPoE, Static IP, here show one by one: If WLAN Controller work as controller only, then can disable the WAN function as follow:...
-
Page 15: Load Balance
Remark: When WAN disable, make AC controller connect with gateway’s LAN port, then AC controller have Ethernet. Under this conditions, AC controller access into cloud server. For the details configure, please help to refer to Chapter 12 Cloud. 4.3.2 Load Balance Load Balance is set bandwidth when there are multiple WAN ports;... - Page 16 Policy Type: Source IP Address: Policy based on source IP address Destination IP address: Policy based on destination IP address Source MAC address: Policy based on source MAC address...
- Page 17 Network Interface: Policy based on router interface Domain Policy: Policy based on router domain Destination Port: Policy based on destination port.
-
Page 18: Chapter 5 Behavior
Chapter 5 Behavior In behavior part, it allow/reject end users some behavior based on rules. Status: Enable or Disable IP Group: Can add the IP group if need based on following picture Time Group: Can add time group based on requirement in following picture:... -
Page 19: Chapter 6 Flow Control
Application Class: Including Instant messaging (QQ, Trade Manager, WeChat); Network Download (Thunder, BT, Edonkey); Network Video (Youtube, PPTV, Tencent Video, Ppstream, Youku, Sohu Video, Letv, RSTP, Douyu, Storm web version, funsh, YY) Office ( FTP, DNS, Http, NTP, NFS, DHCP, RTSP, IRC, Telnet, Stun, System Log, IPSEC, IGMP, SSH, TFTP, PPTP, Radius, OpenVPN) Finance and other ( ICMP, Flush, DZH, Eastmoney) Chapter 6 Flow Control... -
Page 20: Url Filter
Status: Enable/Disable Rule Class: Including user defined, http, https, FTP, POP3, SMTP, DNS, telnet, IPSEC, Remote Desktop Rule name: Show the name of choosed rule class; Protocol: Including TCP, UDP, TCP+UDP LAN IP: port mapping LAN IP address External Port: Set external port rule Internet Port: Set internal port rule Line: the Ethernet Line which will be applied in this rules 7.2 URL Filter... -
Page 21: Mac Filter
router based on rules. 7.4 MAC Filter When enable MAC filter, router will allow or prohibit this MAC address to access into this router based on rules. 7.5 DMZ DMZ or Demilitarized Zone is a physical or logical subnetwork that contains an exposes an organization’s external-facing service to a usually larger and untrusted network, usually the Internet. -
Page 22: Chapter 8 Ip/Time Group
Chapter 8 IP/Time Group For this part, pls check more on chapter 5 Behavior Chapter 9 Authentication There are local authentication and remote authentication. Remote Authentication: Remote authentication need to access into cloud server, then make this cloud server as an authentication server;... - Page 23 Local Authentication: Local authentication, no need access into cloud server to do the captive portal authentication. Here we show the step one by one: : in Auth Switch, change to local authentication in authentication, fill in the client timeout, Url white list, MAC white list and Free Port. B.
- Page 24 Free auth days: which day this authentication is invalid. Page color: choose the color you are prefer to. When finish here, click Save to finish. : Config the Local Auth Params: main to setup the authentication method, Wechat Auth, Onekey Auth(No Auth), SMS Auth, Member Auth, Custom Auth, Radius available. Wechat Auth: Input the Wechat ID and password, then apply it.
- Page 25 Member Auth: can port member list by data spread form, or can work with other radius server to do the member auth. Custom Auth: need to banding the auth API, have to contact with supplier for this part if want to do this.
- Page 26 : Set up the local auth policy for users: Like which IP address will get the authentication, and what time they will be authenticated, which authentication method will be pop up, apply to save. : do the member management for authentication users. Can import or export this member list if need.
-
Page 27: Chapter 10 Routing
Chapter 10 Routing Including system routing and static route In System routing, it show system routing form as follow: Static Route: add the static router based on destination IP address. Chapter 11 Device This is management for WLAN Controller, such as backup, reset, reboot, device log, upgrade firmware, modify password... -
Page 28: Management
11.1 Management Backup Save the WLAN controller configuration file to your computer, can restore to the same configuration if restore this file. Restore Using the saved configuration file to recovery configuration Restore default Restore the factory default settings, please press this button 11.2. -
Page 29: Firmware Upgrade
11.3. Firmware Upgrade This feature allows the device firmware upgrade. Noted:Upgrading software may cause system outage, In the process of upgrading the firmware, do not power off, otherwise it may damage the AC controller! 11.4 Modify Password Modify the login password here: 11.5: Maintenance In this part, including two part: Timer reboot: Reboot in certain time everyday. -
Page 30: Reboot Device
11.6 Reboot Device To Reboot the WLAN controller now 11.7 System time... -
Page 31: Chapter 12 Cloud
Sync with the host Synchronization time with connected PC and router NTP Eable Enable or Disable NTP NTP Server Select the server time synchronization Manual IP Setting Setting user-defined IP address Time Zone Select Setting the router’s time zone Chapter 12 Cloud Cloud server is under developing, please wait...
Need help?
Do you have a question about the WI-AC150 and is the answer not in the manual?
Questions and answers
I'm having trouble getting the access wifi points to receive the internet signal from the controller . They show that they are online but no internet connection. Also the run light on the controller isn't blinking like it says it should be --it stays steady lit.
@Chris Hawks Also the manual I printed out is different than what displays on my PC from the controller.. I didn't receive a manual or anything with the controller.
I'm having trouble setting up my Witek access point controller
To set up the Wi-Tek WI-AC150 access point controller, follow these steps:
1. Access the Controller Interface:
- Log in to the WLAN controller interface.
2. AP Management:
- Click on the “AC” section to view connected wireless APs.
- Use the “Device List” to see online/offline APs.
- You can batch set configurations like channel, TX power, reboot time, max users, and login passwords.
3. Authentication Policy Setup:
- Configure the local authentication policy, including IP addresses, authentication time, and method.
- Save and apply the settings.
- Manage user authentication details. You can import/export the user list.
4. Routing Configuration:
- Go to the routing section and add static routes based on destination IP addresses if needed.
5. Device Management:
- You can back up the configuration file or restore it.
- Reset to factory defaults if necessary.
- Modify the login password and set a scheduled reboot time.
6. Firmware Upgrade:
- Upgrade the device firmware carefully. Do not power off during the upgrade to avoid damage.
7. Logging:
- Enable or disable system logs and configure remote log services.
These steps will help configure and manage the Wi-Tek WI-AC150 controller.
This answer is automatically generated