Table of Contents
Advertisement
Quick Links
Advertisement
Table of Contents

Summary of Contents for Belt-Way 45
- Page 1 ONVEYOR CALE ANUAL Version 1.3...
-
Page 3: Table Of Contents
Table of Contents Introduction Read this First Unpacking The Scale Mechanical Installation Electrical Connections User Interface Navigation Setup Wizard (Do this first) Scale Setup Calibration Test Weight Calibration Material Test Calibration Digital Calibration Belt Length Calibration Zero Calibration - Initial Zero Calibration - Routine Device Setup Printer... - Page 4 Controls Plant Connect Diagnostics Setup Information Sensors IO Board Voltages Communication Calibration Administration Settings Select Run Mode Security Update Firmware Calibration Ethernet Troubleshooting Maintenance General Specifications Drawings...
-
Page 5: Introduction
Introduction Belt-way Scales Inc. is pleased to announce the release of the newly designed Belt-W ay Conveyor Belt Scale. Our state of the art integrator sets the industry standard for high technology and user friendly operation. All design changes were created in response to feedback from our distribution partners and customers. -
Page 6: Read This First
There have been several changes to the terminoligy and functionality in the new integrator. 1. Color Display / Graphical User Interface - The Belt-Way integrator now icon and menu driven. On screen instructions make screen navigation simple. The large color display is easy to read. - Page 7 Read This First Backwards Compatibility Issues Old Power Supply Old 12 or 15 VDC power supplies are NOT powerful enough to drive the new integrator. Our new 110/240 VAC to 24 VDC power supply is required to run the integrator from line power. Old load cells, speed sensors and angle sensors are compatible with new integrator.
-
Page 8: Unpacking The Scale
Unpacking The Scale Each Belt-Way Scale is comprised of a minimum of three cartons: One 26 in. x 10 in. x 8 in. carton contains the integrator, speed sensor, speed sensor hardware kit, and angle sensor (if purchased with the scale). -
Page 9: Mechanical Installation
Mechanical Installation Installation Procedure For Standard CEMA Idlers 1. Scale Placement For accessibility and belt tension reasons, we suggest mounting the scale on the lower third of the conveyor. Two idlers before and after the scale are considered to be the weighbridge. - Page 10 Use the leveling plate as a drill template for the U-Bolts. The centers of the leveling plates and pipes should measure 15" apart. See the drawing located at the back of manual. The pipes must be parallel to each other at 90⁰...
- Page 11 Mechanical Installation Channel Inset Idler (Primarily used for Portable Machines) Many producers require a weighing solution for their portable crushers, screen plants, etc. Installing a scale on this type of equipment is possible but can be more challenging than a standard conveyor. There are to many types of portable machines to cover in t his document.
- Page 12 3. Use Recessed Idler Mounting Brackets To Mount Scale Load Cell Assemblies. Two recessed idler mounting brackets must be used to create a frame to hold the scale support pipes. You must be careful to not install the angle brackets too high. It is better to install them lower and raise the scale using the leveling plates.
-
Page 13: Electrical Connections
Electrical Connections Door Side (Integrator / Display Board) 1. Data Transfer Indicator Light 2. USB Flash Drive 3. Integrator Board 4. Reset / Reboot Button 5. Battery Box Side (Terminal / Sensor / IO) Circuit Boards 1. Terminal Board (top board) 2. - Page 14 WARNING! There is high voltage inside the scale integrator box so please make sure the supply power to the scale integrator has been unplugged or disconnected at the circuit breaker to reduce the possibility of electrocution and injury. Make sure you LOCK OUT, TAG OUT and TRY OUT the electrical system before continuing with any maintenance or service.
- Page 15 2. Speed Sensor For standard return belt speed sensor and shaft mounted speed sensor There are some empty slots on the terminal strip. These slots are for future product upgrades and should be left empty when installing the speed sensor. 3.
- Page 16 12-30VDC Supply Power on Terminal Board The standard Scale is DC powered only! You may power the integrator from another 12-30 VDC source when 110/220 VAC is not available. Approximately 55 watts of power are required to run the integrator. We recommend a DC spike filter (Part # PRD0085) when alternative sources of DC power must be used Power Supply Field Installation Kit The field installation kit is shipped pre-wired complete with push on terminals for the terminal...
- Page 17 A relay MAY NOT be used as a pulsed outputs (Remote Totalizer). Please use an external solid state Relay for this purpose. (Belt-Way Part # REL0015) All analog, digital Inputs & outputs are isolated for external Sources. There is No channel to channel isolation.
-
Page 18: User Interface Navigation
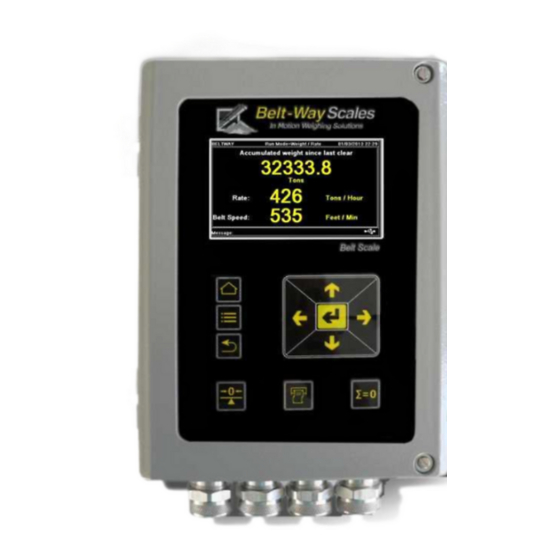
User Interface Navigation Home Press the Home key to display the currently selected Screen. Main Menu Press the Main Menu key to display the Main Menu. Back Press the Back key to return to the previous screen. Zero Calibration Press the Zero Cal key to start a zero calibration Print Ticket... -
Page 19: Setup Wizard (Do This First)
Setup Wizard The Setup Wizard is an intuitive tool designed to assist you in setting up the scale for the first time in an easy to follow sequence. We strongly recommend completing the Setup Wizard for each newly installed scale! Several measurements are required to complete the wizard. -
Page 20: Scale Setup
Scale Setup The Scale Setup menu is available to manage various parameters as well as to directly edit or view the current selection. You can configure the scale manually in this menu instead of following the Setup Wizard. You will need to complete all the calibrations after doing any setup or some changes The Scale Setup menu will allow you to setup and view the following scale parameters: Run Mode Number of Weigh Idlers... - Page 21 1, 2, 3 or 4 idlers. 3. Load Cell Size This is where you would select the load cell capacity of the load cell assemblies used for this scale. Choices are: 45 kg (Aluminum) 50 kg (Stainless) 100 kg (Aluminum or Stainless)
- Page 22 150 kg (Stainless) 200 kg (Aluminum) 350 kg (Stainless) 500 kg (Aluminum or Stainless) 1000 kg (Aluminum or Stainless) 1000 lbs (Catenary Idler Scale) Custom (See Note) All load Cell mV/V specifications are pre-programmed in the software. For Custom you need to know the Load Cell Capacity and mV/V 4.
- Page 23 The speed sensor default shown is for the “Return Belt Speed Sensor” however you are able to use Belt-Way Scales shaft mount encoder or a third party encoder for speed measurement. In order to get an accurate speed you would need change the following values: A.
-
Page 24: Calibration
Calibration The calibration menu is available to go to a specific type of calibration you would like to perform. Each calibration can be performed independently for a specific purpose. For more information on each calibration please continue reading. SELECTION OPTIONS DURING AND AFTER THE CALIBRATIONS PROCEDURES Press the Up Arrow to go to the PREVIOUS screen Press the Left Arrow to CANCEL Press Right Arrow to CHANGE THE VALUE... -
Page 25: Test Weight Calibration
Other methods may be used as long as the weights hang freely from the scale idler or load cell assemblies. Suggested test weight amounts are as follows: Model 45 or Model 100 or Model 200 Model 350 Model 500... -
Page 26: Material Test Calibration
Material Test Calibration The Material Test Calibration is one method that can be used to calibrate the scale and is based on the weight measured by the Belt scale and a Certified scale (typically a truck scale). Navigation Tip Press the MENU key. Navigate to the CALIBRATION icon and press ENTER key Navigate to the MATERIAL TEST menu. -
Page 27: Digital Calibration
Digital Calibration The Digital Calibration is a quick electronic calibration which restores the Trim Factor back to the default of 1. Navigation Tip Press the MENU key. Navigate to the CALIBRATION icon and press the ENTER key Navigate to the DIGITAL CALIBRATION. Then press the ENTER key. ------------------------------------------------------------------------------------------------------------- Belt Length Calibration The Belt Length Calibration calculates the length of the belt. -
Page 28: Belt Length Calibration
The belt must be RUNNING and EMPTY to perform this calibration. 2. Auto Belt length This calibration is performed while the belt is running empty and only measures the length of the belt. You need to do the following steps to complete this calibration: 1. -
Page 29: Zero Calibration - Routine
Press the Left Arrow to REJECT and CANCEL Press Right Arrow to ACCEPT and REPEAT Press the ENTER key to ACCEPT / ACKNOWLEDGE. There are 2 options when doing the Initial Zero Calibration. 1. Dynamic – This calibration is done when the belt is Running Empty The Dynamic Initial Calibration is also accessible through the Setup Wizard or it can be done simultaneously when doing Length and Zero Calibration during the Belt Length Calibration. -
Page 30: Device Setup
The device setup menu is used to activate all peripheral devices. Printer Tickets On / Off - Enable ticket printing. Printer Type: Setup parameters for your printer. Default settings: Belt-Way printer RS232 port Baud rate - 9600 ... -
Page 31: Scoreboard Display
Alternate: Shows both weight and rate. Time Delay - Defines how many seconds each value is displayed. SB Display Type - Setup parameters for your display. Default settings: Belt-Way Display RS232 port Baud rate - 9600 ... - Page 32 Prev set zero value 169.154160 New set zero value 329.742950 Set Zero Accumulated Weight 329.742950 Accumulated weight unit Tons Set Zero Angle 12.000000 Accumulated weight Accumulated weight unit Tons Certified weight 11.000000 Certified weight unit Tons Previous Calibration factor 10.000000 Calibration factor 0.083333 Idler_spacing1...
- Page 33 Runtime Log: Saves the following record to periodic_log.txt once per minute. Type ID # Date Time Total Weight Rate Rate Load % Angle Speed Speed Weight Unit Unit Unit Fpm or Tons, Hour or YYYY/MM/DD HH:MM:SS XXX.XX XX.X XX.X XX.X XX.X Clear Weight Log: Saves the following record to periodic_log.txt when a clear weight event occurs.
-
Page 34: Io Board
I/O Board Assign Inputs Assign any one of the listed input functions to any of the 4 digital inputs. The digital inputs are optically isolated and accept 5-30 VDC. Input options are listed below: 1. Print Ticket - Prints a ticket if a printer is connected to the integrator. 2. - Page 35 Pulse on Time controls how long the pulse remains on. The value is in milliseconds. This must be programmed properly so the control system can count each pulse. 2. Quadrature Wave - Allows a pulsed output to count positive or negative weight. This requires a second output to be programmed as the Pulsed Output channel.
-
Page 36: Controls
Analog Outputs Selection choices are 4-20 mA or 0-20 mA output. This output is used by a PLC system to monitor scale flow rate (tons per hour etc.) or to automatically control a material feed device in blending, rate control or load control applications if configured to do so. 1. - Page 37 The default PID terms will work for most applications. However, they may be adjusted to fine tune feeder performance. Be careful when changing the values as they may result in abnormal feeder behavior. Contact Belt-Way with questions about PID control setup.
- Page 38 Load Out This setting stops a feed device after a predetermined weight has crossed the scale and is primarily used to automate truck and rail car loading. 8 Preset Load Weights can be programmed accommodate different size vehicles. Each load weight can also be accompanied by a Cutoff value. The Cutoff value must match the amount of material that is left on the conveyor after a load is complete.
-
Page 39: Plant Connect
This is the expected belt speed of the conveyor when it is running empty. ---------------------------------------------------------------------------------------------------------- Plant Connect Plant Connect is an Internet based reporting system that allows you to easily access and monitor production from a PC, smart phone or Tablet. Contact Belt-Way Scales for more information. -
Page 40: Diagnostics
Diagnostics The Diagnostic menu is used to visually display the status of current connections, scale settings and live data that is sent to and received by the sensors and devices. Current Settings is the way the scale is currently setup or calibrated Current live data is a measured reading typically relating to the supply or signal voltage or frequency to and from the scale components and secondary devices. -
Page 41: Setup Information
Setup Information The setup section displays the information entered when setting up the scale. This information is related to the load cell selection, conveyor angle, and idler spacing as well how many weigh idlers are used. ---------------------------------------------------------------------------------------------------------- Sensors The Sensors menu will enable you to view the current signals from the scale component sensors at that point in time. - Page 42 2. Speed Sensor The scale speed sensor will send back a signal measured as frequency (Hz). Because the speed sensor generates the frequency, the belt needs to run in order to show a signal coming back. If the signal shows 0Hz while the belt is running there is an issue with the speed sensor, wiring or integrator.
-
Page 43: Io Board
Digital Inputs You are able to view the status of the 4 Digital Inputs and what they are assigned to. The default is Unassigned / OFF Digital Outputs You are able to view the status of the 3 Digital Outputs and what they are assigned to. The default is Unassigned / OFF ... -
Page 44: Communication
Navigate to the VOLTAGES icon. Then press ENTER key. Communication The Communication menu will show the current setting status of all communications ports. Selecting Communication will allow you to view the current settings for the following: 1. RS-485 Port 1 and 2 3. - Page 45 Navigation Tip Press the MENU key. Navigate to the REPORTS AND DIAGNOSTICS icon and press ENTER key Navigate to the DIAGNOSTICS icon and press ENTER key Navigate to the CALIBRATION icon. Then press ENTER key. Trim Factor The Trim Factor is a factor used in the weight calculation and has no unit value. Zero Value This is the weight of the empty belt measured in the selected units during setup.
-
Page 46: Administration
Administration The administration menu is available to manage various parameters as well as to provide additional protection for the scale settings and functions by means of an administrator’s password. This is commonly used at locations where settings could be changed by accident by non-trained personnel affecting scale performance and accuracy as well as causing data or connectivity issues. - Page 47 1. Scale Name This is where you would assign a name to the scale which usually is the conveyor number. The purpose of the Scale Name is to be able to identify the different scales in an application that has multiple scales. The scale name will be sent with data to approved secondary devices connected to the scale.
- Page 48 7. Zero Rate Limit The Zero Rate Limit is a function which will prevent weight accumulation on the scale total if the rate of an empty belt is below a set rate limit. This function is useful if you have a conveyor that shakes or vibrates excessively due to mechanical issues causing an unstable rate on the scale.
-
Page 49: Select Run Mode
Select Run Mode Select Run Mode settings allow you to determine the mode in which you wish to use the scale. You can choose from the following options for run mode selection: 1. Weight / Rate 4. Load Control 2. Load Out 5. - Page 50 CUTOFF The units displayed are defined in the wizard or scale setup menus Target weight is the desired Target net weight of the material you would like to load onto the truck. Cutoff is the amount of material between the feeder and the scale. This feature controls when the scale sends the signal to the close the feeder so that the truck does not get overloaded or under loaded.
-
Page 51: Security
Security Selecting the Security menu allows you to lock out unauthorized access to certain settings and functions. You can also setup an Administrator password which needs to be entered before these functions can be unlocked and performed. You can Lock, Unlock the use of functions and setup a password for the following: 1. -
Page 52: Update Firmware
Update Firmware The Update Firmware menu walks you through 2 items: Identifying the current firmware installed on the integrator Procedure of installing new firmware onto the integrator. Navigation Tip Press the MENU key. Navigate to the ADMINISTRATION icon and press ENTER key Navigate to the UPDATE FIRMWARE menu. -
Page 53: Calibration
Navigation Tip Press the MENU key. Navigate to the ADMINISTRATION icon and press the ENTER key Navigate to the CALBRATION menu. Then press the ENTER key. 1. Trim Factor The trim factor affects the live load reading of the scale. It is a factor that is used in the calculation when calculating the weight displayed on the scale. -
Page 54: Ethernet
Ethernet The Ethernet menu is where you will setup the scale for network connectivity with other Ethernet devices. The settings available for configuration are as follows: The settings available for configuration are as follows: 1. DHCP Client 2. IP Address 3. -
Page 55: Troubleshooting
The Load cell supply voltage should be close to 9 volts. The +5V should be close to 5 volts. Contact Belt-Way for technical assistance if either value is incorrect. 2. - Check Sensor readings under the Reports & Diag menu. - Page 56 3. - Manually Check Supply Voltage, Millivolt, and Ohm Values 1. Supply/Excitation Voltage Check Leave the load cells plugged in with the integrator powered on . Measure the Voltage between the RED and BLACK load cell wires The reading should be approximately 9 VDC 2.
-
Page 57: Maintenance
Maintenance General Scale Maintenance Check list Maintenance Item Task Weighbridge Approach, Scale & Check rollers for Flat spots, Collapsed bearings and make sure Retreat Idlers the rollers Turn freely. Replace as needed Make sure there is No material built up material jammed Scale Idler between the Idler and conveyor frame. - Page 58 2. Routine Calibration and Verification Procudures Routine calibrations consist of conducting: ZERO Calibration 2-3 times / day or when needed based on stability of empty belt weight over time Span Calibration with test weights (when needed) Material tests (when needed) 3.
- Page 59 USE MEASURED VALUES FROM STEP #1 USE the following formula to calculate what rate you should be running after calibration. METRIC Test Weight in (kilograms) (½ X Weigh Span) X 60 Belt Speed in (meters) (meters per Minute) 1000 ENGLISH Test Weight...
-
Page 60: General Specifications
General Specifications Electrical: Input Power to Belt-Way Integrator: 12-30 VDC - 24 VDC 2.25A nominal. AC Power option: 90-265 VAC 50/60 Hz. Use of the factory supplied power supply is recommended. Conformance to local electrical codes is recommended. -
Page 61: Drawings
Belt-Way Scales, Inc. ("Belt-Way"), warrants its products only on the terms contained herein. No one has the right or authority to assume or create any obligation or responsibility, express or implied, on behalf of or in the name of Belt-Way Scales, Inc., or to bind Belt-Way Scales, Inc., in any manner whatsoever. - Page 62 OR IMPLIED WARRANTIES UNDER THE UNIFORM COMMERCIAL CODE, STRICT LIABILITY, NEGLIGENCE OR ANY OTHER LEGAL THEORY REGARDLESS OF WHETHER THE LOSS RESULTED FROM ANY GENERAL OR PARTICULAR REQUIREMENT OR NEED WHICH BELT-WAY SCALES, INC. KNEW ABOUT OR HAD REASON TO KNOW ABOUT AT THE TIME OF THE SALE OF SUCH PRODUCTS.
Need help?
Do you have a question about the 45 and is the answer not in the manual?
Questions and answers