
Summary of Contents for AmeriVacS AVS-20
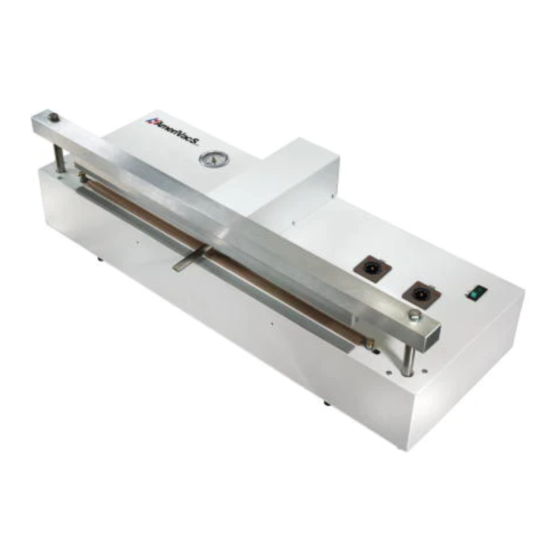
- Page 1 OWNER’S MANUAL AVS-20 RETRACTABLE NOZZLE VACUUM SEALER 99 Washington Street Melrose, MA 02176 800.517.8431 TestEquipmentDepot.com Visit us at www.TestEquipmentDepot.com...
- Page 2 WHAT’S IN THE PACKAGE? This Operation Manual. • (1) Vacuum Sealer. • (1) E-(unit size) Heating Element, inside the manual sheet protector. • (1) T-(unit size) Teflon Set, in a roll, placed next to this manual. • A bag vacuum packaged by this very same vacuum sealer which includes: •...
- Page 3 LET’S GET YOU FAMILIARIZED Unpack your new Vacuum Sealer and place it on its new home, with the logo on the left. Place the foot switch on the floor so it is easy to activate with your foot. Looking at the top of the unit, you will find from left to right: •...
- Page 4 The Vacuum Sealer requires a constant air pressure between 100 to 110 psi. SETTING THE SEAL PART OF YOUR AMERIVACS RETRACTABLE NOZZLE VACUUM SEALER 1. Turn on your Vacuum Sealer by pressing the main On/Off (I/0) switch.
- Page 5 Make sure your Vacuum Sealer has a Vacuum Filter installed on it (by AmeriVacS), or the product will go directly to the vacuum pump making the vacuum sealer inoperative.
- Page 6 8. Place your bag with product between the jaws and with the nozzle inside of the bag. Position the bag so the bag open end goes beyond the pressure bar. Position the product so it is close to the nozzle (this will keep the bag from closing the nozzle and obstructing the air...
- Page 7 Pressure Bar and the Cylinder Rod, and another on top against the head of the Bolt. To order spare parts go to www.AmeriVacS.com and click on “Shop Online” then “Replacement Parts” THE HEATING ELEMENT (Part No. E- and T-) Remove the broken Heating Element: 1) Remove 1½”...
- Page 8 Installing the new element: 1) Remove backing on new ½” Teflon. Center over the ½” wide aluminum flat bar and press to adhere. NOTE: Leave an extra ½” of Teflon tape extending past each end of the aluminum flat bar to avoid electrical grounding with the Heating Element.
- Page 9 THE PRESSURE PAD (Part No. PBK-) 1) Remove the Teflon cover and Red Rubber strip and any adhesive left on the Aluminum Bar. 2) Remove backing from rubber and press onto the Pressure Bar without stretching. 3) Remove backing from 1½” Teflon cover.
-
Page 10: Troubleshooting
TROUBLESHOOTING PROBLEM CAUSE SOLUTION Red Rubber might be Replace Red Rubber indented providing less and Teflon (Pressure Bar seal pressure. Kit) Bag is not sealed in the Make sure air pressure is middle set to 100 to 110 psi, Low air pressure free air flow of 6CFM is needed Make sure air pressure is... - Page 11 99 Washington Street Melrose, MA 02176 Phone 781-665-1400 Toll Free 1-800-517-8431 Visit us at www.TestEquipmentDepot.com...
Need help?
Do you have a question about the AVS-20 and is the answer not in the manual?
Questions and answers