Advertisement
Available languages
Available languages
Safety Information:
CAUTION: This product is only a deterrent. It is not a substitute for proper adult
supervision. Discontinue use when child becomes old enough to defeat it.
Test oven lock before each use.
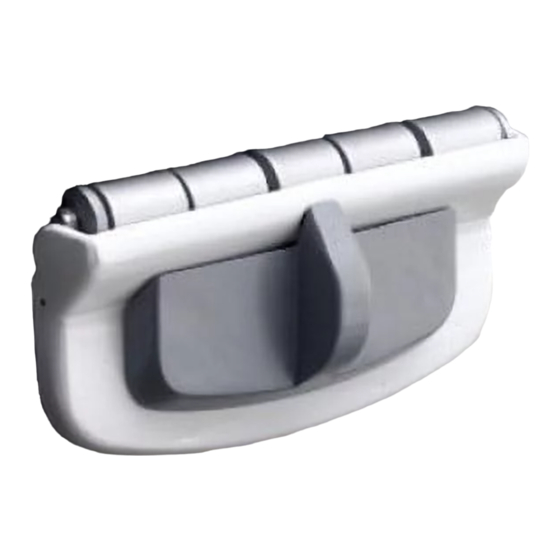
Parts List:
A
Oven Front Lock
A
Tools Needed:
•
Measuring tape
To Install
BEFORE YOU BEGIN: Clean all surfaces that the lock will be adhered to, including the
top of the oven door and the underside of the oven. Oven lock will not adhere properly if
any grease is present.
1
Remove paper backing from adhesive (Figure 1).
2
Locate the center of oven door. Position lock at center (Figure 2).
3
Lift lock up so that adhesive lightly sticks to the top (Figure 3). Then open oven door to
adhere lock firmly in position.
4
Test lock to be sure it is firmly in place.
2
1
Using Oven Lock
TO UNLOCK: Slide lock to the right, and lift hinge up 90°.
TO LOCK: Close oven door. Rotate hinge down in front of oven door.
Latch will click into place.
Care and Cleaning
•
Wipe clean. Keep free of grease.
Oven Front Lock
Questions? Comments?
Missing Parts? Contact Us:
Keep These Instructions
For Future Use
• Read all instructions
before using.
• Remove all contents
from packaging and
discard box, and/or
poly bags.
• Do not return this
product to the place
of purchase. If any
parts are missing, call
Consumer Relations at
(800) 544-1108. Or
visit our web site at
www.safety1st.com.
Have the model
number ready (48408)
and date code
(manufacture date)
3
located on package.
©2004 Dorel Juvenile Group
Styles and colors may vary.
Columbus, IN 47201-7494
In Canada: 12345 Albert-Hudon,
Montreal-N, QC Canada H1G 3K9
48408
User Guide
www.safety1st.com
(800) 544-1108
Made in CHINA
www.safety1st.com
(800) 544-1108
Distributed by
Dorel Juvenile Group
2525 State Street,
Suite 100,
09/04 4358-5344
Advertisement
Table of Contents

Summary of Contents for Safety 1st Oven Front Lock
- Page 1 Oven Front Lock 48408 Safety Information: User Guide CAUTION: This product is only a deterrent. It is not a substitute for proper adult supervision. Discontinue use when child becomes old enough to defeat it. Questions? Comments? Missing Parts? Contact Us: Test oven lock before each use.
- Page 2 Verrou de porte de four 48408 Instructions de sécurité : Guide d’utilisation ATTENTION : Ce produit ne peut remplacer la supervision adéquate d’un adulte. Cesser l’usage lorsque l’enfant est assez âgé pour le vaincre. Des questions? Des commentaires? Vérifiez le verrou de la porte du four avant chaque utilisation. Des pièces sont absentes? Communiquez avec nous : www.safety1st.com...
- Page 3 Cerrojo frontal del horno 48408 Información de seguridad: Guía del Usuario PRECAUCIÓN: Este producto es sólo un elemento disuasivo. El mismo no reemplaza la supervisión adecuada por parte de un adulto. Deje de usar la traba cuando el niño sea suficientemente grande como para destrabarla. ¿Preguntas? ¿Comentarios? ¿Piezas faltantes? Póngase Pruebe el cerrojo del horno antes de usarlo.
Need help?
Do you have a question about the Oven Front Lock and is the answer not in the manual?
Questions and answers