Table of Contents
Troubleshooting

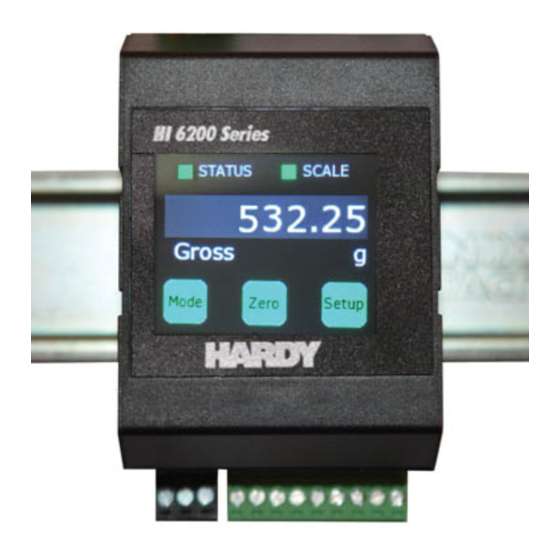
Summary of Contents for Hardy HI 6200 Series
- Page 1 Herror! HI 6200 Single Channel Weight Processor User Guide FastFind Links Product Description Installation Initial Setup Ways to Set Scale Parameters Setting Scale Parameters Troubleshooting Hardy Installation and Commissioning...
- Page 2 Hardy Process Solutions. Notice of Liability Information provided in this manual is intended to be accurate and reliable. However, Hardy Process Solutions, Inc. assumes no responsibility for its use, nor for any infringement of rights of third parties which may result from its use.
-
Page 3: Table Of Contents
3 Initial Setup ......................23 3.1 Initial Setup ......................24 4 Ways to Set Scale Parameters ................25 4.1 Using the Touch Screen ..................26 4.2 Using the Embedded Webserver ................ 28 Hardy Process Solutions HI 6200 Weigh Processor User Guide... - Page 4 5.2.10 Gravity Correction ..................56 5.2.11 Tare Weight ....................57 5.2.12 WAVESAVER® ..................58 5.3 Calibrating the Scale ................... 59 5.3.1 Pre-calibration Procedures ................. 59 5.3.2 C2 Calibration ..................... 60 5.3.3 Hard Calibration ..................60 Hardy Process Solutions HI 6200 Weigh Processor User Guide...
- Page 5 6.3.1 Load Sensor/Point Input/Output Measurements ........63 6.3.2 Load Check ....................64 7 Hardy Installation and Commissioning ............66 7.1 Emergency Service and Support ................. 66 Index ........................77 Hardy Process Solutions HI 6200 Weigh Processor User Guide...
-
Page 6: How To Use This Guide
HOW TO USE THIS GUIDE Introduction The Hardy Process Solutions HI 6200 Weigh Processor is a state-of-the-art product. It uses advanced microprocessor technology and front-end signal processing of stain-gauge type load sensors to provide super-accurate weighing coupled with operator-friendly interfaces and reliability. -
Page 7: Organization Of The Guide
APPENDIX B - List of Parameter IDs This appendix lists the parameter IDs for the HI 6200. APPENDIX C - Frequently Asked Questions This appendix provides answers to frequently asked questions. Hardy Process Solutions HI 6200 Weigh Processor User Guide... -
Page 8: Document Conventions
Indicates text that is displayed on page or entered by the user. page/code [ ] square brackets Indicates optional values. { } braces Indicates required or expected values. | vertical bar Indicates a choice between two or more options or arguments. Hardy Process Solutions HI 6200 Weigh Processor User Guide... -
Page 9: Product Description
Topics: Single Channel Weight Processor. This chapter also Overview (page 10) lists the available models and describes the Models (page 11) instrument’s key features. Key Features (page 12) Hardy Process Solutions HI 6200 Weigh Processor User Guide... -
Page 10: Overview
OEMs and system integrators who build machinery where fast, stable weight data along with low-cost of ownership are critical components to their successful design. Ultra-compact at just 2 inches wide and 3 inches high, the HI 6200 series saves cabinet space. This form factor allows for high-density panel design over traditional weighing instrumentation, reducing machine cost and control cabinet footprint. -
Page 11: Models
The HI 6200 is available in the following models. Figure 1-1. HI 6200 Models Model Description HI6200-WP-10-EIP-000 Single Channel Weight Processor, Ethernet Comms with Display HI6200-WT-10-ANA-000 Single Channel Weight Transmitter, Analog Out with Display Hardy Process Solutions HI 6200 Weigh Processor User Guide... -
Page 12: Key Features
1.3.3 INTEGRATED TECHNICIAN™ Operator Diagnostics Hardy's INTEGRATED TECHNICIAN (IT) core feature helps you troubleshoot your weighing system and diagnose problems from the HI 6200 webserver. These tests display system weights, voltages, and pass/fail information that allow you to isolate a problem to the instrument, cabling, or sensors, reducing troubleshooting times and maintenance costs. -
Page 13: Installation
Climatization (page 17) Handling Precautions (page 17) Mounting the HI 6200 (page 19) Wiring the HI 6200 (page Powering on the HI 6200 (page 22) Hardy Process Solutions HI 6200 Weigh Processor User Guide... -
Page 14: Hardy Field Service
Quality Documentation Creation To request any of these services, or to discuss your needs with a trained Hardy Service Agent, call 800-821-5831 option 4 between 6:30 AM and 5:30 PM PST. For emergency downtime service after hours, leave a message in our emergency mailbox and your call will be returned promptly, or email us at hardysupport@hardysolutions.com. - Page 15 Reviewing the power and the heating, ventilation, and air-conditioning (HVAC) requirements, and then ordering any additional support equipment. Making a final layout of the installation and reviewing the layout with Hardy Field Service. Verifying that the electrical service wiring has been installed at the predetermined location ...
-
Page 16: Unpacking
Customer Service by phone, fax, or email. 4. Record the model number and serial number of the HI 6200 series instrument. Store this information in a convenient, secure location for reference when contacting Customer Service, buying parts, or upgrading firmware. -
Page 17: Climatization
connector pins. Do not install the instrument right next to an AC or high voltage DC module. Route all the load voltage cables away from high voltage cables. Hardy Process Solutions HI 6200 Weigh Processor User Guide... -
Page 18: Sources Of Electrical Interference
Electromagnetic interference can cause various problems. The HI 6200 is designed to reduce its susceptibility to radiated and conducted interference. A Hardy Process Solutions representative can advise you about common causes of electromagnetic interference. Hardy Process Solutions HI 6200 Weigh Processor User Guide... -
Page 19: Mounting The Hi 6200
The HI 6200 is designed to be mounted on a 35mm DIN rail using the spring-loaded DIN clip integrated into the body of the instrument. Figure 2-1. DIN Rail Clips To mount the HI 6200: 1. Engage the bottom of the DIN rail. Hardy Process Solutions HI 6200 Weigh Processor User Guide... - Page 20 Figure 2-3. Mounts on the DIN Rail (Vertical Mounting) To remove the HI 6200: 1. Locate the slot on the top of DIN rail clip. 2. Gently pry up until the instrument releases. Hardy Process Solutions HI 6200 Weigh Processor User Guide...
-
Page 21: Wiring The Hi 6200
When tightening wiring onto the screw-down terminal blocks, remove the terminal blocks from the instrument to prevent undue stress on the instrument. Figure 2-4. HI 6200 Wire Terminations to Hardy Sensors and Junction Boxes Caution: Do not over-tighten the screw-down terminal blocks. Otherwise, you might shear sensor wires and cause intermittent or complete failure of the weighing system. -
Page 22: Powering On The Hi 6200
Required load cell cable for C2 electronic calibration system and INTEGRATED TECHNICIAN is Hardy Process Solutions part number C2Cable (6020-0001-0). 2.8 Powering on the HI 6200 After wiring the HI 6200, power on the instrument and check that Status and Scale LEDs on the front panel indicate normal operation. -
Page 23: Initial Setup
3 INITIAL SETUP Topics: This chapter describes how to set up the HI 6200 prior to initial use. Initial Setup (page 24) Hardy Process Solutions HI 6200 Weigh Processor User Guide... -
Page 24: Initial Setup
Input the Cal Low Weight with nothing on the scale. Confirm that Cal Low Weight is 0. c. Press Do Cal Low to set the low point on the calibration curve. d. Place the span weight onto the scale. e. Press Do Cal Hi. Hardy Process Solutions HI 6200 Weigh Processor User Guide... -
Page 25: Ways To Set Scale Parameters
Embedded Webserver provides access to the touch screen settings along with advanced diagnostics, parameter cloning, and firmware upgrade parameters. PLC provides PLC communications (EIP or Modbus). Hardy Process Solutions HI 6200 Weigh Processor User Guide... -
Page 26: Using The Touch Screen
5. To make a selection, press a secondary menu item or the OK button. 6. To return to the previous menu, press the Back button. 7. To return to the home screen, press the Home button. Hardy Process Solutions HI 6200 Weigh Processor User Guide... - Page 27 User Choice (Fast, Balanced, Stable, Off, Custom) Operations Auto Zero Auto Zero Enable Disable Tolerance User Input variable Tare Ops Tare Weight User Input variable Tare Command Zero Ops Zero Tolerance User Input variable Zero Command Settings Capacity User Input variable Grads User Choice (1, 2, 5, 10, 100) Instrument ID User Input variable Motion Tolerance User Input variable Operator ID User Input variable Units User Choice (oz, lb, ton, g, kg, mt) Hardy Process Solutions HI 6200 Weigh Processor User Guide...
-
Page 28: Using The Embedded Webserver
IP address) are the same as the HI 6200 and the node identifier (last octet) is a number from 0 to 255 other than 100. For example: 192.168.0.101. Hardy Process Solutions HI 6200 Weigh Processor User Guide... - Page 29 In the General tab, select Use the following IP address, and then enter the following values: IP address = 192.168.0.101 Subnet mask = 255.255.255.000 Complete the IP address and Subnet mask fields. Click OK. Hardy Process Solutions HI 6200 Weigh Processor User Guide...
- Page 30 5. Open a web browser on the computer, enter the static IP address of the HI 6200 instrument (192.168.000.100), and press the Enter key. The Home page appears (see Figure 4-1). Figure 4-1. Embedded Webserver Home Page Hardy Process Solutions HI 6200 Weigh Processor User Guide...
-
Page 31: Saving "Known Good" Parameters
1. Open a web browser on the computer, enter the static IP address of the HI 6200 instrument (for example: 192.168.000.100), and press the Enter key. The Home page appears (see Figure 4-1 on page 30). 2. Click Configuration, and then click Diagnostics. 3. Click Parameters. Hardy Process Solutions HI 6200 Weigh Processor User Guide... - Page 32 Chapter 4 – Ways to Set Scale Parameters 4. Make sure all the parameter values are set to your requirements. 5. Click the Save As KnownGood button. Hardy Process Solutions HI 6200 Weigh Processor User Guide...
-
Page 33: Restoring From "Knowngood" Parameters
(192.168.000.100), and press the Enter key. The Home page appears (see Figure 4-1 on page 30). 2. Click Configuration, and then click Diagnostics. 3. Click Parameters. 4. Click Known Good Cfg. Hardy Process Solutions HI 6200 Weigh Processor User Guide... - Page 34 Chapter 4 – Ways to Set Scale Parameters 5. Click the Restore KnownGood button. Hardy Process Solutions HI 6200 Weigh Processor User Guide...
-
Page 35: Using A Plc
2. Right-click the Ethernet Module under which you will be installing the HI6200-WS module. 3. Select New Module to display a list of modules. 4. From the catalog list, select the Hi6200 Series EDS_AOP module. Hardy Process Solutions HI 6200 Weigh Processor User Guide... - Page 36 5. Configure the module by entering a unique name and entering the instrument’s IP address. Enter a unique name. Enter the instrument’s IP address. 6. In the Connection tab, make sure the Requested Packet Interval (RPI) is set no faster than 10ms. Hardy Process Solutions HI 6200 Weigh Processor User Guide...
-
Page 37: Configuration Parameters
WAVERSAVER SINT Num Averages Loadcell Sensitivity AutoZero AutoZero Tolerance FLOAT Gravity Correction FLOAT Motion Tolerance FLOAT Zero Tolerance FLOAT Tare Weight FLOAT Reference Weight FLOAT Span Weight FLOAT Scale Capacity FLOAT Hardy Process Solutions HI 6200 Weigh Processor User Guide... -
Page 38: Configuration With Aop
Table 4-3. Hardy Commands Command Number Command (0x00)0 Read Parameter (0x01)1 Zero Cmd (0x02)2 Tare Cmd (0x64) 100 dec Cal Low Cmd (0x65) 101 dec Cal High Cmd (0x66) 102 dec C2 Cal Cmd Hardy Process Solutions HI 6200 Weigh Processor User Guide... -
Page 39: Read Param Cmd
Write the hexadecimal value 0x01 to the command register to zero the gross weight. If this command succeeds, the status register reads 0. Status Error code 1 Fail Status Error code 2 ADC Failure Status Error code 3 Out of tolerance Hardy Process Solutions HI 6200 Weigh Processor User Guide... -
Page 40: Tare Cmd
Write the hexadecimal value 0x65 to the command register to perform the high step of a traditional calibration. Status Error code 1 Fail Status Error code 2 ADC Failure Status Error code 4 Motion Hardy Process Solutions HI 6200 Weigh Processor User Guide... -
Page 41: C2 Cal Cmd
Hex value: 0x81 Decimal value: 129 Write the hexadecimal value 0x81 to the command register to perform the stability test. Status Error code 1 Fail Status code FF cmd in progress Hardy Process Solutions HI 6200 Weigh Processor User Guide... -
Page 42: It Test Reduced
Status Error code 0x0B Value out of range too high Status Error code 0x0C Value out of range too low Status Error code 0x0D Not allowed Status Error code 0x80 Invalid parameter ID Hardy Process Solutions HI 6200 Weigh Processor User Guide... -
Page 43: Set Default Parameters
Fail - not enough counts between Cal low and Cal high weights Fail – param value too high Fail – param value too low Fail – not allowed Fail – Parameter ID not found Hardy Process Solutions HI 6200 Weigh Processor User Guide... -
Page 44: Modbus
All HI 6200 series units have Modbus TCP built-in. To have the instrument communicate through Modbus-TCP, use the touch screen or web browser to configure the HI 6200 for Modbus TCP. - Page 45 5. If TCP/IP is not selected in the top-right field, select it from the pull-down list. 6. In the IP Address field at the bottom right, type the address of the HI 6200 instrument with which you want to communicate. Hardy Process Solutions HI 6200 Weigh Processor User Guide...
- Page 46 Type the address of the HI 6200 instrument. 7. Click OK. The red No Connection message disappears and the values at the top of the page change. Your computer is now connected to the HI 6200. Hardy Process Solutions HI 6200 Weigh Processor User Guide...
- Page 47 – Length = 10 9. On the Hardy Modbus-Link page, from the Display menu, click Float. The Weight value appears in register 6 (net) or register 8 (gross). Other registers are not float values, so be aware of random numbers in other registers.
- Page 48 12. Double-click the top register. When the Enter Value box appears, enter the new value you want to write to this register. The following figure shows writing a value of 2, which is the Tare command number. Hardy Process Solutions HI 6200 Weigh Processor User Guide...
- Page 49 Reserved 4 Reserved 5 Total Command , Aux Command Information , Parameter ID , and Parameter Value are used to send commands to the instrument, write new parameter values, read existing parameter Hardy Process Solutions HI 6200 Weigh Processor User Guide...
- Page 50 Weight Sample Counts from 0 – 255 repeat. The value returned in the lower byte of the register is the status code for the command. This code is one of the following values: Hardy Process Solutions HI 6200 Weigh Processor User Guide...
- Page 51 0 -999999.99 0 = off Enable AutoZero Tracking BYTE 1 = on 0 = oz 1 = lb 2 = ton 3 = g 4 = kg Unit BYTE 5 = t Hardy Process Solutions HI 6200 Weigh Processor User Guide...
- Page 52 Load Cell Sensitivity BYTE 8 = 5.0 mV/V 0 = Off 1 = 7Hz 2 = 3.5 Hz 3 = 1Hz 4 = 0.5Hz Waversaver BYTE 5 = 0.25Hz Num Averages 1-255 Hardy Process Solutions HI 6200 Weigh Processor User Guide...
-
Page 53: Setting Scale Parameters
(page 55) of time. Be sure to follow all the procedures completely to ensure that the weights read by the Calibrating the Scale (page instrument are accurate. Hardy Process Solutions HI 6200 Weigh Processor User Guide... -
Page 54: Pre-Calibration Procedures
Vertical or at angles other than horizontal will have a negative effect on the scale’s ability to repeat and provide accurate weight readings. Hardy Process Solutions HI 6200 Weigh Processor User Guide... -
Page 55: Calibration Setup Procedures
Note: The amount of weight zeroed off is cumulative. The Auto Zero command will not run if the current gross weight plus any previously zeroed amount exceeds the zero tolerance value. Hardy Process Solutions HI 6200 Weigh Processor User Guide... -
Page 56: Auto Zero Tolerance
Note: Make sure the scale system is clean and ready to receive product. This step establishes the gross zero reference. You must perform a C2 calibration after setting the Gravity Correction; otherwise, the correction factor will not work. Hardy Process Solutions HI 6200 Weigh Processor User Guide... -
Page 57: Tare Weight
Tare weight is the amount of weight tared off with the last tare command or the amount you entered. The tare weight equals the difference between the net and gross weight readings. Hardy Process Solutions HI 6200 Weigh Processor User Guide... -
Page 58: Wavesaver
ATTENTION: LIEU SUR UNE ÉCHELLE / UN BATEAU OU UNE CELLULE DE CHARGE PEUT ENDOMMAGER LE MOUVEMENT VERTICAL LIBRE DE LA CHARGE DE CHARGE ET ÉVITER L'INSTRUMENT DE RETOURNER AU POINT DE RÉFÉRENCE ZERO ORIGINAL. Hardy Process Solutions HI 6200 Weigh Processor User Guide... -
Page 59: Calibrating The Scale
Vertical or at angles other than horizontal will have a negative effect on the scale’s ability to repeat and provide accurate weight readings. Hardy Process Solutions HI 6200 Weigh Processor User Guide... -
Page 60: C2 Calibration
Only Hardy Process Solutions load sensors are capable of C2 (or eCal) calibration. 3. In the Ref Weight text field, enter the reference weight for your application. An empty scale will use a 0.00 reference weight setting. -
Page 61: Troubleshooting
In the unlikely event of a problem with the HI 6200, use the information in this chapter to identify and Troubleshooting Table (page resolve the problem. Weighing System Test (page Electrical Check Procedures (page 63) Hardy Process Solutions HI 6200 Weigh Processor User Guide... -
Page 62: Troubleshooting Table
C2 load cells have unequal capacities due Verify each load cell is correct not equal to using mismatched load cells or faulty per the spec sheet delivered C2 programming. with the cell. Hardy Process Solutions HI 6200 Weigh Processor User Guide... -
Page 63: Weighing System Test
Chapter 6 – Troubleshooting Name/Code # Definition Action Command Status 7 C2 clones C2 load cell has a non-Hardy C2 load cell. Verify the use of Hardy load cells. Command Status 8 Hard Cal Fail Too few A/D counts between zero and... -
Page 64: Load Check
Note: Load sensor measurements are checked with a digital voltmeter at the load cell connector on the front of the module or by using INTEGRATED TECHNICIAN with a Hardy IT Junction Box. The scale calibration must be completed to enable IT to work properly. - Page 65 If the display reads improperly or shows no change, something is wrong with the setup. If the display changes weight in the proper direction, remove the weight and proceed to calibrate the instrument. Refer to 6 for help determining the cause of the poor weight reading. Hardy Process Solutions HI 6200 Weigh Processor User Guide...
-
Page 66: Hardy Installation And Commissioning
Hardy offers preferred rates for new installations and we guarantee that the installation will be done correctly the first time. Plus, with the use of the Hardy Toolbox features like C2 ® Electronic calibration, Hardy Technicians spend less time onsite than the competition, saving you cost and downtime. - Page 67 Chapter 7 – Hardy Installation and Commissioning Figure 7-1. Hardy Support Locations Throughout the United States Hardy Process Solutions HI 6200 Weigh Processor User Guide...
- Page 68 1000 VDC minimum C2 calibration output: Isolation from digital section 1000 VDC minimum Temperature drift: Less than 0.0004% of full scale per degree C for Cal- LO and Cal-HI reference points Hardy Process Solutions HI 6200 Weigh Processor User Guide...
- Page 69 Approvals: UL, CUL Ordinary Location – PENDING CE – PENDING Class I, Division 2 Groups A, B, C and D, Temp Code T6 – PENDING OVDA – PENDING RoHS - PENDING Hardy Process Solutions HI 6200 Weigh Processor User Guide...
- Page 70 IT_NUMSENSORS JBOX 1 0x498D IT_NUMSENSORS JBOX 2 0x498E B.3 IT Test Diagnostic Parameters Parameter Hex Value IT WEIGHT CHANNEL 0 0x4990 IT WEIGHT CHANNEL 1 0x4991 IT WEIGHT CHANNEL 2 0x4992 Hardy Process Solutions HI 6200 Weigh Processor User Guide...
- Page 71 0x49C2 IT WAVERSAVER VARIATION CHANNEL 3 0x49C3 IT WAVERSAVER VARIATION REF 1 0x49C8 IT WAVERSAVER VARIATION CHANNEL 4 0x49C4 IT WAVERSAVER VARIATION CHANNEL 5 0x49C5 IT WAVERSAVER VARIATION CHANNEL 6 0x49C6 Hardy Process Solutions HI 6200 Weigh Processor User Guide...
- Page 72 IT RTZ CHANNEL 2 0x49F2 IT RTZ CHANNEL 3 0x49F3 IT RTZ CHANNEL 4 0x49F4 IT RTZ CHANNEL 5 0x49F5 IT RTZ CHANNEL 6 0x49F6 IT RTZ CHANNEL 7 0x49F7 IT RTZ COMBINED 0x498C Hardy Process Solutions HI 6200 Weigh Processor User Guide...
- Page 73 Hex Value GrossWeight 0x6081 NetWeight 0x6082 ADC_Counts 0x4907 ADC_CountsRaw 0x4908 CalLowCounts 0x4085 CalHighCounts 0x4087 ZeroCounts 0x2889 CalZeroCounts 0x4084 Cal Type 0x4001 NUMBER C2 SENSORS 0x4103 NUMBER IT J-BOXES 0x4881 FirmwareRevision 0x7985 Hardy Process Solutions HI 6200 Weigh Processor User Guide...
- Page 74 Settings are application dependent; however, 1.0hz and 10 averages are A common settings. Where can I find my weight readings in the PLC? Q4 The gross and net weight is displayed in the PLC input table. Hardy Process Solutions HI 6200 Weigh Processor User Guide...
- Page 75 Q6 You perform IT tests using the webserver or with the hexadecimal value A 0x80 in the PLC output table followed by a READ PARAM command to read individual parameter IDs. Hardy Process Solutions HI 6200 Weigh Processor User Guide...
- Page 76 0x and 16# are used interchangeably to signify a hexadecimal value. Can I change my parameters through the “C” configuration tags? Q8 Yes, but changes only take effect when the config table is enabled and A the connection is cycled. Hardy Process Solutions HI 6200 Weigh Processor User Guide...
-
Page 77: Index
Diagnostic write parameters, 70 power on, 22 Document conventions, 8 unpacking, 16 E wiring, 21 HI 6200 setup EDS_AOP file EIP, 35 configuration, 38 embedded webserver, 28 EIP, 35 touch screen, 26 I/O tables, 49 Electrical check procedures, 63 I Electrical interference, 18 I/O tables for MODBUS, 49 Emergency service and support, 66 Initial setup, 24 Environmental requirements, 69 EIP, 35 F embedded webserver, 28 touch screen, 26 Features, 12 installation and commissioning, 66 Frequently asked questions, 74 Installing the HI 6200, 13 Hardy Process Solutions HI 6200 Weigh Processor User Guide... - Page 78 Models, 11 Tare weight, 57 Motion tolerance, 55 Test diagnostic parameters, 70 Mounting the HI 6200, 19 Touch screen, 26 Troubleshooting table, 62 N U Number of averages, 56 Unit of measure, 55 O Unpacking, 16 Overview, 10 W P WAVESAVER, 12, 58 Parameters Webserver, 28 diagnostic write, 70 Weighing System Test, 63 read/write, 70 Wiring the HI 6200, 21 read‐only, 73 Z stability test, 73 test diagnostic, 70 Zero tolerance, 55 PLC commands, 38 Zero track enable, 56 Power on, 22 Hardy Process Solutions HI 6200 Weigh Processor User Guide...
- Page 79 Hardy Process Solutions 9440 Carroll Park Drive Suite 150 San Diego, CA 92121 http://www.hardysolutions.com © 2019 All Rights Reserved, Hardy Process Solutions Part Number 0596-0358-01, Rev A...
Need help?
Do you have a question about the HI 6200 Series and is the answer not in the manual?
Questions and answers