Table of Contents
Advertisement
Advertisement
Table of Contents

Summary of Contents for Essilor Instruments CS POLA 600
- Page 1 User manual www.essilor-instruments.com...
-
Page 2: Table Of Contents
> C SER MANUAL ONTENTS ONTENTS I. I NTRODUCTION 1. Important 2. Outline of product 3. Classification 4. Certification II. S AFETY INFORMATION 1. Introduction 2. Indications for use 3. Safety symbols 4. Environmental factors 5. Symbols marked on the instrument's packaging 6. - Page 3 > C SER MANUAL ONTENTS XIV. S PECIFICATIONS XV. C OMPONENT LIST 1. Standard accessories 2. Optional accessories XVI. S ERVICE INFORMATION 1. Repair...
-
Page 4: Introduction
I. I NTRODUCTION... - Page 5 > I. I SER MANUAL NTRODUCTION The complete user manual is available on a web space. To access, please scan the QR code below using a dedicated application. Le manuel utilisateur complet est disponible sur un espace web. Pour y accéder veuillez scanner le QR code ci-dessous à...
-
Page 6: Important
> I. I SER MANUAL NTRODUCTION 1. I MPORTANT This product may malfunction if exposed to electromagnetic interference generated by cell phones, transceivers, radio-controlled toys, etc. Be sure to avoid bringing such items into close contact with the product. The information in this publication has been carefully checked and is believed to be entirely accurate at the time of publication. -
Page 7: Certification
> I. I SER MANUAL NTRODUCTION 4. C ERTIFICATION CSPOLA600 - Polarized visual chart system > V5 - 03-2018... -
Page 8: Safety Information
II. S AFETY INFORMATION... -
Page 9: Introduction
> II. S SER MANUAL AFETY INFORMATION 1. I NTRODUCTION Safety is everyone's responsibility. The safe use of this equipment is largely dependent upon the installer, user, operator, and maintainer. It is imperative that personnel study and become familiar with this entire manual before attempting to install, use, clean, service or adjust this equipment and any associated accessories. -
Page 10: Safety Symbols
> II. S SER MANUAL AFETY INFORMATION 3. S AFETY SYMBOLS The International Electro-technical Commission (IEC) has established a set of symbols for electronic medical equipment which classify a connection or warn of any potential hazards. I and O on power switch represent ON and OFF respectively. This symbol identifies a safety note. -
Page 11: Environmental Factors
> II. S SER MANUAL AFETY INFORMATION 4. E NVIRONMENTAL FACTORS Avoid the following environments for operation or storage. Where the equipment is exposed to water vapor. Don't operate an equipment with a wet hand. Where the equipment is exposed to direct sunlight. Where the temperature changes extremely. - Page 12 > II. S SER MANUAL AFETY INFORMATION Do not placed the multiple socket-outlet for CSPOLA600 system on the floor in order to prevent liquid penetration and damage to the product. CSPOLA600 system shall not be connected with additional multiple socket-outlets or extension cords in addition to a designated single multiple socket-outlet.
-
Page 13: Symbols Marked On The Instrument's Packaging
> II. S SER MANUAL AFETY INFORMATION 5. S YMBOLS MARKED ON THE INSTRUMENT S PACKAGING Keep away from rain Transport package shall be kept away from rain. Minimum/Maximum temperature Indicates the temperature limits to which the medical device can be safely exposed. Minimum/Maximum humidity Indicates the hygrometry limits to which the medical device can be safely exposed. - Page 14 > II. S SER MANUAL AFETY INFORMATION 3. The equipment must be operated only by, or under the direct supervision of a properly trained and qualified person. 4. Modifications to this equipment may only be carried out by the manufacturer's service technicians or other authorized persons.
-
Page 15: Electromagnetic Emission
> II. S SER MANUAL AFETY INFORMATION 7. E LECTROMAGNETIC EMISSION This equipment complies with IEC60601-1-2 EMC standards for medical devices. This equipment requires special precautions concerning EMC and must be supplied to the service in accordance with the EMC information provided in the installation and operating instructions. -
Page 16: Electromagnetic Immunity
> II. S SER MANUAL AFETY INFORMATION 8. E LECTROMAGNETIC IMMUNITY Guidance and manufacturer's declaration – electromagnetic immunity CSPOLA600 is intended for use in the electromagnetic environment specified below. The customer or the user of CSPOLA600 should assure that they are used in such an environment. IEC 60601 Electromagnetic environment - Immunity test... - Page 17 > II. S SER MANUAL AFETY INFORMATION Guidance and manufacturer's declaration – electromagnetic immunity The equipment CSPOLA600 is intended for use in the electromagnetic environment specified below. The customer of the user of the CSPOLA600 should assure that it is used in such an environment. Immunity test IEC 60601 Compliance level Electromagnetic environment -...
-
Page 18: Features
III. F EATURES... - Page 19 > III. F SER MANUAL EATURES CSPOLA600 system enables a user to reverse all kinds of Red/Green Red / Green reverse chart by using Black & White reverse button on the remote control. CSPOLA600 system has an animation function for making a child Animation function concentrated on the chart during the test and it easy to examine.
-
Page 20: Notes For Using The Instrument
IV. N OTES FOR USING THE INSTRUMENT... - Page 21 > IV. N SER MANUAL OTES FOR USING THE INSTRUMENT 1. Do not hit or drop the instrument. The instrument may be damaged if it receives a strong impact. The impact can damage the function of this product. Handle it with care. 2.
-
Page 22: Configurations
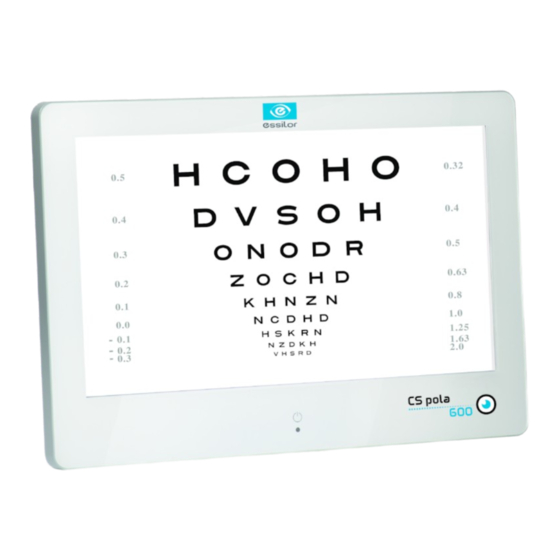
V. C ONFIGURATIONS... - Page 23 > V. C SER MANUAL ONFIGURATIONS The CSPOLA600's main components are shown below. 1. LCD screen: display charts (optotype) 2. IR cover: receive signal from the remote control 3. LED lamp 4. Power switch: power ON and OFF 5. Chassis earth: security measures for the leakage current 6.
- Page 24 > V. C SER MANUAL ONFIGURATIONS Masking button (horizontal): display charts horizontally Masking button (vertical): display charts vertically Move button (Left & Right): display the chart showing on LCD with moving toward left or right Single masking button: display a chart symbol one by one Up &...
-
Page 25: Installation
VI. I NSTALLATION... -
Page 26: Instruction For Wall Mounting
> VI. I SER MANUAL NSTALLATION 1. I NSTRUCTION FOR WALL MOUNTING Warning Unsecured product could be dislodged and fall which causes injury to either patient or examiner. Warning All cables related to the product shall be handled with care for preventing the examiner or the patient from any kinds of dangers. -
Page 27: Feature Set
> VI. I SER MANUAL NSTALLATION 3. F EATURE SET a. Feature set mode menu b. Feature set mode setting method 1. Connect the USB cable to remote control bottom side and body right side (1 picture). 2. Push the "SETUP" button (3 picture). -
Page 28: Feature Set Mode Disable
> VI. I SER MANUAL NSTALLATION Remote control key instructions • "UP": select this button, can move the key top or left. • "DOWN": select this button, can move the key bottom or right. • "ESC": go to selected features used in the previous step. -
Page 29: Function Set Overview
> VI. I SER MANUAL NSTALLATION d. Function set overview Remote channel If several LCD and remote control are installed at the same place, they have to match remote control and channel to prevent communication error. Operator can choose each channel, which was saved by remote control. 1. - Page 30 > VI. I SER MANUAL NSTALLATION How to use pointing functions Circle point Square rectangle 1. Press "SETUP” button (bottom) then, press the number between 1 to 15 as indicated in the remote. 2. Then, the circled type or square rectangle type will be shown on the chart as above pictures. This pointing function is available for minimum 1 illustration to maximum 15 illustrations on screen and enable way to show it (circular type or square type) is the same on all screen.
- Page 31 > VI. I SER MANUAL NSTALLATION Opto and number type For user convenience, this mode can select the chart type like above. OPTOTYPE mode • MODE1: Numeral / Snellen / English / Korean • MODE2: Numeral / Snellen / English / Russian •...
- Page 32 > VI. I SER MANUAL NSTALLATION Color strength Red/Green filter adjustment function. The chart system provides 31 steps of Red/Green filter density that can be used in accordance with test circumstances. All of Red/Green chart color charts can be adjusted. 1.
- Page 33 > VI. I SER MANUAL NSTALLATION Auto off and Slide AUTO OFF: it is changed to "Light-Off" mode when the system doesn't operate for specific time period and the mode is changing back to "System-On" when the remote starts working again. TIME MODE: the system can be set to be off by every 5-minute, 10-minute and 15-minute.
- Page 34 > VI. I SER MANUAL NSTALLATION Kinds of radiation charts Phoria: 2 kinds of cross phoria charts are selectable and No. 1 cross phoria chart is set as a default. Setting mode: either of the above cross phoria charts can be selectable and the new chart is set with No. 1 cross phoria chart as a default.
- Page 35 > VI. I SER MANUAL NSTALLATION In the case the LCD visual chart is installed in limited space which is less than 1.5 meters (4.9 feet) for minimum acuity checking distance, this mirror mode shall be set on and the specific mirror shall be placed on the half distance as above.
- Page 36 > VI. I SER MANUAL NSTALLATION Program A/B Program A-B: program A or program B can save the specific visual acuity charts which user prefers in advance and show the visual charts in sequence by pressing the specific button. Following is the instruction. •...
-
Page 37: Vii. T Est Method
VII. T EST METHOD... - Page 38 > VII. T SER MANUAL EST METHOD Division Description Test method 1. Show binocular test types to a patient. 2. Let a patient wear Red/Green glasses (right eye = red filter, left eye = green filter). 3. Ask a patient which line of both above and below lines Orthoptic test - This test is for is shown much clearer.
-
Page 39: Test Method
> VII. T SER MANUAL EST METHOD Division Description Test method 1. Show Aniseikonia test type. 2. Let a patient wear Red/Green glasses (right eye = red filter, left eye = green filter). The patient sees fixation target and « ] » in a right eye and fixation target and «... - Page 40 > VII. T SER MANUAL EST METHOD Division Description Test method 1. Show cross phoria test type to a patient. 2. Let a patient wear Red/Green glasses (right eye = red filter, left eye = green filter). The patient sees « »...
- Page 41 > VII. T SER MANUAL EST METHOD Division Description Test method 1. Show Schober's test type to a patient. 2. Let a patient wear Red/Green glasses (right eye = red filter, left eye = green filter). The patient sees « »...
-
Page 42: How To Use Additional Function
> VII. T SER MANUAL EST METHOD 1. H OW TO USE ADDITIONAL FUNCTION Function Method of use 1. Select the optotype on system screen by using the remote. 2. Press "Up & Down" key at the bottom side of the remote, when optotype appears on the screen. -
Page 43: Remote Control Function
VIII. R EMOTE CONTROL FUNCTION... -
Page 44: General Function
> VIII. R SER MANUAL EMOTE CONTROL FUNCTION 1. G ENERAL FUNCTION CSPOLA600 - Polarized visual chart system > V5 - 03-2018... -
Page 45: Slide Function
> VIII. R SER MANUAL EMOTE CONTROL FUNCTION 2. S LIDE FUNCTION 1. Additional function can be selected after "SLIDE" button press. 2. Charts can be changed for quality improvement without notice. CSPOLA600 - Polarized visual chart system > V5 - 03-2018... -
Page 46: How To Recharge A Remote Control
IX. H OW TO RECHARGE A REMOTE CONTROL... - Page 47 > IX. H SER MANUAL OW TO RECHARGE A REMOTE CONTROL Remote control can be rechargeable by the USB adapter. CSPOLA600 - Polarized visual chart system > V5 - 03-2018...
-
Page 48: Upgrading Acspola600 System
X. U CSPOLA600 PGRADING A SYSTEM... - Page 49 > X. U CSPOLA600 SER MANUAL PGRADING A SYSTEM Insert the USB upgrade key. Power up the unit. > It will be upgraded automatically. How to use USB slide mode Create a folder on the USB key. Name the folder "Slide". Save the images you want in JPEG or PNG format.
-
Page 50: Maintenance Of Unit
XI. M AINTENANCE OF UNIT... - Page 51 > XI. M SER MANUAL AINTENANCE OF UNIT 1. You should adjust brightness as low level, in order to keep quality of screen remains good. 2. Some of consumable parts (LED panel, boards) will be worn out, due to its life time. Please, check about its performance regularly.
-
Page 52: Xii. T Roubleshooting Guide
XII. T ROUBLESHOOTING GUIDE... -
Page 53: Troubleshooting Guide
> XII. T SER MANUAL ROUBLESHOOTING GUIDE Followings are the common errors with the product and how to resolve them. The product may need the professional technical servicing unless the problems are not solved with following guide. Problem Estimated cause Recommended solution Product doesn't turn ON. -
Page 54: Environmental Conditions
XIII. E NVIRONMENTAL CONDITIONS... - Page 55 > XIII. E SER MANUAL NVIRONMENTAL CONDITIONS Temperature +10°C ~ +40°C Operation Humidity 30% ~ 85% Atmospheric pressure 70 to 106 kPa Temperature -10°C ~ +55°C Transportation and storage Humidity 10% ~ 95% Atmospheric pressure 50 to 106 kPa CSPOLA600 - Polarized visual chart system > V5 - 03-2018...
- Page 56 XIV. S PECIFICATIONS...
-
Page 57: Specifications
> XIV. S SER MANUAL PECIFICATIONS LCD type 24 Inch IVO TFT LCD / optical polarizing glass type Resolution 1920 x 1080 pixels Chart window size (H) 293.2 x (W) 521.3 mm Max 250 cd / m² (volume buttons to adjust the Brightness brightness) Snellen, Landolt, English, Korean, Russian, Japanese,... - Page 58 XV. C OMPONENT LIST...
-
Page 59: Component List
> XV. C SER MANUAL OMPONENT LIST 1. S TANDARD ACCESSORIES • Remote control • USB cable for remoter control • USB adapter for remote control recharge • Power adapter • Power cable • Wall mounting bracket • Digital refractir cable •... -
Page 60: Service Information
XVI. S ERVICE INFORMATION... -
Page 61: Repair
> XVI. S SER MANUAL ERVICE INFORMATION If there are any problems with the product, please follow the below steps. 1. Turn OFF the power. 2. Remove the power cable connected to the equipment. 3. Connect power adapter to the equipment and turn ON the power. 4. - Page 62 Essilor International 147, rue de Paris – 94220 Charenton-le-Pont France www.essilor.com...
Need help?
Do you have a question about the CS POLA 600 and is the answer not in the manual?
Questions and answers
How to open black screen