Table of Contents
Advertisement
Advertisement
Table of Contents
Troubleshooting

Subscribe to Our Youtube Channel
Related Manuals for Pentax EG29-i10c


Summary of Contents for Pentax EG29-i10c
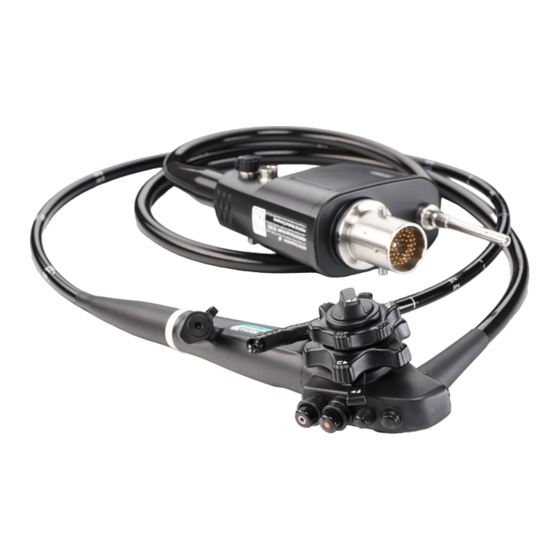
- Page 1 Instructions for Use PENTAX Medical Video Upper GI Scope EG29 - i10c Operation EG29 - i10c For cleaning, high - level disinfection, and sterilization of the product after use, refer to the separate Instructions for Use (Reprocessing) with the model name of the endoscope.
-
Page 3: Instructions For Use
This IFU does not describe specific endoscopic procedures. The specific procedures should be determined according to the discretion of a medical professional. If you have any questions or concerns about any information in this IFU, contact your local PENTAX Medical service facility. -
Page 4: Signal Words And Symbols
Signal words and symbols Signal words The following signal words are used throughout this IFU. Indicates a situation that could result in death or serious injury if not avoided. Warning Indicates a potentially hazardous situation that could result in minor or moderate Caution injury or damage to equipment if not avoided. -
Page 6: Table Of Contents
Contents Instructions for Use ................1 Signal words and symbols ............... 2 Important information: Please read before use ..........6 Product summary ..................... 6 Intended use ......................6 Application ......................6 Classification ......................7 Specifications ......................7 Compatible products ....................8 Reprocessing before initial use / Reprocessing / Storage after use .......... - Page 7 5 Troubleshooting ................75 5 -1. Troubleshooting guide ..................76 5 - 2. Withdrawal of an endoscope with an abnormality ............. 79 5 - 3. Returning the endoscope for repair ............... 80 Disposal ..................... 81 Electromagnetic compatibility (EMC) ............82 Electromagnetic disturbances ..............
-
Page 8: Important Information: Please Read Before Use
Intended use The PENTAX Medical Video Upper GI Scope EG29 - i10c is intended to provide optical visualization of (via a video monitor), and therapeutic access to, the upper gastrointestinal tract. This anatomy includes, but is not restricted to, the organs; tissues; and subsystems: esophagus, stomach, and duodenum. -
Page 9: Classification
Classification Degree of protection against electric shock for TYPE BF applied part (when connected to a compatible PENTAX Medical video the applied parts processor) Degree of protection against water IPX7 Mode of operation Continuous operation Specifications Environment █ Ambient temperature 10 to 40 ºC... -
Page 10: Compatible Products
Prior to use, the product must be prepared and inspected according to its IFU. Warning PENTAX Medical does not warrant compatibility with unlisted products. If products are not listed, contact the manufacturer of the equipment or accessory to confirm the compatibility and instructions for use with PENTAX Medical products. - Page 11 NI - D1816 -T2304 NI - D1816 -T2305 NI - D1816 -T2306 NI - D1816 -T2308 NI - D2416 -T2304 PENTAX Medical NI - D2416 -T2306 Injection Needle NI - D2423 -T2305 NI - D1816 -T2504 NI - D1816 -T2505...
-
Page 12: Reprocessing Before Initial Use/Reprocessing/Storage After Use
For instructions, refer to the respective manual provided with each equipment. Category Description Model Name Brand Name Irrigation Pump EGA - 500P EGA Series PENTAX Medical CO 2 Insufflator EGA - 501P VIO 300D High Frequency Generator VIO Series ERBE VIO 200S... - Page 13 Storage after use █ Warning Observe the following guidelines. Failure to do so may result in contamination of the endoscope with bacteria or pose a risk of infection to patients and /or users. – Ensure that all removable accessories, such as air/ water feeding valve, suction control valve, inlet seal, and cleaning adapter are removed from the endoscope when storing.
-
Page 14: General Warnings And Cautions
NOT attempt to correct the blockage or continue to use the endoscope. In such a case, contact your local PENTAX Medical service facility to have the endoscope repaired. The use of an endoscope with a blocked internal channel may result in ineffective reprocessing and / or the introduction of debris and /or device components into a patient during a subsequent procedure, posing a risk of cross contamination. -
Page 15: Maintenance Management
The service life of this endoscope is 6 years after date of shipment with the following conditions. • Perform inspection before use, care after use, storage, and replacement of consumables according to this IFU. • Have a specialist specified by PENTAX Medical perform repairs and at least annual periodic inspections. -
Page 16: Package Contents
For detail picture of the contents /accessories, refer to Figure 1.1 and 1.2. If there are any damaged or missing components, do not use the endoscope. Immediately contact your local PENTAX Medical service facility. „ Endoscope EG29 - i10c Figure 1.1... - Page 17 „ Accessories Silicone Oil (OF - Z11) Irrigation Tube (OF - B113) O Ring Set (OF - B192*) * For Air/ Water Feeding Valve (OF - B188) Check Valve Sets (OE - C15) O Ring Set (OF - B127**) Cleaning Brush (CS - C13A) ** For Suction Control Valve (OF - B120) Cleaning Brush (CS5522A) Bite Block (OF - Z5)
-
Page 18: Nomenclature And Functions
Nomenclature and functions 2-1. Control body and insertion portion Distal End Bending Section Control Body „ Alternative view Insertion Portion (Endoscope components that come into direct contact with the patient.) Insertion Tube Figure 2.1... - Page 19 The inlet seal is attached to the instrument channel inlet to avoid fluid /air leakage. 13. Model Name Label The model name label shows the model name, minimum instrument channel width, and other related information.(Figure 2.2) Minimum Instrument Channel Width EG29-i10c Model Name Figure 2.2...
-
Page 20: Scope Connector
2-2. Scope connector Model Name Serial Number Country of Origin Scope Connector Date of Manufacture Water Jet Connector Cap (OF - B118) Umbilical Cord „ Alternative view Manufacturer Label Electrical Contacts Figure 2.3 14. Suction Nipple Connect the suction tube on the suction source to the suction nipple. 15. -
Page 21: Preparation And Inspection
Preparation and inspection Before use, the endoscope, accessories, video processor, and other components must be prepared and carefully inspected according to the IFU. Any equipment used in combination with the endoscope must also be prepared and inspected according to the respective instruction manuals. Always perform pre - use inspection before each use. -
Page 22: Preparation Of The Equipment
3-1. Preparation of the equipment Prepare the endoscope, accessories, ancillary equipment, and protective equipment. Refer to the “Compatible products” to prepare the ancillary equipment as necessary and to the IFU provided with the video processor for its inspection. „ Endoscope „... - Page 23 „ Ancillary Equipment Video Processor Monitor Water Bottle Assembly Endoscopic Device Gas / Water Feeding Valve (OF - B194*) Gas Adapter (OF - G11*) * Optional item * Optional item Suction Source CO 2 Insufflator (EGA - 501P) Irrigation Pump (EGA - 500P) „...
-
Page 24: Inspection Of The Endoscope
3-2. Inspection of the endoscope Prepare an endoscope that has been reprocessed according to the procedure specified in the separate IFU(Reprocessing) of this endoscope. Warning • NEVER disassemble or modify the endoscope. Doing so may impair its original functionality and possibly result in serious injury to the patient and /or user. •... - Page 25 Bending Section Do Not Forcefully Bend Figure 3.3 Note In case the endoscope is hot /cold immediately after cleaning, high - level disinfection, and /or sterilization, wait until it returns to room temperature before using it. Lens fogging, which will result in blurry images, might result from abrupt changes in environmental temperature.
- Page 26 Inspection of the entire endoscope Warning NEVER use the endoscope with any abnormality in function. Doing so may result in endoscope damage, detachment of parts into the patient’s body cavity, endoscope malfunction during use, and /or injury to the patient and /or user. Caution Clear images can NOT be obtained if there is any foreign material attached to the objective lens or light guides.
- Page 27 Gently clean the objective lens and light guides with clean gauze or a cotton - tip applicator moistened with 70% – 90% medical grade ethyl or isopropyl alcohol. Check that there is no attachment of the adhesive to the gauze. 8.
- Page 28 12. Check the electrical contacts for any attachment of foreign materials such as residual chemical solution, water deposit, sebum, dust and gauze lint, etc. Note In case there are any attachment of foreign material or the endoscope has been left unused for a prolonged period of time, wipe the electrical contacts with gauze moistened with 70% –...
- Page 29 2. Turn the up /down and right / left angulation control knobs slowly in each direction until they stop, and return them to their original position. Check that the angulation control knobs operate smoothly with no roughness or catching. Figure 3.10 3.
- Page 30 Inspection of the up /down bending lock mechanism █ 1. Turn the up /down angulation lock lever counterclockwise until it stops. Figure 3.13 2. Turn the up /down angulation control knob slowly in the “ ▲ U” or “ ▲ D” direction until it stops. Figure 3.14 3.
- Page 31 Inspection of the right / left bending lock mechanism █ 1. Turn the right / left angulation lock knob counterclockwise until it stops. Figure 3.16 2. Turn the right / left angulation control knob slowly in the “ ▲ R” or “ ▲ L ” direction until it stops. Figure 3.17 3.
-
Page 32: Inspection Of Accessories And Attachment To The Endoscope
3-3. Inspection of accessories and attachment to the endoscope When using reusable accessories, ensure that they have been cleaned, high - level disinfected, and /or sterilized according to the separate IFU (Reprocessing) for this endoscope. Warning NEVER disassemble or modify the accessories and endoscopic devices. Doing so may impair their original functionality and possibly result in serious injury to the patient and /or user. - Page 33 Inspection of the air/water feeding valve (OF - B188) Warning Replacement O - rings are NOT sterilized or disinfected before shipment. Perform cleaning and high - level disinfection and /or sterilization of the air/ water feeding valve after O - ring replacement.
- Page 34 Inspection of the suction control valve (OF - B120) Warning • If any abnormality is detected with the rubber seal of suction control valve (OF - B120) (Figure 3.20), replace the suction control valve with a new one. Use of a suction control valve with any abnormality can result in continuously weak aspiration, which may hinder the procedure.
- Page 35 2. Close the inlet seal as depicted in Figure 3.22. Correct Incorrect Figure 3.22 Note PENTAX Medical PROfILE Single Use Endoscope Inlet Seal (OF - B215) can also be used. For details on the inspection method, refer to the IFU provided with the inlet seal (OF - B215).
- Page 36 Inspection of the water jet check valve adapter (OE - C12) Warning Replacement check valve sets (OE - C15, a packed set of multiple check valves) are NOT sterilized or disinfected before shipment. Perform cleaning and high - level disinfection or sterilization of the water jet check valve adapter after check valve replacement.
- Page 37 Inspection of the irrigation tube (OF - B113) Warning NEVER use the irrigation tube (OF - B113) when an abnormality is suspected in inspection. Replace it with a new one. Using the OF - B113 with abnormality in the process of cleaning, high level disinfection, or sterilization may cause leaking of detergent from the connection part and detachment of the OF - B113.
- Page 38 Inspection of the bite block (OF -Z5) Caution NEVER use a bite block with any abnormality. Replace it with a new one. Using a bite block with an abnormality may result in endoscope damage and injury to the oral cavity of patients. Check the bite block for any abnormalities such as attachment of foreign materials, cracks, deformity, chipping, and discoloration.
- Page 39 • NEVER use an endoscopic device with signs of damage and /or operational abnormality. Doing so may result in malfunction during use, endoscope damage, and /or patient injury. • Use endoscopic devices specified by PENTAX Medical whose compatibility has been confirmed. Using endoscopic devices whose compatibility has not been confirmed may result in endoscope damage and /or patient injury caused by failure during use.
- Page 40 4. Form a loop with a diameter of 20 - 30 cm with the flexible shaft at approximately 20 - 30 cm from the tip of the insertion portion of the biopsy forceps. Check that the cups of the biopsy forceps open /close smoothly by operating its handle.
- Page 41 Attachment of accessories Warning Attach the accessories properly to the endoscope. Failure to do so may result in lowered function and potential reflux or dispersal of patient’s body fluids, posing a risk of infection to the user. Attachment of the air/ water feeding valve (OF - B188) and suction control valve (OF - B120) █...
- Page 42 3. Ensure that the air/ water feeding valve (OF - B188) is firmly attached. Press down the air/ water feeding valve a few times to ensure that it moves smoothly. Figure 3.33 4. Align the metal tab on the shaft of the suction control valve with the notch on the suction cylinder of the endoscope.
- Page 43 Attachment of the inlet seal (OF - B190 or OF - B215 (option)) █ 1. Attach the inlet seal (OF - B190 or OF - B215 (option)) to the instrument channel inlet. Figure 3.37 2. Ensure that the inlet seal is tightly attached to the instrument channel inlet without gaps. Correct Incorrect Figure 3.38...
-
Page 44: Inspection And Connection Of Ancillary Equipment To The Endoscope
CO 2 Insufflator, etc. Inspection of the video processor Only use compatible PENTAX Medical video processors. For compatible video processors, refer to “Compatible products” (p. 8) or “System chart” (p. 90). For details on the preparation and inspection of the video processor, refer to the IFU of the respective... - Page 45 Connection of the endoscope and ancillary equipment Connection to the video processor █ Warning Ensure that the scope connector is securely attached to the video processor. Failure to do so may result in an abnormality such as disappearance of the image which may cause patient injury.
- Page 46 Connection of the water bottle assembly, suction tube, and irrigation tube (OF - B113) █ Warning • Use only sterile water in the water bottle assembly. Failure to do so may pose a risk of infection. • Do NOT use defoaming agents in the water bottle assembly. These agents attach to the internal lumen of the air/ water channel and may block the channel and /or damage the endoscope.
- Page 47 3. Connect the suction tube of the suction source to the suction nipple of the endoscope. Figure 3.43 4. Remove the lid of the water jet connector cap (OF - B118) and push the irrigation tube (OF - B113) into the water jet check valve adapter (OE - C12) until it clicks. Figure 3.44 Caution Do NOT orient the irrigation tube (OF - B113) at an angle when attaching it to or removing it...
-
Page 48: Inspection Of The Endoscopic System
3-5. Inspection of the endoscopic system Inspection of the endoscopic image Caution Do NOT look directly at the light emitted from the distal end of the endoscope. The intense light may cause eye injuries. Turn off the lamp when looking directly at the distal end of the endoscope. Note The following instructions regarding the operation of a video processor are general in nature. - Page 49 Note If the image is not clear, gently clean the endoscope objective lens with clean gauze moistened with 70% – 90% medical grade ethyl or isopropyl alcohol. 6. On the touch panel of the video processor, check that the exposure control is set to [Average] or [Peak]. Place the distal end of the endoscope at a distance of approximately 1 cm from the palm of your hand and then move it approximately 5 cm away from your palm.
- Page 50 Inspection of the remote buttons Warning Always inspect the remote buttons even if they are NOT expected to be used. During a procedure, the endoscopic image may freeze or other abnormalities may occur, which may result in patient injury. „ Alternative view Remote Button 1 Remote Button 2 Remote Button 4...
- Page 51 Inspection of the air/water feeding function Warning Use sterile water for inspection of the air/ water feeding function. Failure to do so may pose a risk of infection. Note Refer to the separate IFU of water bottle assembly for details of the operating procedure. 1.
- Page 52 Caution If air bubbles are continuously discharged from the air/ water nozzle at the distal end of the endoscope when the hole on the top of the air/ water feeding valve is NOT closed, stop use immediately and replace the air/ water feeding valve with a new one. Continuous use of an air/ water feeding valve with abnormalities could cause unintended continuous air feeding and pose a risk of pain to the patient.
- Page 53 8. Remove your finger from the air/ water feeding valve. Check that the air/ water feeding valve returns smoothly to the original position and that the flow of water from the air/ water nozzle stops when you remove your finger from the hole in the valve. Figure 3.55 Caution Do NOT attempt to clear the air or water nozzles with a needle or any other sharp object if...
- Page 54 Inspection of the irrigation function Warning Use sterile water for inspection of the irrigation function. Failure to do so may pose a risk of infection. 1. Fill a syringe with sterile water. 2. Put the distal end of the endoscope to the clean container, and insert a syringe filled with sterile water into the inlet seal (OF - B190) as shown in Figure 3.56.
- Page 55 Inspection of the suction function Warning Use sterile water for inspection of the suction function. Failure to do so may pose a risk of infection. Note Before inspecting the suction function, close the cap of the inlet seal (OF - B190). Failure to do so may result in a decrease in suction strength.
- Page 56 Inspection of the instrument channel Use a biopsy forceps for inspection of the instrument channel. Prepare a biopsy forceps which has been cleaned and sterilized according to the manual provided with that product and ensure to perform a pre - use inspection. Warning Do NOT use the endoscope if you feel a significant resistance when inserting a biopsy forceps.
- Page 57 2. Insert the biopsy forceps into the inlet seal (OF - B190). When the cups are first passed through the inlet seal, temporary resistance will be encountered. 3. Hold the shaft at approximately 5 cm from the inlet seal and slowly advance the biopsy forceps, and check that the tip exits the distal tip of the endoscope.
- Page 58 4. Feed sterile water using the irrigation pump or syringe filled with sterile water attached to the luer connector of the irrigation tube (OF - B113). (1) Water Jet Connector Cap (OF - B118) (2) Irrigation Tube (OF - B113) (3) Water Jet Check Valve Adapter (OE - C12) Figure 3.61...
-
Page 59: Directions For Use
Directions for use This endoscope should only be used by a physician authorized by the medical safety administrator at each medical facility to perform endoscopy. The device should never be used by individuals who are not licensed medical professionals or used at facilities other than medical facilities. - Page 60 Caution • Users as well as the assisting personnel should always wear protective equipment (e.g., gloves, goggles, masks, medical gowns, etc.) to minimize the risk of infection, as the patient’s body fluids may be dispersed into the environment from endoscope components such as the instrument channel inlet and the suction control valve.
-
Page 61: Preparation Immediately Before Insertion Of The Endoscope
4-1. Preparation immediately before insertion of the endoscope Perform appropriate patient preparation for endoscopy as necessary. Warning Do NOT spray or wipe the surface of the endoscope insertion portion with an anesthetic (particularly anesthetic sprays containing alcohol) or non - medical lubricants (such as petroleum jelly). -
Page 62: Insertion And Observation
4-2. Insertion and observation Insertion of the endoscope Warning Do NOT severely and /or forcefully bend the strain relief boot as shown in Figure 4.1. Doing so may result in endoscope damage. Caution Clear images can NOT be obtained if any foreign material is attached to the objective lens or the light guide. - Page 63 Angulation operation Warning Immediately stop the endoscopic procedure and slowly and cautiously withdraw the endoscope when an abnormality, such as an inability to smoothly angulate the endoscope, is experienced. NEVER forcefully turn the angulation control knob as it may result in endoscope damage and /or patient injuries, including bleeding and perforation.
- Page 64 Suction Warning Do NOT aspirate solid materials as it may cause a clogging in the suction control valve and /or the suction channel. Caution • Securely attach the cap to the inlet seal. Failure to do so may result in weaker suction strength as well as potential reflux or dispersal of patient’s body fluids, posing a risk of infection to the user.
- Page 65 Water jet feeding Warning Use sterile water for water jet feeding. Failure to do so may pose a risk of infection. Caution Use minimum pressure for water feeding while observing the condition of the patient’s mucosa. Water feeding with the excessive pressure may result in mucosal injury to the patient. Use the irrigation pump by following its operation manual or by attaching a syringe to the luer connector of the irrigation tube (OF - B113) and delivering water into it.
-
Page 66: Using An Endoscopic Device
Failure to do so may result in lowered suction function as well as potential reflux or dispersal of patient’s body fluids, posing a risk of infection to the user. • Use only compatible endoscopic devices specified by PENTAX Medical. Using non - compatible endoscopic devices NOT specified by PENTAX Medical may result in clogging and /or damage to the instrument channel and /or endoscopic device. - Page 67 Note The minimum instrument channel width applicable to a particular endoscopic device may be found on the endoscopic device label. Insertion and operation of the endoscopic device 1. Ensure that the distal tip of the endoscopic device is closed or retracted into the sheath. In case of biopsy forceps, operate the forceps to fully close the cups at the tip.
- Page 68 Withdrawal of the endoscopic device Warning • Do NOT forcefully withdraw the endoscopic device or in an oblique direction. Doing so may result in decreased suction strength caused by inlet seal damage, falling of the broken inlet seal particle(s) into the patient’s body cavity, and potential reflux or dispersal of patient’s body fluids, posing a risk of infection to the user.
-
Page 69: Using A Nonflammable Gas
4-4. Using a nonflammable gas If there is a possibility of an inflammable gas being present within a body cavity, convert the gas to a nonflammable gas using carbon dioxide prior to laser cautery or electrosurgery. Warning Do NOT use non - flammable gas cylinders whose pressure and flow settings can NOT be controlled. - Page 70 3. Connect the gas cylinder to the gas adapter (OF - G11). Figure 4.6 4. Connect the air/ water connector of the water bottle assembly to the gas adapter. Figure 4.7 5. Ensure that all the devices are securely connected before opening the gas cylinder valve. Note In addition to the procedure described above, a CO 2 gas / water feeding equipment (EGA - 501P) can also be used.
-
Page 71: Laser Cauterization
4-5. Laser cauterization Warning • Laser equipment should be used only by experts who have thorough knowledge of the laser equipment and endoscopic laser treatment. • Before using laser equipment, thoroughly read the manual provided with it, and always perform pre - use inspection. Ensure that the laser equipment is ready for use by performing the safety checks specified in the manual. -
Page 72: Electrosurgery
4-6. Electrosurgery Warning • Thoroughly read the manual provided with the high frequency generator and device before using them, and always perform a pre - use inspection. Ensure that the high frequency generator and device are ready for use by performing the safety checks specified in the manual. -
Page 73: Withdrawal Of The Endoscope
4-7 . Withdrawal of the endoscope Warning • In order to prevent the possibility of patient material being drawn into the water bottle assembly, leave the water bottle connected to both the video processor and the endoscope before withdrawing the endoscope from the patient. •... -
Page 74: Care After Use
4-8. Care after use Caution Do NOT touch the electrical contacts after use. This could result in a burn injury. „ Endoscope: Perform cleaning, high - level disinfection, and /or sterilization according to the procedure specified in the separate IFU (Reprocessing) of this endoscope. „... - Page 75 Disconnecting the endoscope from the video processor Caution Do NOT attach or remove the scope connector while the video processor power is powered on. Doing so may damage the endoscope. 1. Immediately after use, perform pre - cleaning according to the separate IFU (Reprocessing) of this endoscope.
- Page 76 4. While depressing the endoscope eject lever, remove the scope connector from the processor. Figure 4.11...
-
Page 77: Troubleshooting
“5 -1. Troubleshooting guide” . If an abnormality persists after troubleshooting, do not use the endoscope. Send it to PENTAX Medical for repair according to “5 - 3. Returning the endoscope for repair” (p. 80). -
Page 78: Troubleshooting Guide
5-1. Troubleshooting guide Connecting the video processor █ Description of abnormality Possible cause Solution The scope connector removes The scope connector is not all the way inserted Check the scope connector and the video from the video processor. and fixed. processor for any inside attachment of foreign materials;... - Page 79 Air/ Water Feeding █ Description of abnormality Possible cause Solution Air feeding is not possible. The air/ water feeding pump of the video Turn on the air/ water feeding pump of the processor is turned off. video processor. The water bottle assembly is not connected. Connect the air/ water connector of the water bottle assembly to the air/ water port of the endoscope.
- Page 80 Suction █ Description of abnormality Possible cause Solution The suction function does not The inlet seal is not attached to the instrument Attach the inlet seal. operate properly. port of the endoscope. The cap of inlet seal is open. Attach the cap section of the inlet seal to the main unit (body of the inlet seal).
-
Page 81: Withdrawal Of An Endoscope With An Abnormality
Endoscopic device operation █ Description of abnormality Possible cause Solution An endoscopic device cannot The bending section of the endoscopic is Straighten the bending section as much as possible be inserted. angulated. and reinsert the endoscopic device. An incompatible endoscopic device is used. Use an endoscopic device that is compatible with this endoscope. -
Page 82: Returning The Endoscope For Repair
5-3. Returning the endoscope for repair When returning the endoscope for repair, follow the instructions below. For more details, contact your local PENTAX Medical service facility. Always clean and high level disinfect the endoscope before returning it for repair. Warning Only qualified personnel from PENTAX Medical are authorized to repair this endoscope. -
Page 83: Disposal
Disposal Warning Follow the national or local laws /guidelines to appropriately dispose of the consumables. Failure to do so may create a risk of cross contamination or infection. Contact your local PENTAX Medical service facility when disposing of an endoscope. -
Page 84: Electromagnetic Compatibility (Emc)
Electromagnetic compatibility (EMC) This product conforms to IEC60601-1- 2: 2007: Medical electrical equipment, EMC standard. Guidance and manufacturer’s declaration - electromagnetic emissions This product is intended for use in the electromagnetic environment specified below. The customer or the user of this product should assure that it is used in such an environment. Emissions test Compliance Electromagnetic environment - guidance... - Page 85 Guidance and manufacturer’s declaration - electromagnetic immunity This product is intended for use in the electromagnetic environment specified below. The customer or the user of this product should assure that it is used in such an environment. Immunity test IEC 60601 test level Compliance level Electromagnetic environment - guidance Floors should be wood, concrete or...
- Page 86 Note • At 80 MHz and 800 MHz, the higher frequency range applies. • These guidelines may not apply in all situations. Electromagnetic propagation is affected by absorption and reflection from structures, objects and people. • Interference may occur in the vicinity of equipment marked with the following symbol: •...
-
Page 87: Electromagnetic Disturbances
Electromagnetic disturbances This product conforms to IEC60601-1- 2: 2014: Medical electrical equipment, IEC standard. Guidance and manufacturer’s declaration - electromagnetic emissions This product is intended for use in the electromagnetic environment specified below. The customer or the user of this product should assure that it is used in such an environment. Emissions test Compliance Electromagnetic environment - guidance... - Page 88 Guidance and manufacturer’s declaration - electromagnetic immunity This product is intended for use in the electromagnetic environment specified below. The customer or the user of this product should assure that it is used in such an environment. Immunity test IEC 60601 test level Compliance level Electromagnetic environment - guidance Floors should be wood, concrete or...
- Page 89 Immunity to proximity fields from wireless communications equipment Test frequency (MHz) Band (MHz) Modulation Distance (m) Immunity test level (V/ m) Pulse modulation 380 to 390 18 Hz 430 to 470 ± 5 kHz deviation 1 kHz sine Pulse modulation 704 to 787 217 Hz Pulse modulation...
- Page 90 Recommended separation distances between portable and mobile RF communications equipment and this product This product is intended for use in the electromagnetic environment in which radiated RF disturbances are controlled. The customer or the user of this product can help prevent electromagnetic interference by maintaining a minimum distance between portable and mobile RF communications equipment (transmitters) and this product as recommended below, according to the maximum output power of the communications equipment.
-
Page 91: Endoscope Specifications
Endoscope specifications Model Name EG29 - i10c Direction of view Forward ( 0°) Field of view 140 ° Depth of field 3 to 100 mm Up – Down 210 ° to 120 ° Tip angulation Right – Left 120 ° to 120 ° Rigid distal width Ø... -
Page 92: System Chart
System chart This section shows the system chart (configuration) for this endoscope and the ancillary equipment. Warning Use this product in combination only with compatible products shown in “Compatible products” (p. 8) and the “System chart” . Failure to do so may result in lowered function and patient / user injury or damage to the equipment. - Page 93 Suction Source (Suction Device) Patient Environment 1. OF - B120 2. OF - B188 3. OF - B194 (Option) Endoscope (EG29 - i10c) 4. OF - B190 or OF - B215 (Option) 5. OE - C12 6. OF - B113 Endoscopic Device Refer to “Compatible products”...
- Page 96 Fax: +49 40 560 42 13 Fax: +86 21 6170 1655 PENTAX Medical PENTAX Medical Singapore Pte. Ltd. A Division of PENTAX of America, Inc. 438A Alexandra Road, #08 - 06 3 Paragon Drive Alexandra Technopark, 119967 Singapore Montvale, NJ 07645 -1782...
Need help?
Do you have a question about the EG29-i10c and is the answer not in the manual?
Questions and answers