Table of Contents
Advertisement
Advertisement
Table of Contents

Summary of Contents for SPECS CCX 70
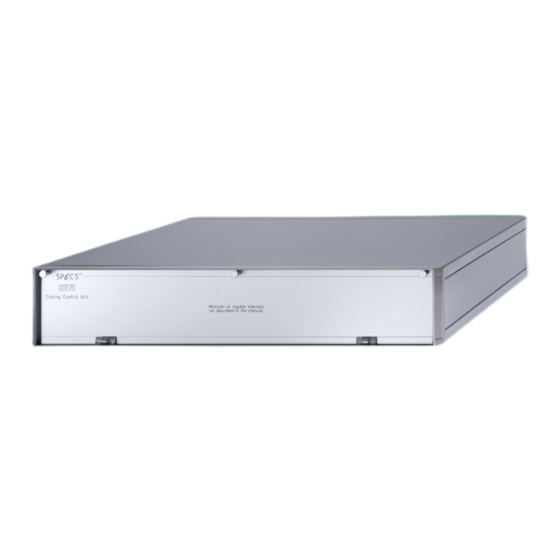
- Page 1 CCX 70 Cooling Water Controller User Manual V1.1 | 29 April 2016...
- Page 2 © 2016 . All rights reserved. No part of this manual may be reproduced without the prior per- mission of SPECS GmbH. Other product and company names mentioned in this document may be the trademarks or registered trademarks of their respective owners and are used for iden-...
-
Page 3: Table Of Contents
Water Flow Problems Chapter 6 – Cleaning Cleaning the Internal Filters Cleaning the Anode Connections Cleaning the External Filter Cleaning the Water Cooling Circuit Chapter 7 – Technical Details Front Panel Rear Panel Block Diagram CCX 70 V1.1 | 29 April 2016... - Page 4 Interior Details Specifications Index CCX 70 V1.1 | 29 April 2016...
-
Page 5: Chapter 1 - Introduction
Chapter 1 – Introduction Welcome to the user manual for the SPECS CCX 70. This controls and monitors the water cool- ing for SPECS X-ray sources. This chapter explains briefly how to use the manual and points you toward further sources of information. -
Page 6: Safety
After switching off the power units, wait a minimum of 3 minutes before making dis- connections or opening power supplies or the X-ray source protection cover. Ÿ In the event of a water leak in the CCX 70, make sure that all parts are dry before attempt- ing to operate the source again. Ÿ... -
Page 7: Environmental Operating Conditions
There must be no condensed water on the equipment. Atmospheric pressure: Ÿ 800–1200 mbar Air conditioning is advisable in order to ensure the ambient requirements, especially for dis- sipating heat produced by the equipment. CCX 70 V1.1 | 29 April 2016... - Page 8 This page intentionally left blank. CCX 70 V1.1 | 29 April 2016...
-
Page 9: Chapter 2 - Installation
The CCX 70 fits into a standard 19" rack. You should observe the following points: Ÿ Mount the CCX 70 at the bottom of the 19" rack. In the event of a water leak, no other elec- tronic units will be damaged. -
Page 10: Water Cooling
The XR-MF only has a cooling circuit for the anode. Nevertheless, you should read the section "Head Cooling Circuit" on page 8 as it contains useful information about connecting a closed-cir- cuit chiller. Please also see the XR-MF manual for more details. CCX 70 V1.1 | 29 April 2016... -
Page 11: Fitting The Protection Cap
The hoses and pipes are labeled with arrows. The center (longer) pipe is for water flowing into the source. Note The high voltage connections are also made when you fit the hoses. CCX 70 V1.1 | 29 April 2016... -
Page 12: 2.3.2 Head Cooling Circuit
SPECS recommends a water chiller to supply water to both cooling circuits on the source. Fig- ure 1 shows the connection scheme for the water cooling. The Chiller output on the CCX 70 supplies a +24 VDC signal when the cooling is activated. This switches the power supply to the water chiller. - Page 13 Figure 1: Connection scheme for water cooling CCX 70 V1.1 | 29 April 2016...
- Page 14 This page intentionally left blank. CCX 70 V1.1 | 29 April 2016...
-
Page 15: Chapter 3 - Water Supply
Clean tap water is recommended for the cooling water. If you have doubts about the quality of your mains water supply, you should use distilled (or deionized) water and add bottled mineral water until the water current reaches the normal range (2…10 mA). CCX 70 V1.1 | 29 April 2016... -
Page 16: Preventing Biological Activity
The water inlet valve is con- trolled by the UXC 1000. The reading of the pressure meter is read by the CCX 70 and can be displayed by the UXC 1000. -
Page 17: Temperature
Figure 2: Operation of X-ray source For stable operation, the water current should be in the range 2…10 mA. You can monitor the water current in the Chiller menu of the UXC 1000. CCX 70 V1.1 | 29 April 2016... - Page 18 High water current can also be caused by contaminants in the cooling water. In this case, per- form some cleaning cycles with tap water to wash the cooler and the water lines, then refill the cooler with deionized or distilled water. CCX 70 V1.1 | 29 April 2016...
-
Page 19: Chapter 4 - Operation
Chapter 4 – Operation The CCX 70 is controlled by the UXC 1000. In addition to switching the water cooling on and off, the UXC 1000 can display the status of the CCX 70 and allows you to set parameters such as the water flow and temperature limits. -
Page 20: Software
Software SpecsLab Prodigy has facilities for controlling an X-ray source via the UXC 1000. You can view the properties of the CCX 70 in the device control for the UXC 1000 as well as setting limits for the cooling water. - Page 21 Figure 4: Viewing the cooling water parameters in SpecsLab Prodigy Limits tab allows you to change the settings for the cooling water. Please see the UXC 1000 manual as well as the SpecsLab Prodigy Online Help for more information. CCX 70 V1.1 | 29 April 2016...
- Page 22 This page intentionally left blank. CCX 70 V1.1 | 29 April 2016...
-
Page 23: Chapter 5 - Troubleshooting
Check water. high! (2203)" Table 1: UXC 1000 error messages relating to the CCX 70 Most of these problems are related to the interlock conditions being satisfied, or to the correct flow of water in the circuits, as described in more detail in the following sections. -
Page 24: Water Interlock Problems
Ÿ Examine the water hoses between the CCX 70 and the source. Make sure there are no kinks or loose connections. Also check the temperature of the water. This should be ~20 °C. If it is not within the limits set in the UXC 1000, check your water supply or chiller unit. - Page 25 2. Fit the bypass hose to the anode connectors in order to complete the circuit, as indicated in the picture below. 3. Switch on the water cooling circuit and check the water flow. CCX 70 V1.1 | 29 April 2016...
- Page 26 This page intentionally left blank. CCX 70 V1.1 | 29 April 2016...
-
Page 27: Chapter 6 - Cleaning
Over time, small particles will appear in the water supply due to electrochemical reactions. The CCX 70 contains internal filters as well as an external filter to the water supply. Over time, con- taminants will build up on these filters and connections. Clean these parts occasionally to ensure adequate water flow and to prevent contaminants from damaging the source. -
Page 28: Cleaning The Anode Connections
2. Remove the protection cap from the source (see "Fitting the Protection Cap" on page 7) 3. Remove the quick hose connector. 4. Clean the hose connectors and anode tubes on the source using tissues or cotton wool tips and water. CCX 70 V1.1 | 29 April 2016... -
Page 29: Cleaning The External Filter
If you remove the filter from the hose, observe the flow direction when reconnecting. To clean the external filter: 1. Switch off the water cooling supply. 2. Unscrew the cover on the blue filter on the water input line. 3. Remove the white filter. CCX 70 V1.1 | 29 April 2016... -
Page 30: Cleaning The Water Cooling Circuit
Very long working periods or poor water quality can cause a build up of contamination in the cooling circuit. These deposits are visible in the tubes inside the CCX 70. If you have a closed circuit water chiller, you can clean the whole circuit by pumping a citric acid solution through the system. - Page 31 Use a saturated solution of citric acid (~750 g/l of water). Ÿ Warm the water with a thermostat up to a temperature of ~50–60 ºC. Ÿ Run the citric acid solution through the source for up to 24 hours. CCX 70 V1.1 | 29 April 2016...
- Page 32 This page intentionally left blank. CCX 70 V1.1 | 29 April 2016...
-
Page 33: Chapter 7 - Technical Details
Chapter 7 – Technical Details This chapter contains an overview of the features on the front and rear panels of the CCX 70, including pin assignments of the electrical connectors. It also contains information about the internal components and construction of the instrument. - Page 34 Figure 10: Water interlock connector pin-out Chiller The CCX 70. is able to control a water chiller. The Chiller output provides a 24 V signal that can switches power to the water chiller. An example of the wiring scheme is shown in "Head Cool- ing Circuit"...
-
Page 35: Block Diagram
This tube is connected to the internal water tank and allows water to escape in the event of an internal water leak. You should attach a hose which leads away from the electronic racks. Block Diagram The diagram below shows the components used in the CCX 70. Flowmeter HV control... -
Page 36: Ccx 70 V1.1 | 29 April
There is a water sensor on the bottom of the tank that shuts down the water supply in the event of a leak. Figure 13 shows the main internal features of the CCX 70. The inset shows the water tank with the cover removed. - Page 37 Specifications Table 2 contains a list of general specifications for the CCX 70. Property Value Size 19" rack, 3 units height, 360 mm depth. Weight 14 kg. Power 24 VDC from UXC 1000 (no mains power). Water pressure measurement 10 bar.
- Page 38 This page intentionally left blank. CCX 70 V1.1 | 29 April 2016...
- Page 39 23 , 29 Tank Grounding Temperature 6 , 13 Hoses Water Water Current Water Drain 5 , 32 Water Pressure 15 , 29 Interlock Water Sensor Service area Weight Water X-Rays Mains Supply Safety CCX 70 V1.1 | 29 April 2016...
- Page 40 This page intentionally left blank. CCX 70 V1.1 | 29 April 2016...
Need help?
Do you have a question about the CCX 70 and is the answer not in the manual?
Questions and answers