Advertisement
Quick Links
FleetPlow
Model 440T & 440S Portable
OneTAP™ Full Automation or AutoUP™ Standard Automation
For your records, please record these serial numbers, found on the inside of the control panel door:
FleetPlow Serial Number:
Control System Serial Number:
WARNING:
This machinery should not be operated or maintained by any person who has not read and understood all
the contents of this manual. Installation and service should be performed by an authorized dealer. Failure to read and
comply with the contents of this manual can result in serious bodily injury or death, and/or property damage.
OWNER'S MANUAL
™
FOR
1
Trucks
Model 110T & 110S Base-Mount
st
Effective: March 1
2018
Advertisement

Summary of Contents for Scraper Systems FleetPlow 440T Portable
- Page 1 Effective: March 1 2018 OWNER’S MANUAL FleetPlow Trucks ™ Model 440T & 440S Portable Model 110T & 110S Base-Mount OneTAP™ Full Automation or AutoUP™ Standard Automation For your records, please record these serial numbers, found on the inside of the control panel door: FleetPlow Serial Number: Control System Serial Number: WARNING:...
-
Page 2: North American Warranty
North American Warranty Scraper Systems FleetPlows™ are warranted, from the date of shipment, to be free from defects in material and workmanship for a period of two (2) years on all mechanical and electrical parts and one (1) year for labor, based on approved travel and labor repair times. - Page 3 • Do not operate a damaged or malfunctioning FleetPlow. Call Scraper Systems or your dealer for service. • Always turn off power to unit when not in use.
- Page 4 Conversion Between Operating and Rolling Modes (Portable FleetPlows™ Only) To prepare for rolling, fasten the provided tow bar angles (P/N 41580) to the front and back of the unit in the holes provided at each wheel set frame. 2) Remove concrete ballasts with forklift. 3) Using the screw jacks, lower each wheel set so the FleetPlow frame is raised approximately 2 inches off the ground.
- Page 5 for Models Equipped with Standard Automation - AutoUP™ Operating Procedures Turn selector switch on main control box to Auto. 2) Driver should always check that bottom wheels of the plow assembly are above the reflective tape strips located on the columns before entering the FleetPlow.
- Page 6 6) Using the pendant control up button, raise the plow assembly until the full up sensor detects the plow assembly, automatically stopping it. Release up button. 7) The next driver may now enter the FleetPlow. Multi-Trailer Operation (Doubles or Triples) never use the Automation features for multi-trailer operation. In deeper, wetter, snow conditions, cleared snow and ice falling between coupled trailers may cause damage to air lines.
-
Page 7: Maintenance
Maintenance **Please contact one of our North American network of dealers to provide an efficient preventative maintenance program for your FleetPlow™.** All Models Criteria Action Test the Operation of the Unit Verify electrical system is functioning properly. Test run unit several times in the fall before the first snow. -
Page 8: Troubleshooting
Electric Chain Hoist Criteria Action Hook – Hook Latches Latch should not be deformed. Attachment of latch to Replace. hook should not be loose and Latch spring should not be missing or weak. Latch, when depressed and released should snap smartly into closed position Hook –... - Page 9 Situation - Standard Automation, AutoUP Action(s) Plow doesn’t raise automatically. Selector Switch is in the manual position. Emitter and Receiver sensors not lined up. LED on top of Receiver should be off when lined up correctly.) Emitter and Receiver sensors are installed on the wrong sides. Plow Full Up sensor cable switched with Emitter cable on junction box.
- Page 10 Troubleshooting Sensor Functionality Using Input Lights on the Turck FEN for OneTAP Full Automation Model Year November 2017 and After PLC in Main Control Box, Only Qualified Person(s) Should Access. Input 0 = Hoist Up. Turns on when hoist raising Input 1 = Hoist Down.
- Page 11 Troubleshooting Sensor Functionality Using Input Lights on Siemens PLC for OneTAP Full Automation Model Year November 2017 and Before PLC in Main Control Box, Only Qualified Person(s) Should Access. Input 3 = Plow Up sensor. It is ON when the plow is up. Input 4 = Plow Proximity.
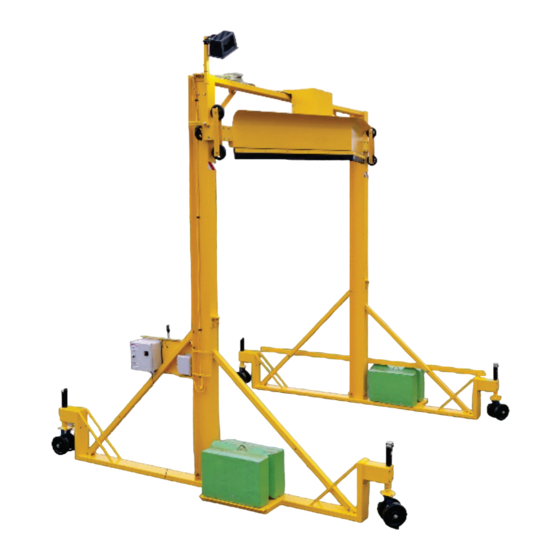
- Page 12 Model 440 - Portable Model 110 – Base Mount...
- Page 17 Figure 1: Summer Storage Figure 2: Load Spring Piston Assembly P/N 92690...
- Page 18 For Parts. Please contact dealer for pricing. X = C omes with Unit at Installation Part Description Number All Models Replacement Plow Assembly (includes P/N 01080, 01081, 01082, 01083, 01070 02090, 02190 and all necessary hardware) Plow Assembly 01080 01081 Outside Wheel Bracket w/ 3/4"...
- Page 19 Part Description Number Portable 440 and 880 Models PRT Base LH (includes 2 - P/N 41690, 1 each - P/N 42790 and 42890 and 4 41280 ea. - 42990) PRT Base RH (includes 2 - P/N 41690, 1 each - P/N 42790 and 42890 and 4 41380 ea.
- Page 20 Part Description Number Electrical Control Systems and Components 92491 OneTAP Operating Instruction Label, (start station) 92492 OneTAP Automation Label, (control box) 92493 Pendant Storage Enclosure 92475 4MM Cold Weather Plow Proximity Sensor (used in P/N 92690) 92472 Proximity Sensor Cable 92476 30mm Plow Full Up Sensor 92474...
- Page 21 For maintenance and service, contact your authorized dealer: Dealer Contact Info: www.scrapersystems.com Patent numbers 5,802,654; 8,584,295; 9,168,898; 9,321,432 and other patents pending. Manufactured by: Quintin Machinery LLC Lancaster, PA USA Toll Free: 888-340-4344 info@scrapersystems.com...
Need help?
Do you have a question about the FleetPlow 440T Portable and is the answer not in the manual?
Questions and answers