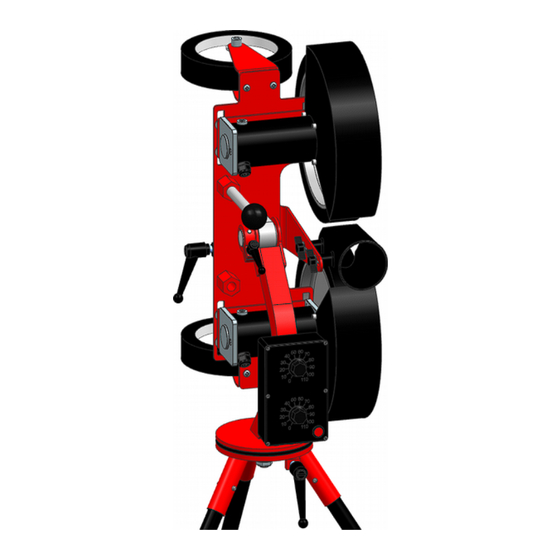
Summary of Contents for Rawlings Pro Line Two Wheel
- Page 1 Rawlings Pitching Machines Pro Line Two Wheel Pitching Machine Owner's Manual Rawlings Pitching Machines...
- Page 2 ● Machine operator (person feeding balls into machine) should stay behind a protective screen. FAST, FREE, FRIENDLY HELP Rawlings® Pro Line 2 and 3 wheel pitching machines are manufactured, sold, serviced, and supported by Spinball Sports LLC. For assistance assembling or using your machine, please view our videos online, call us at 618-244-4587, or email us at info@spinballsports.com.
-
Page 3: Assembly & Set-Up
Rawlings Pitching Machines ASSEMBLY / SET UP INSTALL HANDLES Thread the clamp handle into the shaft clamp on the back of the machine and tighten it so the machine doesn't pivot freely on the shaft. Thread the ball ended aiming handle into the top hexagonal base. - Page 4 Rawlings Pitching Machines Figure 2a: Baseball leg installation than harder balls do. And of course, softballs require a much larger gap than baseballs. Too small of a gap will slow the wheels noticeably when pitches are thrown, producing a loud “thunk”. Too large of a gap will not...
- Page 5 Rawlings Pitching Machines Figure 2b: Softball leg installation generate enough squeezing force on the ball, and pitches will be too slow, without enough spin. As a general rule, when the gap is correct, you should be able to feed a ball through an unpowered machine by rotating the wheels by hand with a moderate effort.
- Page 6 Rawlings Pitching Machines Figure 3: Ball feed tube and transport wheel installation can quickly and precisely locate each of the wheels. See Figures 4 and 5 for the typical positioning for real baseballs and softballs. For baseball, the blocks are in the center position, with 5 empty notches on each side of the block.
- Page 7 Rawlings Pitching Machines Figure 4a: Real baseball positioning block location (top wheel) Figure 4b: Real baseball positioning block location (bottom wheel) with all 10 empty notches on the inside. Each wheel and motor assembly should be moved one step inward from these locations when using soft dimpled balls, creating a tighter grip on the compressible ball.
- Page 8 Rawlings Pitching Machines Figure 5a: Real softball positioning block location (top wheel) Figure 5b: Real softball positioning block location (top wheel) holds each motor to the frame. Be sure to support the motor / wheel assembly when removing the knobs – do not let the motor fall or hang by its cord.
-
Page 9: Operation
Rawlings Pitching Machines The positions shown in Figures 4 & 5 are just starting points and may require adjustment for optimal performance. Each motor does not need to be set at the same distance from center, but they should not be more than one setting apart. - Page 10 Rawlings Pitching Machines machine as it is aimed. THROWING DIFFERENT PITCHES Thrown balls will tend to curve in the direction they are spinning, and the greater the spin, the more the curve. Spin is imposed on the ball by setting one wheel to turn faster than the other- the ball will spin &...
-
Page 11: Maintenance
Rawlings Pitching Machines SPEED The speed displays are very close to actual pitch speeds, but they are not exact. There is no economical way to compensate for the different types, weights, and conditions of the variety of balls that might be used. - Page 12 Rawlings Pitching Machines All components of your machine are covered for non-commercial use for five years from the date of purchase, but wheels are wear items which are prorated just like car tires. For example, if a wheel only lasts 3 years, you will receive 40% off the price of a new one.

Need help?
Do you have a question about the Pro Line Two Wheel and is the answer not in the manual?
Questions and answers