
Related Manuals for Swoffer Instruments 3000

Summary of Contents for Swoffer Instruments 3000
- Page 1 MODEL 3000 OPERATING INSTRUCTIONS Software Version January-03-2017 SWOFFER INSTRUMENTS, INC 1112 S. 344 St., Suite 302 Federal Way, WA 98003 USA http://www.swoffer.com...
-
Page 2: Table Of Contents
STATION ERASURE/STATION EDIT ..........21 TRANSFER DATA TO COMPUTER ..........21 ERASE SECTIONS ..............17, 22 GLOSSARY ..................23 SPECIFICATIONS ................25 DEFAULT SETTINGS AND CALIBRATION NUMBERS ....25 CARE & MAINTENANCE OF THE MODEL 3000 INDICATOR ..27 END NOTES ................... 28... -
Page 3: Description And Modes Of Operation
The Model 3000 is used with rotating sensor current meters for calculating, storing, and processing stream velocity and discharge data to enable on-site evaluation. The Model 3000 can operate in units of either feet or meters. There are four basic modes of operation: CALIBRATE MODE This mode is used to input directly or to field calculate the pitch of a “prop”. -
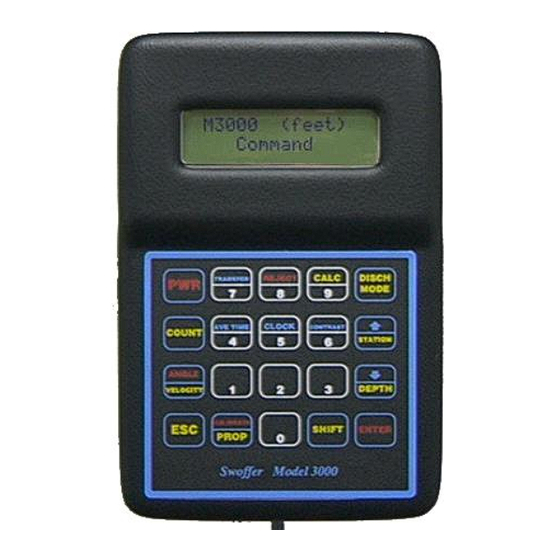
Page 4: Keypad Operation
Engineering, Roberson/Cassidy/Chaudhry, Houghton Mifflin. Open-Channel Flow, M. Hanif Chaudhry, Prentice Hall, ISBN 0-13-637141-8 is also an excellent reference work for applications in many different types of channels. KEYPAD OPERATION The operator controls the Model 3000 through a 20-button keypad. The keypad is configured as 4 rows by 5 columns:... -
Page 5: Lcd / Display Operation
POWER ON AND OFF The PWR key turns the Model 3000 on and off. ON is instant after pressing the PWR key. OFF requires that the key be held depressed for four seconds. The Model 3000 display counts down from three seconds to OFF while the key is depressed. -
Page 6: Units Of Measure
UNITS OF MEASURE The Model 3000 can work in either feet or meters units of measure. The Model 3000 does not show the units on the LCD except at the initial screen and in the initial screens of each cross section in the Discharge Mode. Units may be toggled from feet to meters by simply using the 0 (zero) key while the indicator is in the initial screen only. -
Page 7: Memory Capacity
Data in any section in the Discharge Mode can only be viewed and edited when the Model 3000 is toggled to the same units (feet or meters) as the original data. Once any section has had data stored, it remains in those units unless the entire section is erased. -
Page 8: Calibrate Mode
Pitch : 130.00 Repeated pressing of the PROP key will cause the Model 3000 to display the pitches for prop numbers 3, 4, and 5. Pressing PROP again will scroll the display to show the pitch for a USGS AA meter using the original catwhisker contactor (one pulse per revolution) on the 1/1 connection. - Page 9 Enter the length of course to be used by pressing digits followed by ENTER. Any accurately measured course length will do since the Model 3000 adjusts the number to equal counts in 10 feet/10 meters, but the longer the distance and the quieter the water the better.
- Page 10 "feet" mode. Your velocity measurements as well as the discharge measurements (as calculated by the model 3000) will be in error. Back out using the ESC key to the initial screen and toggle the "0" key for units selection.
-
Page 11: Calibration Equation Input
"feet" mode. Your velocity measurements as well as the discharge measurements (as calculated by the Model 3000) will be in error. Back out using the ESC key to the initial screen and toggle the "0"... -
Page 12: Count Revolutions Mode
Opposite these parameters are tabulated the corresponding velocities. Before initiating this mode select the "PROP" (sensor) you will be using. The Model 3000 default for this setting is an AA or Pygmy meter using the Swoffer optical retrofit sensor producing 2-pulses per revolution. (PROP positions 4 [AA optic] or 5 [Pygmy optic] ). -
Page 13: Count Mode To Determine Rotor Condition
Model 3000 timer has counted down to zero. This method is very accurate but of course will not yield exact corresponding figures to a standard rating table for an AA or Pygmy meter. -
Page 14: Select An Averaging Time
Press ESC to return to the previous screen. Note: because the Model 3000 starts and stops timing from the first input pulse (after a timing period has started) through to the first input pulse after the timing period has stopped, the actual time in measurement will always be slightly longer than the time selected for your averaging period. - Page 15 The Model 3000 counts up sensor pulses as it counts down the seconds remaining for the measurement. If the ESC key is pressed before tt = 0 then the measurement will be aborted and the LCD will go back to the last measured velocity: Avg.
-
Page 16: Discharge Mode
Discharge mode allows the operator to make velocity and depth measurements at Stations and record this information in the Model 3000's memory. The Model 3000 can then calculate total stream discharge using formulas shown on pages 3 and 4 . The data stored in memory can also be transferred to a computer (page 21) for more detailed analysis. - Page 17 To enter the Discharge mode, press the DISCH key. LCD will display: Section: (1..100) The Model 3000 shows the last Section number used and allows you to pick 1 through 100 for the next Section. Enter the Section number desired. LCD will read:...
- Page 18 Depth may be zero, but a Station must have a value. 2. The Model 3000 will not allow two Station numbers of the same value. If you try to enter the same number as a Station that already exists, the Model 3000 will simply return a value of zero.
- Page 19 ENTER after each timing period ends. Pressing shift REJECT after any timing period ends will void that period and the Model 3000 will not use it in the average.
-
Page 20: Flow Direction Correction
Avg. vel: 00.00 The Model 3000 will now compute the velocity in the normal manner except that the displayed velocity will be the measured value multiplied by the cosine of the entered angle. As many measurements as desired (at the same angle) can be averaged using the same procedures listed above. -
Page 21: Station Erasure/Station Edit
Whenever velocity is displayed on the LCD it is the component normal to the cross-section, i.e., the measured velocity x cosine of any angle entered. If no angle has been entered the Model 3000 assumes the angle to be 0.0°. - Page 22 NOTES: You may transfer the data in the Model 3000 as many times and to as many file names as you desire, the data will not be changed or deleted until you deliberately erase it from the cross section using one of the erase procedures.
-
Page 23: Erase Sections
The velocity determined by the Model 3000 by sampling input pulses from a rotating sensor against the internal timer. The Model 3000 can be set to sample from 1 to 999 seconds. Each averaging period can also be averaged with as many successive sampling periods as desired to produce a moving average. - Page 24 + ENTER will erase all 1000 stations including the two sample cross sections (100 & 99). "PROP" KEY A "PROP" is any sensor that can be used with the Model 3000. Commonly it is a propeller driven opto-electronic sensor, but any sensing device can be called a PROP and therefore have a "calibration number".
-
Page 25: Specifications
CONTACT CLOSURE Model 3000 can read contact closure signal inputs in any one of four modes; AA 1/1, Pygmy, Contact Closure and Equation / Contact, accessed by pressing the PROP key. Extreme care must be used in the adjustment of a "catwhisker" type signal input to prevent multiple counts and errors in measurement due to contact bounce. - Page 26 DEFAULT PROP PITCHES These are the figures originally shipped with the Model 3000 and are also the ones which will be re-installed if the system is "reset" using the start up key sequence described under “System Reset” in the Glossary.
-
Page 27: Care & Maintenance Of The Model 3000 Indicator
Remove batteries if the compartment is wet and while storing the unit for periods longer than a few weeks. WATER INCURSION: If water is visible through the LCD window inside the housing, get the Model 3000 to a warm, dry location as soon as possible. REMOVE THE BATTERIES. It will be necessary to breach the silicone seal with a sharp knife along the periphery inside the battery compartment to allow water to escape. -
Page 28: End Notes
Keep extra batteries in your coat close to your body and exchange them often. High temperatures and direct sunlight will also effect the operation of the Model 3000. DO NOT LEAVE THE INDICATOR IN A CLOSED VEHICLE IN THE SUN. Cover the indicator and avoid prolonged exposure of the liquid crystal display to ultra-violet light.
Need help?
Do you have a question about the 3000 and is the answer not in the manual?
Questions and answers