
Subscribe to Our Youtube Channel
Summary of Contents for Urbaco G6EVO
- Page 1 INSTALLATION AND OPERATION MANUAL G6 EVO AUTOMATIC RETRACTABLE BOLLARD 11/2015 BEA-G6EVO V3.0 p. 1/58...
-
Page 2: Table Of Contents
2.3. G6EVO bollard main components ........................10 2.4. G6EVO bollard technical details ........................11 2.5. G6EVO bollard configuration ..........................12 2.5.1 G6EVO bollard configuration codes description ..................... 12 2.5.2 G6EVO bollard configuration codes details ....................13 2.5.3 G6EVO bollard configuration example ......................16 2.6. - Page 3 7. SPARE PARTS ................................49 7.1. G6EVO - COMMON PIECES ..........................49 7.2. G6EVO - PNEUMATIC SOLUTION ........................50 7.3. G6EVO - STANDARD HYDRAULIC SOLUTION ....................50 7.4. G6EVO - BUILT-IN HYDRAULIC SOLUTION ...................... 51 7.5. G6EVO - COVERING ............................52 8.
-
Page 4: Introduction
DECLARATION OF CONFORMITY URBACO, 457 avenue du Clapier, 84320 Entraigues sur la Sorgues, certify that the G6EVO bollard is intended to be incorporated into other equipment or to be assembled to other machinery, for the purpose of constituting machinery that complies with EC Machinery Directive 2006/42/CE. - Page 5 URBACO undertakes, within the limits of the guarantee, to replace, free of charge, any faulty components that are returned to the factory, provided that: 1 - The owner informs URBACO in writing about any system anomalies during the guarantee period.
-
Page 6: Warnings
To warn users of the presence of the obstacle and tell them about the travel directions, fit a vertical sign that reads "retractable bollard". Adding red and yellow flashing warning-lights increases safety. Installing magnetic loops into the ground that are • associated to an operating logic, protects the perimeter around the bollard. 11/2015 BEA-G6EVO V3.0 p. 6/58... -
Page 7: Limits Of Use
(when the red light turns to flashing yellow, if the access point is fitted with light). • Those managing the access point must inform users on the way to use it and how it works, as URBACO cannot be held liable for improper installation or non-respect of safety rules. •... -
Page 8: General Description
2. GENERAL DESCRIPTION 2.1 Presentation URBACO's G6EVO access control bollards are designed to prevent and/or select the passage of vehicles or trucks in areas, such as town centers, private areas or building access, while keeping free access to pedestrian or bicycle traffic. -
Page 9: G6Evo Bollard General Description
The G6EVO bollard is designed to control access when associated with a full automation solution. Consequently, the bollard provides a high level of impact resistance and an intensive rate of use. Also, the G6EVO bollard maintenance is limited due to the use of simple and sturdy elements. The bollard is made up of:... -
Page 10: G6Evo Bollard Main Components
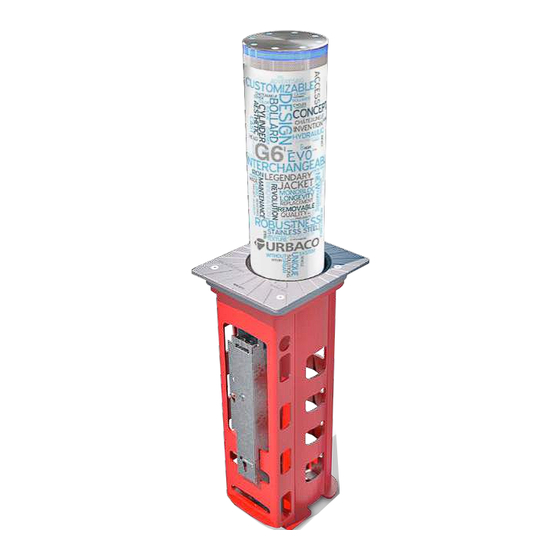
2.3 G6EVO bollard main components The G6EVO bollard is made of 4 main components Figure 2: Structure (Casing, cover and Figure 3: Motorization (components bracket and cylinder) bare bollard’s head) Figure 4: Bollard’s covering Figure 5: Top plate with screws and light diffusers... -
Page 11: G6Evo Bollard Technical Details
2.4 G6EVO bollard technical details G6EVO Monobloc automatic retractable bollard: Figure 7: Top view Figure 6: Front view Mechanical characteristics: Size Ø250 H750 Ø200 H750 Ø250 H550 Material Ductile cast iron: head, casing and cover / Galvanized sheeting: supports / stainless steel: screws... -
Page 12: G6Evo Bollard Configuration
2.5 G6EVO bollard configuration 2.5.1. G6EVO bollard configuration codes description G6EVO Monobloc automatic retractable bollard can be configured using the following codes: 4 to 5 codes are necessary to fully set a G6 EVO Bollard. 1 – Code to choose bollard motorization and size 2 –... -
Page 13: G6Evo Bollard Configuration Codes Details
2.5.2. G6EVO bollard configuration codes details Each configuration codes are detailed below. 1 – Choose G6EVO Bollard size (diameter and height) and Motorization Example: BPEVOF75 – Pneumatic Bollard G6EVO Ø250 H750 BP EVO F 75 ... - Page 14 3 – Choose G6EVO Bollard Led light ring Example: BOEVOSFCL – Led light ring for G6EVO bollard Ø250 BO EVO S F CL Bollard O ption ...
- Page 15 CY : C yan WH : W hite 11/2015 BEA-G6EVO V3.0 p. 15/58...
-
Page 16: G6Evo Bollard Configuration Example
2.5.3. G6EVO bollard configuration example To configure the bellow G6EVO Bollard example, here are the codes that must be chosen: Pneumatic G6EVO Bollard Ø250 H750, painted Chateauneuf sleeve, White LED light ring, stainless steel top plate with light diffusers and hidden screws. -
Page 17: G6Evo Bollard Options Detail
2.6 G6EVO bollard options detail Below are all G6EVO Bollard options that could be choosen: Independently of the G6EVO bollard size and motorization choosen, the following options are compatible with the product. Tamper-proof screws Tamper-proof screws require specific tool to be desassembled. -
Page 18: Installation
• Check that the bollard and surrounding fixed parts are not constitutes an obstacle and become a tripping risk for pedestrians or cyclists when the bollard is fully retracted. • Check that the components have been properly installed and that they are stable. In case of problems, contact Urbaco S.A. for understanding proper corrective actions to be performed. -
Page 19: Standard Installation Of A Complet And Safe Access Control Solution
Please refer to the manual N° NT-BCL and NT-for all types of installation layouts including specific safety solutions. Automatic retractable bollard safety loop Automatic exit loop Technical control unit Safety loop Traffic light Figure 11: Standard installation skecth 11/2015 BEA-G6EVO V3.0 p. 19/58... -
Page 20: G6Evo Bollard Concrete Foundation Dimensions
It is recommended to install the bollard using concrete foundation as shown below. Lost casing width* Lost casing length* Traffic Way Lost casing height* Figure 13: Cross section view of an installed G6EVO bollard (with lost casing) *For lost casing dimensions, refer to the appendix N°COFG6 11/2015 BEA-G6EVO V3.0... -
Page 21: Place Of Installation Protection
In the same way, cut the plastic film at the bottom, just under the yellow adhesive tape. Figure 14: Bollard wrapped in heat-shrinkable film upon receiving 11/2015 BEA-G6EVO V3.0 p. 21/58... -
Page 22: Handling The Bollard
Besides requesting a certificate of conformity for the concrete, it is always best to take a sample and check it. 3.4.1. Bollard positioning POSITION THE BOLLARD PROPERLY, RESPECTING THE TRAFFIC WAY (THE TRAFFIC WAY IS SHOWN ON THE BOLLARD’S COVER) Figure 17: Cover traffic way Figure 18: Cover traffic way marking (FR) marking (EN) 11/2015 BEA-G6EVO V3.0 p. 22/58... -
Page 23: Bollard Position Marks And Excavation
Figure 19: Lost casing with top finishing frame • The lost casing of the G6EVO bollard must be positioned so that the axis of the side holes is parallel with the traffic way. • See the "Lost casing assembly process" in the technical document N° NT- COFG6 •... -
Page 24: Building The Draining System
When the ground is not very permeable, it is best to link the bottom of the excavation to an additional drainage network/system.. Figure 25: First concrete layer Figure 23: Excavation cut view Figure 24: Drainage with PVC pipe 11/2015 BEA-G6EVO V3.0 p. 24/58... -
Page 25: Positioning The Lost Casing (If Used)
Steel elements must be covered by at least 5 cm of concrete. It is recommanded to vibrate the concrete for a homogeneous fill. Figure 28: Concrete poured Figure 29: Reinforcement removed after concrete cure time 11/2015 BEA-G6EVO V3.0 p. 25/58... -
Page 26: Checking The Capacity Of The Lost Casing Or The Excavation To Receive The Bollard
- Pass the sheath extremities through the casing’s hole and leave a few centimeters inside the bollard. - For a good bollard’s stability, inject the polyurethane foam between the casing and the excavation (lost casing). Figure 30: Bollard positioning Figure 31: Bollard installed 11/2015 BEA-G6EVO V3.0 p. 26/58... -
Page 27: Leveling And Finishing The Final Top Layer
The U-bend end shape of the hose must stand on the bollard side for connection. The hydraulic hose must remain as straight as possible, to prevent any pressure loss. Do not roll up the hydraulic hose. It must be ordered at proper length. 11/2015 BEA-G6EVO V3.0 p. 27/58... -
Page 28: Bollard Connections
All automatic bollards are supplied with an access control unit. This access control unit could be installed independently from the bollard. The technical control unit connection will depend on the global solution choosen. Here are the controllers compatible proposed by URBACO: U200... -
Page 29: Commissioning
Connect the electrical powering cables to the hydraulic unit. Check the oil level in the hydraulic tank. Check that there is no oil leak. Check that there is no contact between the hydraulic hose and the bollard head. 11/2015 BEA-G6EVO V3.0 p. 29/58... -
Page 30: Operating Test - Commissioning Of The System
The operating tests to perform depend on the global solution and allocated controller chosen. Therefore please refer to the used controller before commissioning the sytem. 4.3. REMOVING SITE PROTECTIONS After performing all operating tests with success and making the access point functional and safe, the protections and signs can be removed. 11/2015 BEA-G6EVO V3.0 p. 30/58... -
Page 31: Maintenance
5. MAINTENANCE 5.1. G6EVO BOLLARD'S PREVENTATIVE MAINTENANCE PROGRAM This preventive maintenance program is intended to ensure the continuous operation and maintenance of the equipment. Please refer to the preventive maintenance program of the technical control unit to perform maintenance tasks. -
Page 32: Common Check Points Details
NOTE: to perform this action, remove the cover and action the bollard in the raised position (without dismantling the bollard head). Check that the cylinder is properly centred in the cross-bar on the bottom of the casing. Figure 38: Casing crossbar Figure 37: Cylinder position 11/2015 BEA-G6EVO V3.0 p. 32/58... -
Page 33: Limitswitch Sensors Controlled
(if necessary, clean it). Pour 20 liters of water into the casing and check that it evacuates in five minutes. If any drainage problem occurs, clean the drainage conduit by liquid suction and repeat the operation several times until the drainage system works correctly. 11/2015 BEA-G6EVO V3.0 p. 33/58... -
Page 34: After Vehicul Impact Control
5.3.3. Proper solenoid-valve connection – Check Point N°10 Make sure that the soleniod-valve is properly connected. See appendix N° NT-REVB for more detail. Figure 42: Solenoide-valves mounted onto the components bracket 11/2015 BEA-G6EVO V3.0 p. 34/58... -
Page 35: Components Properly Fastened Onto The Braket
Make sure that the hydraulic hose hasn’t moved during the transport. The hydraulic hose must stay in center position and have no contact with the bollard head part at any time. Figure 47: Inner bottom view. Hydraulic hose passing through the bollard head 11/2015 BEA-G6EVO V3.0 p. 35/58... -
Page 36: No Oil Leak
5.5.4. Tighten up the fastening screws of the hydraulic pump onto support and support onto casing – Check Point N°17 Check that all assembly screws are well tightened. Figure 50: Built-in hydraulic pump top view 11/2015 BEA-G6EVO V3.0 p. 36/58... -
Page 37: Corective Actions
Cylinder replacement 6.4.3 Standard hydraulic components braket replacement Specific corrective tasks for the BUILT-IN HYDRAULIC motorization Operation date Task name § 6.5.1 Limit-switch sensors replacement 6.5.2 Cylinder replacement 6.5.3 Hydraulic pump replacement 6.5.4 Solenoid valve replacement 11/2015 BEA-G6EVO V3.0 p. 37/58... -
Page 38: Commun Corrective Actions Details
Figure 53: Raised up bollard Figure 51: Bollard retracted Figure 52: Screws and cover removing For the visible screws top plate version Figure 54: Screws and top plate removing Figure 56: Sleeve removed Figure 55: Removing covering 11/2015 BEA-G6EVO V3.0 p. 38/58... - Page 39 Figure 62: When the sleeve has Figure 63: Remove the top plate slid down, a gap between top using an Allen key plate and sleeve appears Figure 64: Sleeve removed 11/2015 BEA-G6EVO V3.0 p. 39/58...
-
Page 40: Plastic Frictionless Ring Changing
Remove the old frictionless ring. After having scrapped off all glue residues, fit the new ring with polyurethane glue. 6.2.3. Guide rails cleaning – Task N°3 The casing guide rails must be dust free Before reassembling the bollard, spray the guides with Molykote 3402C or equivalent lubrication oil. Figure 67: Guide rails view 11/2015 BEA-G6EVO V3.0 p. 40/58... -
Page 41: Led Light Changing
To perform this task, the bollard head must be cover free and out from the casing. See §6.2.1. for more details. Figure 71: Sleeve Figure 73: Remove Figure 72: Take the Figure 74: Remove holding system the first part bottom bolt off the second part 11/2015 BEA-G6EVO V3.0 p. 41/58... -
Page 42: Magnet Changing
In case of malfunction, check the connections on the technical control unit and in the bollard and, if the problem continues, replace the limit switch sensor. Limit-switch sensor replacing kit is supplied with plastic rivets. Figure 78: Limit-switch sensor assembled with 2 plastic rivets. 11/2015 BEA-G6EVO V3.0 p. 42/58... -
Page 43: Pneumatic Cylinder Changing
See appendix N° NT-RVP for more detail. Figure 79: remove the central screw that holds the cylinder Figure 80: remove the cylinder Figure 81: disconnect the cylinder 6.3.3. Pneumatic components bracket replacement – Task N°9 Figure 82: replace components bracket 11/2015 BEA-G6EVO V3.0 p. 43/58... -
Page 44: Standard Hydraulic Motorization Corrective Actions Details
6.4.2. Hydraulic cylinder replacement – Task N°11 To perform this task, the bollard head must be cover free. See §6.2.1. for more details. See appendix NT-RVH for more detail Figure 85: remove the central screw that holds the cylinder 11/2015 BEA-G6EVO V3.0 p. 44/58... -
Page 45: Standard Hydraulic Components Braket Changing
Figure 86: remove the cylinder Figure 87: disconnect the cylinder 6.4.3. Standard hydraulic components braket replacement – Task N°12 Figure 88: Replace components bracket 11/2015 BEA-G6EVO V3.0 p. 45/58... -
Page 46: Built-In Hydraulic Motorization Corrective Actions Details
In case of malfunction, check the connections on the technical control unit and in the bollard and, if the problem continues, replace the limit switch sensor. Figure 92: Limit-switch sensor assembling 11/2015 BEA-G6EVO V3.0 p. 46/58... -
Page 47: Hydraulic Cylinder Changing
Figure 94: remove the cylinder Figure 95: disconnect the cylinder 6.5.3. Hydraulic pump replacement – Task N°14 Figure 96: Hydraulic pump Figure 97: Unscrew the hydraulic support assembly screw pump support assembly screw identification 11/2015 BEA-G6EVO V3.0 p. 47/58... -
Page 48: Solenoid Valve Changing
Figure 99: Hydraulic pump top Figure 100: Hydraulic pump assembling screws bottom assembling screws 6.5.4. Solenoide valve replacement – Task N°15 Figure 101: Solenoide valve Figure 102: Remove the knurled Figure 103: Remove the solenoid identification valve 11/2015 BEA-G6EVO V3.0 p. 48/58... -
Page 49: Spare Parts
7. SPARE PARTS 7.1. G6EVO - COMMON PARTS Ref. DESCRIPTION DIMENSIONS CODE RCAIF50A Ø250 H500 Ø250 H550 RCAIF50A Casing for pneumatic and hydraulic standard motorization RCAIE75ANM Ø200 H750 Ø250 H750 RCAIF75AM Ø200 H750 1bis Casing for built-in hydraulic motorization Ø250 H750 Ø250 H500... -
Page 50: G6Evo - Pneumatic Solution
Pneumatic components bracket (Fail safe) H550 RSUPACCP55 H750 RSUPACCP75 H750 RVEP75M Pneumatic cylinder H500/550 RVEP50M Figure 106: Pneumatic components bracket Figure 107: Pneumatic cylinder 7.3. G6EVO – STANDARD HYDRAULIC SOLUTION Ref. DESCRIPTION DIMENSIONS CODE H500 RSUPACCH50 Standard hydraulic components bracket H750 RSUPACCH75 H500 RVEH50M... -
Page 51: G6Evo - Built-In Hydraulic Solution
7.4. G6EVO – BUILT-IN HYDRAULIC SOLUTION Ref. DESCRIPTION CODE Built-in hydraulic unit with cylinder (Fail safe) RKITHE75SP Built-in hydraulic unit with cylinder (Fail secure) RKITHE75SN Limit-switch on bracket RG6EVO-FDC01 Hydraulic unit (Fail safe) RGRPHE75SP Hydraulic unit (Fail secure) RGRPHE75SN Hydraulic cylinder... -
Page 52: G6Evo Covering
7.5. G6EVO COVERING Ref. DESCRIPTION MATERIAL DIMENSIONS CODE Ø200 H750 RG6EVOHE75-CLP Painted steel Ø250 H550 RG6EVOHF55-CLP Ø250 H750 RG6EVOHF75-CLP Standard sleeve Ø200 H750 RG6EVOHE75-VDM Polished stainless steel Ø250 H550 RG6EVOHF55-VDM Ø250 H750 RG6EVOHF75-VDM Ø200 H750 RG6EVOHE75-CHP Painted steel Ø250 H550 RG6EVOHF55-CHP Ø250 H750... - Page 53 Figure 117: Top plate with screws Figure 118: Top plate without screws Figure 120: Top plate without screw Figure 119: Top plate with screws and with diffusers and diffusers 11/2015 BEA-G6EVO V3.0 p. 53/58...
- Page 54 Fugure 121: Sleeve holding system Fugure 122: Led light ring Fugure 123: Magnet Fugure 124: Led light spiral cable Fugure 125: Reinforcing ring 11/2015 BEA-G6EVO V3.0 p. 54/58...
-
Page 55: First Level Corrective
The bollard retracts but stops There is a foreign object under Clean the bottom of the casing and before reaching the lower limit- the bollard head. the lower part of the bollard head. switch. 11/2015 BEA-G6EVO V3.0 p. 55/58... -
Page 56: Maintenance Log
. MAINTENANCE LOG This form must be filled in at each maintenance job. Otherwise the warranty is no longer valid. 11/2015 BEA-G6EVO V3.0 p. 56/58... -
Page 57: Dismantling And Disposal
10. DISMANTLING AND DISPOSAL For URBACO, environmental protection is a basic requirement of our operating and market strategies and we encourage you to follow a few simple rules concerning recycling: DISPOSING OF THE PACKAGING The components of the packaging (cardboard, plastic, and so on) are considered solid urban waste and can be disposed of easily, simply by separating them for recycling. - Page 58 The information provided in this manual is merely indicative. The illustrations are not binding and may be slightly different with respect to the product. URBACO reserves the right make any changes it deems useful, without having to update this documentation, while safeguarding the main characteristics.
Need help?
Do you have a question about the G6EVO and is the answer not in the manual?
Questions and answers