Table of Contents
Advertisement
Available languages
Available languages
Quick Links
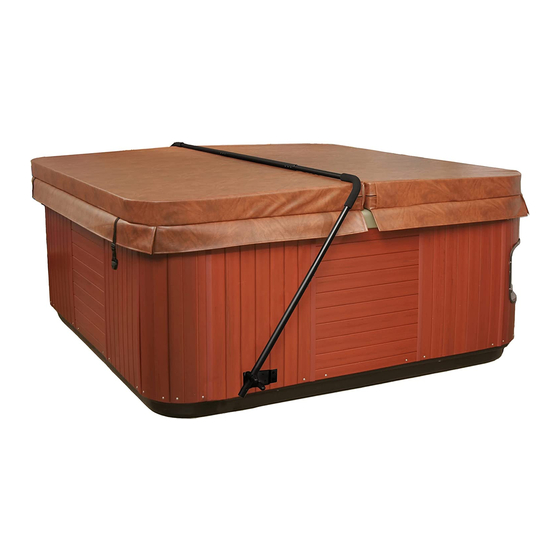
LOW MOUNT SPA COVERLIFT
IMPORTANT!! READ ALL INSTRUCTIONS CAREFULLY
!! CAUTION !!
Please read all instructions and
precautions in this installation sheet
before using this equipment. Save this
installation sheet for future reference.
Use this Spa Coverlift only as described
in this installation sheet. Inspect and
tighten all parts regularly, replace any
worn or missing parts immediately.
DO NOT attach o r incorporate e lectrical app liances or accessories into or onto T he Spa Coverlift as an
electrical hazard could be created, resulting in injury or death.
DO NOT lean, sit, stand on or play around The Spa Coverlift that could cause a loss of balance resulting in
injury.
Use of The Spa Coverlift for any application other than fo r wh ich it was
purchaser's risk and Blue Wave will not be held liable for such use resulting in injur y, property damage or
damage to the product.
Installation Instructions
BEFORE BEGINNING INSTALLATION
ITEM NUMBER: NP5022
CUSTOMER SERVICE HOTLINE: 1-800-759-0977
BlueWave, 1745 Wallace Ave., St. Charles, IL 60174
Mfg#3200103
(Spa and Spa Cover Not Included)
!! WARNING !!
Adult assembly required. This package
contains small parts which are a
choking hazard. Keep children away
from bags and parts until assembled.
Dispose of packaging with care.
designed is solely at th e
- 1 -
Advertisement
Table of Contents

Summary of Contents for Bluewave NP5022
- Page 1 Blue Wave will not be held liable for such use resulting in injur y, property damage or damage to the product. CUSTOMER SERVICE HOTLINE: 1-800-759-0977 BlueWave, 1745 Wallace Ave., St. Charles, IL 60174 - 1 -...
-
Page 2: Before You Get Started
BEFORE YOU GET STARTED You will need to make sure you have at least 2 feet of clearance of all 4 sides of your spa. We reco mmend the coverlift opens towa rd the back of the spa away fro m the contro l panel. Mounting the coverlift in an y othe r o rientation may cause interference w ith the spa's front acces s pan el if any repairs or maintenance of spa is required in the future. -
Page 3: Top View
SET-UP AND ASSEMBLY: • Place all parts in a cleared area and remove the packing materials from the spa shell; do not dispose of the packing materials until assembly is completed and the spa is in operation. • Assembly requires two people. •... - Page 4 Step 4: • Attach the left and right Mounting Brackets to the appropriate sides of the spa, 3-5” above the ground* • Use (4) 1” Mounting Screws for the four outer holes. • Use (2) 4” Mounting Screws for the two inner holes. (Fig. 4-1) 4 x 1”...
- Page 5 ATTENTION! SPA COVERS UP TO 72”: FOLLOW STEP 6-A SPA COVERS 73”-96”: FOLLOW STEP 6-B Step 6-A: FOR SPA COVERS UP TO 72” • Slide the LONG END of the Cover Support Arm into either side of the Coupler piece •...
- Page 6 Step 7: • Adjust the C oupler Piece and Support Arms so that the Coupler Piece is laying parallel, approximately ½” away from the fold in the spa cover. • Once you have the lifter fitted to the size of your spa, pre-drill the holes that connect all the arms together. •...
- Page 7 Blue Wave ne sera pas tenue responsable d’une telle utilisation en cas de blessure, de dommages à des biens ou de dommages au produit. SERVICE À LA CLIENTÈLE : 1-877-762-6010 BlueWave, 1745 Wallace Ave., St. Charles, IL 60174 - 1 -...
-
Page 8: Avant De Commencer
AVANT DE COMMENCER Vérifiez si vous avez un espace d’au moins 0,6 m (2 pi) des quatre côtés du spa. Nous vous recommandons de faire ouvrir le couvercle vers l’arrière du spa le plus loin possible des commandes. Si vous assemblez le levier selon une autre orientation, ce dernier pourrait gêner l’accès au panneau de service à... -
Page 9: Vue De Dessus
É • Placez toutes les pièces dans un endroit dégagé et enlevez l’emballage de la cuve du spa. Ne jetez pas l’emballage tant que l’assemblage n’est pas terminé et que le spa n’est pas en fonction. • Il faut deux personnes pour effectuer l’assemblage. •... - Page 10 Étape 4: • Fixez les supports gauche et droit au côté correspondant du spa, de 7,5 à 12 cm (3 à 5 po) au-dessus du sol*. • Utilisez quatre vis de montage de 1 po pour les quatre trous extérieurs. •...
- Page 11 ATTENTION! COUVERCLES DE SPA D’AU PLUS 1,83 M (72 PO) : RENDEZ-VOUS À L’ÉTAPE 6-A COUVERCLES DE SPA DE 1,85 À 2,43 M (73 PO À 96 PO) : RENDEZ-VOUS À L’ÉTAPE 6-B Étape 6-A: COUVERCLES DE SPA D’AU PLUS 1,83 M (72 PO) •...
- Page 12 Étape 7: • Ajustez la tige horizontale et les tiges en L de manière à ce que la tige horizontale soit parallèle au pli à environ 1,2 cm (½ po) de ce dernier dans le couvercle. • Une fois que le levier a la bonne taille pour votre spa, percez les trous qui serviront à fixer les tiges les unes aux autres.
Need help?
Do you have a question about the NP5022 and is the answer not in the manual?
Questions and answers