
Summary of Contents for pathway Cognito
-
Page 1: User Guide
User Guide Version 9.25.14 1439 17 Ave SE Calgary AB T2G 1J9 403-243-8110 www.pathwayconnect.com... - Page 3 Video Tutorials www.youtube.com/pathwayconnectivity Phone Support +1 403 243 8110 (8am – 4:30pm MT) Subject to change. Check the website for the latest version of this guide. © 2012-2014 Pathway Connectivity, a division of Acuity Brands Lighting Canada All Rights Reserved...
-
Page 4: Table Of Contents
Table of Contents Common Tasks to Get You Started .................. 6 What to Plug in ......................6 How to Start the Console ....................6 How to Open a (New) Show ..................6 How to Patch a Light ..................... 6 How to Strike/Unstrike an Arc Light or Reset a Moving Light ........7 How to Set Intensity ...................... - Page 5 Updating Software ....................... 48 Obtaining and Applying Fixture Library Updates ............49 Warranty.......................... 49 September 25 2014 Cognito Release Notes ..............50 Airplane view in PLAY MEMORIES ................51 Show files can be named .................... 52 Drag and Drop Improvements ..................53 ...
-
Page 6: Common Tasks To Get You Started
First, snap the correct wall plug adaptor onto the 24V power supply that came with Cognito. Then plug the barrel connector into the DC IN port on the rear of the console. Finally, plug the power adaptor into an AC power outlet (90-240VAC, 50/60Hz). -
Page 7: How To Strike/Unstrike An Arc Light Or Reset A Moving Light
Select the light that requires the ballast strike, or requires a reset. Several lights may be selected at the same time, but remember that the fixture attributes displayed by Cognito are determined by the first light selected. Selected cells will have red outlines. From the bottom of the screen, touch the Control icon. -
Page 8: How To Set An Effect
Touch the Position icon to adjust where the light is pointing, using one of the following: Wheels: Use the encoder wheels to set pan and tilt in degrees. Libraries: Recall previously user-recorded positions. Joystick: Touch the screen to move the light relative to its current position. Bullseye: Touch the screen to move the light relative to its home position. -
Page 9: How To Record A Memory
How to Record a Memory Touch the Record icon to open the RECORD tasks, then touch the Memory icon. Select the Memory location you wish to use – outline turns red – and touch “Done” or simply push the button below the fader where you want the Memory located. The look will be recorded with default timings and you will return to your previous CONTROL task. -
Page 10: How To Playback Cues (Playlists)
Cognito automatically saves all changes to a non-volatile memory. If you wish to back up to USB, insert a USB thumb drive into any USB port on Cognito. Press the Power Button once. Touch the Setup icon, then the Showfile icon. Select “Save to USB”. -
Page 11: Finding Your Way Around - The Hardware
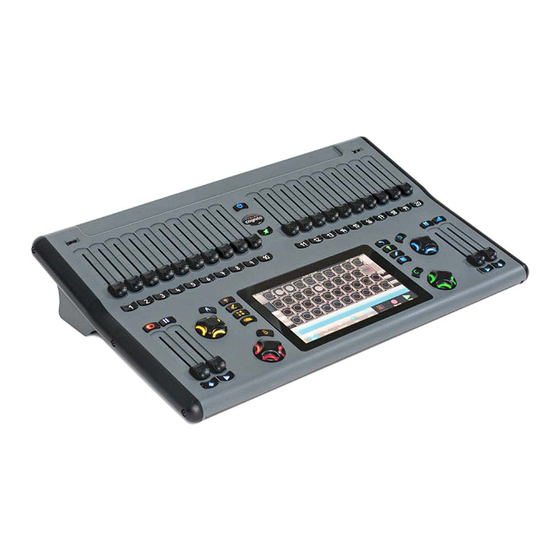
Finding Your Way Around – The Hardware Cognito consists of two interrelated work surfaces. A 7” touch screen provides the main programming interface, while the surrounding backlit hardware controls, consisting of 24 faders, four encoder wheels and forty-two buttons, provide programming support and playback control. -
Page 12: Rear Panel
Cognito may be connected to a mains voltage ranging from 90-240VAC at 50/60Hz. When operating on PoE Cognito is a Class 3 device for purposes of power consumption. Plug the DC power supply into the DC plug on the far left side of the rear panel. The rear panel indicator LED will steadily glow amber/green. -
Page 13: Data Connections
Connect DMX OUT A to the lights controlled by Universe 1 using a five-pin XLR cable (all Cognito models). DMX OUT B is enabled to also output Universe 1 on PRO512 models, and to output Universe 2 on PRO1024 models. -
Page 14: Grand Master And Dead Black Out Button
In the PLAY task, faders are used to recall Memories, sometimes called submasters and presets. In PLAY, if a Memory has been recorded into a fader, the bump button’s backlight will glow blue. When a Memory is recorded, the bump button can be given different functions, including fade times. -
Page 15: Left And Right Playback
Left and Right Playback Cognito provides two Playbacks, one located beside the Grand Master and one beside the Memory Master. Each Playback consists of a Go button, a Playback Master, and a Pause/Back button. Any Playlist may be assigned to either Playback. A Playlist is a series of cues or ‘looks’... -
Page 16: Encoder Wheels And Buttons
When releasing all active Cues and Memories, a dialog screen will appears asking for confirmation. Choosing OK from this screen will cause all lights to turn OFF. Always warn everyone present before turning off all lights (black out the stage). Help Press the Help button once to launch Hints. -
Page 17: Pin Button And Pin Crossfade Timings
Pin Button and Pin Crossfade Timings Located just below the Cognito badge between the fader banks, the Pin button provides a simple method of transitioning between lighting looks when in SELECT or PLAY. With a lighting look activated by using the faders or manual control, press the Pin button to hold the look (i.e. -
Page 18: Finding Your Way Around - The Touch Screen
Finding Your Way Around - The Touch Screen The touch screen has four distinct displays, each corresponding to a specific programming task: SELECT, CONTROL, RECORD and PLAY. Each task is shown on the Task Bar at the bottom of the screen. Enter a task screen by touching its icon. Above each Task Bar is a tool bar, showing the tools available for the active task. -
Page 19: Screen Navigation
Screen Navigation Across the top of the main display is the status bar, which shows the level (in percentage) of the Grand Master and Memory Master; the name of the Playlist currently loaded in each of the right and left playbacks; and the name of the current cue. On either side of the main display are navigation icons. -
Page 20: Select - The Fixture Grid
lights in use’ (intensity above zero). The icon turns red when filtering is in use. Only lights that meet the Filter criteria are shown on the Fixture Grid. The Information icon toggles the Fixture Grid to show further information about each light. -
Page 21: Manual Selection
Standard The Standard tool allows quick selection by certain customary rules, such as All Lights, No Lights or by fixture types. Cognito automatically creates Standard groups of identical lights, as the lights are patched into the Fixture Grid. Groups The Groups tool allows rapid selection of show-specific or user-defined groups of lights. -
Page 22: Control
Light Type Most color-changing-only lights will match one of the Generic profiles. Lights with position or shape attributes require specific profiles. If a light doesn’t appear in the Light Type, or a required operating mode is missing, email a pdf of the light’s manual to fixtures@pathwayconnect.com to request inclusion in the fixture library. -
Page 23: Intensity
100%, Cognito will automatically lower the other colors until the desired color is reached. Effects: Shows any currently active effects on a secondary tool bar. Intensity must be higher than zero percent for an effect to be visible. -
Page 24: Shape
standard positions. Wheels also allow the choice between Polar (normal arc) and Linear (direct path) movement. Advanced: Allows you to lock or ‘park’ the position attributes of selected lights. Also allows you to release recent position changes, or to set a light to its default position (when hung, typically straight down). -
Page 25: Cue
Memory Page. Use the Left/Right navigation arrows to access the additional banks within the page. Once a fader location is selected, the Memory may be labeled by touching the keyboard icon next to Name. Bump button modes (actions) and timings may also be adjusted. Bump Button Modes Momentary: The Memory is active only while the button is pressed. - Page 26 Cue Timings - Basic Properties Fade: Sets a basic crossfade time. If no other timings are set, this timing will be used to govern a light’s change in Intensity, Color, Position and Shape attributes. Delay: Sets a delay time between pressing GO and the start of the fade. Down Fade: Sets a different fade time for all lights moving to a lower intensity.
-
Page 27: Library
Record Update and Insert Rarely is a cue perfect the first time it’s recorded. Cognito offers two ways of updating cues and libraries using RECORD. Once changes are made to an existing cue, touch Record>Cue, then select the same cue location from the Playlist. -
Page 28: Play
Insert New Cue Before Existing Cue Records the current console ‘look’ as a new cue, immediately prior to the selected cue position. Inserting a cue will not affect adjacent cues. Insert New Cue After Existing Cue Records the current console ‘look’ as a new cue between the selected position and the immediately following cue. -
Page 29: Left/Right Playback
By default, faders only play back Memories when the PLAY task is active. To change the default, so faders always playback Memories, go to Setup>System and change “Sliders Always Run Memories” to ‘yes’. Blind Editing To make changes to a Memory while another Memory is live on-stage, select the desired Memory location. -
Page 30: Mixed
To make changes to Cues in one Playlist while a different Playlist is active, it may be necessary to change the record behavior of the console. Normally, Cognito acts as a preset console, and records the entire current DMX output whenever a Cue is saved. - Page 31 Touch the keyboard icon to name the event. Event Timing None: Event is disabled. At Time: Set a specific start time for the associated action. Sunrise: The associated action will begin at local sunrise, as determined by the astronomical clock setting under System Preferences. Sunset: The associated action will begin at local sunset, as determined by the astronomical clock setting under System Preferences.
- Page 32 Cognito: Triggers a console-level event, according to the following: Power Off: Turns off the console Send MIDI: Sends a MIDI string to the MIDI OUT port MIDI Data: Touch the keypad to enter the required MIDI string neato Lockout: Enables/disables wireless device control.
-
Page 33: Setup And Console Configuration
Choose from a list of zones, regions or cities, dependent on the Continent selection. The selection sets the time zone Cognito uses when displaying time, either as set by the user or as retrieved from an Internet time service. The Region also determines whether... -
Page 34: Network
Advanced Record Changes Only Cognito normally records the current on-stage “look”, so that a Cue or Memory captures all active intensities and other attributes. However, some situations (and some operators) prefer that only any updated or altered attributes are recorded in a Cue or Memory. -
Page 35: Dmx
IP address. Automatic: Cognito waits to be assigned an IP address by on on-line service such as a DHCP server. If no server is found, Cognito will use the last address assigned to it. Not editable. -
Page 36: Neato
Playlist. Playlist Limits Cognito to cue playback only. Once the parameters are set, touch the Lock icon to enter Playlist mode. A release icon, a GO icon and a pause icon will be shown. Touch the appropriate icons to advance, pause or release the playlist. Or press the left GO button to advance the playlist. -
Page 37: Upgrade
(clear) a radio group. Logo The Cognito logo will displayed when the Lock icon is touched. A password may be set by touching the keyboard icon and entering a password. When in Logo mode, the console hardware and touch screen are inactive. However, playlists operating from PLAY>Schedule will be run, and the playback may still be... -
Page 38: Show File
When in the SELECT or PLAY task, Cognito can emulate this behavior using the PIN button. The faders will control their associated lights, allowing the operator to quickly set a look onstage. -
Page 39: Advanced Attribute Control
More than twenty lights (or Memories) may be accessed and controlled by using the arrow icons to reach other fader banks. For the Pin function to crossfade intensities, “Sliders Always Run Memories” must be set to ‘no’, under SETUP>System Preferences>General. If “Sliders Always Run Memories” is set to ‘yes’, then the Pin function will crossfade between recorded Memories in SELECT as well as PLAY. -
Page 40: Shift Button Short Cuts And Extensions
The Information screen shows how many lights are currently Tech Locked, under the “Locks” tab. Default [Intensity/Color/Position/Shape]: Sets the selected light’s attribute to the default value. The default results are dependent on the light and will be recorded in any subsequent record operations. Release [Intensity/Color/Position/Shape]: Releases changes made since the last RECORD action, to the chosen attribute of selected light(s). -
Page 41: I - The Information Screen, Or, What Do All Those Colors Mean
Wheel In CONTROL>Wheels, allows fine control of current associated attribute, such as pan or tilt, or splitting of color/gobo slots Wheel In RECORD or PLAY>Edit, allows 0.1s timing changes when editing fade times Wheel In PLAY>L Playback (or R Playback), jumps to top or bottom of current Playlist Color/Position/Shape In CONTROL>Wheels, move backwards through available... - Page 42 The tabs on the left include Selected Lights (shown above), Show (number of recorded Playlists, Cues, Memory Pages and Memories), Locks (number of Tech and Desk Locked lights) and Media (internally saved shows and backups). The CAPT icon shows how many lights have been selected. If more than one light is selected, the +/- Par Can icons move between the individual lights.
-
Page 43: Automated Or Unattended Operation
Cue Number and Playlist information. If no Playlist is specified, Cognito uses the first Playlist. If no Cue Number is specified, the next cue in numeric sequence or the current cue (depending on the command) will be used. Data format is described below. - Page 44 Starts a timed transition or fade to a cue using a transition time sent in the data string. The use of this command is not recommended, as all cues in Cognito have fade times. Transition time stated using Standard Time Specification in “hr mn sc fr ff” format (hour minute second frame fractional frame).
-
Page 45: Serial Control
Transmit Data (Tx) Common The other pins are not used. If controlling Cognito from a computer via RS232, a null modem serial cable is needed, with Pins 2 and 3 reversed at one end. Connection speed and attributes are: 9600 baud, no parity, 8-Bit, 1 stop bit, no flow control (9600, N, 8, 1) All commands, including item names included in the command string, are case sensitive. -
Page 46: Telnet Control
Setup>Network to use Advance (see above). Otherwise, a static IP and subnet scheme is recommended. Open a Telnet connection from the computer to the Cognito’s IP address on port 11123. For example, if Cognito’s IP is 192.168.1.116, the following would be sent from the computer’s command window:... -
Page 47: Contact Closure Control
API.PlayListGotoAndExecuteFollows('Playlist 1', 4) <CR> <Release ‘Playlist 1’.> API.PlayListRelease('Playlist 1’) <CR> In addition to the above command set, Cognito supports much more advanced scripting using its built-in Lua interpreter. For more information on the Lua programming language, see www.lua.org. Contact Closure Control The RS232 serial connector also offers a simple method of running Cues. -
Page 48: New Show/Clear Console Configuration
Software and Fixture Library Updates From time to time, updates will be issued for the Cognito, covering either software improvements or light fixture definitions. A link to these update is posted on the Cognito product page on the Pathway Connectivity website (www.pathwayconnect.com) or on the Pathway product forums (forums.pathwayconnect.com). -
Page 49: Obtaining And Applying Fixture Library Updates
Pathway’s option, any units which are determined to be defective on Pathway’s inspection. Pathway Connectivity may elect to refund the cost of the device upon return, solely at Pathway Connectivity’s discretion. -
Page 50: September 25 2014 Cognito Release Notes
September 25 2014 Cognito Release Notes This release of software includes some major enhancements to Cognito, particularly in the PLAY task. Here is a list of new features and improvements. More detailed descriptions appear below. ● Airplane view in PLAY MEMORIES ●... -
Page 51: Airplane View In Play Memories
Airplane view in PLAY MEMORIES Similar to how pressing the Airplane in SELECT shows you banks of Lights, pressing Airplane in PLAY MEMORIES shows you all 20 banks of memories on the current Memory Page and indication as to which are recorded and which are active. Blue bars are recorded memories and yellow bars are active (up) memories. -
Page 52: Show Files Can Be Named
Show files can be named Let’s face it, show file management on Cognito to date has been a real bear. It was like consoles of old where saving only happened on removable media like floppy disks - one show file per disk - all shows using the same name. Finally we’ve given you the ability to save with a name and keep multiple show files on the internal drive. -
Page 53: Drag And Drop Improvements
Drag and Drop Improvements Earlier versions of Cognito only allowed you to move Memories in Mixed mode. Also dragging Memories to Cues in Mixed mode always did a copy. Likewise, moving cues within a Playlist had unpredictable results because we didn’t ‘Move Cue State’. -
Page 54: Double Tap To Set Intensity
Pan and Tilt. If your lights don’t move while they’re one, the automatic Move In Black feature of Cognito will set up your lights for you and you many never find the need for this new feature. But, sometimes when you write cues and the lights do move from Point A to Point B, again, there will be two ways of getting there. -
Page 55: Fanning
Fanning When you have a large rig of lights you often want to see them work with each other to create large, bold looks. Selecting lights individually and setting attributes manually, one by one, can be a tedious task. The new tools available in CONTROL WHEELS, available for all attribute families, makes setting attributes en masse a breeze. -
Page 56: Indented Follow Cues
‘Boy’ cue, but you don’t press GO for the ‘Girl’ cue; it will happen on its own. PLAY Task Overhaul Earlier versions of Cognito showed you up to ten different Playlists in the green L.Playback toolbar (above the main task bar). To change Playlists on the Playback, you’d just select a new Playlist from the toolbar. - Page 57 pressing the Go button. If it were a chase (see Options below), the Go icon would be replaced with the appropriate chase icon: Transport The default tool for Playbacks is Transport. In the image above, we are looking at the Left Playback, so the cues appear on the left-hand-side where the Transport controls appear on the right.
- Page 58 Is Chase - This is a huge new feature in this release of Cognito. Prior to Chases, if you wanted looping effects you would have to write a series of cues, then one by one change the Follow Properties and then manually link the last cue to the first.
- Page 59 If you don’t use MIDI, leaving this option on does not hurt anything. Timecode This is a very big new feature for Cognito that allows Playlists to run automatically, synchronized to a Timecode clock, either an internal one or an external source like a media player.
- Page 60 frame or two, until you get the timing perfect. It’s a good idea to turn Learn TC off when you’re ready to run your show automatically from timecode. Start - Press this button to start the timecode running from the current time shown above.
- Page 61 Rate As mentioned above, cue timing is irrelevant when a Playlist is a chase. Each cue is now a step in the chase and a beat clock will advance from one step to the next automatically without the need for setting the Follow properties in each cue. Rate - The rate is measured in Beats Per Minute (BPM).
- Page 62 Direction - The bottom four buttons change the direction of the chase, either Forward (top down), Reverse (bottom up), Bounce (down then up then down again) or Random. Only one of these options can be selected at any one time. Remember, there is no need to assign Links to any cues.
-
Page 63: Native Hsi Dmx Mapping
Native HSI DMX Mapping Although Cognito’s Natural Language Control has always allowed you to mix colors in multiple color spaces (CMY, RGB, HSV), it has only been able to drive either RGB or CMY lights on the DMX wire. Some manufacturers have defined fixture profiles that expect to see Hue and Saturation in DMX slots. - Page 64 ● Confirmation required when overwriting a Memory with REC BUMP or using the REC task. ● Effects on Memories don’t flash base values (single DMX frame) before starting effects. ● After recording a Library, all Captured Lights have new Library applied so subsequent recording of cues or memories reference Library.
Need help?
Do you have a question about the Cognito and is the answer not in the manual?
Questions and answers