Table of Contents

Related Manuals for OilQuick OQ 70/55

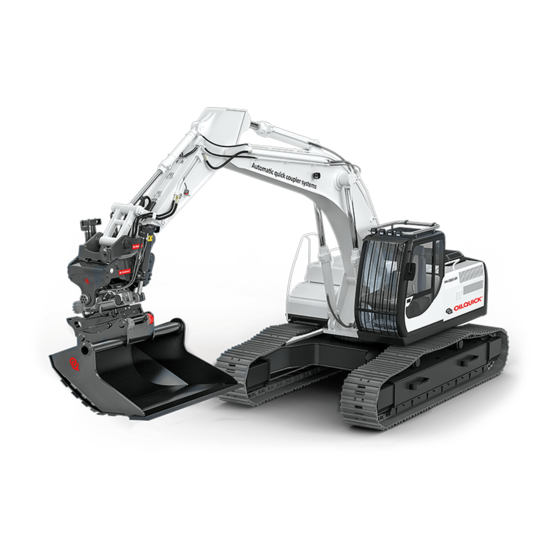
Summary of Contents for OilQuick OQ 70/55
- Page 1 OPERATING MANUAL AND FITTING INSTRUCTIONS OilQuick quick coupler with automatic hydraulic connection for excavators OQ 70/55 and 80 Please read the instructions carefully before using the quick coupler. Specifications subject to change without notice.
-
Page 2: Dear Customer
Dear Customer, We congratulate you on your purchase of an OilQuick quick coupler system. OilQuick is the most advanced quick coupler system for excavators and can be supplied in various models for machines from 1 to 120 tons. The modular OilQuick system is available as a standard hydraulic hitch or also with OilQuick function, which allows hydraulic attachments to be connected or disconnected automatically from inside the cab. -
Page 3: Registration Card For Product Warranty
Registration card for product warranty The warranty is only valid if your new OilQuick product is installed correctly on the excavator and attachment. Completing and sending in the registration card to OilQuick AB registers you as the warranty holder for this product. -
Page 5: Contents
Declaration of Conformity The company OilQuick AB Box 1055 SE-824 12 Hudiksvall SWEDEN hereby certifies that the quick coupler system Designation Quick Coupler Type Serial no. Year of manufacture Weight conforms to the requirements of Machinery Directive 2006/42/EC and the applicable regulations in... -
Page 6: Table Of Contents
Contents Dear Customer Introduction Registration card for product warranty Contents Declaration of Conformity OilQuick quick coupler system components Coupler part H-cylinder Attachment frame for mechanical tools Attachment frame for hydraulic tools V-90 electric coupling (option) 1/2" electric coupling (option) Locking hydraulic kit (option) Quick coupler functionality H-cylinder –... - Page 7 Checking the attachment frame 21-22 Starting and stopping the excavator for maintenance work Inspection and maintenance 13.1 Daily inspection 13.1.1 At the start of the working day 13.1.2 At the end of the working day 13.2 Monthly inspection Maintenance of quick couplers on H-cylinders 14.1 Replacing the nose seal in the female connector 14.2...
-
Page 8: Oilquick Quick Coupler System Components
OilQuick quick coupler system components The following section describes the various components in the OilQuick quick coupler system. Quick coupler body Coupler body For attaching to the excavator arm For attaching to the linkage Fingers H-cylinder H-cylinder Cylinder holder Hydraulic hoses for locking and unlocking... -
Page 9: Attachment Frame For Hydraulic Tools
Alarm Electric selector valve, 4/2 Cable set Electric connection Use this kit when a hydraulic lock has not yet been installed on the machine or OilQuick's requirements for hydraulic locking has not been met (see section 3). Version 1.1 2011-06-28... -
Page 10: Quick Coupler Functionality
The hydraulic quick couplers are located in the middle of the H-cylinder between the locking plungers. Models OQ 70/55 and OQ 80 can be fitted with two 1/2", two 3/4" and two 1" quick couplings. A dirt guard (5) prevents the quick couplers from becoming dirty. It is opened automatically when the H-cylinder is at the front position (4:1) and closed automatically at the H-cylinder's rear position (4:2). -
Page 11: H-Cylinder - Function And Requirements
In today's excavators, both the pressure and the oil flow from the machine's hydraulic pump (5) change in relation to the excavator load. Unlike many other systems, the OilQuick quick coupler system operates at the excavator's maximum working pressure. This is necessary to ensure that the coupler part is securely locked to the attachment frame on the tool with no play. -
Page 12: Technical Data
If the excavator is fitted with a 1/2" electric coupling, it replaces hydraulic coupling no. 1. The couplings fitted may vary and depend on the excavator's hydraulic system and what attachments are to be used. For further details, please contact your nearest OilQuick dealer. Version 1.1 2011-06-28... -
Page 13: Attachment Frame For Mechanical Tools Without Coupling Ramp
Weight (kg) OilQuick attachment frames for mechanical tools follow S-standard and can also be used together with other quick couplers which follow the same S-standard (N.B This operating manual is only valid for OilQuick quick couplers). 4.3.2 Attachment frame for hydraulic tools with coupling ramp... -
Page 14: Quick Coupler Installation
Quick coupler installation When installing the OilQuick quick coupler system, the following requirements must be met: The coupler part design must be suitable for the excavator's arm, linkage and geometry. The bolts connecting the excavator arm and linkage must be appropriate and mounted securely. -
Page 15: Hydraulic System Installation
First just try placing the hose holders and check the length of the hoses. It is important for you to check the hose routing when the linkage is at both end positions (see illustrations below). Hose holders are available in various designs for different installation configurations. Our nearest OilQuick dealer will be happy to help you select a suitable product. -
Page 16: Coupling An Attachment
Coupling an attachment In the descriptions regarding handling of the quick coupler, we have assumed that an OilQuick locking hydraulic kit is installed. If this is not the case, proceed as described in your excavator manual when using the quick coupler. -
Page 17: Checking Hydraulic Tools
Move the tilt cylinder in until the quick coupler is at an angle of 30-45 degrees to the attachment frame on the tool (see illustration below). Hook the fingers at the front of the quick coupler onto the front attachment frame pin. ... -
Page 18: Lock Test For Mechanical Tools
Setting down a tool In the descriptions regarding handling of the quick coupler, we have assumed that an OilQuick locking hydraulics kit is installed. If this is not the case, proceed as described in your excavator manual when using the quick coupler. - Page 19 Procedure for setting down an attachment: Lock function Make sure that everyone is clear of the excavator's working area. Raise the attachment. Move the tilt cylinder out until the attachment hangs The warning light on the from the front pin and the rear pin presses against the lock switch is on and an coupler part (see illustration below).
-
Page 20: Using The Hoisting Hook
10. Using the hoisting hook The OilQuick coupler part is fitted with a safety hook for lifting work on site. The maximum load capacity is affected by two factors: 1. The hoisting hook's maximum load capacity. See marking on the hook or details on this page. -
Page 21: Checking The Attachment Frame
11. Checking the attachment frame If the OilQuick quick coupler system is to function properly, it is important for the attachment frames to be of high quality and the hydraulic parts to be installed correctly. You therefore have to ensure in particular that the hydraulic coupling connectors are plugged into the attachment frame correctly. -
Page 22: Starting And Stopping The Excavator For Maintenance Work
Simple measurements can also be taken with a caliper. The measurements to be taken are listed below. OQ 70/55 OQ 80 Distance (A): 1/2” 284 mm 332 mm Distance (A): 3/4” 290 mm 338 mm Distance (A): 1“ 290 mm 338 mm The hydraulic hose fittings have O-ring face seals (ORFS). -
Page 23: Inspection And Maintenance
13. Inspection and maintenance The OilQuick quick coupler system must undergo regular inspection and maintenance to ensure that it works properly and reliably. 13.1 Daily inspection N,B! When re-assembling bolted joints (NORD-LOCK), safety washers have to be installed in pairs, cam face to cam face (see illustration). -
Page 24: Maintenance Of Quick Couplers On H-Cylinders
14. Maintenance of quick couplings on H-cylinders The quick couplings for connecting an attachment to the excavator are subject to wear and aging. When they are no longer tight, they must be repaired or replaced. If there is a leak while you are using an attachment, the seal is probably defective and has to be replaced (see instructions for 14.1). -
Page 25: Replacing Quick Couplers Secured With Circlips
14.2 Replacing quick couplings secured with circlips Procedure: Stop the excavator and depressurize the hydraulic system. Disconnect the hydraulic hose (2) from the quick coupling (1). Unscrew the dirt guard (3). Unscrew the guide plate (4). Remove the circlip (5) for the coupling, which is now accessible. -
Page 26: Replacing Quick Couplers Secured With Nose Nuts
14.3 Replacing quick couplings secured with nose nuts Description of the parts: Angle connector Quick coupling Nose nut Assembly tool Torque wrench Procedure: Stop the excavator and depressurize the hydraulic system. Disconnect the hydraulic hose from the angle connector (1). ... -
Page 27: Troubleshooting
The quick coupler cannot be One of the two pilot-controlled check unlocked valves on the H-cylinder is defective and Contact OilQuick customer does not open. service. Pressure control valve is defective. Replace the seal as described in The seal is missing or defective. -
Page 28: Plates And Stickers
16. Plates and stickers Identification plate Warning sign, crush hazard Information stickers These information stickers should be applied clearly visible inside the cab. Version 1.1 2011-06-28... -
Page 29: Terms Of Warranty
OQAB. 17.7 The warranty is not valid if the OilQuick has been rebuilt or modified without the written approval of OQAB. No reimbursement will be made for parts purchased elsewhere. Parts delivered after the expiration date of the warranty period are covered by a 3-month... - Page 30 Notes Version 1.1 2011-06-28...
- Page 31 Notes Version 1.1 2011-06-28...
- Page 32 Dealer: OilQuick AB, Box 1055, 824 12 Hudiksvall, Sweden Tel: +46 650 153 40 Fax: +46 650 148 84 E-mail: information@oilquick.com www.oilquick.com Art nr: 7412213...
Need help?
Do you have a question about the OQ 70/55 and is the answer not in the manual?
Questions and answers