Advertisement
Advertisement

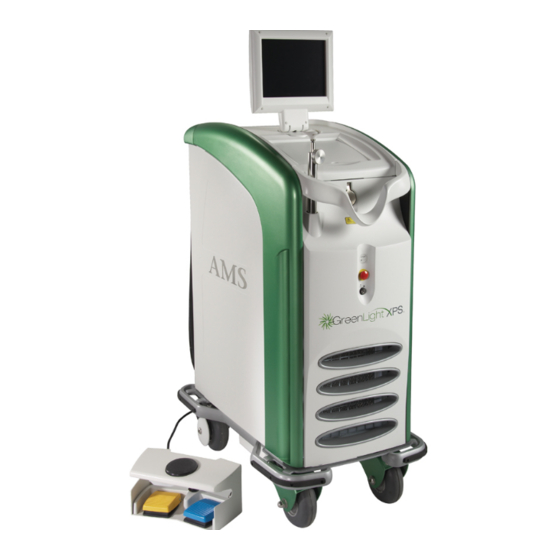
Related Manuals for AMS GreenLight XPS


Summary of Contents for AMS GreenLight XPS
- Page 1 Service Manual...
- Page 2 AMS further assumes no liability for patient treatment or outcome or for physician’s negligence, breach of duty of care, or malpractice. In no way does this or any of AMS’ policies, procedures, training materials, guidelines, or instructions create an obligation for AMS to perform any services. Products and services may be purchased from AMS.
- Page 3 Who Should Read This Manual? All users of the GreenLight XPS system should read this manual thoroughly before attempting any repair. Pay particular attention to all warnings, contraindications, and precautions noted in this manual and other related materials. Failure to do so may result in harm to a patient or the user of the system.
-
Page 4: Table Of Contents
Components of a Safe Laser Program 1-11 Electrical Hazards 1-11 Skin Hazards 1-11 DOCUMENTATION 1-11 Section Two System Specifications SPECIFICATIONS SPACE REQUIREMENTS Positioning the Laser Console ELECTRICAL REQUIREMENTS ENVIRONMENTAL REQUIREMENTS Copyright 2009, AMS, Proprietary Information, All Rights Reserved P/N 0010-0667, Rev A... - Page 5 Pump and Motor COMPONENT REPLACEMENT Section Five Electronic Components SYSTEM PC BOARD DESCRIPTIONS Fiber Port FiberLife Resonator Control Touch Screen Controller Laser Power Supply Master Control Power Distribution COMPONENT REPLACEMENT Copyright 2009, AMS, Proprietary Information, All Rights Reserved P/N 0010-0667, Rev A...
- Page 6 Removing the existing Resonator Installation of new Resonator Section Seven Preventive Maintenance COMPONENTS PM PROCEDURE Section Eight Troubleshooting COURTESY MESSAGES COMMON FAULT MESSAGES Section Nine Appendix BLOCK DIAGRAM DRAIN PROCEDURE Copyright 2009, AMS, Proprietary Information, All Rights Reserved P/N 0010-0667, Rev A...
-
Page 7: Eye Injury
If undetected, this condition will result in a burn or ignition of flammable materials. Copyright 2009, AMS, Proprietary Information, All Rights Reserved P/N 0010-0067, Rev A... -
Page 8: Reflection
Always disconnect the laser by grasping the plug and not the power cord. Examine the electrical cord routinely; if signs of wear are noted, contact AMS to have it repaired or replaced. Operating Room Environment This section describes specific safety measures for the operating room to aid in the safe operation of the Laser System. - Page 9 – EVITAR EXPOSIÇÃO DOS OLHOS E DA PELE À RADIAÇÃO DIRETA OU REFLETIDA - PRODUTO LASER CLASSE 4- TO EN60825-1:2007 Laser em uso 635±10nm 5mW MAX. CW 532nm 180W MAX. CW Copyright 2009, AMS, Proprietary Information, All Rights Reserved P/N 0010-0067, Rev A...
-
Page 10: Remote Door Interlock
The safety features of the Laser System are described in the following list. All required labeling information is also provided in this section. 1.1.1.1.1.1 SYSTEM SAFETY FEATURES The GreenLight XPS Laser System incorporates the following safety features: The laser will stop firing when the pressure is removed from either footswitch. - Page 11 Do not attempt to remove any panel from the laser console. All panels are fitted with tamper-proof fastenings. Any attempt to remove the panels, unless instructed by authorized AMS personnel, can damage the laser and will void the manufacturer’s warranty.
-
Page 12: Console Labeling
Figures 3-2 and 3-3 show the location of all labels on the laser unit. The actual labels used in these locations are also shown. Figure 3-2 Emergency Off (International) Copyright 2009, AMS, Proprietary Information, All Rights Reserved P/N 0010-0067, Rev A... - Page 13 Section 1 Safety Certification Label Laser Warning Logo Service, Foot Pedal, Remote Interlock, Fill Label Power Cord Grounding Label Circuit Breaker Figure 3-3: Labeling of Rear Panel of Laser System Copyright 2009, AMS, Proprietary Information, All Rights Reserved P/N 0010-0067, Rev A...
-
Page 14: System Specifications
50 F (10 C) 104 F (40 C) Temperature Humidity 10% - 90%, non-condensing Width: less than 22 inches Dimensions Depth: less than 36 inches Height: less than 58 inches Weight Less than 475 pounds Copyright 2009, AMS, Proprietary Information, All Rights Reserved P/N 0010-0667, Rev A... -
Page 15: Electrical Requirements
The laser can function when some voltage change is present in the service line, however the voltage may not vary by more than ± 10%. Recommended receptacle and plug: Receptacle: Nema Configuration: L6-30R. The plug sent with the machine is the Hubbell twist lock plug: HBL2621 AMS PN 2120-0028. Note... -
Page 16: Remote Interlock
If the system shuts off, it is due to the low water pressure in the water pump. Turn the key OFF and repeat the above steps. Please contact AMS customer Care at (800) 356- 7600 for any other errors displayed. -
Page 17: Electrical Service Requirements
Safety glasses must be worn for the following power checks. Attach a 600 micron fiber (flat cut). Direct the distal end of fiber into an AMS approved, calibrated power meter. Measure actual power displayed vs. power delivered per the following chart in applications mode. - Page 18 The weight of the laser system is less than 477 pounds (215 kg) and suitable transportation devices are required as well as the use of a Tail Lift Truck and/or Pallet Truck Copyright 2009, AMS, Proprietary Information, All Rights Reserved P/N 0010-0667 Rev A...
-
Page 19: Cooling System
Fill and Drain Ports: The fill and drain port is used to fill and drain the laser’s internal cooling system. Fan: The fan speed is constant and controlled by the chiller. Copyright 2009, AMS, Proprietary Information, All Rights Reserved P/N 0010-0067, Rev A... -
Page 20: Pump And Motor
Connect the flow meter to the flow gauge. Place the knob on the flow valve. ADD WATER Turn the system on. Verify the chiller set point in Service Mode. Copyright 2009, AMS, Proprietary Information, All Rights Reserved P/N 0010-0067, Rev A... - Page 21 Turn the system off and reattach the hoses to the flow gauge. Reconnect interlock cable to diode power supply. Check all quick disconnects for leaking. Copyright 2009, AMS, Proprietary Information, All Rights Reserved P/N 0010-0067, Rev A...
-
Page 22: Electronic Components
It interfaces passively with the Resonator Control Board. FiberLife Board The GreenLight XPS Laser System is equipped with the FiberLife feature. FiberLife continuously monitors the temperature of the tip of the fiber and momentarily stops the laser emission when an over-temperature condition occurs. -
Page 23: Laser Power Supply
Remove the screws and carefully lift up and out. Install: Set the PDB in place and secure the mounting screws. Reconnect the cables Reinstall the four resonator plate screws Copyright 2009, AMS, Proprietary Information, All Rights Reserved P/N 0010-0667, Rev A... -
Page 24: 24 Volt Power Supply
Slide new q-switch driver into place. Secure the two screws at the front of the q-switch driver. Route cable J1000 to the master control board. Copyright 2009, AMS, Proprietary Information, All Rights Reserved P/N 0010-0667, Rev A... -
Page 25: Fuse Replacenment
F230 SLO BLO SLO BLO SLO BLO 250V 20A 250V 10A 250V 500ma F260 LPS (2EA) SLO BLO SLO BLO 250V 20A 250V 20A LAMP POWER SUPPLY ONLY Copyright 2009, AMS, Proprietary Information, All Rights Reserved P/N 0010-0667, Rev A... -
Page 26: Resonator Peplacemnt
Plug in the Diode power supply bus wires. Follow procedure outlined above for the removal of the bus wires in reverse. Plug in the Q-switch and detector cables. Copyright 2009, AMS, Proprietary Information, All Rights Reserved P/N 0010-0667, Rev A... - Page 27 Connect your 600 micron test fiber. Take powers per AMS Service report. Carefully pack-up defective sealed resonator in shipping box and send back to AMS. Copyright 2009, AMS, Proprietary Information, All Rights Reserved P/N 0010-0667, Rev A...
-
Page 28: Section Seven Preventive Maintenance
System status is checked and documented in the AMS Service report before performing the PM. De-ionizer (DI) filter, particle filter, desiccant pack, coolant, and calibration are changed during the PM. - Page 29 Can be calibrated at regular intervals against the Laser power or Laser energy actually emitted on the working area. Attach a 600 micron fiber (flat cut). Direct the distal end of fiber into an AMS approved, calibrated power meter.
- Page 30 Quick Change 5400-0295 each Solderless" RF Connectors #4240- Yearly sales@talleycom.com 0133-4471/50 Flow Meter Model S- 111 European Yearly 0133-4470/60 Flow Meter Model S- 111 Domestic 110V Yearly Copyright 2009, AMS, Proprietary Information, All Rights Reserved P/N 0010-0667 , Rev A...
-
Page 31: Courtesy Messages
Customer Care. Release Footswitch Operator should reposition his or her foot so as to contact only one footswitch. Only one footswitch may be pressed at a time. Copyright 2009, AMS, Proprietary Information, All Rights Reserved P/N 0010-0667, Rev. A... - Page 32 Usually this is due to a dirty or Please clean and inspect fiber tip damaged fiber. If the problem persists after cleaning or if the fiber is damaged, replace Copyright 2009, AMS, Proprietary Information, All Rights Reserved P/N 0010-0667, Rev. A...
- Page 33 If the procedure requires treatment beyond the limit, use a new fiber. Double check the footswitch connector: reattach and/or tighten connection. If Check Footswitch Connection problem persists, contact the Customer Care Center. Copyright 2009, AMS, Proprietary Information, All Rights Reserved P/N 0010-0667, Rev. A...
- Page 34 The system can be reset if you see the message “Press Here to Continue”. If the system cannot reset itself, then it will require servicing before it can be used again. Copyright 2009, AMS, Proprietary Information, All Rights Reserved P/N 0010-0667, Rev. A...
-
Page 35: Appendix
HPS & XPS Laser System. Allow the system to gravity drain in to a floor drain or equivalent container so as not to spill water in the surrounding area. Copyright 2009, AMS, Proprietary Information, All Rights Reserved P/N 0010-0667, Rev A... - Page 36 Cut Ty-wraps that are securing the particle filter and flow switch assemblies to allow easier manipulation during this process. See Fig. 4 & Fig. 5 Copyright 2009, AMS, Proprietary Information, All Rights Reserved P/N 0010-0667, Rev A...
- Page 37 7.4 Disconnect the cooling hoses coming from the resonator and chassis components which attach to the Particle Filter Assembly and the Flow Switch Assembly, watch for excess water from the connectors upon removal. See Fig. 7 Copyright 2009, AMS, Proprietary Information, All Rights Reserved P/N 0010-0667, Rev A...
- Page 38 See Fig. 8 & Fig. 9 Copyright 2009, AMS, Proprietary Information, All Rights Reserved P/N 0010-0667, Rev A...
- Page 39 Section Appendix Figure 8 Figure 9 Remove the resonator hoses out of the way for the next step. See Fig. 10 Copyright 2009, AMS, Proprietary Information, All Rights Reserved P/N 0010-0667, Rev A...
- Page 40 Lydall Chiller only. The Lytron flow switch is of a flow through design and following the proper steps outlined here will effectively evacuate the Lytron Chiller Module. See Fig. 11, Fig. 12 & Fig. 13 Copyright 2009, AMS, Proprietary Information, All Rights Reserved P/N 0010-0667, Rev A...
- Page 41 Tilt the particle filter assembly toward the ground during this portion. Pump the ball pump until the particle filter assembly is fully evacuated. See Fig. 14 Copyright 2009, AMS, Proprietary Information, All Rights Reserved P/N 0010-0667, Rev A...
- Page 42 & Fig. 17 for correct routing and ty-wrap placements reinstall the QD lock for the flow switch connector after securing it with the ty-wrap. Figure 15 Figure 16 Copyright 2009, AMS, Proprietary Information, All Rights Reserved P/N 0010-0667, Rev A...
- Page 43 Close all access covers and tighten the (3) thumb screws, then close and tighten the external molded covers. Put system in the shipping container for return shipment. See Fig. 18 & Fig. 19 Copyright 2009, AMS, Proprietary Information, All Rights Reserved P/N 0010-0667, Rev A...
- Page 44 Section Appendix Figure 18 Figure 19 9-10 Copyright 2009, AMS, Proprietary Information, All Rights Reserved P/N 0010-0667, Rev A...
- Page 45 Section Appendix 9-11 Copyright 2009, AMS, Proprietary Information, All Rights Reserved P/N 0010-0667, Rev A...
Need help?
Do you have a question about the GreenLight XPS and is the answer not in the manual?
Questions and answers