Advertisement
Crua Tri (TT3) - Pitching Instructions
The contents of the tent come in one bag
1. The outer tent and stakes
2. The inner tent
3. The outer tent poles
Remove the contents from the bag.
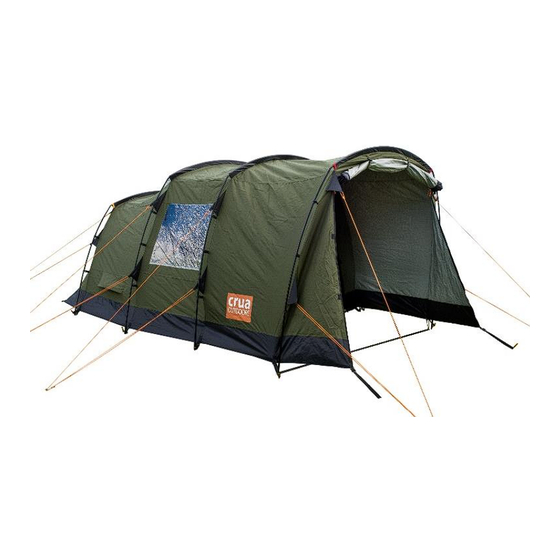
Erect the outer tent first
Step 1:
• Lay out the outer tent and stake down the corners (green flysheet facing up)
(Fig. 1)
Fig. 1
1
Advertisement
Table of Contents

Summary of Contents for Crua Outdoors Tri TT3
- Page 1 Crua Tri (TT3) - Pitching Instructions The contents of the tent come in one bag 1. The outer tent and stakes 2. The inner tent 3. The outer tent poles Remove the contents from the bag. Erect the outer tent first Step 1: •...
- Page 2 Step 2: Tent pole construction • Connect the tent poles together using the shock chord system, note keep side poles and top poles separate to ease the process. (Fig. 2A) • The poles are colour coded consisting of red, yellow and black (Fig.
- Page 3 Step 3: • Insert silver buckle (attached to the groundsheet) into the bottom of the side poles, ensuring to do one side entirely before moving to the other side (Fig. 3A) • It’s important to pull the floor and flysheet into position before inserting second side of clips •...
- Page 4 Step 4 • When the tent is spread evenly across the surface proceed to stake down the front and side guy-lines, also stake the bottom of the poles once they are in place. Tighten the rear guy-lines as required (Fig. 4A) •...
- Page 5 Step 5: Inner Tent Construction • Remove the insulated tent materials from the bag. • Lay out the inner tent inside the outer tent and clip into place using the buckles along the ground of the sleeping area (Fig. 5A) •...
- Page 6 Step 6: Taking down the tent • Start off by removing the inner tent before taking down the tent poles and removing the stakes from the ground. • Fold the tent upon itself so each pole is resting on top of one another, remove pins from the bottom of each pole and place the poles back into the appropriate bag.
Need help?
Do you have a question about the Tri TT3 and is the answer not in the manual?
Questions and answers