Hach FL900 Series User Manual
Flow logger
Hide thumbs
Also See for FL900 Series:
- User instructions (7 pages) ,
- Basic user manual (256 pages) ,
- Basic user manual (106 pages)
Table of Contents
Advertisement
Advertisement
Table of Contents
Troubleshooting

Subscribe to Our Youtube Channel
Related Manuals for Hach FL900 Series

Summary of Contents for Hach FL900 Series
- Page 1 DOC026.53.80015 FL900 Series Flow Logger 06/2018, Edition 9 User Manual...
-
Page 3: Table Of Contents
Table of Contents Specifications ......................3 General information ....................4 Safety information ......................4 Use of hazard information ..................4 Precautionary labels ..................... 5 Confined space precautions ................. 5 Certification ........................5 Wireless modem certification ..................6 Cellular devices ......................6 Product overview ...................... - Page 4 Table of Contents Communication failure ....................24 Replacement parts and accessories ............... 25...
-
Page 5: Specifications
Specifications Specifications are subject to change without notice. Specification Details Dimensions (W x D x H) 25.4 x 22 x 40 cm (10.0 x 8.7 x 16.0 in.) Enclosure PC/ABS structural foam Environmental rating NEMA 6P/IP68 (24 hours at 1.8 m (6 ft) submersion) Weight (model FL900) 4.5 kg (10 lb) with no batteries, 6.3 kg (14 lb) with 2 batteries and 8.2 kg (18 lb) with 4 batteries... -
Page 6: General Information
Flo-Dar, Flo-Dar with SVS, Flo-Tote, Rain Gauge, Ultrasonic, Submerged Area Velocity , Sigma 950 Sampler interface Compatible with Sigma 900 Standard, Sigma 900 Max, Hach SD900 and AS950 to support set point sampling, flow-pacing and sample history logging Certifications Logger: CE Optional AC power supply: UL/CSA standards (cETLus)/CE Modems: FCC, IC, others may be available—contact the manufacturer for more... -
Page 7: Precautionary Labels
Precautionary labels Read all labels and tags attached to the instrument. Personal injury or damage to the instrument could occur if not observed. A symbol on the instrument is referenced in the manual with a precautionary statement. This is the safety alert symbol. Obey all safety messages that follow this symbol to avoid potential injury. -
Page 8: Wireless Modem Certification
Supporting test records reside with the manufacturer. This Class A digital apparatus meets all requirements of the Canadian Interference-Causing Equipment Regulations: CAN ICES-3(A)/NMB-3(A). Cet appareil numérique de classe A répond à toutes les exigences de la réglementation canadienne sur les équipements provoquant des interférences. FCC Part 15, Class "A"... - Page 9 W A R N I N G Pacemaker precautions. If electromagnetic interference (EMI) occurs, it can either: • Stop the stimulating pulses from the pacemaker that control the rhythm of the heart. • Cause the pacemaker to supply the pulses irregularly. •...
-
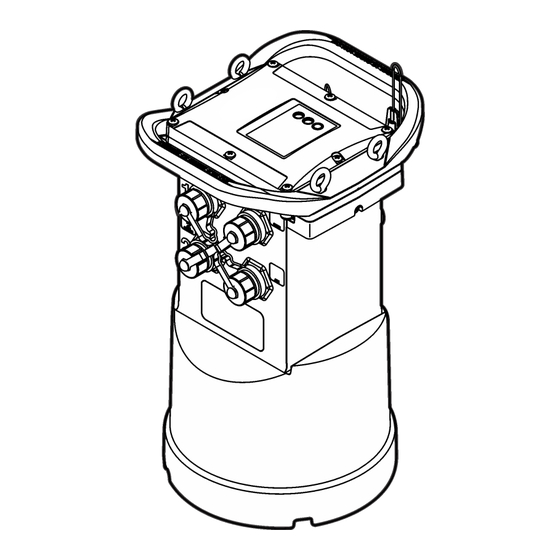
Page 10: Product Overview
Product overview The FL900 series flow loggers are used in open-channel flow monitoring studies such as inflow & infiltration (I&I), combined sewer overflow (CSO), capacity and planning and storm water runoff monitoring. Data is collected from attached sensors and logged for future retrieval. The sensors can be added or changed in the field. -
Page 11: Product Components
Product components If any items are missing or damaged, contact the manufacturer or a sales representative immediately. Apply power to the Logger Install the batteries W A R N I N G Explosion hazard. Incorrect battery installation can cause the release of explosive gases. Be sure that the batteries are of the same approved chemical type and are inserted in the correct orientation. - Page 12 10 English...
-
Page 13: Attach An External Power Supply (Optional)
Attach an external power supply (optional) W A R N I N G Potential explosion hazard. The instrument is not approved for use in hazardous locations. The instrument can be powered by an external long-life battery, an AS950 power supply or other source that can supply power in the specified range (refer to Specifications on page 3 and... -
Page 14: System Startup
USB driver for the logger. When finished, the message “Your new hardware is installed and ready to use” is shown. In the event the wizard does not run or the install fails, contact Hach Flow Tech Support to assist with trouble shooting your specific operating system. -
Page 15: Attach An External Module
Attach a sampler The logger can attach to a Sigma 900 Standard, Sigma 900 Max, Hach SD900 or Hach AS950 sampler for flow-paced and set point sampling. Connect the AUX port on the logger to the... -
Page 16: User Interface
auxiliary port on the sampler using a full auxiliary cable. If it is necessary to externally power the logger while connected to an AS950 sampler, use the power input aux cable assembly. To make a sampler program, refer to the documentation supplied with the sampler. User interface The indicators on the user interface show the status of the instrument and the modem. - Page 17 N O T I C E Network and access point security is the sole responsibility of the customer using the wireless instrument. The manufacturer will not be liable for any indirect, special, incidental or consequential damages caused by a breach in network security.
-
Page 18: Install A Sim Card
Install a SIM card N O T I C E Potential Instrument Damage. Delicate internal electronic components can be damaged by static electricity, resulting in degraded performance or eventual failure. N O T I C E The instrument enclosure can break if the cover screws are over-tightened. Tighten the cover screws by hand with a maximum torque of 2.0 Nm (20 in./lb). -
Page 19: Attach An Antenna (Wireless Option)
Attach an antenna (wireless option) C A U T I O N Electromagnetic radiation hazard. Make sure that the antenna is kept at a minimum distance of 20 cm (7.9 in.) from all personnel in normal use. The antenna cannot be co-located or operated in conjunction with any other antenna or transmitters. -
Page 20: Add The Logger To The Fsdata Server
N O T I C E Be sure to enter the serial number and SVC correctly to prevent communication failure. 1. Go to the website http://fsdata.hach.com to access the FSDATA server. 2. Enter the user name and password: • User name—the default user name is the 8-digit customer ID number •... -
Page 21: Verify The Telemetry (Wireless Option)
Option Description LAT3 4G Select the network provider and enter the user name and password, if applicable. Primary Call Interval The frequency that the logger calls the server. Secondary call interval The frequency that the logger calls the server during an alarm condition. Server Verification Code The code that specifies which account on the FSDATA server the logger belongs to. -
Page 22: Verify The Telemetry With Fsdata Desktop
• Make sure the SVC is correct. • Make sure the serial number is registered and active on the host server. • Make sure the modem is enabled and the Hach IP address has been correctly entered. • If the problem persists, contact technical support. -
Page 23: Calibrate The Sensor With The Cal Wizard
visit to change the batteries and prevent lost data. If the logger contains a port for a rain gauge, the Rain channel is also shown. To include a Logger channel in the datalog, select the check box next to the channel name. b. -
Page 24: Site Installation
4. Select the options on each screen. When the Calibration Complete screen is shown, click FINISH. 5. Click WRITE TO LOGGER to save the settings. A message window is shown: Option Description Warning: all data All data that is stored in the logger is erased when a program is written to the logger. will be lost, To save the data, select No and download the data to a safe location. -
Page 25: Install On A Wall Bracket
Figure 13 Hang the logger from a cable Install on a wall bracket The logger can be attached to a wall, pole or ladder. Refer to the documents that are supplied with the hardware for installation instructions. Maintenance W A R N I N G Multiple hazards. -
Page 26: Replace The Batteries
Replace the batteries Replace the batteries with the same type and rating. Refer to Install the batteries on page 9 and Specifications on page 3. Replace the desiccant The desiccant is located in the battery compartment. To remove the battery cover, refer to Install the batteries on page 9. - Page 27 Replacement parts and accessories Note: Product and Article numbers may vary for some selling regions. Contact the appropriate distributor or refer to the company website for contact information. Replacement parts Description Item no. Battery compartment cover 8524400 Battery compartment cover, O-ring 8533400 Desiccant cap assembly (battery compartment desiccant) 8754900...
- Page 28 Antennas (continued) Description Item no. Burial, 3G/4G LTE, 3 m (9.8 ft) cable, 3 dBi 8624200 Manhole Lid, 3G/4G LTE, 3 m (9.8 ft) cable, 3 dBi 8624400 Auxiliary/Sampler cables Description Item no. Cable, auxiliary, multi-purpose half, 7 pin, 2.7 m (9 ft) 8528500 Cable, auxiliary, multi-purpose half, 7 pin, 7.6 m (25 ft) 8528501...
- Page 30 *DOC026.53.80015* HACH COMPANY World Headquarters P.O. Box 389, Loveland, CO 80539-0389 U.S.A. Tel. (970) 669-3050 (800) 368-2723 (U.S.A. only) U.S.A. – orders@hach.com International – intlsupport@hach.com flowtechsupport@hach.com www.hachflow.com © Hach Company/Hach Lange GmbH, 2013–2014, 2016, 2018. All rights reserved.
Need help?
Do you have a question about the FL900 Series and is the answer not in the manual?
Questions and answers