Advertisement
WATERSKI
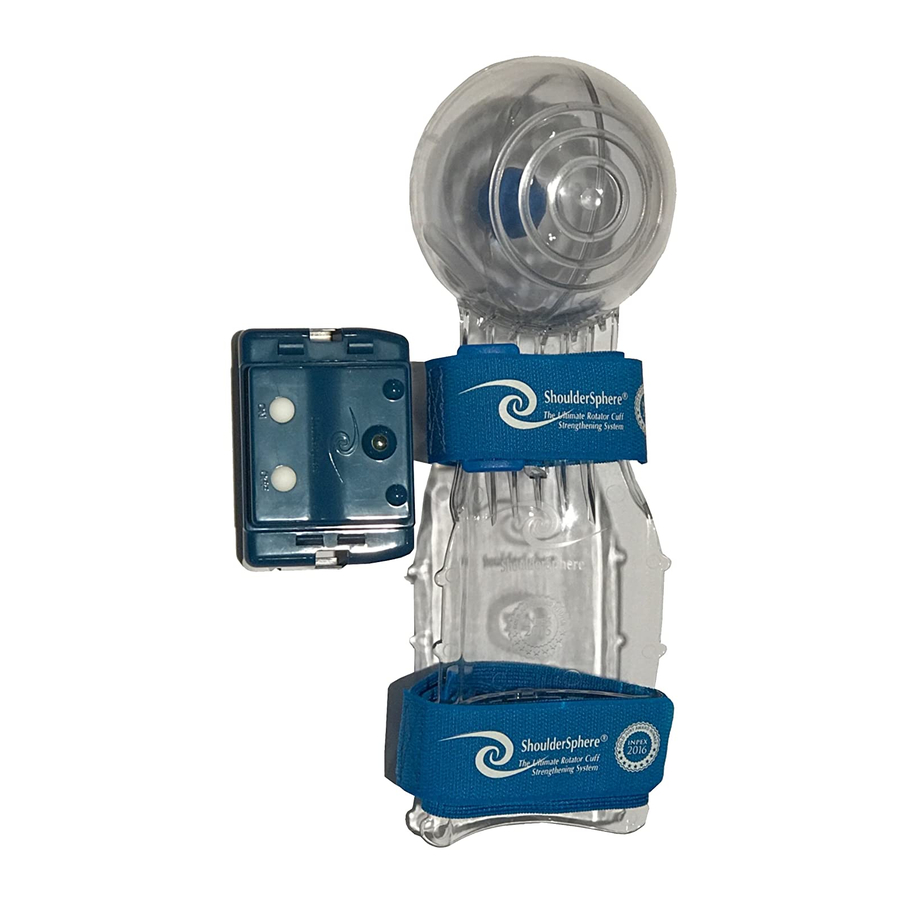
ShoulderSphere® Instructions for Use
Correct position: ensure your wrist is relaxed and has complete contact against the plastic
splint while being securely strapped in by the elastic strap. Relatively tight engagement is
necessary in order to optimize the rotator cuff workout. Make sure there is no wiggle room
between your wrist and the splint. This also avoids undue stress against the plastic splint,
which may cause breakage.
The easiest way of putting on the ShoulderSphere® is to place it on top of your hand --
PALM facing UP - and gently cradle it, making sure that the strap is wrapped securely,
particularly the part at wrist level.
Incorrect position: note in the image below how the wrist is tense and flexed against the
splint. There is a large gap between the splint and the wrist, which creates undue three-
point contact stress against the plastic splint. This will break the plastic splint. There
should be no wiggle room in-between the skin and the plastic splint. Incorrect posture
prevents an optimal rotator cuff workout.
Advertisement
Table of Contents

Related Manuals for ShoulderSphere ShoulderSphere

Summary of Contents for ShoulderSphere ShoulderSphere
- Page 1 WATERSKI ShoulderSphere® Instructions for Use Correct position: ensure your wrist is relaxed and has complete contact against the plastic splint while being securely strapped in by the elastic strap. Relatively tight engagement is necessary in order to optimize the rotator cuff workout. Make sure there is no wiggle room between your wrist and the splint. This also avoids undue stress against the plastic splint, which may cause breakage. The easiest way of putting on the ShoulderSphere® is to place it on top of your hand -- PALM facing UP - and gently cradle it, making sure that the strap is wrapped securely, particularly the part at wrist level. Incorrect position: note in the image below how the wrist is tense and flexed against the splint. There is a large gap between the splint and the wrist, which creates undue three- point contact stress against the plastic splint. This will break the plastic splint. There should be no wiggle room in-between the skin and the plastic splint. Incorrect posture prevents an optimal rotator cuff workout.
- Page 2 10 Week Rotator Cuff (RC) progressive strengthening program ShoulderSphere Method Event simulation reaching out moves. Sports specific training. Do all with spinning the ball. Work BOTH arms ! May add Red Theraband for contra-lateral load - titrate to capability for added strength build Workout every other day - 24 hour recovery time essential for muscle recuperation and mass gain.
- Page 3 WEEK 3 — 1) 12 reaches, 2 sets. 2) on bench — 12 stretches on side, 12 stretches overhead, 12 stretches to opposite side. 2 sets WEEK 4 — 1) 15 reaches, 2 sets. 2) on bench — 15 reaches on side, 15 reaches overhead, 15 reaches to opposite side.
Need help?
Do you have a question about the ShoulderSphere and is the answer not in the manual?
Questions and answers