
Summary of Contents for Sycamore DNX Series
- Page 1 DNX Series Multiservice Cross-Connect Quick Install & Setup Guide Inside ... Provides instructions for: Inspecting equipment Part descriptions Hardware installation/setup Powering up the system. DOC-001-11001 Revision 006 February 2008...
- Page 2 The Sycamore Networks, Inc. trademarks may not be used in connection with any product or service that is not Sycamore Networks' in any manner that is likely to cause confusion among customers or in any manner that disparages or discredits Sycamore Networks, Inc.
- Page 3 • Note: Screens shown in this document still reflect Eastern Research, as the software has not yet been rebranded as Sycamore Networks. Guide Summary This Quick Install Guide is designed to provide instructions for mounting a DNX or PSX chassis into a rack, installing power supplies, innstalling the System Manager Controller card set, installing interface and application module sets, and installing the N+1 Protection Switch.
- Page 4 Foreword Conventions To enhance the usability and clarity of this Guide, the following conventions are used to delineate specific types of information that are of importance to the user: Warnings Warnings are used to present information or describe conditions that if not observed could potentially result in bodily injury: Figure 1: Sample Warning WARNING...
- Page 5 Quality Commitment Sycamore Networks, Inc., as an ISO-9001 registered firm, is committed to customer value and the lasting quality of all its products, services and documentation. As an integral part of its con- tinuous improvement program, Sycamore Networks is actively seeking feedback on the overall quality, usability and accuracy of this guide.
- Page 6 Foreword THIS PAGE INTENTIONALLY LEFT BLANK. DOC-001-11001 (Rev. 006) DNX Quick Install & Setup Guide...
-
Page 7: Table Of Contents
Table of Contents Prior to Installation ......... 1 Inspect Shipment . - Page 8 Table of Contents PSX-5300 Installation ........27 Rack Mounting.
-
Page 9: Prior To Installation
Inspect Shipment Sycamore Networks equipment is shipped in cardboard cartons with foam inserts to protect the units from shock and vibration during shipment. All products are shipped in separate shipping cartons, unless instructed otherwise. -
Page 10: Site Preparations
Prior to Installation Site Preparations Site Preparations Before you install the DNX, contact your service provider to ensure that the proper transmission equipment and lines are installed. For LAN-based network management applications, the site must have at least one 10BaseT Ethernet network in place. Depending upon the application being supported, you may also need dial-in telephone lines. -
Page 11: Dnx-11 Installation
DNX unit for the N+1 Protection Switch to reside (approximately 3U high). Note: To insure proper ventilation, Sycamore recommends leaving a minimum of 1RU of space above and below each DNX or DNX/PSX combination. As long as there is at... -
Page 12: 23" Eia Flush Rack Mounting
DNX-11 Installation Rack Mounting 23” EIA Flush Rack Mounting 1. Orient the flush mounting brackets behind the DNX-11 mounting brackets as shown in figure 2. Align the four small threaded holes of the flush mounting brackets with the DNX- 11 mounting brackets. Figure 2: DNX-11 Rack Mounting (23-inch rack). -
Page 13: 23" Eia Center Rack Mounting
DNX-11 Installation Rack Mounting 23” EIA Center Rack Mounting 1. Orient the center mounting brackets behind the DNX-11 mounting brackets as shown in figure 3. Align the four small threaded holes of the center mounting brackets with the DNX- 11 mounting brackets. Figure 3: DNX-11 Center Rack Mounting. -
Page 14: 19" Telco Flush Rack Mounting
DNX-11 Installation Rack Mounting 19” Telco Flush Rack Mounting Adapts a standard 19” flush EIA rack mount configuration for center mounting within a 19” wide Telco equipment rack or cabinet via provided bracket set. Note: If you intend to install an N+1 Protection Switch, make sure that you leave enough space above the DNX-11 for the N+1 Protection Switch to reside - approximately 3U high. -
Page 15: 23" Telco Flush Rack Mounting
DNX-11 Installation Rack Mounting 23” Telco Flush Rack Mounting Adapts a standard 19” flush EIA rack mount configuration for flush mounting within a 23” wide Telco equipment rack or cabinet via provided bracket set. Note: If you intend to install an N+1 Protection Switch, make sure that you leave enough space above the DNX-11 for the N+1 Protection Switch to reside - approximately 3U high. -
Page 16: 23" Telco Center Rack Mounting
DNX-11 Installation Rack Mounting 23” Telco Center Rack Mounting Adapts a standard 19” flush EIA rack mount configuration for center mounting within a 23” wide Telco equipment rack or cabinet via provided bracket set. Note: If you intend to install an N+1 Protection Switch, make sure that you leave enough space above the DNX-11 for the N+1 Protection Switch to reside - approximately 3U high. -
Page 17: Proper Grounding
DNX-11 Installation Proper Grounding Proper Grounding Grounding via Rack Mount 1. Mount the DNX to the equipment rack using rack-mounting screws as shown in Figure 7 below: Figure 7: Properly Grounding the DNX. Mounting Bracket Rack Mounting Screw DOC-001-11001 (Rev. 006) DNX Quick Install &... -
Page 18: Grounding Via Grounding Strap
DNX-11 Installation Proper Grounding Grounding via Grounding Strap Using two #10-32 screws and external-toothed lockwashers (provided), connect a grounding strap lug to the grounding points near the power terminal block as shown in Figure 8. Figure 8: Grounding Strap Connection. Grounding Strap TALK BATTERY TALK BATTERY... -
Page 19: Installing Dnx-11 Power Supply Module(S)
Use a No. 1 Phillips Head screwdriver and apply firm, even pressure. Should you strip the screws, do not pry them from the chassis. Contact the Sycamore Networks Technical Assistance Center (TAC) at 1-877-526-2321 for assistance. -
Page 20: Dnx-11 Ac Power
DNX-11 Installation DNX-11 AC Power DNX-11 AC Power The AC-powered version of the DNX-11 contains two integrated 110/220VAC (auto-sensing) power supplies (part number MKT-006-11206). To take advantage of the redundant power supplies, the DNX-11 requires two 110VAC or 220VAC power connections. AC Power Requirements The AC model of the DNX-11 will automatically sense whether it is connected to 110VAC or 220VAC power, and adjust accordingly. -
Page 21: Connecting Ac Power To A Dnx-11
DNX-11 Installation DNX-11 AC Power Connecting AC Power to a DNX-11 An AC power supply requires an AC power cord with a three-prong grounded plug. This plug must be inserted into the three prong grounded receptacle (shown in Figure 10). Caution Do not use an adapter to connect the AC power cord to an ungrounded receptacle. -
Page 22: Dnx-11 Dc Power
DNX-11 Installation DNX-11 DC Power DNX-11 DC Power The DC-powered version of the DNX-11 contains two integrated -48VDC power supplies (part number MKT-006-11048). To take advantage of the redundant power supplies, the DNX-11 requires two -48 volt DC power connections. DC Power Requirements The DNX-11 is designed to operate on -48 volt DC power, at a maximum of 3 amps, 200 watts. -
Page 23: Connecting Dc Power (-48Vdc) To A Dnx-11
DNX-11 Installation DNX-11 DC Power Connecting DC Power (-48VDC) to a DNX-11 Note: When powering the DNX-11 from a DC power source, use two separate fuse panels or a fuse panel with redundant (A and B) fuse positions. 1. Mount the unit in a rack as specified previously. 2. - Page 24 DNX-11 Installation DNX-11 DC Power 7. Insert the “-48 volt supply” wire into the negative terminal and tighten the clamp screw. 8. Insert the “return” wire into the positive terminal and tighten the clamp screw. 9. Insert the power terminal block into the mating receptacle on the rear panel. 10.
-
Page 25: Connecting The Talk Battery Or Signal Battery
DNX-11 Installation DNX-11 DC Power Connecting the Talk Battery or Signal Battery This connection is used exclusively for voice applications. The Signal Battery input is provided for applications where separate talk and signal power is required. 1. Shut off power to the Talk Battery or Signal Battery leads. 2. - Page 26 DNX-11 Installation DNX-11 DC Power 6. Insert the “-48VDC” lead into the negative terminal clamp and tighten the clamp screw. 7. Insert the “return” lead into the negative terminal clamp and tighten the clamp screw. For a talk battery connection, DC Return should be tied to the service provider for the FXO/FXS Ground Start operations to work properly.
-
Page 27: Talk Battery & Signal Battery Fuses
DNX-11 Installation DNX-11 DC Power Talk Battery & Signal Battery Fuses The talk battery and signal battery fuses on this model are both 2A, 250V Delayed Action (Slo- Blo) fuses. To access the fuses, use a small screwdriver and unscrew the cover 1/4 turn counter-clockwise. -
Page 28: Installing The System Manager Controller
DNX-11 Installation Installing the System Manager Controller Installing the System Manager Controller To install an SMC II module into a DNX-11 chassis: 1. Remove the SMC II module and corresponding SMC II rear interface module from the anti- static bags. 2. -
Page 29: Smc Ii Module Jumper Configuration
DNX-11 Installation SMC II Module Jumper Configuration SMC II Module Jumper Configuration On the SMC II front module, there is a jumper block that is used to select whether the SMC is installed in a standalone DNX-11 nest, or in a subordinate nest (Nest 2 through 8) of a DNX-88. Jumper block location and designator are dependent on the hardware revision level of the SMC II Module. -
Page 30: Revision 0 And Revision 1 Smc Ii Modules - Jumper Placement
DNX-11 Installation SMC II Module Jumper Configuration Revision 0 and Revision 1 SMC II Modules - Jumper Placement For DNX-11/-4 standalone applications, a jumper is not necessary, however, SMC II modules are shipped with a spare jumper shunt across inactive pins (such as pins 7 and 9) in order to facilitate later DNX-88 application upgrades if desired. -
Page 31: Revision 2 Smc Ii Modules
DNX-11 Installation SMC II Module Jumper Configuration Revision 2 SMC II Modules For Revision 2 SMC II printed circuit boards, the revision label is located as shown in Figure . The jumper block is labeled J3 , and its location is also shown in Figure 18. See Figure 19 for jumper shunt placement for DNX-11 or DNX-88 use. -
Page 32: Revision 2 Smc Ii Modules - Jumper Placement
DNX-11 Installation SMC II Module Jumper Configuration Revision 2 SMC II Modules - Jumper Placement For DNX-11/-4 standalone applications, a jumper is not necessary, however, SMC II modules are shipped with a spare jumper shunt across inactive pins (such as pins 7 and 9) in order to facilitate later DNX-88 application upgrades if desired. -
Page 33: Installing Application & Interface Modules
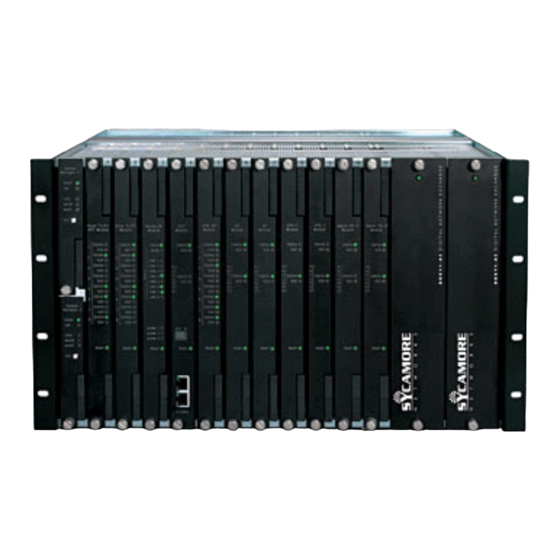
Installing Application & Interface Modules SMC II Module Jumper Configuration Installing Application & Interface Modules Figure 20: DNX-11 and an application module pictured below. To install application and interface modules into a DNX-11 chassis: 1. Remove the application module and corresponding rear interface card from the anti-static bags. -
Page 34: Connecting External Clocking
Connecting External Clocking SMC II Module Jumper Configuration Connecting External Clocking External Clocking can be supplied via two source connectors provided on the new SMC IIA rear interface module to enable the DNX to receive clock inputs from specific external timing sources. -
Page 35: Psx-5300 Installation
PSX-5300 Installation SMC II Module Jumper Configuration PSX-5300 Installation This section will guide you through installing the PSX-5300 N+1 Protection Switch, installing modules, and configuring Network Redundancy. Figure 22: N+1 Protection Switch (rear view). DOC-001-11001 (Rev. 006) DNX Quick Install & Setup Guide... -
Page 36: Rack Mounting
PSX-5300 Installation Rack Mounting Rack Mounting Ensure that you have 3RU (5.25"/133mm) of empty rack space above the DNX unit in which to install the PSX-5300. 1. Securely mount the N+1 Protection Switch in the equipment rack, directly above the DNX- Proper Grounding Grounding via Rack Mount 1. -
Page 37: Grounding Via Grounding Strap
PSX-5300 Installation Rack Mounting Grounding via Grounding Strap Note: This is the most reliable method of grounding the PSX-5300. 1. Securely mount the PSX-5300 directly above the DNX-11 in the equipment rack as shown in Figure 23. 2. Using two #10-32 screws and external-toothed lockwashers (provided), connect a grounding strap lug to the grounding points near the power terminal block as shown in Figure 24. -
Page 38: Psx-5300 Dc Power
PSX-5300 Installation PSX-5300 DC Power PSX-5300 DC Power To take advantage of the redundant power supplies, use two separate -48 volt DC power connections from two separate fuse panels or from a fuse panel with redundant (A and B) fuse positions. -
Page 39: Psx Module Installation And Cable Connection
PSX-5300 Installation PSX Module Installation and Cable Connection PSX Module Installation and Cable Connection 1. Install the Protection Switch Controller module. 2. Connect the DB9 male-to-male Serial Interface Cable to the DB9 connector on the PSX Controller module. 3. Connect the opposite end to the DB9 connector located System Manager Rear Interface Module, marked Protect Swt (SMC II) or PSX (SMCII A). -
Page 40: Narrowband Cable Connections
PSX-5300 Installation PSX Module Installation and Cable Connection Narrowband Cable Connections 1. Connect the 50-pin cable from the network to the 50-pin connector that is on the PSX Narrowband Primary module. 2. Connect the 50-pin cable from the Narrowband Primary module to the corresponding 50-pin connector that is on the DNX Narrowband (Octal T1/E1) rear interface module. -
Page 41: Broadband Cable Connections
PSX-5300 Installation PSX Module Installation and Cable Connection Broadband Cable Connections 1. Connect the RX BNC cable from the network to the "IN" RX jack on the PSX Broadband Primary module and the TX BNC cable to the network to the "IN" TX jack. 2. - Page 42 PSX-5300 Installation PSX Module Installation and Cable Connection Figure 26: PSX Broadband Cable Installation. POWER POWER Figure Notes: In Figure 26, slot 9 contains a Broadband Group 1 primary interface module, and slot 1 contains the Broadband Group 1 backup module. Slots 2 and 4 contain Broadband Group 2 primary interface modules, and slot 7 contains the Broadband Group 2 backup module.
-
Page 43: Connecting N+1 Protection Switch Dc Power (-48Vdc)
PSX-5300 Installation PSX Module Installation and Cable Connection Connecting N+1 Protection Switch DC Power (-48VDC) Note: To insure DC power redundancy is maintained, use two DC Power Supply Modules, in conjunction with power sources from two separate fuse panels or from a fuse panel with redundant (A and B) fuse positions. - Page 44 PSX-5300 Installation PSX Module Installation and Cable Connection Figure 28: Connecting DC Power Leads. WARNING Remove Power Cable Before Removing Module FUSE: F2A - 250VAC DC POWER 7. Insert the “-48 volt supply” wire into the negative terminal clamp and tighten the clamp screw.
-
Page 45: System Visual Inspection
System Visual Inspection PSX Module Installation and Cable Connection System Visual Inspection Once all of the modules have been installed, power up the system. The LED(s) should be lit on the power supply module(s), the “READY” LED should be lit on the on the SMC module(s), and the READY LED should be lit on each application module. -
Page 46: Console Management Access
Console Management Access PSX Module Installation and Cable Connection Console Management Access Use the console to configure the interface protocol and parameters for each device port, moni- tor the network, and perform diagnostics. A console may be a PC, workstation or a dedicated terminal. - Page 47 Console Management Access PSX Module Installation and Cable Connection Note: Some terminal manufacturers might identify the data bit configuration as 7-N-1 (seven data bits plus a “not used” parity bit) while other manufacturers might identify the same configurations 8-N-1 (eight bits including a “not used” parity bit). Check the terminal’s user manual.
-
Page 48: Logging Into The Dnx
Console Management Access PSX Module Installation and Cable Connection Logging into the DNX 1. Press <Enter> on your terminal keyboard to activate automatic baud rate recognition (ABR). 2. Enter your login name and password. To use the default login name and password, press <Enter>... -
Page 49: System Security
System Security PSX Module Installation and Cable Connection System Security The DNX provides system security by utilizing four different user-access levels. These are as follows: Admin - The highest level of access. Users at this level can access all DNX functions and •... -
Page 50: Install Ip Address
Install IP Address PSX Module Installation and Cable Connection Install IP Address Port IP Address Configuration The Port Configuration Menu is used to configure the TCP/IP stack in the DNX and control its IP address and how it behaves on your 10BaseT LAN segment. These options only affect the 10BaseT (SMC II) or 10/100BaseT (SMC IIA) port operation, they are not directly related to the flow of user data through the DNX. - Page 51 Install IP Address PSX Module Installation and Cable Connection Table 4: Port IP Address Field Descriptions. Field Description IP Encapsulation: (option The choices are Ethernet II or 802.3 . If your LAN is using standard TCP/IP you field) should select Ethernet II for the encapsulation type. 802.3 encapsulation is used most often on LANs running Novell Netware.
-
Page 52: Verifying Protection Switch Installation
Verifying Protection Switch Installation PSX Module Installation and Cable Connection Verifying Protection Switch Installation To ensure the Protection Switch has been properly installed, verify the Card Status is Ok and the Switch State’s condition is Normal. Verify the Protection Switch Installation 1. - Page 53 Verifying Protection Switch Installation PSX Module Installation and Cable Connection Figure 32: Protection Switch Main Menu. Eastern Research, Inc. DNX - Protection Switch Help = [?] Main Menu --------- Status Utilities About 3. Move your cursor to the Status field and press <Enter> . The Protection Switch’s Status Menu appears;...
- Page 54 Verifying Protection Switch Installation PSX Module Installation and Cable Connection To expose additional information about the Protection Switch, go back to the Nest Summary Menu, and at the PSX field, press the E key. The resulting screen should look similar to the one shown in Figure Figure 34: Protection Switch Slot Information Display.
- Page 55 Verifying Protection Switch Installation PSX Module Installation and Cable Connection Table 5: Protection Slot Information Display Field Descriptions. Field Description Device: (display field) Displays the state of the PSX as Online or Offline . Psx Controller: (display Displays the revision level of the PSX Controller Module. field) Chassis: (display field) Displays the type of chassis as PSX-5200 or PSX -5300 .
-
Page 56: Verify The Protection Switch Profile Settings
Verifying Protection Switch Installation PSX Module Installation and Cable Connection Verify the Protection Switch Profile Settings From the DNX Main Menu, select System Configuration, then Nest Profile. The resulting screen should look similar to the one shown in Figure Figure 35: Nest Profile Menu. Eastern Research, Inc. -
Page 57: Maintenance & Repair
Limited Warranty statement on the Sycamore Networks website. If the unit has been found defective or in need of repair, Sycamore Networks will issue an RMA (Return Material Authorization) number. You can also complete the Repair/Replacement Card included with your unit and ship the defective equipment with the card enclosed in the package and the RMA number prominently displayed on the outside of the package. - Page 58 Maintenance & Repair Equipment Repair and Return THIS PAGE INTENTIONALLY LEFT BLANK. DOC-001-11001 (Rev. 006) DNX Quick Install & Setup Guide...
- Page 59 Maintenance & Repair Equipment Repair and Return DOC-001-11001 (Rev. 006) DNX Quick Install & Setup Guide...
-
Page 60: Appendix A Regulatory Information
If trouble is experienced with this equipment, for repair or warranty information, please contact the Sycamore Networks Technical Assistance Center (TAC) at 1-877-526-2321. If the equipment is causing harm to the telephone network, the telephone company may request that you disconnect the equipment until the problem is resolved. -
Page 61: Affidavit Requirements For Connection To Digital Services
Appendix A - Regulatory Information North America Affidavit Requirements For Connection To Digital Services • An affidavit (see next page for format) is required to be given the telephone company whenever digital terminal equipment without encoded analog content and billing protection is used to transmit digital signals containing encoded analog content which are intended for eventual conversion into voiceband analog signals and retransmitted on the network. - Page 62 Appendix A - Regulatory Information North America AFFIDAVIT FOR CONNECTION OF CUSTOMER PREMISES EQUIPMENT TO 1.544 MBPS AND/OR SUBRATE DIGITAL SERVICES For the work to be performed in the certified territory of ___________________________ (Telco name). State of ______________________ County of ____________________ I, _________________________________ (name) _____________________________________________________ (business address) _______________________ (telephone number) being duly sworn, state: I have responsibility for the operation and maintenance of the terminal equipment to be connected to 1.544 Mbps and/or _______...
-
Page 63: Product Safety
Appendix A - Regulatory Information North America Industry Canada Statement NOTICE: The Industry Canada label identifies certified equipment. This certification means that the equipment meets certain telecommunications network protective, operational and safety requirements as prescribed in the appropriate Terminal Equipment Technical Requirements document(s). -
Page 64: Europe
Appendix A - Regulatory Information Europe Europe This equipment has been designed to be in conformity with the following standard(s) or other normative document(s): EN55022, Class A, 1994 EN55024:1998 EN50082-1:1991 EN 300 386-2:1997 EN60950:1992 CTR 12/A1 following the provisions of the EMC directive 89/336/EEC, the Low voltage directive 73/23/EEC, and the R&TTE directive 1995/5/EC. -
Page 65: Taiwan
Appendix A - Regulatory Information Taiwan Taiwan Battery Recycling & Disposal Australia (DNX-11 only) ACA AS/NZ 3548:1995 AS/NZS 3260:1993 ACA TS 016:1997 ACA TS 001:1997 DOC-001-11001 (Rev. 006) A–6 DNX Quick Install & Setup Guide... - Page 66 THIS PAGE INTENTIONALLY LEFT BLANK.
- Page 67 220 Mill Road Chelmsford MA 08125-4144 Telephone: 978-250-2900 Fax: 978-250-3350 Web site: www.sycamorenet.com...
Need help?
Do you have a question about the DNX Series and is the answer not in the manual?
Questions and answers