Table of Contents
Advertisement
Advertisement
Table of Contents

Related Manuals for inDESIGN iD-S9920-OPT


Summary of Contents for inDESIGN iD-S9920-OPT
-
Page 2: Table Of Contents
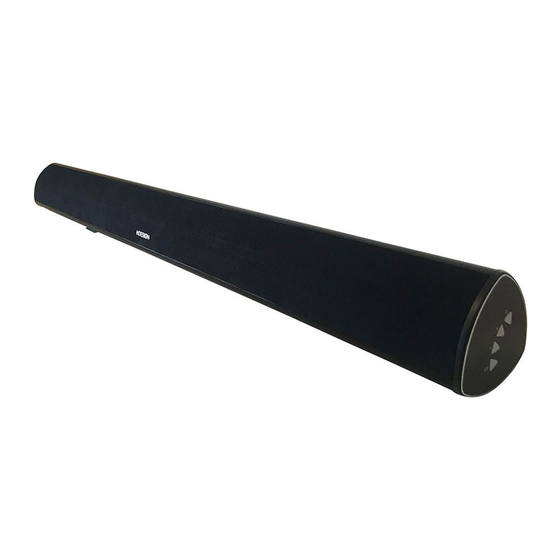
Active Sound Bar INTRODUCTION IMPORTANT SAFETY Enhance your viewing experience with this sound device. INSTRUCTIONS The iD-S9920-OPT TV Sound Bar is Bluetooth compatible for WHAT’S INCLUDED wireless streaming of music from your smartphone, tablet PRODUCT OVERVIEW or media device. CONNECTING ELECTRICAL... -
Page 3: Important Safety Instructions
20. Caution marking and nameplate are located on back or bottom of product. iD-S9920-OPT: INSTALLATION & OPERATION MANUAL PAGE 3... -
Page 4: What's Included
WHAT’S INCLUDED iD-S9920 Sound Bar Remote Control User Manual Digital Optical Cable Stereo RCA 50 3.5mm Audio Cable Power Adapter Wall Mount Brackets Mount Screws Wall Mount Template PAGE 4 iD-S9920-OPT: INSTALLATION & OPERATION MANUAL... -
Page 5: Product Overview
• When disconnecting the power cable of the DC/AC power adapter from a wall outlet, pull the plug. Do not pull the cable. • Do not connect this unit or other components to an AC outlet until all connections between components are completed. iD-S9920-OPT: INSTALLATION & OPERATION MANUAL PAGE 5... -
Page 6: Connecting Electrical Power
• You must use the Sound Bar’s remote to turn power on or control the volume under this connection. • If there is no sound or a cracking noise, set your TV’s audio output to “PCM” (refer to TV’s manual). * NOTE: Take the caps off on the OPTICAL jack. PAGE 6 iD-S9920-OPT: INSTALLATION & OPERATION MANUAL... - Page 7 Scroll until “PCM” is displayed as the current audio output. Press “OK” to save the settings. • Depending on the model of your television, steps maybe different, please refer to your TV’s manual. iD-S9920-OPT: INSTALLATION & OPERATION MANUAL PAGE 7...
-
Page 8: Connecting An External Device
An external device can be connected via 1. Optical cable, or 2/3. RCA to 3.5mm cable. To connect via Optical cable, refer to Page 6. To connect via RCA to 3.5mm cable, refer to Page 8 (above). PAGE 8 iD-S9920-OPT: INSTALLATION & OPERATION MANUAL... -
Page 9: Connecting A Usb
Select “S9920” from the list, connect it. When your Bluetooth device is connected, the LED indicator blinks BLUE slowly. Play music files from the device, connected via Bluetooth, throught the Sound Bar. • You cannot connect more than one Bluetooth device at a time. iD-S9920-OPT: INSTALLATION & OPERATION MANUAL PAGE 9... -
Page 10: Know Your Remote
Bluetooth mode, LED indicator: BLUE “BT”: Optical mode, LED indicator: WHITE “OPT”: “COAX”: Coaxial mode, LED indicator: GREEN “USB”: USB mode, LED indicator: PURPLE AUX1(R/L) mode, LED indicator: LIGHT BLUE “AUX1”: “AUX2”: AUX2 mode, LED indicator: YELLOW PAGE 10 iD-S9920-OPT: INSTALLATION & OPERATION MANUAL... -
Page 11: Installing The Wall Mount
Install the Sound Bar by hanging the bracket on the wall. Consult a professional installer if you are unfamiliar with power tools or the layout of electrical wiring in the walls of your home. iD-S9920-OPT: INSTALLATION & OPERATION MANUAL PAGE 11... -
Page 12: Troubleshooting
Set your TV audio to External Speaker. • Mute the TV speaker. IMPORTANT NOTES ABOUT SERVICE Figures and illustrations in this Manual are provided for reference only and may differ from actual product appearance. PAGE 12 iD-S9920-OPT: INSTALLATION & OPERATION MANUAL... -
Page 13: Specifications
User Manual, Line in Cable, Digital Optical Cable, Wall Mounting accessories, Remote Control, Power Adaptor Compliance UL, FCC, ROHS, CE, RCM Country of Origin China * Disclaimer: Instructions and specifications are correct at time of printing. Information within may be subject to change without notice. iD-S9920-OPT: INSTALLATION & OPERATION MANUAL PAGE 13... -
Page 14: Warranty Information
The cost of claiming under this warranty, including return of any product to NAS is to be borne by the consumer. The Warranty excludes removal or reinstallation costs. * All inDESIGN products come with a 5 year warranty term. For further information and warranty claims, refer to our Support page at www.nationalaudio.com.au.
Need help?
Do you have a question about the iD-S9920-OPT and is the answer not in the manual?
Questions and answers