Table of Contents
Troubleshooting

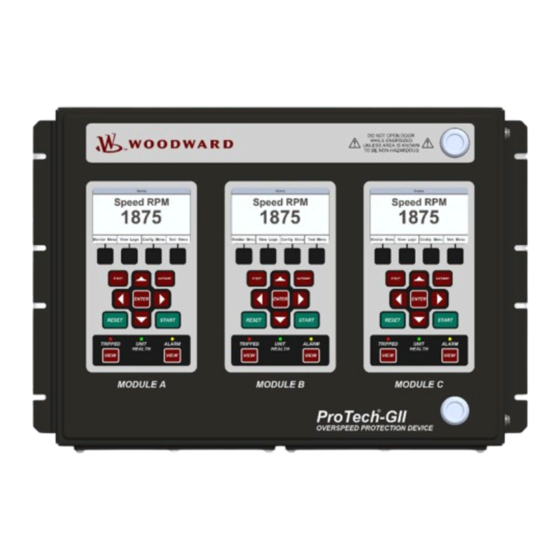
Related Manuals for Woodward ProTech-GII 8237-1594

Summary of Contents for Woodward ProTech-GII 8237-1594
- Page 1 Product Manual 26709 (Revision F, 10/2016) Original Instructions ® ProTech-GII Overspeed Protection Device with Voted Inputs 8237-1594, -1595, -1596, -1597, -1598, -1599, -1600, -1601, -1656, -1660 Installation and Operation Manual...
- Page 2 Revisions—Changes in this publication since the last revision are indicated by a black line alongside the text. Woodward reserves the right to update any portion of this publication at any time. Information provided by Woodward is believed to be correct and reliable. However, no responsibility is assumed by Woodward unless otherwise expressly undertaken.
-
Page 3: Table Of Contents
Configure Menu Page ..................100 Configuration Procedure ..................101 6. T ..............120 HAPTER OUTINES Test Modes Menu ....................120 Temporary Overspeed Setpoint Test ..............121 Auto Simulated Speed Test ................126 Auto-Sequence Test ................... 128 Woodward... - Page 4 Product Service Options ..................190 Returning Equipment for Repair .................191 Replacement Parts .....................192 Engineering Services ..................192 Contacting Woodward’s Support Organization ..........192 Technical Assistance ..................193 13. A ............194 HAPTER SSET ANAGEMENT Product Storage Recommendations..............194 ...
- Page 5 .................. 203 EVISION ISTORY ..................204 ECLARATIONS The following are trademarks of Woodward, Inc.: ProTech Woodward The following are trademarks of their respective companies: Modbus (Schneider Automation Inc.) Illustrations and Tables Figure 1-1. Typical ProTech-GII Application (Voted Trip Relay Models) ..... 15 ...
- Page 6 Figure 4-9. Monitor Trip Latch ................85 Figure 4-10. Monitor Alarm Latch ................. 87 Figure 4-11. Monitor Dedicated Discrete Inputs ........... 88 Figure 4-12. Monitor Speed Input ................. 89 Figure 4-13. Speed Redundancy Manager ............89 Woodward...
- Page 7 Table 2-1a. Low Voltage Input Specifications ............31 Table 2-1b. High Voltage Input Specifications ............. 31 Table 2-1c. Low Voltage Input Specifications ............32 Table 2-2 Relay Output Power Supply Specifications .......... 32 Table 2-3. General I/O Specifications ..............33 Woodward...
- Page 8 Table 9-1. Trip Relay Safe State Configuration ..........176 Table 9-2. SIL Specifications ................177 Table 9-3. Failure Rate ..................177 Table 10-1. I/O Troubleshooting .................183 Table 10-2. Trip Indications ................184 Table 10-3. Alarm Indications ................186 Woodward...
-
Page 9: Warnings And Notices
Start-up To prevent damage to a control system that uses an alternator or battery-charging device, make sure the charging device is turned off before disconnecting the battery from the system. Battery Charging Device Woodward... -
Page 10: Electrostatic Discharge Awareness
Do not touch the components or conductors on a printed circuit board with your hands or with conductive devices. To prevent damage to electronic components caused by improper handling, read and observe the precautions in Woodward manual 82715 , Guide for Handling and Protection of Electronic Controls, Printed Circuit Boards, and Modules. -
Page 11: Regulatory Compliance
TÜV certified for SIL-3 per IEC 61508 Parts 1-7, Functional Safety of TÜV: Electrical / Electronic / Programmable Electronic Safety Related Systems. Other Compliance IEC60068-2-60:1995 Part 2.60 Methods 1 and 4 (conformal coating) Gas Corrosion: API670, API612, & API-611 compliant Machinery Protection: Woodward... - Page 12 Measurement inputs are classified as permanently connected IEC measurement Category I and are designed to safely withstand occasional transient overvoltages up to 1260 Vpk. To avoid the danger of electric shock, do not use these inputs to make measurements within measurement categories II, III, or IV. Woodward...
- Page 13 Classe I, applications Division 2 ou Zone 2. Safety Symbols Both direct and alternating current Alternating current Direct current Caution, risk of electrical shock Caution, refer to accompanying documents Protective conductor terminal Frame or chassis terminal Woodward...
-
Page 14: Acronyms And Definitions
Probability of Failure on Demand Probability of dangerous Failure per Hour Programmable Logic Controller PROX Proximity Probe Remote Terminal Unit Settings-File A file that contains the configuration settings loaded with the ProTech Programming and Configuration Tool (.wset). ProTech Overspeed Protection Device Woodward... -
Page 15: Chapter 1. General Information
This product is designed for critical applications and when installed correctly complies with standards API-670, API-612, API-611, and IEC61508 (SIL-3). The following table shows the various hardware configurations (mounting options, power supplies, and trip relay options) available: Woodward... -
Page 16: Applications
(operation run time) is a concern or necessity. The ProTech-GII is certified as an IEC61508 SIL-3 (Safety Integrity Level 3) safety device and can be applied as a stand-alone IEC61508-based device or within an IEC61511-based plant safety system. Woodward... -
Page 17: Figure 1-1. Typical Protech-Gii Application (Voted Trip Relay Models)
Manual 26709 ProTech-GII Overspeed Protection Device Figure 1-1. Typical ProTech-GII Application (Voted Trip Relay Models) Figure 1-2. Typical ProTech-GII Application (Independent Trip Relay Models) Woodward... -
Page 18: Figure 1-3. Typical Gas Turbine Application (Voted Trip Relay Models)
ProTech-GII Overspeed Protection Device Manual 26709 Figure 1-3. Typical Gas Turbine Application (Voted Trip Relay Models) Woodward... -
Page 19: Chapter 2. Installation
Apply power to each module, one at a time, and verify that each module boots up and its front panel screen displays turbine or equipment speed. Enter the configuration mode and configure all settings to the specific application’s requirements. Woodward... -
Page 20: Enclosures
ProTech-GII control’s back side, and a back cover is included to protect wiring terminals after installation. Figures 2-4 and 2-5 display the Panel-Mount ProTech-GII model’s layout and mounting pattern. Figure 2-1. Typical ProTech-GII Bulkhead Package—Front View Woodward... -
Page 21: Figure 2-2A. Typical Protech-Gii Bulkhead Package—Front Door Open
Manual 26709 ProTech-GII Overspeed Protection Device Figure 2-2a. Typical ProTech-GII Bulkhead Package—Front Door Open Figure 2-2b. Bulkhead Schematic Showing Front Panel A Connection to Module A and Front Panel C Connection to Module C—Top View Woodward... -
Page 22: Figure 2-3. Mounting Outline Diagram For Bulkhead-Mounted Models
ProTech-GII Overspeed Protection Device Manual 26709 Figure 2-3. Mounting Outline Diagram for Bulkhead-Mounted Models Note—The outline drawings for the TPS and GII are identical. The TPS is shown for reference. Woodward... -
Page 23: Module Removal And Installation-Bulkhead Mount Package
Currently, display circuit boards are not replaceable. Users should not attempt to remove or install any display board. If a display board is unresponsive, contact Woodward for a recommendation regarding service options. DO NOT ATTEMPT TO REPAIR! Follow this procedure for module removal and installation: Removal: Disconnect power from the module to be removed. - Page 24 ProTech-GII Overspeed Protection Device Manual 26709 Remove module by pulling the two handles simultaneously. Remove by pulling from handles Woodward...
- Page 25 Insert module into slot by pressing firmly on handles. The module has guides to assist in location. Tighten 4 module retention screws. Install terminal blocks. Insert power terminal block and observe that the power LED is ON. Woodward...
-
Page 26: Figure 2-4A. Typical Protech-Gii Panel Mount Package—Front View
ProTech-GII Overspeed Protection Device Manual 26709 Figure 2-4a. Typical ProTech-GII Panel Mount Package—Front View Figure 2-4b. Typical ProTech-GII Panel Mount Package—Rear View with Cover Woodward... -
Page 27: Figure 2-4D. Panel Mount Schematic Showing Front Panel A Connection To Module A And Front Panel C Connection To Module C—Top View
Modules Displays Figure 2-4d. Panel Mount Schematic Showing Front Panel A Connection to Module A and Front Panel C Connection to Module C—Top View Woodward... -
Page 28: Figure 2-5A. Mounting Outline Diagram For Panel-Mount Models
ProTech-GII Overspeed Protection Device Manual 26709 Figure 2-5a. Mounting Outline Diagram for Panel-Mount Models Woodward... -
Page 29: Figure 2-5B. Mounting Outline Diagram For Panel-Mount Models
Manual 26709 ProTech-GII Overspeed Protection Device Figure 2-5b. Mounting Outline Diagram for Panel-Mount Models Woodward... -
Page 30: Module Removal And Installation-Panel Mount Package
Disconnect power from the module to be removed. Remove 4 back panel retaining screws. Remove back panel. Verify power removed by observing power LED is OFF. Remove terminal blocks from module terminals. Loosen 4 module retaining screws. Remove module by pulling the two handles simultaneously. Woodward... - Page 31 Manual 26709 ProTech-GII Overspeed Protection Device Woodward...
-
Page 32: Mounting Location Considerations
Protection from high-voltage or high-current devices which produce electromagnetic interference Avoidance of vibration A location that has H S and SO gases at or below the levels classified in international standard IEC 721-3-3 1994 - environment Class 3C2 Maximum purge pressure: 4 psi Woodward... -
Page 33: Environmental Specifications
0.18 Arms @ 150 Vdc 10 A at 115 Vac, 20 A @ 220 Vac Inrush Current Reverse Polarity Yes, for DC connection Protection 45 ms, when operating on one power supply only Interrupt Time Table 2-1b. High Voltage Input Specifications Woodward... -
Page 34: Table 2-1C. Low Voltage Input Specifications
Table 2-2 Relay Output Power Supply Specifications Each ProTech-GII module will function normally with power sourced to both or either power supply input independently, however Woodward recommends that both input power sources be used to improve system availability. Please refer to Table 1-1 for available ProTech-GII models. -
Page 35: Input/Output Specifications
Input Frequency 1 Vrms to 35 Vrms Input Amplitude 1.5 k Input Impedance 500 Vac from input to chassis and input to all other Isolation circuits MPU only > 7.5 kΩ Open Wire Detection Table 2-4a. Passive Probe Specifications Woodward... -
Page 36: Table 2-4B. Active Probe Specifications
500 Vac from output to chassis and output Isolation to all other circuits Must be limited to 1000 ft / 305 m (low Signal Cable Length capacitance 16 AWG / 1.3 mm² pair) Table 2-5a. Independent Trip Relay Specifications Woodward... -
Page 37: Table 2-5B. Voted Trip Relay Specifications
Chapter 2). This power supply is current limited. Supply 32 V (for externally power wiring, see, Chapter 2) Max Input Voltage 500 Vac from output to chassis and output to all Isolation other circuits Table 2-7. Dedicated Discrete Input Specifications Woodward... -
Page 38: Shielded Wiring
Do not run shielded signal wires with other wires carrying large currents or high voltages. See Woodward manual 50532, EMI Control in Electronic Governing Systems, for more information. -
Page 39: Control Wiring Guidelines
Terminal Blocks. If the wire strands are soldered together, the solder will cold flow and shrink over time causing the connection to become intermittent or disconnected. Woodward recommends the following for ProTech-GII: Stranded bare copper wire (unless gaseous Sulfur compounds are present) at the wire ends ... - Page 40 Field wiring access for panel-mounted models is located on the back of the ProTech- GII enclosure. To allow proper installation of the unit’s back cover plate, Woodward recommends that all field wiring be routed from the bottom of the package. The units back cover must be installed.
-
Page 41: Figure 2-7. Inside View Of Protech-Gii
Manual 26709 ProTech-GII Overspeed Protection Device Figure 2-7. Inside View of ProTech-GII Woodward... -
Page 42: Figure 2-8. Protech-Gii Control Wiring Diagram
ProTech-GII Overspeed Protection Device Manual 26709 Figure 2-8. ProTech-GII Control Wiring Diagram Woodward... -
Page 43: Figure 2-9. Trip Module—Included Within Voted Trip Relay Units Only
Manual 26709 ProTech-GII Overspeed Protection Device Figure 2-9. Trip Module—Included within Voted Trip Relay Units Only Figure 2-10a. Power Supply Field Wiring Routing & Stress Relief Diagram Woodward... -
Page 44: Figure 2-10B. I/O Wiring Routing & Stress Relief Diagram
ProTech-GII Overspeed Protection Device Manual 26709 Figure 2-10b. I/O Wiring Routing & Stress Relief Diagram Figure 2-10c. Relay Output Field Wiring Routing & Stress Relief Diagram Woodward... -
Page 45: Figure 2-11A. Example Mpu (Passive Magnetic Pickup Unit) Wiring
0.25 to 1.02 mm (0.010 to 0.040 inch) from tooth face to pole piece. For information on selecting the correct MPU or gear size please refer to Woodward manual 82510. Refer to Figure 2-11a of this manual for wiring information. -
Page 46: Figure 2-11D. Example Eddy Current Probe (Active Magnetic Pickup Unit Wiring
(Internal Power) Figure 2-11c. Example Proximity Probe (Active Magnetic Pickup Unit) Wiring (External Power, Non-preferred) +24V Active Probe Configured Eddy Current Probe Bently Proximitor Active Probe Configured Sensor Figure 2-11d. Example Eddy Current Probe (Active Magnetic Pickup Unit) Wiring Woodward... -
Page 47: Figure 2-12A. Example Standard Discrete Input Wiring (Internal Power Option)
This output is designed to drive into an impedance between 0 and 500 . Twisted shielded pair wiring must be used. Refer to Chapter 3 (Functionality) of this manual for information on how to program and use this analog output in an application. Woodward... -
Page 48: Figure 2-13. Example Analog Output Wiring
However, de-energize to trip is a safer way to fail so that a total power loss to the control will trip the prime mover. TRIP RELAY OUTPUT LOCATION FOR INDEPENDENT VOTED MODELS TRIP RELAY OUTPUT LOCATION FOR 2-o-o-3 VOTED MODELS Figure 2-14a. Example Trip Relay Output Wiring Woodward... - Page 49 Relay Solid State Relay (24V, 1A) Interposing Relay ProTech Module +24V_P (0.5A) P_GND Figure 2-14b. Example Trip Relay Wiring (per Module) (Independent Trip Relay) (Internal Supply) Figure 2-14c. Example Trip Relay Wiring (per Module) (Independent Trip Relay) (External Supply) Woodward...
-
Page 50: Figure 2-14D. Example Trip Relay Wiring (Voted Trip Relay Models)
(A, B, C) has an alarm output. The alarm relay output has normally- open type contacts and is rated for 24 Vdc @ 1 A. Refer to Figure 2-14e or 2-14f for wiring information. Figure 2-14e. Example Alarm Relay Wiring (Internal Supply) Woodward... -
Page 51: Figure 2-14F. Example Alarm Relay Wiring (External Supply)
24 V EXT supply or Discrete Supply. Referencing input power to DISCRETE PWR or 24 V EXT causes the internal supplies to respond more readily to transients on the power bus. Woodward... -
Page 52: Figure 2-15. Power Supply Relationship Diagram
Optional termination resistors for RS-485 communication networks are included within the ProTech-GII control’s internal circuitry, and only require terminal block wire jumper(s) for connection to a network, for applications requiring these termination resistors. Refer to Figure 2-18b for jumper connections. Woodward... -
Page 53: Figure 2-16B. Serial Com Port Interface Diagram—Rs-485
PIN 5 D_GND TYPICAL STRAIGHT-THROUGH CABLE Figure 2-17. Programming and Configuration Tool Cable/Interface Diagram The RS-232 serial cable must be disconnected when not in use. The port is a service port only. It is not designed for permanent connection. Woodward... -
Page 54: Chapter 3. Functionality
(A, B, C) while the monitored turbine or equipment is on-line and operating normally. This is also referred to as ‘hot replacement.’ Ease of replacement is enhanced by the unit’s backplane plug-and-operate structure and its module-to-module program copying function. Woodward... - Page 55 Refer to Chapters 9 and 10 of this manual for more information on performing program changes. The logic unit requires that it be in the tripped state in order to change the configuration. Woodward...
-
Page 56: Figure 3-1. Module Diagram With Speed Redundancy Manager Configured
ProTech-GII Overspeed Protection Device Manual 26709 Figure 3-1. Module Diagram with Speed Redundancy Manager Configured Woodward... -
Page 57: Figure 3-2. Module Diagram Without Speed Redundancy Manager Configured
Manual 26709 ProTech-GII Overspeed Protection Device Figure 3-2. Module Diagram without Speed Redundancy Manager Configured Woodward... -
Page 58: Product Models
The energize-to-trip functionality is implemented such that a complete loss of power to the module does not result in a trip of that module. Woodward... -
Page 59: Figure 3-3. Basic Functional Overview Of Independent Trip Relay Models
These models are typically used with special 2-out-of-3 voted trip block assemblies or 2-out-of-3 voted trip string relay logic. Figure 3-3. Basic Functional Overview of Independent Trip Relay Models Woodward... -
Page 60: Figure 3-4. Functional Diagram Of Single Protech-Gii Module With Independent Trip Relay Outputs
ProTech-GII Overspeed Protection Device Manual 26709 Figure 3-4. Functional Diagram of Single ProTech-GII module with Independent Trip Relay Outputs Woodward... -
Page 61: Figure 3-5. Example Tmr Trip Block Assembly Interface
Manual 26709 ProTech-GII Overspeed Protection Device Figure 3-5. Example TMR Trip Block Assembly Interface Woodward... -
Page 62: Figure 3-6. Basic Functional Overview Of Voted Trip Relay Models
“Form-C” 2oo3 voted relays are used in these models providing four isolated relay output signals with normally open and normally closed contacts. Speed Input Module 2-out- Speed Input of 3 “Form-C” Module Voted Trip Relays Relays Speed Input Module Figure 3-6. Basic Functional Overview of Voted Trip Relay Models Woodward... -
Page 63: Figure 3-7. Functional Diagram Of Single Protech-Gii Module With Voted Trip Relay Outputs
Manual 26709 ProTech-GII Overspeed Protection Device Figure 3-7. Functional Diagram of Single ProTech-GII Module with Voted Trip Relay Outputs Woodward... -
Page 64: Figure 3-8. Simplex Trip Block Assembly
Single ProTechTPS HVAC/DC Module 24VDC or HVAC/DC Reset Trip Relay Start / Start Reset Trip Relay Logic Override Freq MPU or Prox Compare Set Pt. Configurable Trip & Alarm Relay Logic Alarm Relay Figure 3-8. Simplex Trip Block Assembly Woodward... -
Page 65: Inputs And Outputs
(wiring to) three modules, two modules or only one module and using the sharing and voting logic to manage logic in all three modules. Woodward... - Page 66 (from the first module) to use in their overspeed and over-acceleration detection logic. If the unit is configured for only two probes (or just one probe), there will be a configuration mismatch and associated alarm. This alarm can be disabled in the Configuration Management Menu. Woodward...
- Page 67 Speed-Fail-Override contact input, or all modules’ Speed-Fail-Override contact inputs. Alarm Relay Output Each module has one alarm relay output. This output is a normally open contact. When an alarm is present, the contact is open. Woodward...
-
Page 68: Overspeed And Over-Acceleration Detection Logic
Programming and Configuration Tool (PCT). Trip Area Overspeed Setting (110%) Max Turbine Acceleration Setting Trip Area High Acceleration Enable setting (0 rpm to Overspeed rpm) Rated Speed (100%) Turbine Speed Rate of Increase (rpm/second) Figure 3-10. Over-Acceleration Enabling Diagram Woodward... - Page 69 Once that speed signal is fixed, all three modules will need to be reset to clear the alarms (If the Reset inputs are shared, then one reset may reset multiple modules). Woodward...
-
Page 70: Start Logic
Either, both, or neither of these methods can be selected. There is also an alarm that can be enabled to indicate any time the Speed is below the Speed Fail Setpoint. Woodward... -
Page 71: Figure 3-11. Start Logic Diagram
Manual 26709 ProTech-GII Overspeed Protection Device Figure 3-11. Start Logic Diagram Woodward... -
Page 72: Figure 3-12. Speed Fail Trip Diagram
'Start' must be selected when the turbine or equipment is to be started. The timer can only be started when speed is below the Speed Fail Setpoint. Selecting 'Start' has no effect if speed is above the Speed Fail Setpoint. Woodward... -
Page 73: Test Routines
Once the module is in its tripped state, this test is disabled and the module’s overspeed setpoint is returned to its normal setting. Woodward... - Page 74 Then, module A is automatically reset and module B is tested. When the module B test is completed, module C is tested. In this way, periodic testing can be performed automatically on a regular basis with no operator intervention. Woodward...
-
Page 75: Alarm And Trip Latches
3 is used) Temporary Overspeed Setpoint Active Alarm Manual Simulate Speed Test Active Alarm Auto Simulated Speed Test Active Alarm Auto Simulated Speed Test Failed Alarm Auto-Sequence Test Active Alarm TRIP (if configured) Woodward... - Page 76 Speed Lost Trip (if configured and the speed input is used) Speed Fail Trip (if configured and the speed input or speed redundancy manager is used) Speed Fail Timeout Trip (if configured and the speed input or speed redundancy manager is used) Woodward...
-
Page 77: System Logs
This includes the speed and acceleration levels sensed during an automatic or manual overspeed testing routine. This log can be reset from the front panel with the use of the Config Level Password. Woodward... -
Page 78: Protech-Gii Response Time Performance
Refer to below graphs to understand the system response differences. Independent Trip Relay Models—Response Graphs Figure 3-14. Total System Response Time Based on Sensed Frequency Level for Independent Trip Relay Models when Speed Redundancy Manager Function is not Configured Woodward... - Page 79 Independent Trip Relay Models when Speed Redundancy Manager Function is Configured Voted Trip Relay Models—Response Graphs Figure 3-16. Total System Response Time Based on Sensed Frequency Level for 2oo3 Voted Trip Relay Models when Speed Redundancy Manager Function is not Configured Woodward...
-
Page 80: For 2Oo3 Voted Trip Relay Models When Speed Redundancy Manager Function Is Configured
Frequency = (rpm) * (number of teeth) / 60 Figure 3-18. Response Time Definition Analog Output The response time of the analog output is less than 12 ms measured from a change in speed to a change in the output current. Woodward... -
Page 81: Chapter 4. Front Panel Interface
Monitor Menu—View configuration settings, real time values, and status indications. View Logs—View all logged events with corresponding time stamps. Config Menu—Configure basic functions such as overspeed, acceleration trip, etc. Test Menu—Perform system tests. Overspeed, Simulated Speed, Auto Sequence, and Lamp Test. Woodward... -
Page 82: Screen Layout
4 keys immediately below them. Depending on the screen, the soft keys may be used to select different views, enter data such as setpoints or passwords, select from a list of options, or initiate a function such as performing a test or copying a module’s configuration. Woodward... -
Page 83: Keypad Functions
Illuminates RED if there is an error in the safety Unit Health functionality. Off indicates a communication or power failure Indicator either to the display or to the module. Illuminates YELLOW when an Alarm condition exists. Alarm Indicator Woodward... -
Page 84: Navigation
“ESC” button navigates up through the menu hierarchy until the “Home” screen is displayed. Home Screen Page (with an Alarm condition indicated) Figure 4-4. Home screen (with Alarm) Home Screen Page (with a Trip condition indicated) Figure 4-5. Home screen (with Trip) Woodward... -
Page 85: Passwords
Default Test Level Password: AAAAAA (as shipped from factory) Default Config Level Password: AAAAAA (as shipped from factory) Woodward... -
Page 86: Monitor Menu
Speed Redundancy Manager Accel Redundancy Manager Speed Fail Timer Speed Readout Analog Output Modbus Date / Time System Status Module Information Detailed information on the contents of these screens and examples follows: Woodward... -
Page 87: Figure 4-8. Monitor Summary (Page 1)
Speed Fail Override Status: Displays state of the speed fail override logic. Analog Output: Displays current value of Analog Output in mA. Date: Displays current date. Time: Displays current time. Monitor Trip Latch Page Figure 4-9. Monitor Trip Latch Woodward... - Page 88 Speed Fail Timeout: Indicates lack of speed detected during a start condition. Only provided when the Speed Redundancy Manager is configured or the speed input is used. Resettable Trip Input: Indicates a trip from the Resettable Trip function. Woodward...
-
Page 89: Figure 4-10. Monitor Alarm Latch
Only provided when configured for passive probe type and Speed Redundancy Manager is configured. If the Speed Redundancy Manager is not configured, the Open Wire detection will be indicated as a Speed Probe Open Wire Trip instead of a Speed Probe Open Wire Alarm. Woodward... -
Page 90: Figure 4-11. Monitor Dedicated Discrete Inputs
START discrete input is active (closed contact input). Reset Input: Displays a TRUE value if the START discrete input is active (closed contact input). Speed Fail Override Input: Displays a TRUE value if the Speed Fail Override discrete input is active (closed contact input). Woodward... -
Page 91: Figure 4-12. Monitor Speed Input
If the source is invalid, the word “INVALID” will appear in RED instead of the speed value. Active Mode: Indicates the redundancy mode(MEDIAN, HSS or LSS) used to set the output. Diff Threshold: The threshold for the “Diff Det” output. Woodward... -
Page 92: Figure 4-14. Acceleration Redundancy Manager
Active Mode: Indicates the redundancy mode(MEDIAN, HSS or LSS) used to set the output. Output: Result of a Median, HSS or LSS calculation on the inputs. Monitor Speed Fail Timer Page Figure 4-15. Monitor Speed Fail Timer Woodward... -
Page 93: Figure 4-16. Monitor Analog Output
This page provides users information on the Analog Output function. Speed: This gauge displays the sensed/calculated speed being sensed by the module’s input speed channel. Analog Output: This gauge displays the current level being output from the module’s analog output channel. Woodward... -
Page 94: Figure 4-17. Monitor Modbus Status
The page provides users the module’s current date and time information and allows access for the setting of the modules time and date parameters. The module’s time setting must be re-set for all local time changes (i.e. daylight savings time). Woodward... -
Page 95: Figure 4-19. Set Date & Time
4. Press the ENTER key to save the change or the ESC key to return the value to its original value. 5. Select and edit/change the other fields as required. Woodward... -
Page 96: Figure 4-21. Set Date & Time
Unit Health OK: This message indicates the module is operating properly. Unit Health Bad: This message indicates an internal module alarm is present due to one of the following reasons and should be repaired or replaced: Module processor failure Module memory failure Module data bus failure Woodward... -
Page 97: View Logs
The time stamps in the logs are based on the internal clock at the time of the event. Time stamps are not changed when the internal clock time is modified (i.e. time/date is set). When the “View Logs” soft key is pressed the following Logs Menu screen is displayed: Figure 4-24. Logs Menu Woodward... -
Page 98: Figure 4-25. Overspeed/Over-Acceleration Log
Indication if the module was in a test mode during the time the event was sensed and logged. The word “TEST” will appear next to the time in if the module was in test mode at the time of the logged event. Woodward... -
Page 99: Figure 4-26. Trip Log
This page displays a log of all sensed and recorded Alarm events and the associated time and date stamp information. A “●” symbol in the Test column indicates that the alarm event occurred while the module was in a test mode. Woodward... -
Page 100: Figure 4-28. Peak Speed/Accel Log
To reset All Logs, either the Test or Config level passwords may be entered. To reset Peak Speed/Acceleration, the Config Level Password must be entered. After the correct password is entered, press the Enter soft key to reset the log. Woodward... -
Page 101: Chapter 5. Configuration Of The Protech-Gii Via Front Panel
Password Entry screen appears. When the correct Config Level Password is entered, the fields can be edited with the soft key selections. Once a password has been successfully entered, it will remain in effect until the user exits the Configuration mode. Woodward... -
Page 102: Configure Menu Page
Home Page. Configuration Management Menu: This page is used to configure the module’s Module-to-Module configuration settings, file comparison function, and to access the module’s CONFIGURATION COPY function. Password Change Menu: Used to configure the module’s passwords. Woodward... -
Page 103: Configuration Procedure
Before putting the ProTech-GII into operation, if the system had been designed such that all modules are required to have the exact same configuration it is recommended that the Configuration Compare routine be used to verify and confirm this is true. Woodward... -
Page 104: Figure 5-2. Save Configuration
Select the Laguage to use: Used to select the language. Language can only be configured from the front panel and cannot be configured from the Programming and Configuration Tool. The selected language is retained through a power cycle. Valid values: English or Chinese. Woodward... -
Page 105: Figure 5-4. Configure Speed Submenu
Start Logic: This page is used to enable and configure the speed fail logic and speed fail override logic. Speed Redundancy: This page is used to configure the speed redundancy. Acceleration Redundancy: This page is used to configure the acceleration redundancy. Configure Speed Input Page Figure 5-5. Configure Speed Input Woodward... -
Page 106: Figure 5-6. Configure Acceleration
/ activated. Below this speed level the acceleration trip function is disabled. Valid values: 0-32000 rpm. Acceleration Trip: Used to set the over-acceleration trip setpoint in rpm/second. Valid values: 0-25000 rpm/s. Woodward... -
Page 107: Figure 5-7. Configure Start Logic
USED or USED. Speed Fail Timeout Time: Used to set the period of time between when a “Start” command has been issued and a Speed Fail Timeout Trip command is given to the Trip Latch function. Valid values: 1-28800 seconds. Woodward... -
Page 108: Figure 5-8. Configure Speed Redundancy Manager
Difference Alarm Time: Used to set the time the Speed Difference Alarm is allowed to exist before the difference alarm is set. Valid values: 4–10000 milliseconds. Configure Acceleration Redundancy Manager Page Figure 5-9. Configure Acceleration Redundancy Manager Woodward... -
Page 109: Figure 5-10. Configure Trip Latch
When configured for this action if all input signals to the Trip Latch function are false the latch output signal will be false. A Reset command is not required to change the Trip Latch’s output signal to its false state. Woodward... -
Page 110: Figure 5-11. Configure Alarm Latch
Start Input Sharing: This page is used to configure the start input sharing. Reset Input Sharing: This page is used to configure the reset input sharing. Speed Fail Override Input Sharing: This page is used to configure the speed fail override input sharing. Woodward... -
Page 111: Figure 5-13. Configure Start Input Sharing
Figure 5-14. Configure Reset Input Sharing This page is used to configure what other modules can provide a Reset signal. Input 1-3: Used to specify the source of the Reset signal. Valid values: MODULE A, MODULE B, MODULE C or NOT USED. Woodward... -
Page 112: Figure 5-15. Configure Speed Fail Override Input Sharing
4 mA current level. Valid values: 0-32000 RPM. Speed @ 20 mA: This setting is used to configure the speed value which corresponds to the output’s 20 mA current level. Valid values: 0-32000 RPM. Woodward... -
Page 113: Figure 5-17. Configure Test Modes
Valid choices are: “NONE” (i.e., No permissive), “NOT TRIPPED” (i.e., Module not tripped and not running a test), “NOT IN ALARM” (i.e., Module not tripped, not in alarm and not running a test). Configure Auto-Sequence Test Page Figure 5-18. Configure Auto-Sequence Test Woodward... -
Page 114: Figure 5-19. Configure Modbus
Slave Address: This setting is used to set the unique slave address used by the module’s serial communications port. If all three modules are connected to the same network, each will require a unique address. Valid values: 1-247. Woodward... -
Page 115: Figure 5-20. Configure Power Supply Alarms
For reliability purposes it is recommended that two power sources be connected to each module at all times. However, in the event that two power sources are not available, users can disable either alarm. Configure Display Page Figure 5-21. Configure Power Supply Alarms Woodward... -
Page 116: Figure 5-22. Configuration Management Menu
Module to Module Configuration compare alarm. Copy Configuration: This page allows users to verify if the module’s configuration settings file matches the other module’s configuration settings files and allows the user to copy the configuration to another module. Woodward... -
Page 117: Figure 5-23. Configuration Overview
Note that passwords are not included in the configuration and are therefore not compared or copied between modules. For additional details on the values displayed on this screen, refer to the Parameter Block Definitions in the Configuration Overview screen section of the Programming and Configuration Tool (PCT) chapter. Woodward... -
Page 118: Figure 5-24. Configuration Compare
This is because the module’s overall CRC calculation can be different between modules as the Home Screen setting, Jump To Home Screen On Trip setting, and Modbus slave addresses are expected to be different between modules. Configuration Copy Page Figure 5-25. Configuration Copy Woodward... -
Page 119: Figure 5-26. Configuration Copy
Figure 5-26. Configuration Copy Press the “Copy to X” soft button to initiate copy routine to the respective module. When the Password Entry screen is displayed, enter the configuration level password and press the ENTER key. Woodward... -
Page 120: Figure 5-27. Password Change
If changing the Test Level Password, either the current test or configure password may be entered. If changing the Config Level Password, the current configure password must be entered. After successfully entering the current password, press the ENTER key. Woodward... - Page 121 Default Test Level Password: AAAAAA (as shipped from factory) Default Config Level Password: AAAAAA (as shipped from factory) There is no means to reset the password if it is forgotten. Units requiring a password reset must be returned to Woodward. Woodward...
-
Page 122: Chapter 6. Test Routines
Auto Simulated Speed Test: This page allows users to initiate the Auto Simulated Speed Test function. Auto-Sequence Test: This page allows users to initiate the Auto-Sequence Test function. Lamp Test: This page allows users to initiate the Lamp Test function. Woodward... -
Page 123: Temporary Overspeed Setpoint Test
Trip” level/setting. If during this time the rotating equipment’s speed is taken above the “Temporary Overspeed Setpoint” level, the module’s Overspeed Trip function will issue a trip command (tripping the module), and the Overspeed Trip setpoint will be set back to its normal “Overspeed Trip” level/setting. Woodward... -
Page 124: Figure 6-2B. Temporary Overspeed Test
Overspeed Trip Setpoint. When the test is ended by the user or when the “Test Time Remaining” Timer has expired, the module will trip. Test Time Expired—This message indicates the “Test Time Remaining: timer has reached zero (expired). Woodward... -
Page 125: Figure 6-3. Manual Simulated Speed Test
.0016 1000 0.16 10000 32000 20.5 Table 6-1. Simulated Speed Resolution The resolution of the internal frequency generator is described in the following graph. The discontinuities in the chart occur when different internal clock scaling occurs to optimize resolution. Woodward... -
Page 126: Figure 6-4. Test Frequency Resolution
Manual Simulated Speed Active—This message indicates the Manual Simulated Speed Test is active. Test Time Expired—This message indicates the “Test Time Remaining” timer has reached zero before the simulated speed level was raised above the Overspeed Trip setpoint. Woodward... - Page 127 Users can alternatively use/view the “Overspeed/Acceleration Log” screen to verify sensed tripped speed, maximum speed sensed during the event, sensed acceleration at trip point, and maximum acceleration sensed during event. See “General Testing Notes” below for information on related messages and their meaning. Woodward...
-
Page 128: Auto Simulated Speed Test
Speed Test is active. Test Time Expired—This message indicates the 12-second timer has reached zero before the simulated speed level was raised above the Overspeed Trip setpoint. Test Ended by Modbus—This message indicates the test was ended by a Modbus command. Woodward... - Page 129 Users can alternatively use/view the “Overspeed/Acceleration Log” screen to verify sensed tripped speed, maximum speed sensed during the event, sensed acceleration at trip point, and maximum acceleration sensed during event. See “General Testing Notes” below for information on related messages and their meaning. Woodward...
-
Page 130: Auto-Sequence Test
Note: This test routine can also be initiated periodically if the Periodic Test Timer function is configured/enabled. 3. If the module’s front panel is used to initiate this test then the “Enter Password” screen will appear. From this screen enter the “Test Level” password. Woodward... -
Page 131: Figure 6-8. Lamp Test
Periodic Test Timer function will continue to operate as normal. See “General Testing Notes” below for information on related messages and their meaning. Lamp Test Figure 6-8. Lamp Test Woodward... - Page 132 The Test Mode Permissive setting is used to prevent any of the module’s overspeed test modes/routines from being initiated when another module is in a tripped or alarm state. Valid choices are: None, Module Not Tripped, Module Not In Alarm. Woodward...
-
Page 133: Chapter 7. Programming And Configuration Tool
Cable Type Table 7-1. Service Port Specifications The PCT consists of a combination of Woodward’s “ToolKit” HMI (Human Machine Interface) software program and a special ProTech-GII application file. Although the PCT is provided with each ProTech-GII on an included software installation CD, it can also be loaded from Woodward’s Internet website... -
Page 134: Installation Of The Pct
Installation of the PCT The ProTech-GII control’s PCT is a combination of Woodward’s “Toolkit” software and a special ProTech-GII application program. Use the following installation procedure to install the PCT (Programming and Configuration Tool). -
Page 135: Using The Programming And Configuration Tool (Pct)
The correct Toolkit version is supplied with the Installer CD that is provided with the product and must be installed on a PC. Run the Toolkit service tool by double-clicking on the file ProTech- GII.wstool. The following introduction screen will be displayed on the PC. Woodward... - Page 136 “Connect”, the following pop-up window appears which prompts you to select a network: Select the Communication port that the serial interface cable is connected to and click on the Connect button in the pop-up window. When the communication link is established, the following pop-up window appears: Woodward...
-
Page 137: On-Line Menu
Selecting the Reset Peak Speed/Acceleration button will clear the Peak Speed/Acceleration. The Reset Peak Speed/Acceleration button is only visible when logged in with Test Level permissions or higher. If desired, the logs can be cleared from the front panel user interface (see Logs Menu). Woodward... - Page 138 If a configuration error exists, the configuration is not saved and the following screen appears when trying to upload the settings file to the ProTech-GII. All configuration errors must be resolved before a successful upload of the settings file can be completed. Woodward...
- Page 139 ProTech-GII are displayed. Each log can contain up to 50 events. Logs can be cleared from the View Trip and Alarm Log screen or from the front panel user interface, with Test Level permissions or higher. Woodward...
- Page 140 (after trip) and the maximum acceleration (after trip). The log can be saved to an html file using the Export button. Woodward...
- Page 141 Test Level permissions or higher. The Module Faults Log is only available from the Programming and Configuration Tool (PCT) and is not displayed on the front panel user interface. The log can be saved to an html file using the Export button. Woodward...
- Page 142 The CRC values are also displayed on the front panel user interface (see Configuration Management Menu/Configuration Overview screens). The log can be saved to an html file using the Export button. NOTE—Although some functions are not available (as noted below) on ProTech- GII, the Parameter Block CRC’s are still available. Woodward...
- Page 143 Configure Test Modes section of the Test Modes page. Note—See Test Modes CRC for Test Mode Permissive setting. Modbus: CRC code of the Configure Modbus settings on the Modbus page, excluding the Slave Address setting which has a separate CRC. Woodward...
-
Page 144: Off-Line Menu
Discrete Inputs page. Off-Line Menu Edit/View Configuration After selecting “Edit/View Configuration”, all parameters can be set or changed and loaded to the device while the ProTech-GII is operational. After selecting this button, the following screen is displayed: Woodward... -
Page 145: Configuration Of The Protech-Gii - Pct
Speed Fail Setpoint [RPM/s] Speed Fail Trip [Not Used/Used] Speed Fail Alarm [Not Used/Used] Speed Fail Timeout Trip [Not Used/Used] Speed Fail Timeout Time Speed Redundancy Manager Acceleration Redundancy Manager Trip Latch [De-energize/Energize to Trip] Woodward... -
Page 146: On-Line Configuration
After selecting one of the buttons, a sub-screen is displayed in which particular parameters for the selected function can be checked and modified if necessary. For executing this configuration, see “Configuration Settings” in this chapter. The right bottom corner of each sub-screen has three buttons and an information bar. Woodward... - Page 147 ProTech-GII module is not in a trip condition. Test Level was selected If Test Level was selected, the following pop-up window appears: Communications must be stopped and restarted using Config Level. Once logged in at the Config Level, configuration settings can be changed. Woodward...
- Page 148 If the unit is not in a trip condition, uploading is inhibited. If no trip condition is present, the configuration save will ask if a trip is desired. A trip will only be allowed if the other modules are not tripped. For configuration of all particular parameters, see “Configuration Settings” in this chapter. Woodward...
-
Page 149: Off-Line Configuration
When using the ProTech-GII Programming and Configuration Tool (PCT) for preparation of the configuration file (in isolated level), the following selections from the settings drop-down menu can be used: New from SID Specification Defaults Edit Settings File Compare Settings File Differences Woodward... - Page 150 After clicking this selection, the following sub-window appears with a list of applications: Select the appropriate file compatible with your ProTech software. If other Woodward applications are installed on your PC, a list of choices in addition to ProTech may appear in this list. Woodward...
- Page 151 ProTech-GII to a settings file on a PC. A new file can be created or an existing file can be modified. To save a setting file from the ProTech-GII to a file, either the Test Level or Config Level login is required. Woodward...
- Page 152 Serial communication was not yet established If serial communication was not yet established, and after the filename is defined and the “Next” button is selected, the following pop-up screen appears. Select the appropriate network. Woodward...
- Page 153 Programming and Configuration Tool (PCT). See “Edit Setting File” below for information on how to modify the configuration file. 10. If the communication link cannot be established, the PCT will continue to attempt to establish the communication link until the Disconnect Button is selected. Woodward...
- Page 154 The settings-files have extension *.wset. If no settings files are available, a settings file must be created (New from SID Specification Defaults), or a settings file must be loaded from the ProTech-GII to a PC (Save from Device to File). Woodward...
- Page 155 “File”, followed by “Save”, or “Save As”. Assign a file location and name, and save the file, or overwrite the existing settings file on the PC, then close the Settings Editor screen. The settings files have a *.wset extension. Woodward...
- Page 156 A trip will only be allowed if the other modules are not tripped. After clicking “Load Settings File to Device”, the following sub-window appears: Use the Browse button to select the location and name of the settings file to be uploaded to the ProTech-GII. The settings-files have a *.wset extension. Woodward...
- Page 157 Level and restart the “Load Settings File to Device” procedure. Serial communication was not yet established 6. If serial communication was not yet established, and after the filename is defined and the “Next” button is selected, the following pop-up screen appears that requests you to select a Network. Woodward...
- Page 158 A trip will only be allowed if the other modules are not tripped. 10. If the communication link cannot be established, the PCT will continue to attempt to establish the communication link until the disconnect button is used. Woodward...
- Page 159 If the configuration contents of a ProTech-GII need to be compared with the configuration contents of a file, a configuration file of the contents of the ProTech- GII must first be created by selecting “Save from Device to File”. Woodward...
-
Page 160: Configuration Settings - Pct
Input Configuration: Speed Discrete Inputs Modbus Functions: Test Modes Program Logic: Start Logic/Misc Output Configuration: Other Outputs The following parameters can be set: Woodward... - Page 161 “No” to allow other screens to be viewed during a trip event. Speed and Redundancy Management If the “Speed” button is selected, the following screen is displayed: The following parameters can be set: Woodward...
- Page 162 Base Function (3 inputs valid): Select the redundancy mode. Choices are Median, LSS (Low Signal Select), or HSS (high Signal Select). Fallback Function (2 inputs valid): Select the redundancy mode when only two of three speed signals are valid. Choices are HSS or LSS. Woodward...
- Page 163 1 output voltage is out of range. Valid values: No or Yes. Power Supply 2 Alarm Enabled: When used, this alarm is activated when power supply 2 output voltage is out of range. Valid values: No or Yes. Woodward...
- Page 164 Inputs 1-3: This selection creates the “ORed” state for the dedicated discrete Speed Fail Override input from each module. Selections are Module A Speed Fail Override, Module B Speed Fail Override, Module C Speed Fail Override, or Not Used. Woodward...
- Page 165 The speed of the rotating machine must be raised within the allowed test time span in order to test the trip action. If the overspeed setpoint is not exceeded within this time span, the overspeed test is aborted. Woodward...
- Page 166 The test can be repeated as needed and a cancel option is provided to cancel the test or to return to the previous test modes screen. If the “Test Modes” button is selected, the following screen is displayed: Woodward...
- Page 167 Other Outputs Each unit has one 4–20 mA analog output. The analog output is a 4–20 mA signal proportional with measured speed of which scaling can be adjusted using the 4 mA value and 20 mA value input fields. Woodward...
-
Page 168: Protech-Gii Configuration Checks
If a configuration error is detected during a settings file load, the file load is aborted and the values are discarded. Detection of configuration warnings will not preclude a settings file load operation. Woodward... - Page 169 Error – <block identifier> configuration contains data that is invalid (out-of-range). Condition: A setting has been detected that is out of the range allowed. This error condition needs to be corrected in the Programming and Configuration Tool (PCT) and should be reported to Woodward for correction. Woodward...
-
Page 170: Error Messages And Solutions
ProTech. If there is an error, the settings are not changed. The PCT must be connected to the ProTech-GII to see this log. The results are stored in volatile memory so a power cycle would clear this log. Woodward... -
Page 171: Chapter 8. Modbus Communications
Thus a module will only accept an Initiate Test command and perform the requested test if all three modules are healthy, not tripped, not in a test mode, and optionally not in alarm. Woodward... -
Page 172: Modbus Communication
This list consists of Boolean Write, Boolean Read, and Analog Read parameters. Analog write parameters are not used nor available with this device. Reserved address ranges can be read, but they are undefined for ProTech-GII. Woodward... - Page 173 Analog Read registers are used by an external master device (plant DCS, etc.) to read the value of internal ProTech-GII module signals (hardware inputs, logic blocks, hardware outputs, etc.). An example of an analog read value would be actual speed. Woodward...
- Page 174 This register indicates the state of the Auto Sequence Test as follows: 0 = Not Started 1 = Passed 2 = Failed 3 = Not Completed ADDRESS DESCRIPTION Reset 0:0001 Confirm Auto Speed Test 0:0101 Initiate Auto Speed Test 0:0102 Abort Auto Speed Test 0:0103 Table 8-3. Boolean Write Addresses (Code 05) Woodward...
- Page 175 Power Supply 2 Fault Alarm 1:0205 Speed Fail Alarm 1:0206 Speed Lost Alarm 1:0207 Speed Probe Open Wire Alarm 1:0208 Speed Red Mgr Input Difference Alarm 1:0209 Speed Red Mgr Input 1 Invalid Alarm 1:0210 Speed Red Mgr Input 2 Invalid Alarm 1:0211 Speed Red Mgr Input 3 Invalid Alarm 1:0212 Temp Overspeed SP is Active Alarm 1:0213 Simulated Speed Test in Progress Alarm 1:0214 Auto Speed Test Active Alarm 1:0215 Auto Speed Test Failed Alarm 1:0216 Auto Sequence Test Active Alarm 1:0217 to 1:0222 Reserved 1:0223 Trip Latch Output Alarm 1:0224 to 1:298 Reserved 1:1001 Speed Fail Override 1:1002 Overspeed 1:1003 Over‐acceleration 1:1004 Speed Fail Trip Non‐Latched Woodward...
- Page 176 1:1336 Speed Red Mgr Input 3 Invalid 1:1337 Speed Red Mgr Input Difference 1:1338 Accel Red Mgr Input 1 Invalid 1:1339 Accel Red Mgr Input 2 Invalid 1:1340 Accel Red Mgr Input 3 Invalid 1:1341 Speed Probe Open Wire Alarm Non‐Latched 1:1342 Speed Red Mgr Trip Non‐Latched 1:1343 to 1:1345 Reserved 1:1401 to 1:1430 Reserved 1:1431 Module A Trip Latch Out 1:1432 Module A Alarm Latch Out 1:1433 Module B Trip Latch Out 1:1434 Module B Alarm Latch Out 1:1435 Module C Trip Latch Out 1:1436 Module C Alarm Latch Out 1:1501 Heartbeat Table 8-4. Boolean Read Addresses (Code 02) Woodward...
- Page 177 Last Trip time and date indication registers (3:1001 - 1007) will indicate the sensed date and time of the event. This Date/Time will remain locked in these registers until the next trip condition occurs. Woodward...
-
Page 178: Chapter 9. Safety Management
PFH = Probability of a dangerous Failure per Hour (High Demand or Continuous mode of operation) PFD and PFH calculations have been performed on the ProTech-GII according IEC61508. For SIL3, IEC states the following requirements. Type SIL 3 Value to 10 to 10 > 90% Woodward... -
Page 179: Failure Rate Data
Refer to Chapter 3 of this manual and Figures 3-14 to 3-18 for ProTech-GII based response time information. Limitations When proper installation, maintenance, proof testing, and environmental limitations are observed, the product life of the ProTech-GII is 20 years. Woodward... -
Page 180: Management Of Functional Safety
All persons involved in the initial design or modification of the programmable software, installation and maintenance must have appropriate training. Training and guidance materials include this manual, the ProTech-GII Programming and Configuration Tool, and training programs available at Woodward. See Chapter 12 (Service Options) for more information. Operation and Maintenance Practice A periodic proof (functional) test of the ProTech-GII is required to verify that no dangerous faults not detected by internal run-time diagnostics remain undetected. -
Page 181: Functional Testing After Changes
Chassis isolation checks using resistance measurement. Measure from terminals 66, 67 to a point on the ProTech-GII chassis (the grounding braid is a good place for this measurement): < 1 . 10. Perform a lamp test from front panel Test Menu. Woodward... -
Page 182: Chapter 10. Troubleshooting
Unlit—No alarms or the module is not powered. Yellow—Active alarms, press VIEW button below LED to see the alarm log or navigate to the Monitor Alarm Latch screen to see the active status on each alarm input. Woodward... -
Page 183: I/O Troubleshooting
Internally supplied wetting Measure voltage from terminal 1 to voltage fault. terminal 81 and verify it is 23 V ±2 V. If out of range, return unit to Woodward. Woodward... - Page 184 LO wires are terminated to the correct terminals for RS-485 and likewise for TXD and RXD for RS-232. Also verify the terminations jumpers are installed for RS-485 mode Configuration Using the PCT or front panel, verify the correct settings are selected. Woodward...
-
Page 185: Trip Indications
Log. This log expands the Internal Fault annunciation. In general, it is not possible to fix internal faults without returning the unit to Woodward. Power Up Trip The module has lost Power source Verify power source, (if configured for De-energize to... -
Page 186: Table 10-2. Trip Indications
Incorrect speed fail See manual for description of detected speed timeout time function. Use PCT to verify within the time set configured proper configuration settings. by the Speed Fail Timeout setting. Table 10-2. Trip Indications Woodward... -
Page 187: Alarm Indications
One of the speed Wiring fault, speed Check wiring continuity and (if speed redundancy is probes is reading probe fault. probe integrity, replace used) different from the probe. others. Incorrect speed gear ratio or number of teeth Check speed sensor configured, configuration. Woodward... -
Page 188: Table 10-3. Alarm Indications
Auto Sim Spd Test Indicates the Internal problem with the Return unit to Woodward. Failed automated simulated unit. overspeed test failed. Auto Sequence Test Indicates the User enabled the auto... -
Page 189: Chapter 11. Protech-Gii Configuration Worksheet
Module C Speed MANAGER Base Function (3 Median / HSS / Median inputs) Two Inputs Failed Trip / No Trip No Trip Action Fallback Function HSS / LSS (2 inputs) Difference Alarm 0-32000 rpm Limit Difference Alarm 4-10000 ms Time Woodward... - Page 190 Latching / Non- Trip Latch Output Latching Latching Parameter Option/Range Default User Setting ALARM Trip is Alarm Yes/No LATCH Parameter Option/Range Default User Setting Speed at 4 mA 0-32000 rpm ANALOG Speed at 20 mA 0-32000 rpm 32000 OUTPUT Woodward...
- Page 191 Selected Home All Pages Home Screen DISPLAY Home Screen On Yes / No Trip Option Parameter Option/Range Default User Setting Enable CONFIGURATION Configuration Yes / No COMPARE Compare PASSWORD CHANGE – Test Level Password _______________ Config Level Password _______________ Woodward...
-
Page 192: Chapter 12. Product Support And Service Options
A Recognized Turbine Retrofitter (RTR) is an independent company that does both steam and gas turbine control retrofits and upgrades globally, and can provide the full line of Woodward systems and components for the retrofits and overhauls, long term service contracts, emergency repairs, etc. -
Page 193: Returning Equipment For Repair
Flat Rate Remanufacture: Flat Rate Remanufacture is very similar to the Flat Rate Repair option with the exception that the unit will be returned to you in “like- new” condition and carry with it the full standard Woodward product warranty (Woodward Product and Service Warranty 5-01-1205). This option is applicable to mechanical products only. -
Page 194: Replacement Parts
Engineering Services Woodward offers various Engineering Services for our products. For these services, you can contact us by telephone, by email, or through the Woodward website. Technical Support ... -
Page 195: Technical Assistance
ProTech-GII Overspeed Protection Device Technical Assistance If you need to contact technical assistance, you will need to provide the following information. Please write it down here before contacting the Engine OEM, the Packager, a Woodward Business Partner, or the Woodward factory: General... -
Page 196: Chapter 13. Asset Management
However, to take advantage of related product software and hardware improvements, Woodward recommends that your product be sent back to Woodward or to a Woodward authorized service facility after every five to ten years of continuous service for inspection and component upgrades. -
Page 197: Appendix . Modbus Ethernet Gateway Information
Appendix. Modbus Ethernet Gateway Information Introduction For customers who want to use Modbus Ethernet communications or put the ProTech on the plant network, Woodward recommends the following Ethernet-to- Serial Gateways: B&B Electronics – Model: MESR901 Serial: RS-232, RS-485, or RS-422 Power Input: 10–48 Vdc... - Page 198 ProTech-GII Overspeed Protection Device Manual 26709 Wiring RS-232 NOTE—The Serial DB9 connection is used for RS-232 communication only. RS-485 2-wire NOTE—Use the terminal block for wiring of RS-485 communications. Woodward...
- Page 199 14—15 and 18—19 to activate the termination. Configuration – Configuration of the MESR901 is done through Vlinx Modbus Gateway Manager. The configuration software is provided with the device. Network Settings Modbus TCP Settings Woodward...
-
Page 200: Lantronix Setup
ProTech. When multi-dropping the 3 modules together using RS-485/422, you will need to assign each module a unique node address, which can be found in the Modbus configuration screen on the ProTech. Woodward... - Page 201 Manual 26709 ProTech-GII Overspeed Protection Device Wiring RS-232 Verify that the dip switch on the front of the device is in the up position, indicating RS-232 communications. RS-485 2-wire Woodward...
- Page 202 The ProTech has the termination resistor built into the module, jumpers are necessary between terminals 14—15 and 18—19 to activate the termination. Configuration Configuration of the UDS100-Xpress DR IAP is done through DeviceInstaller. The configuration software is provided with the device. Overview Network Menu Woodward...
- Page 203 Manual 26709 ProTech-GII Overspeed Protection Device Serial Settings Menu NOTE—For RS-485 communications, choose option 3 under interface type and don’t forget to set the dip switch on the front of the device. Modem Control Menu Woodward...
- Page 204 ProTech-GII Overspeed Protection Device Manual 26709 Advanced Menu Woodward...
-
Page 205: R Evision H Istory
Expanded/clarified Module Removal & Installation section (Chapter 2) Changes in Revision C— Updates throughout Changes in Revision B— Major updates throughout Changes in Revision A— Added new part number (8237-1660) Updated information on PN 8237-1656 (Table 1-1) Woodward... -
Page 206: D Eclarations
ProTech-GII Overspeed Protection Device Manual 26709 Declarations Woodward... - Page 207 26709 Please reference publication ËB26709è:èF´ ¹ ¶ ¸ µ ¹ Î PO Box 1519, Fort Collins CO 80522-1519, USA 1041 Woodward Way, Fort Collins CO 80524, USA Phone +1 (970) 482-5811 Email and Website—www.woodward.com Woodward has company-owned plants, subsidiaries, and branches, as well as authorized distributors and other authorized service and sales facilities throughout the world.
Need help?
Do you have a question about the ProTech-GII 8237-1594 and is the answer not in the manual?
Questions and answers