Table of Contents
Advertisement
Quick Links
Version: 2.0
The purpose of this book is to give programming inspires for the VS series PLC. For the installation, wiring,
maintenance and safety precautions of VS Series PLC, please refer to the VS Series PLC Product Manual.
Name of Manual
VS Series PLC
Programming Manual
(This book)
VS Series PLC Product Manual
VIGOR
®
WINDOWS is a registered trademark of Microsoft Corporation in the United States.
Other products or service names appeared in this book are the property of their companies .
VS Series PLC
Programming Manual
Descriptions of VS Series PLC components
Functions of basic instructions and application instruction
Precautions regarding programming
Introduction to VS Series PLC
Environment, wiring and installation cautions of VS Series PLC
Precautions of environment, wiring and installment
Instructions of optional devices
is a registered trademark of VIGOR ELECTRIC CORP . in Taiwan.
Date: August , 2018
Preface
Content
Trademark
Advertisement
Table of Contents

Summary of Contents for Vigor VS Series
- Page 1 Date: August , 2018 Preface The purpose of this book is to give programming inspires for the VS series PLC. For the installation, wiring, maintenance and safety precautions of VS Series PLC, please refer to the VS Series PLC Product Manual.
-
Page 2: Table Of Contents
1-1-6 Some Improper Diagrams at a PLC Program 1-1-7 Double Coil Output 1-1-8 Conclusion 1-2 The VS Series PLC Products Overview 1-3 Specification Table of All the VS Series Main Units 1-4 Overview of VS series PLC models 2. Component Descriptions 2-1 Table of Components... - Page 3 2-9 Index Register (V and Z) 2-9-1 Using Index Register in Basic Instruction 2-9-2 Using Index Register in Application Instruction 2-9-3 Demonstration Program Using Index Register 2-10 Mark Pointer and Branch Pointer (P) 2-11 Table Nickname and Table Code (Q) 2-12 Interrupt Pointer (I) 2-13 Numerical System 2-14 Special Relay and Special Register...
- Page 4 3-9 The OUT and RST Instructions for the Timer or Counter 3-10 Significant Notes for Programming 3-10-1 Convert the Ladder Diagram to the Instruction List 3-10-2 Programming Techniques 4. Sequential Function Chart (SFC) and Step Ladder (STL) 4-1 What is the Sequential Function Chart (SFC) 4-1-1 The Framework of SFC 4-1-2 Basic Components of SFC 4-1-3 State and Action of SFC...
- Page 5 6-4 Arithmetic and Logical Operation Instructions 6-5 Rotary and Shift Instructions 6-6 Data Operation Instructions 6-7 High Speed Processing Instructions 6-8 Handy Instructions 6-9 External Setting and Display Instructions 6-10 Serial Communication Instructions 6-11 Handy Instructions 6-12 Floating Point Arithmetic Instructions 6-13 Advanced Data Processing and MBUS Instructions 6-14 Real Time Clock Related Instructions 6-15 Code Conversion and Timer Instructions...
- Page 6 7-3-4 VB Computer Link Slave 7-3-5 MODBUS Slave 7-3-6 MODBUS Master 7-3-7 CPU Link 7-3-8 Non Protocol 7-4 VS Series PLC Communication Protocol 8. Statement of Positioning Control Functions 8-1 Positioning Parameter Setup 8-1-1 Assign the positioning Units 8-1-2 Basic Parameters...
-
Page 7: Introduction Of Vs Series Plc
1. Introduction of VS series PLC 1-1 The Basic Concept of PLC Users 1-1-1 Introduction of PLC The programmable Logic Controller (PLC) is an industrial computer control system that is easy to maintain, low cost and saves space. In addition to its programmable features, because it is used in the eld of industrial control, PLC is also required to have high reliability and resistance to climate. - Page 8 Program memory The memory for the PLC user to store the compiled control program, can let the CPU to interpret and compute then produces the control procedures. The program memory must have the ability to preserve its contents, in order to continue work after the power is resumption.
-
Page 9: Plc Operation And Scan Time
1-1-3 PLC Operation and Scan Time The PLC systems use microcomputer technology to achieve the purpose of simulating traditional relay control panel. The microcomputer rst reads the external inputs and then sequentially scans and executes the user program, so as to calculate the control result that the user wants to achieve. -
Page 10: Plc Input Signals
1-1-4 PLC Input Signals PLC's input endpoint is a window for PLC to accept control signals from outside, and is used to interface with a variety of switches and sensing elements. In recent years, the PLC functions have been tending to more developed diversication, detecting elements connected with the input points are also more diverse. -
Page 11: Plc Output Signals
1-1-5 PLC Output Signals The PLC's output endpoint is a window for PLC to send out the computed results, and is used to interface with a variety of loads. Since the output signals are to drive external loads and to complete machine's actions, must pay extra attention about the safety. -
Page 12: Double Coil Output
1-1-7 Double Coil Output The PLC program with the following characteristic will affect the operation result, please pay special attention. 1. When executing the user program PLC follows sequential scan (from left to right, up to down). 2. In the PLC executing process, only the contents of the data memory will be used and changed. Actually to drive the external loads are performed after the execution of the program and there is a procedure to output the computing results. -
Page 13: The Vs Series Plc Products Overview
1-2 The VS Series PLC Products Overview VS Series Controller Provides [Comprehensive] Control Application Series VS3 High Performance VS1 General VS2 Advanced VSM Motion Control Item Process Time of /Step /Step / Step 0.17µs/Step 0.17 0.17 0.15 µs µs µs... -
Page 14: Specification Table Of All The Vs Series Main Units
1-3 Specification Table of All the VS Series Main Units Item VS1 Series VS2 Series VSM Series VS3 Series Operation Control Method Cyclic Operation by Stored Program Programming Language Ladder Diagram + Sequential Function Chart (SFC) or Ladder Diagram + Step Ladder (STL) - Page 15 Item VS1 Series VS2 Series VSM Series VS3 Series 16-bit K–32,768 ~ K32,767 Decimal K –2,147,483,648 ~ K2,147,483,647 32-bit Range of 16-bit H 0 ~ HFFFF Hexadecimal Constant 32-bit H 0 ~ HFFFFFFFF Real No. (E) E–3.402 + 38 E3.402 + 38, decimal or exponent notation 32-bit Main Unit Programming...
-
Page 16: Overview Of Vs Series Plc Models
1-4 Overview of VS series PLC models Main Specification Item Model Name VS1 Main Unit: 6 DI (DC 24V, X0~X5 10 kHz); 4 DO ★; 16K words project memory; 1 Expansion Card socket; ★ VS1-10M I/O by screw-clamp terminal VS1 Main Unit: 8 DI (DC 24V, X0~X7 10 kHz); 6 DO ★; 16K words project memory; 1 Expansion Card socket;... - Page 17 VSPC-200A Connection length: 200 cm Cable Extension Cable: For the Expansion Slot of the VS series; length□□□:50/100 cm VSEC- □ □ □ 8 Relays Output Module: 16A 1c contact relays; with varistors and relay sockets VB-T8R 8 Relays Output Module: 5A 1a contact relays; with 5mm removable screw-clamp terminals VB-T8RS 8 MOSFETs Output Module: 2A current source MOSFETs;...
-
Page 19: Component Descriptions
2. Component Descriptions 2-1 Table of Components Description Item X0~X77, 64 Pt.(named by the octal system) VS1 Series X0~X177, 128 Pt.(named by the octal system) VS2 Series External Input X0~X177, 128 Pt.(named by the octal system) VSM Series X0~X377, 256 Pt.(named by the octal system) VS3 Series Y0~Y77, 64 Pt.(named by the octal system) VS1 Series... -
Page 20: External Input (X) And External Output (Y)
2-2-1 External Input (X) VS Series PLCs read the ON/OFF status of various external switches and sensing elements as operating conditions through the input points. To prevent problems such as noise interference and switch bouncing, there is a filter of about 10ms equipped at each input point. -
Page 21: External Output (Y)
2-2-2 External Output (Y) The contacts of external output in the VS Series PLC are for the purpose of to drive external loads. By transmitting the operation results through its external output points, the PLC drives various loads, such as motors, electromagnetic valves, electromagnetic conductors, etc. -
Page 22: External Input/Output Assigned Numbers
2-2-3 External Input/Output Assigned Numbers The identification numbers of the External Input/Output points are assigned by the octal numeral system. The table below lists the assigned numbers of Input (X) and Output (Y) in the VS1 Main Unit: Models VS1-10M VS1-14M VS1-20M VS1-24M... - Page 23 Notes for VS2, VSM and VS3 Series PLCs module expansion. The Main Unit of VSM-14M is not equipped with the module expansion slot, cannot be connected with any module or special module. The Main Unit of VS2, VSM or VS3 equips a module expansion slot, could connect with DIO expansion modules and special modules.
-
Page 24: Auxiliary Relay (M)
2-3 Auxiliary Relay (M) The PLC includes considerable internal Auxiliary Relays (M), the function of those are to store up plenty ON/OFF status, which provided data for the processing demand. The operating method of an Auxiliary Relay is the same way to operate the External Output Y, but the contact of Auxiliary Relay can not directly drive an external load. -
Page 25: Step Relay (S)
2-4 Step Relay (S) A Step Relay is the basic component in the Sequential Function Chart (SFC) or Step Ladder (STL). The identifier number of a Step Relay S uses the decimal method, and the functions can be divided into four different types: (1) Initial Step Relay It is used in the initial status of the Sequential Function Chart . -
Page 26: Timer (T)
2-5 Timer (T) The timers count the time are by increase counting. When the timer's Present Value = Set Value (the value designated to a Timer), the contact of the timer is (ON). The real Set Value of a timer = Designated number × Unit of the timer The set value of a timer can be set directly by using a constant number K or indirectly by using the content value in a Data Registers D or R. -
Page 27: Using A Timer In A Subroutine
2-5-3 Using a Timer in a Subroutine When the PLC scans to the coil of an general non-retentive timer (not includs T192~T199), it accumulates or clears the present value of the timer then controls its contact. When the PLC scans to the END instruction, it accumulates or clears the current value of each T192~T199 timer then controls its contact. -
Page 28: Counter (C)
2-6 Counter (C) When the pulse input signal in a counter turns from OFF to ON, the present value of the counter will increase (+1 in a up count) or decrease (-1 in a down count) each time, based on the counting types of counters. If the present value equals to set value, the counter's contact turns to be ON. -
Page 29: 32- Bit Counter
2-6-2 32- bit Counter The X0 drives the M9200 to define the UP/Down count direction of the M9200 C200. It OFF is defined as an UP count; while ON for Down count. When the counting signal X2 switches from OFF to ON, C200 R S T C 2 0 0 accumulates counting, and the present value in the register alters. -
Page 30: Methods To Appoint The Set Value Of A Counter
2-6-3 Methods to Appoint the Set Value of a Counter 16-bit Counter Indirect setting by using a Data Register D Direct setting by a constant number K K100 MOV K50 D0 C0 becomes a UP counter with 100 counts. When D0=50, C0 becomes a counter with 50 counts. When D0=200, C0 becomes a counter with 200 counts. -
Page 31: Software High Speed Counter
2-7 Software High Speed Counter Each one of the input points X0~X7 in the VS series PLC can be used for high speed function, such as the high speed counter, external interrupt or frequency meter. If a X0~X7 is not designed for high speed function, it can still be used as a general input point. -
Page 32: 1-Phase High Speed Counter
2-7-1 1-Phase High Speed Counter The X20 drives the M9235 to define the Up/Down count direction of the C235. M9235 When the X22 is ON, the C235 will receive that count signal from the X0. R S T C 2 3 5 When the signal X21 is ON, the RST instruction is executed. -
Page 33: 2-Phase High Speed Counter
2-7-2 2-Phase High Speed Counter When X21 is ON, the C246 receives counting signal from either X0 or X1 R S T C 2 4 6 input point. When X20 is ON, the RST instruction is executed. C246's present value is C246 reset to 0, and its output contact becomes OFF. -
Page 34: A/B Phase High Speed Counter
2-7-3 A/B Phase High Speed Counter The A/B phase high speed counter is exclusively for receiving A/B phase pulses from a rotary or linear encoder. When X21 is ON, C251 is activated to receive pulse signals from input R S T C 2 5 1 point X0 (A-phase) and X1 (B-phase). -
Page 35: Precautions For Using The Software High Speed Counter
2-7-4 Precautions for Using the Software High Speed Counter The VS series PLC is equipped with the Software High-Speed Counters (SHSC) and the Hardware High-Speed Counters (HHSC). Since the Software High-Speed Counters operate in a way of interrupt and thus occupy considerable CPU's capacity and influence its efficiency. - Page 36 (2) Limit of total interruption frequency that PLC system can accept: The VS series PLC can accept about 200kHz of total interruption frequency. (The sum of 1-phase counting frequencies) + (The sum of 2-phase counting frequencies) + (The sum of A/B-phase counting frequencies) ×...
-
Page 37: Data Register (D) And Expansion Register (R)
VS series Memory Cards The VS series PLC provides the VS-MC and VS-MCR memory cards. After the installation of a memory card, 655,360 words of latched data storage space are available. Data can be transferred between the data register and the memory in the card via the data bank write instruction DBWR (FNC 91) and the data bank read instruction DBRD (FNC 90). -
Page 38: Index Register (V And Z)
2-9 Index Register (V and Z) Index Register V, Z is a very special register in the VS series PLC. Its purpose is to use the index to modify the operand in an instruction, to serve the purpose of specifying the operand indirectly and exchangeable, thereby improving the flexibility and efficiency of program editing. -
Page 39: Using Index Register In Application Instruction
2-9-2 Using Index Register in Application Instruction The Index Registers can be used to modify the operand in an application instruction, the modifiable components are shown below: Bit component: X, Y, M, S Pointer: P , Q (P as the label name of the jump or subroutine cannot be modified) Word component: The present value of T and C Index register D, R The KnX, KnY, KnM, KnS which is composed by X, Y, M, S (Kn itself can not be modified) - Page 40 To add up all values in D0~D9 and store the result into the D10. M9000 Reset the content of V1 to zero Reset D100 to zero, this component is to store the result D100 Assign to execute 10 times within the loop, that for every command between the For FOR K10 and Next instructions.
-
Page 41: Mark Pointer And Branch Pointer (P)
In the past, the VB series PLC only had Branch Pointer P , which indicates a specific location with indication number, but the program's readability was disadvantageous. Therefore, the VS series PLC newly enhances the Mark Pointer indicator function to enable programmers use illustrative text to indicate a specific address, thus greatly increases the readability. -
Page 42: Table Nickname And Table Code (Q)
In order to meet the demands, the VS series PLC has provided the “Table” as a data source form. The table is a data set by collecting data of relevant characteristics, such as data table, MBUS communication table, LINK communication table. -
Page 43: Interrupt Pointer (I)
The interrupt, as the name suggests, is to break the sequentially executed program, and then insert a program section to be processed immediately. In the VS series PLC, every Interrupt Pointer is bound up with its interrupt subroutine to interruption. - Page 44 The interruption is a special mechanism for to break the rules of regular operation; an interrupt subroutine is not regularly implemented. Therefore, special attention must be paid to the components that are driven in the interrupt subroutine. If a step relay is for to active a part of the SFC, it is not allowed to be driven in an interrupt subroutine. The following example shows that the elements driven in the interrupt subroutine remain in their state.
-
Page 45: Numerical System
2-13 Numerical System (1) Binary Number (BIN) The value in PLC is operated and stored used the binary system. The binary number and relative terminology are given as follows: Bit: the basic of the binary number, each value of a Bit must be either “0” or “1”. Nibble: composed of 4 sequential bits. - Page 46 (2) Octal Number (OCT) The assigned numbers of PLC’s external input and output terminals are displayed by the octal system. For example, The external input ports: X0 ~ X7, X10 ~ X17 The external output ports: Y0 ~ Y7, Y10 ~ Y17 (3) Decimal Number (DEC) Decimal Number is the value system which people are familiar with.
- Page 47 (7) Floating Point (Real number) The PLC was provided with Floating Point instructions therefore the PLC can calculate decimal numbers. The decimal numbers are storage and calculated in a PLC using two different pattern formats: Binary Floating Point Number and Decimal Floating Point Number. The expositions are showed below. Binary Floating Point Number Inside of the PLC, the Floating Point calculates and decimal number storages are using Binary Floating Point Numbers.
-
Page 48: Special Relay And Special Register
2-14 Special Relay and Special Register In the tables below, the symbol “ ” represents that the component is not allowed to use an instruction in the program to ■ drive the relay or write data to the register. And if the special relay or the special register is not listed in this table, which is reserved for the system and can not be used to drive the relay or write the data to the program either. - Page 49 Relay ID Description Series Assigning Specification of Applied Operation Instructions Mode VS1 VS2 VSM VS3 Assign the BINDA operating mode. 16-bit instruction: If M9091= “OFF”, will add the end of string 0000H after the result. If M9091=“ON”, will only convert the data without to add the end of string. M9091 ○...
- Page 50 Relay ID Description Series VS1 VS2 VSM VS3 Pulse Measurement To set the mode of X1's pulse measurement. “OFF”: pulse width measurement, M9081 ○ ○ ○ ○ “ON”: pulse period measurement To set the mode of X3's pulse measurement. “OFF”: pulse width measurement, M9082 ○...
- Page 51 Relay ID Description Series The 32-bit Counter Count Direction Control M9200 When M92 □□ =“OFF”, the C2 □□ is operated as a up counter. ○ ○ ○ ○ When M92 □□ =“ON”, the C2 □□ is operated as a down counter. M9234 Controlling Flag of Software High Speed Counter Count Direction M9235...
- Page 52 Relay ID Description Series Y2 Axis's Positioning Control Flag VS1 VS2 VSM VS3 Y2 axis's status. “OFF” means the Y2 is in the READY status, it is available for a positioning M9380 ■ ○ ○ ○ ○ instruction; while “ON” = BUSY, the Y2 has been occupying. Y2 axis's pulse output monitor.
-
Page 53: Instruction Table Of Special Register
2-14-2 Instruction Table of Special Register Register Description Series ID No. PLC Operation Status Time Setting of Watch Dog Timer. The WDT default value is 200ms (unit: 1ms) D9000 ○ ○ ○ ○ Error code. When M9004= “ON”, this content value will show an error report. Please refer to the D9004 ■... - Page 54 Register Description Series ID No. VS1 VS2 VSM VS3 Pulse Measurement D9074 Lower 16 bits The X0's rising edge to catch the present value of loop counter. ○ ○ ○ ○ (unit: 1/6 µs) Upper 16 bits D9075 Lower 16 bits D9076 The X0's falling edge to catch the present value of loop counter.
- Page 55 Register Description Series ID No. VS1 VS2 VSM VS3 RND, HSCT, INT D9160 Lower 16 bits Providing a number for the RND (FNC184) instruction to produce a ○ ○ ○ ○ random value. Initial value: K1 Upper 16 bits D9161 D9162 ■...
- Page 56 Register Description Series ID No. Y0 Axis's Positioning Control The Y0's maximum speed (by user unit). D9340 Lower 16 bits (Convert it to the real frequency that should appropriate to the PLC's range: ○ ○ ○ ○ Upper 16 bits D9341 VS1, VS2 is 1~50kHz;...
- Page 57 Register Description Series ID No. Y2 Axis's Positioning Control The Y2's maximum speed (by user unit). Lower 16 bits D9380 (Convert it to the real frequency that should appropriate to the PLC's range: ○ ○ ○ ○ Upper 16 bits D9381 VS1, VS2 is 1~50kHz;...
-
Page 58: Error Code Description
2-14-3 Error Code Description System error information (use the contents of D9004) Opportunity to Detect the Error PLC Status Status of the ERR Indicator Error Code Error Cause Twinkling by 1Hz STOP → RUN 9064 PLC ID≠Project ID STOP STOP → RUN Twinkling by 1Hz 9065 PLC model is incorrect... -
Page 59: The X0~X7 High Speed Input Function Description
2-15 The X0~X7 High Speed Input Function Description The input points X0~X7 of the VS Series PLC have the abilities to respond to high-speed input and to execute many high speed functions. The functions of these 8 output points are listed as follows. -
Page 60: External Interrupt
IRET The VS series PLC external interrupt has the function of delay interrupt. That delay time is by the unit of 1ms. This feature allows the user to change the starting of the interrupt subroutine by the parameter adjustments, without to change the external detector's location where the interrupt signal has occurred. -
Page 61: Pulse Capture
2-15-2 Pulse Capture The function of pulse capture is to get the input signal which the width of ON is narrow. If an input point X0~X7 is not to use an input special function, its pulse capture is active automatically. The pulse signals which X0~X7 input points capture will reect to the special relays M9170~M9177. -
Page 62: Pulse Measurement
2-15-3 Pulse Measurement With the pulse measurement function, the VS series PLC can measure X0, X1, X3, X4 input pulse signal's ON width or cycle period. The pulse measurement function uses an 1/6 µs loop counter to store the count value to the specic special registers at the rising edge and falling edge of the input signal respectively. - Page 63 Program example 1: Pulse width measurement at the X0 input point. X0 input signal Measuring zone M9075 Use the M9075 to drive the M9076 to activate the X0's pulse measurement function. M9076 FEND The First End instruction. End of the main program. The IX0F external interrupt pointer.
-
Page 64: Hardware High Speed Counter
2-15-4 Hardware High Speed Counter The VS series PLC has two sets of Hardware High-Speed Counter: HHSC1 and HHSC2. To reach the purposes of high-speed counting, the HHSC uses its hardware circuit to get high-speed pulse input. Therefore, in the counting process, HHSC will not affect the efficiency of CPU implementation. When planning a control system, one can make good use of HHSC function. - Page 65 The operating modes of HHSC are illustrated by using the HHSC1. Mode 1: 1-phase Up count Mode 2: 1-phase Up/Down count Up count DIR(X1) Down count U(X0) U/D(X0) HHSC1 HHSC1 Present value Present value Mode 3: 2-phase Up/Down count Mode 4: AB-phase×1 count The encoder is reversed here U(X0) A(X0)
- Page 66 Program example: This exemplary program is mainly used to describe the actual usage of the HHSC1 and HHSC2. To use the HHSC, only need to set the counting mode at the special register, then the HHSC can start to count obediently.
-
Page 67: Expansion Card Related Components
2-16 Expansion Card Related Components The Expansion Card Sockets are designed for exible expansions, on the upper side of the VS Series PLC. Which are available to install DIO expansion cards to increase a small number of control points in a cost effective way. Also can install the communication port (CP) expansion card to expand communication capabilities for linking with external accessories of communication control. -
Page 68: The Dio Expansion Card Related Components
2-16-1 The DIO Expansion Card Related Components When a DIO Expansion Card is installed in the Main Unit, those components' X/Y numbers at this card are correspond to their Simple Codes respectively. (★ Selectable output: R: Relay; T: NPN transistor) Simple Code at the DIO Card Model Name of Expansion Card... -
Page 69: The Communication Expansion Card Related Components
2-16-2 The Communication Expansion Card Related Components At the VS1 series PLC, only one CP card can be installed at the EC1 socket. Since the VS1 series PLC has two communication ports the built-in CP1 and the expandable CP2, thus the installed CP card is to provide the CP2. At the VS2 or VSM series PLC, only one CP card can be installed at the EC1 socket. - Page 70 The special relays and registers related to the CP5: ( means read only) ■ Component ID No. Description CP5 RS instruction data sending out request ag. M9140 CP5 RS instruction data receive completed ag. M9141 CP5 RS instruction data receive time-out ag. M9142 CP5 RS / LINK / MBUS instruction on communication abnormal ag.
-
Page 71: The Special Function Expansion Card Related Components
2-16-3 The Special Function Expansion Card Related Components For convenience, every EC1~EC3 expansion card socket at a VS series PLC will possess 20 special registers that is the working area of the installed expansion card. When a special card is installed in the socket, the PLC can access related data for the respective device on the card through its working area. - Page 72 EC Card Register (Simple Code) Related to the VS-2DA-EC Component Description To assign the analog output modes of AO1~AO2. EC1D10 EC2D10 EC3D10 Digital set value for AO1, 0~4000 or 0~3200. EC1D11 EC2D11 EC3D11 Digital set value for AO2, 0~4000 or 0~3200. EC1D12 EC2D12 EC3D12...
- Page 73 EC Card Register (Simple Code) Related to the VS-3ISC-EC Component Description The output ratio at the VO terminal that connect to the VO set value of CH1, 0~1000 EC1D0 EC2D0 EC3D0 analog speed control point of inverter. This VO set value is the percentage of 0 to “VO Max.” VO set value of CH2 ,0~1000 EC1D1 EC2D1...
- Page 74 EC Card Register (Simple Code) Related to the VS-4TC-EC Component Description To assign the thermocouple types for TC1~TC4. EC1D0 EC2D0 EC3D0 To assign the unit of temperature measurement. 0:℃; 1:℉; other values:℃. EC1D1 EC2D1 EC3D1 Converted temperature value of TC1, with unit as 0.1 ℃ or 0.1 ℉. EC1D2 EC2D2 EC3D2...
- Page 75 EC Card Register (Simple Code) Related to the VS-2PT-EC Component Description To select the frequency of power noise to be ltered out. 0: 60Hz, 1: 50Hz; other values: 60H. EC1D0 EC2D0 EC3D0 Reduce the inuence of noise from power lines. Always set the value as 1 for 50Hz AC system. To assign the unit of temperature measurement.
-
Page 76: Special Function Module
There are some Buffer Memories (BFM) built-in at every Special Function Module to store the related data. The VS series Main Unit uses the FROM/TO instruction to read/write the data in the module's BFM thus can achieve the purpose of data transfer across each other. The FROM instruction is used to read BFMs data from the designated special module. -
Page 77: Buffer Memory Bfm In The Vs-4Ad Module
2-17-1 Buffer Memory BFM in the VS-4AD Module Component Description BFM No. To assign the analog input modes of AI1~AI4. When the power is turned from OFF to ON, the default value is H0000. To set the average times of AI1. To set the average times of AI2. -
Page 78: Buffer Memory Bfm In The Vs-2Da Module
2-17-2 Buffer Memory BFM in the VS-2DA Module Component Description BFM No. To assign the analog output modes of AO1~AO2. When the power is turned from OFF to ON, the default value is H00. The digital set value of AO1. When the power is turned from OFF to ON, the default value is 0. -
Page 79: Buffer Memory Bfm In The Vs-3A Module
2-17-3 Buffer Memory BFM in the VS-3A Module Component Description BFM No. To assign the analog input modes of AI1~AI2. When the power is turned from OFF to ON, the default value is H00. To set the average times of AI1. When the power is turned from OFF to ON, the default value is 10. -
Page 80: Buffer Memory Bfm In The Vs-6A Module
2-17-4 Buffer Memory BFM in the VS-6A Module Component Description BFM No. To assign the analog input modes of AI1~AI4. When the power is turned from OFF to ON, the default value is H0000. To set the average times of AI1. To set the average times of AI2. -
Page 81: Buffer Memory Bfm In The Vs-4Tc Module
2-17-5 Buffer Memory BFM in the VS-4TC Module Component Description BFM No. To assign the thermocouple types for TC1~TC4. When the power is turned from OFF to ON, the default value is H0000. To assign the scale of temperature measurement. 0: ℃ ; 1: ℉ ; other values: ℃ . When the power is turned from OFF to ON, the default value is 0. -
Page 82: Buffer Memory Bfm In The Vs-8Tc Module
2-17-6 Buffer Memory BFM in the VS-8TC Module Component Description BFM No. To assign the thermocouple types for TC1~TC4. When the power is turned from OFF to ON, the default value is H0000. To assign the thermocouple types of TC5~TC8. When the power is turned from OFF to ON, the default value is H0000. To assign the scale of temperature measurement. -
Page 83: Buffer Memory Bfm In The Vs-2Pt Module
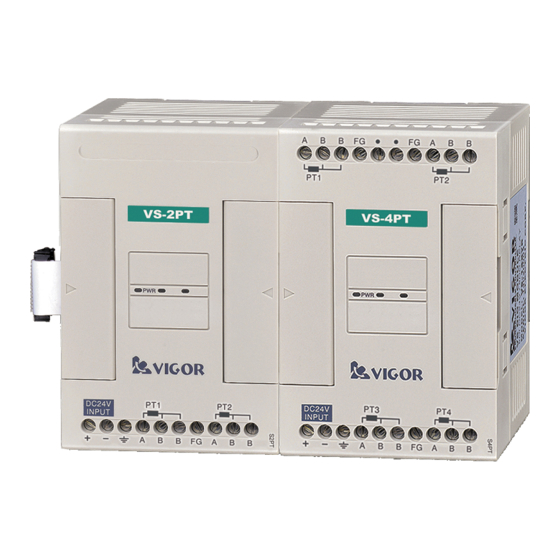
2-17-7 Buffer Memory BFM in the VS-2PT Module Component Description BFM No. To assign the scale of temperature measurement. 0: ℃ ; 1: ℉ ; other values: ℃ . When the power is turned from OFF to ON, the default value is 0. To set the average times of PT1. -
Page 84: Buffer Memory Bfm In The Vs-4Pt Module
2-17-8 Buffer Memory BFM in the VS-4PT Module Component Description BFM No. To assign the scale of temperature measurement. 0: ℃ ; 1: ℉ ; other values: ℃ . When the power is turned from OFF to ON, the default value is 0. To set the average times of PT1. -
Page 85: Basic Instruction
3. Basic Instruction 3-1 Basic Instruction Table Mnemonic Format Devices Function Initial logical operation contact type NO X, Y, M, S, T, C, D.b, R.b (Normally Open) (LOAD) Initial logical operation contact type NC X, Y, M, S, T, C, D.b, R.b (Normally closed) (LOAD INVERSE) Initial logical operation Rising edge pulse... - Page 86 To establish the set value of OUT T or OUT C instruction can use the K, D or R, also which can use the Index Register V, Z to modify. The basic instructions of the VS series PLC provide the “Bitwise Operation” and the “Bit Index” function. That greatly improving the convenience of programming, but also greatly enhances the overall performance.
-
Page 87: The Ld, Ldi, And, Ani, Or, Ori, Inv, Out And End Instructions
3-2 The LD, LDI, AND, ANI, OR, ORI, INV, OUT and END Instructions Mnemonic Format Devices Function Initial logical operation contact type NO X, Y, M, S, T, C, D.b, R.b (Normally Open) (LOAD) Initial logical operation contact type NC X, Y, M, S, T, C, D.b, R.b (Normally closed) (LOAD INVERSE) -
Page 88: The Ldp, Ldf, Andp, Andf, Orp, Opf, Mep And Mef Instructions
3-3 The LDP, LDF, ANDP, ANDF, ORP, OPF, MEP and MEF Instructions Mnemonic Format Devices Function Initial logical operation Rising edge pulse X, Y, M, S, T, C, D.b, R.b LOAD PULSE Initial logical operation Falling edge pulse X, Y, M, S, T, C, D.b, R.b LOAD FALLING PULSE ANDP Serial connection of Rising edge pulse... -
Page 89: The Anb And Orb Instructions
3-4 The ANB and ORB Instructions Mnemonic Format Devices Function Series connection of multiple (AND BLOCK) parallel circuit blocks Parallel connection of multiple (OR BLOCK) contact circuit blocks Ladder Diagram Instruction List Initial logical operation contact type NO (Normally Open) Parallel connection of NO (Normally Open) contact Initial (the starting point of another circuit block) logical operation contact type NO (Normally Open) -
Page 90: The Mps, Mrd And Mpp Instructions
3-5 The MPS, MRD and MPP Instructions Mnemonic Format Devices Function Store the current result of the internal PLC operation (POINT STORE) Read the current result of the internal PLC operation (POINT READ) Pop (recall and remove) the currently (POINT POP) stored result Ladder Diagram Instruction List... -
Page 91: The Mc And Mcr Instructions
3-6 The MC and MCR Instructions Mnemonic Format Devices Function MC N0 N0〜 N7 Denote the start of a master control block (MASTER CONTROL) MCR N0 N0〜 N7 Denote the end of a master control block (MC RESET) Ladder Diagram Instruction List The X0 is the condition contact MC N0... -
Page 92: The Set And Rst Instructions
3-7 The SET and RST Instructions Mnemonic Format Devices Function Y, M, S, D.b, R.b Set component permanently ON (SET) Y, M, S, D.b, R.b, T, C, D, R, V, Z Reset component permanently OFF (RESET) Ladder Diagram Instruction List Active I/O duration time sheet S E T Y 2 1... -
Page 93: The Out And Rst Instructions For The Timer Or Counter
3-9 The OUT and RST Instructions for the Timer or Counter If the OUT instruction is used for the coil of the component T or C, input a Set Value is required. Timer Ladder Diagram Instruction List Active I/O duration time sheet T0 coil T0 contact 2 sec... -
Page 94: Significant Notes For Programming
3-10 Significant Notes for Programming 3-10-1 Convert the Ladder Diagram to the Instruction List The rule to convert a program from the Ladder Diagram to the Instruction List format should follow the sequence that from left to right and from top to bottom. Serial connection Block A N I Serial connection Block... -
Page 95: Programming Techniques
3-10-2 Programming Techniques 1. Put a section which with longer serial connections of contacts at the upper place of a Parallel Connection Circuit Blocks. This way will make the programming simpler and easier. Ladder Diagram Ladder Diagram Instruction List Instruction List 2. -
Page 97: Sequential Function Chart (Sfc) And Step Ladder (Stl)
4. Sequential Function Chart (SFC) and Step Ladder (STL) In the universe of Automatic Control, the Electro-Control system should work closely with machine movements to get the result of the Automatic Control, i.e. the synergistic integration technology of Mechatronics, which has become popular in recent years. -
Page 98: State And Action Of Sfc
4-1-3 State and Action of SFC The VS series PLC uses step relay to indicate the state in the SFC. The diagrams below show the action of step relays under various of situations. S20=OFF, the step is not active, Y7=OFF. -
Page 99: Types Of Sfc
In the process of SFC step transferring, there are some phenomena which need to pay special attention to, as the following diagrams show. The step S21 will be executed at the region will not be executed will not be executed will not be executed will be executed :It is a Scan Time, the activated step is transferred at the scan time. -
Page 100: Compiling The Sequential Function Chart (Sfc)
4-2 Compiling the Sequential Function Chart (SFC) The SFC has its special operating method. Through the step-by-step description of compiling the SFC program in this chapter, designers can understand the methods of the SFC programming. Here, we use the application example of a fountain in park to explain the design procedure of the SFC in sequence. -
Page 101: Convert The Flowchart To The Sfc
4-2-2 Convert the Flowchart to the SFC In an actual application, the external input Turn the READY indicator ON at signals and output loads must be wired to this standby step. the PLC's input and output terminals, therefore it could receive the state of external signal and The START button actually drive the load. -
Page 102: Description The Application Types Of Sfc
4-3 Description the Application Types of SFC This section introduces various of processing flow modes about the SFC and the related precautions when to compile it. 4-3-1 Single Flow, Jump and Repeat Flow During the Flowchart Transfer The Single Flow is the basic construction of a SFC and it is used in simple sequential controls. In the actual layout of the SFC, the JUMP instruction (represented by ) is used to specify a jump or repeat about the process of steps ow . -
Page 103: Selective Branch And Merge
4-3-2 Selective Branch and Merge Selective Branch : Select one of the branch ows to transfer the effective state. Selective Merge : Merge a number of branch ows into a single ow. The number of available branch ows is 2~8. (no more then 8) When the step relay S10 is effective, its following eight transfer conditions are simultaneously used for to select and move the effective state to either one of the S20, S30, S40, S50, S60, S70, S80 or S90. -
Page 104: Special Notices About The Sfc
4-3-4 Special Notices About the SFC The SFC must use the Ladder Masters S (LMS) to compose and join that into the project, then could be loaded and executed at the PLC. There are some rules about the state transfer. The merge operation must direct to a destination step. -
Page 105: Precautions About The Composition Of The Sfc
4-4 Precautions About the Composition of the SFC To create an user program for the VS PLC, the Ladder Master S provides the SFC to combine with the original ladder diagram. Be sure to understand its specications and restrictions, in order to use it smoothly and complete the control program correctly. - Page 106 Two non sequential steps can share a timer with the same ID number. Also, it can be set with different set values respectively. K100 Steps S10 and S11 are sequentially connected, the left side T0 is not allowed. Steps S10 and S12 are not sequentially connected, the left side T0 is allowed. The MC and MCR instructions cannot be used in the SFC.
-
Page 107: Stl / Sfc Relevant Special Components
When a signal is repeatedly used to transfer state at different steps, this signal must be a pulse signal. Also, since the effective state transferring between two sequential steps will cause both of the states ON for a scan time, therefore the prohibitive M1 signal should be added as shown below. -
Page 108: The Relationship Between The Sfc And Stl
4-6 The Relationship Between the SFC and STL For to programming a step by step movement program, the VS series PLCs provide SFC and STL to choose from. The relationship between these two methods is described below. 4-6-1 The Step Ladder Instruction (STL) -
Page 109: Compare The Descriptive Methods Between The Sfc And Stl
4-6-2 Compare the Descriptive Methods Between the SFC and STL Simple Flow at the SFC and STL (a)SFC (b)STL M9002 M9002 M100 M100 In diagram (a) SFC, each step has three functions and parts: to drive the output points for loaders to appoint transfer destination devices and to assign the transition conditions. - Page 110 Simultaneously Parallel Branch / Merge at the SFC and STL (a)SFC (b)STL M100 M101 M100 M101 Jump at the SFC and STL (a)SFC (b)STL M100 M100 Repeat at the SFC and STL (a)SFC (b)STL...
-
Page 111: Examples Of Sfc Applications
4-7 Examples of SFC Applications 4-7-1 Construct the Repeat / Single Run / Single Step Control Modes for a Park Fountain This example is modied from the example of the Park Fountain in the Section 4-2. It is to demonstrate the controls of Repeat / Single Run / Single Step. - Page 112 (b) Programming by the STL Control the step transfer prevent special relay. It allows step transfer at the moment M9040 X0=ON, to achieve the purpose of single-step control. M9002 Activate the step S0. Turn the READY indicator ON. When X0=ON, the active step transfers to S10. Illuminate the lighting.
-
Page 113: Filling Bottles
4-7-2 Filling Bottles READY START Repeat Single Run The lifter of nozzle is driven by Y2: ON : Down Nozzle valve Y3 OFF: UP ON : Open valve to ll up OFF : Close valve Bottle Conveyor motor Y1 Bottle inspector X1 Function Description of Bottle Filling: There is a control panel next to the bottle lling machine. - Page 114 (a) Programming by the SFC M9002 Ladder Activate the step S0 in the SFC program Diagram in the main The SFC is named Filling_Bottle. S F C Filling_Bottle program Turn the READY indicator ON. When X0=ON, the active step transfers to S10. TRAN S10 Drive the conveyor motor to move forward At the moment that the S10 turns from OFF to ON, the input signal...
- Page 115 (b) Programming by the STL M9002 Activate the step S0. Turn the READY indicator ON. When X0=ON, the active step transfers to S10. Drive the conveyor motor to move forward. At the moment that the S10 turns from OFF to ON, the input signal X1 has been already ON for a while.
-
Page 116: TrafC Lights
4-7-3 Traffic Lights In this section, we choose the familiar trafc lights, as an example for the description of step-by-step movement. There are two sets of trafc lights at the crossroads, hereby referred to as Group A lights and Group B lights as shown below. - Page 117 Below displays simple ow programming, individually using (a) SFC and (b) STL in writing the program, in order to comparison reference. (a) Programming by the SFC M9002 Ladder Activate the step S0 in the SFC program. Diagram in the main The SFC is named “Trafc_Light”.
- Page 118 Repeat this loop to let the A green light ash for 5 times, by 1 Sec. cycle. Activate the coil of 0.5 Sec. timer. When the contact T7=ON, the active step transfers to S18. TRAN S18 Activate the coil of 5 times counter. A green light is lit.
- Page 119 Reset C0. B yellow light is lit. B yellow light is lit for 5 Sec. Activate the coil of 5 Sec. timer. When the contact T4=ON, the active step transfers to S15. B red light is lit. The B red light is lit and kept, even the step will be transferred after 2 Sec.
- Page 120 Below displays Simultaneously Parallel Branch / Merge programming, individually using (a) SFC and (b) STL in writing the program, in order to comparison reference. (a) Programming by the SFC M9002 Ladder Activate the step S0 in the SFC program. Diagram in the main Traffic_Light The SFC is named “Trafc_Light”.
- Page 121 (b) Programming by the STL M9002 Activate the step S0. When X0=ON, the active step transfers to S10. A red light is lit. B red light is lit. Activate the coil of 2 Sec. timer. When the contact T0=ON, the active step transfers to both S20 and S30.
- Page 122 Below displays Selective Parallel Branch / Merge programming, individually using (a) SFC and (b) STL in writing the program, in order to comparison reference. (a) Programming by the SFC M9002 Ladder Activate the step S0 in the SFC program. Diagram in the main Traffic_Light The SFC is named “Trafc_Light”.
- Page 123 The example above via slightly modify that could execute the “general trafc light control” or “trafc light adds with yellow ash control”. The select signal from a switch is to the X0 input. Clear all the outputs Y0~Y5 to OFF. ZRST Y0 Y5 If X0=OFF, executes the “trafc light adds with yellow...
- Page 124 (b) Programming by the STL M9002 Activate the step S0. When X0=ON, the active step transfers to S10. Set A red light ON. Set B red light ON. Activate the coil of 2 Sec. timer. When the contact T0=ON, alters the ON/OFF status of M0. ALT M0 This M0 is about to select either B group go (M0=ON) or A group go (M0=OFF).
-
Page 125: Mechanical Double-Decked Parking Space
4-7-4 Mechanical Double-Decked Parking Space The Calling Panel READY Car No.1 Car No.2 Car No.3 The car parking in the lower level is usable, but the upper level is for storage only. When the READY indicator is ON and press a No. button on the calling panel, the decks will start to move. The decks on the upper level (No.1, 2, 3 parking spaces) can only move up or down, while the decks on the lower level (No.4, 5 parking spaces) can only move horizontally. - Page 126 (a) Programming by the SFC M9002 Ladder Activate the step S0 in the SFC program. Diagram in the main SFC DoubleDeckedPark The SFC is named “DoubleDeckedPark”. program TRAN S10 TRAN S20 TRAN S30 X1 X2 TRAN S11 TRAN S21 TRAN S31 TRAN S12 TRAN S22 TRAN S32...
-
Page 127: General Rules Of Application Instructions
5 General Rules of Application Instructions 5-1 The Formats of Application Instructions Instruction and Operand Each application instruction has its unique instruction mnemonic, e.g. ADD, CMP .., etc. Some application instructions are purely made up of themselves: W D T Instruction Most of the application instructions are constituted by instruction themselves and several “Operands”: SMOV... - Page 128 16-bit or 32-bit Instructions Because of different Operand value sizes, some of the application instruction can be organized into 16-bit instruction or 32-bit instruction. A 16-bit instruction, the content of D0 is transferred to D10. MOV D0 D10 DMOV D0 D10 A 32-bit instruction, the contents of (D1, D0) are transferred to (D11, D10).
-
Page 129: Data Process Of Application Instructions
5-2 Data Process of Application Instructions The X, Y, M and S are called bit devices, because they have only two different status (“ON” or “OFF”). But the T, C D and R are called word devices because they are specially used to store data. Some bit devices can be a group together as a word device pattern, shown in the form of Kn X, Kn Y, Kn M and Kn S. -
Page 130: Precautions Of Using Application Instruction
5-3 Precautions of Using Application Instruction Flags The execution result is related to the Application Instruction and that will cause some change to the corresponding flags: M9020 : Addition / Subtraction Zero Flag M9021 : Borrow Flag M9022 : Carry Flag M9023 : Multiplication / Division Zero Flag M9025 : Division Overow Flag M9029 : Instruction Execution Completed Flag... -
Page 131: Application Instructions
6.Application Instructions The VS Series PLC has many application instructions, each instruction has its specific function. The PLC will easily achieve a complicated control system also diminish programming codes and programming development time effectively by cleverly using these instructions. We hope readers will have an in-depth understanding of the application instructions and make the best use of them. - Page 132 Series Page FNC No. Mnemonic Brief Function Introduction Code Exchange Instructions ○ ○ ○ ○ Convert Gray Code to BIN GBIN Convert Decimal ASCII String to BIN Number ○ DABIN Convert BIN Number to Decimal ASCII String ○ B NDA Arithmetic Insructions Addition (S1) + (S2) →...
- Page 133 Series Page FNC No. Mnemonic Brief Function Introduction Data Processing Instructions ○ ○ ○ ○ Swap High / Low Byte SWAP ○ ○ ○ ○ SORT2 Sort Tabulated Data 2 Floating Point Arithmetic Instructions BIN Integer → BIN Floating Point Format ○...
- Page 134 Series Page FNC No. Mnemonic Brief Function Introduction Handy Instructions ○ ○ ○ ○ Ramp Variable Value RAMP PID Control Loop ○ ○ ○ ○ ○ ○ ○ ○ DBRD Read Data From Data Bank ○ ○ ○ ○ Write Data Into Data Bank DBWR Temperature PID Control ○...
- Page 135 Series Page FNC No. Mnemonic Brief Function Introduction Block Data Handling Instructions ○ Block Data Subtraction Block Data Compare (S1) = (S2) ○ BKCMP= Block Data Compare (S1) > (S2) ○ BKCMP> Block Data Compare (S1) < (S2) ○ BKCMP< Block Data Compare (S1) ≠...
-
Page 137: Program Flow Instructions
6-2 Program Flow Instructions Applicable VS Mnemonic in Ladder Diagram Function Description 1 2 M 3 Conditional Jump ○ ○ ○ ○ C A L L Call Subroutine ○ ○ ○ ○ S R E T Subroutine Return ○ ○ ○... - Page 138 1 2 M 3 Conditional Jump ○ ○ ○ ○ Devices Operand By a numeric pointer or an user-dened 16 English characters pointer Numeric pointer: P0~P1023 The total amount of Mark / Branch and numeric pointers is 1024. S : the destination Pointer of the Conditional Jump instruction SKIP_ A When the conditional contact for the CJ instruction is “OFF”...
- Page 139 1 2 M 3 C A L L Call Subroutine ○ ○ ○ ○ 1 2 M 3 S R E T Subroutine Return ○ ○ ○ ○ Devices Operand By a numeric pointer or an user-dened 16 English characters pointer Numeric pointer: P0~P1023 The total amount of Mark / Branch and numeric pointers is 1024.
- Page 140 1 2 M 3 R E T Interrupt Return ○ ○ ○ ○ Enable Interrupt ○ ○ ○ ○ Disable Interrupt ○ ○ ○ ○ Generally a program is under Enable Interrupt status. Except for the program ow is during the area between the DI and EI instructions, M9050 where interruption is prevented.
- Page 141 1 2 M 3 F E N D First End ○ ○ ○ ○ An FEND instruction indicates the rst end of the main program CALL P1 block. An FEND instruction placed before the CALL instruction or after The First END of the FEND the SRET instruction will be treated as an error.
- Page 142 1 2 M 3 W D T Watch Dog Timer Refresh ○ ○ ○ ○ A PLC is provided with the WDT (Watch Dog Timer), which is used to monitor operation condition of the PLC system. By way of the WDT to monitor the process, when the PLC's CPU runs abnormally, that will command the PLC to stop operation and turn all external output “...
- Page 143 F O R Start of a FOR-NEXT Loop ○ ○ ○ ○ N E X T End of a FOR-NEXT Loop ○ ○ ○ ○ Devices Operand UnG K,H " $" KnX KnY S =1~32,767 (beyond the range, the set value S is regarded as 1) S : the number of times to be repeated in the FOR-NEXT loop.
-
Page 145: Comparison, Move And Code Exchange Instructions
6-3 Comparison, Move and Code Exchange Instructions Applicable VS Mnemonic in Ladder Diagram Function Description 1 2 M 3 C M P Compare ○ ○ ○ ○ Z C P Zone Compare ○ ○ ○ ○ M O V Move ○... - Page 146 1 2 M 3 C M P Compare ○ ○ ○ ○ Devices Operand UnG K,H KnX KnY " $" D occupies 3 consecutive devices : the compare value #1 : the compare value #2 CMP K100 D100 M100 D : the compare result; occupying 3 consecutive points Compare the content value of (Compare Value #1) with the value of (Compare Value #2), and save the...
- Page 147 1 2 M 3 Z C P Zone Compare ○ ○ ○ ○ Devices Operand UnG K,H KnX KnY " $" D occupies 3 consecutive devices ≤S : the lower limit of zone compare : the upper limit of zone compare ZCP K100 K200 D100 M100 S : the compare value D : the compare result;...
- Page 148 1 2 M 3 M O V Move ○ ○ ○ ○ Devices Operand UnG K,H KnX KnY " $" S : the source device to be transferred D : the destination device MOV D100 D200 To copy the designated value from The content value of D100 will be copied to D200 when X20=“ON”.
- Page 149 1 2 M 3 S M O V Shift Move ○ ○ ○ ○ Devices Operand UnG K,H KnX KnY " $" =1~4 S : the source device of transfer : the source position of the rst digit to be moved SMOV D0 K3 K2 D1 K2 : the number of source digits to be moved D : the destination device...
- Page 150 1 2 M 3 C M L Complement ○ ○ ○ ○ Devices Operand UnG K,H KnX KnY " $" S : the source device of transfer D : the destination device CML D0 D1 Invert all the content bits from the designated (status of each bit, “0”...
- Page 151 1 2 M 3 B M O V n → n Block Move ○ ○ ○ ○ Devices Operand UnG K,H KnX KnY " $" The S and D occupies n consecutive devices respectively n=1~512 S : the head ID of source device D : the head ID of destination device BMOVP D100 D200 K4 n : the length of the block to be moved...
- Page 152 1 2 M 3 F M O V 1 → n Fill Move ○ ○ ○ ○ Devices Operand UnG K,H KnX KnY " $" For 16-bit instruction, D occupies n devices For 32-bit instruction, D occupies n×2 devices n = 1~512 S : the source device of transfer D : the head ID of destination device FMOV K0 D100 K5...
- Page 153 1 2 M 3 X C H Exchange ○ ○ ○ ○ Devices Operand UnG K,H KnX KnY " $" : the data #1 to be exchanged : the data #2 to be exchanged XCHP D100 D200 Exchange (swap) the content values of the appointed devices When X20 = “OFF”...
- Page 154 B C D Convert BIN to BCD ○ ○ ○ ○ Convert BCD to BIN ○ ○ ○ ○ Devices Operand UnG K,H " $" KnX KnY S : the source (BIN) of the conversion D : the converted result destination (BCD) BCD D0 K4Y20 When X20 = “ON”, the BIN value at D0 will be converted into a BCD value.
-
Page 155: Arithmetic And Logical Operation Instructions
6-4 Arithmetic and Logical Operation Instructions Applicable VS Function Description Mnemonic in Ladder Diagram 1 2 M 3 A D D Addition (S1)+(S2) → ○ ○ ○ ○ S U B Subtraction (S1) – (S2) → ○ ○ ○ ○ M U L Multiplication (S1)×(S2) →... - Page 156 1 2 M 3 A D D Addition (S1)+(S2) → ○ ○ ○ ○ Devices Operand UnG K,H KnX KnY " $" : the summand : the addend ADDP D0 D1 D2 D : the sum When X20= “OFF” → “ON” , the summand (D0) will be added to the addend (D1), and the sum will be stored at the specified destination device (D2).
- Page 157 1 2 M 3 S U B Subtraction (S1) – (S2) → ○ ○ ○ ○ Devices Operand UnG K,H KnX KnY " $" : the minuend : the subtrahend SUBP D0 D1 D2 D : the difference When X20 = “OFF” → “ON”, the subtrahend (D1) will be subtracted from the minuend (D0), and the difference will be stored at the destination device (D2).
- Page 158 1 2 M 3 M U L Multiplication (S1)×(S2) → (D+1,D) ○ ○ ○ ○ Devices Operand UnG K,H KnX KnY " $" : the multiplicand : the multiplier MUL D0 D1 D2 D : the product (of a multiplication) When X20 = “ON”, the multiplicand (D0) will be multiplied by the multiplier (D1), and the product will be stored at the destination device (D3, D2).
- Page 159 1 2 M 3 Division (S1)÷(S2) → (D),(D+1) ○ ○ ○ ○ Devices Operand UnG K,H KnX KnY " $" : the dividend : the divisor DIVP D0 D1 D2 D : the quotient and remainder When X20= “OFF” → “ON” , the dividend (D0) will be divided by the divisor (D1), and the quotient will be stored at the destination device (D2) while the remainder will be stored in (D3).
- Page 160 I N C Increment (D)+1 → ○ ○ ○ ○ D E C Decrement (D) – 1 → ○ ○ ○ ○ Devices Operand UnG K,H " $" KnX KnY D : the destination device INCP D100 When X20 = “OFF” → “ON”, the content value of destination (D100) will be increased by one. If the instruction is not a pulse (P) instruction, the destination (D100) will increase its value in every scan cycle.
- Page 161 W A N D Logic Word AND (S1) (S2) → ○ ○ ○ ○ W O R Logic Word OR (S1) (S2) → ˇ ○ ○ ○ ○ Logic Word Exclusive OR W X O R → (S1) ˇ (S2) ○...
- Page 162 1 2 M 3 N E G Negation → ○ ○ ○ ○ Devices Operand UnG K,H KnX KnY " $" D : the selected device to be inverted NEGP D0 When X20 = “OFF” → “ON”, each single bit pattern of (D0) will be inverted (“0” inverted into “1” and vice versa) and then added with “1”.
-
Page 163: Rotary And Shift Instructions
6-5 Rotary and Shift Instructions Applicable VS Mnemonic in Ladder Diagram Function Description 1 2 M 3 R O R Rotation Right ○ ○ ○ ○ R O L Rotation Left ○ ○ ○ ○ R C R Rotation Right with Carry ○... - Page 164 R O R Rotation Right ○ ○ ○ ○ R O L Rotation Left ○ ○ ○ ○ Devices Operand UnG K,H " $" KnX KnY The 16-bit instruction, n=1 ~ 16 The 32-bit instruction, n=1 ~ 32 When D is designated as KnY, KnM and KnS, the 16-bit instruction can only designate K4Y, K4M and K4S, while the 32-bit instruction can only designate K8Y, K8M and K8S D : the selected device to be rotated n : the number of the bits to be rotated...
- Page 165 R C R Rotation Right with Carry ○ ○ ○ ○ R C L Rotation Left with Carry ○ ○ ○ ○ Devices Operand UnG K,H " $" KnX KnY The 16-bit instruction, n=1 ~ 16 The 32-bit instruction, n=1 ~ 32 When D is designated as KnY, KnM and KnS, the 16-bit instruction can only designate K4Y, K4M and K4S, while the 32-bit instruction can only designate K8Y, K8M and K8S D : the selected device to be rotated...
- Page 166 S F T R Bit Shift Right ○ ○ ○ ○ S F T L Bit Shift Left ○ ○ ○ ○ Devices Operand UnG K,H " $" KnX KnY = 1~1024 = 1~n S occupies n components D occupies n components S : the device ID number of source header to be moved in...
- Page 167 1 2 M 3 W S F R Word Shift Right ○ ○ ○ ○ Devices Operand UnG K,H KnX KnY " $" = 1~512 = 1~n S occupies n components D occupies n components S : the device ID number of source header to be moved in WSFRP D100 D0 K12 K3 D : the device ID number of the destination header...
- Page 168 1 2 M 3 W S F L Word Shift Left ○ ○ ○ ○ Devices Operand UnG K,H KnX KnY " $" D occupies n components = 1~512 = 1~n S occupies n components S : the device ID number of source header to be moved in WSFLP D100 D0 K12 K3 D : the device ID number of the destination header...
- Page 169 1 2 M 3 S F W R Shift Register Write (FIFO Write) ○ ○ ○ ○ Devices Operand UnG K,H KnX KnY " $" D occupies n components n = 2~512 S : the source device to be written to a FIFO data stack D : the header ID number of the FIFO data stack SFWRP D100 D0 K10 n : the length of the FIFO data stack...
- Page 170 1 2 M 3 S F R D Shift Register Read (FIFO Read) ○ ○ ○ ○ Devices Operand UnG K,H KnX KnY " $" S occupies n components n = 2~512 S : the header ID number of the FIFO data stack D : the destination device for storing read data from SFRDP D0 D101 K10 a FIFO data stack...
-
Page 171: Data Operation Instructions
6-6 Data Processing Instructions Applicable VS Mnemonic in Ladder Diagram Function Description 1 2 M 3 Z R S T ○ ○ ○ ○ Zone Reset D E C O Decode ○ ○ ○ ○ E N C O Encode ○... - Page 172 1 2 M 3 Z R S T Zone Reset ○ ○ ○ ○ Devices Operand UnG K,H KnX KnY " $" The ID number of device D must be less than or equal to (≤) the device D The D and D must use the same device type.
- Page 173 1 2 M 3 D E C O Decode ○ ○ ○ ○ Devices Operand UnG K,H KnX KnY " $" If S is a bit device, it occupies n bits If D is a bit device, n = 1~8 and D occupies 2 bits If D is a word device, n = 1~4 S : the source device to decode D : the destination device where the decoded result...
- Page 174 1 2 M 3 E N C O Encode ○ ○ ○ ○ Devices Operand UnG K,H KnX KnY " $" If S is a bit device, n = 1~8 and S occupies 2 bits If S is a word device, n = 1~4 S : the source device to encode D : the destination device where the encoded result ENCOP M0 D0 K3...
- Page 175 1 2 M 3 S U M The Sum of Active Bits ○ ○ ○ ○ Devices Operand UnG K,H KnX KnY " $" S : the source device to be count D : the destination device to store processed data SUM D0 D10 When X20 = “ON”, the instruction is to count the number of active bits within the 16 bits of D0, and the amount will be stored in D10.
- Page 176 1 2 M 3 B O N Check Specified Bit Status ○ ○ ○ ○ Devices Operand UnG K,H KnX KnY " $" The 16-bit instruction, n=1 ~ 15 The 32-bit instruction, n=1 ~ 31 S : the source device D : the destination device where specied results are BON D0 M0 K5 stored...
- Page 177 1 2 M 3 M E A N Mean ○ ○ ○ ○ Devices Operand UnG K,H KnX KnY " $" n = 1~64 The 16-bit instruction, S occupies n components The 32-bit instruction, S occupies (n×2) components S : the head ID of source devices to be generated a mean MEAN D0 D10 K5 D : the destination device where the mean is stored...
- Page 178 1 2 M 3 A N S Timed Annunciator Set ○ ○ ○ ○ 1 2 M 3 A N R Annunciator Reset ○ ○ ○ ○ Devices Operand UnG K,H " $" KnX KnY S = T0~T199 m = 1~32767 D =...
- Page 179 Application Example of Timed Annunciator Set When the special auxiliary relay M9049= “ON” and any assigned annunciator of S900 ~ S999 is activated, then M9048= “ON” and D9049 will display an activated annunciator number. If there is more than one annunciator being activated simultaneously, D9049 will display the smallest active annunciator ID number.
- Page 180 1 2 M 3 S Q R Square Root ○ ○ ○ ○ Devices Operand UnG K,H KnX KnY " $" The 16-bit instruction, S = 0~32,767 The 32-bit instruction, S = 0~2,147,483,647 S : the source device for performing mathematical square root SQR D0 D1 D : the destination device to store the result...
- Page 181 1 2 M 3 BIN Integer → Binary Floating Point F L T Format ○ ○ ○ ○ Devices Operand UnG K,H KnX KnY " $" The 16-bit instruction, S occupies 1 and D occupies 2 components The 32-bit instruction, S occupies 2 and D occupies 2 components S : the source data to be converted D : the destination device to store the equivalent FLT D0 D10...
-
Page 183: High Speed Processing Instructions
6-7 High Speed Processing Instructions Applicable VS Mnemonic in Ladder Diagram Function Description 1 2 M 3 R E F I/O Refresh ○ ○ ○ ○ R E F F I/O Refresh and Filter Adjust ○ ○ ○ ○ M T R Input Matrix ○... - Page 184 1 2 M 3 R E F I/O Refresh ○ ○ ○ ○ Devices Operand UnG K,H KnX KnY " $" The D should designate as X0, X10 or Y0 When D=X0, n=8 or 16. When D = X10 or Y0, n = 8. D : the head address of I/O device to be refreshed n : the number of I/O devices to be refreshed REF X0 K8...
- Page 185 1 2 M 3 R E F F I/O Refresh and Filter Adjust ○ ○ ○ ○ Devices Operand UnG K,H KnX KnY " $" n =0~60 n: the setting for response time (unit = ms) REFF K1 When X20=“ON”, response time of external inputs X0~X7 will be changed into 1ms and the “ON”/“OFF” statuses of X0~X7 will be reloaded into the input data memory.
- Page 186 1 2 M 3 M T R Input Matrix ○ ○ ○ ○ Devices Operand UnG K,H KnX KnY " $" S should designate to an X with the last digit of the ID is “0” (e.g. X0, X10), S occupies consecutive 8 points. should designate to a Y with the last digit of the ID is “0”(e.g.
- Page 187 1 2 M 3 D H S C S Software High Speed Counter Set ○ ○ ○ ○ Devices Operand UnG K,H KnX KnY " $" = C235~C255 If D designates to Y, should use Y0~Y7 D can also designate to IHC0~IHC7 : the set value of comparison : the ID No.
- Page 188 Software High Speed Counter Interrupt M9000 K2147483647 C254 The comparison result output of the DHSCS instruction can DHSCS K100 C254 IHC0 also designate to an Interrupt Pointer of the Software High Speed Counter that serviceable name is IHC0~IHC7. By way of the pointer to perform the interrupt subroutine immediately.
- Page 189 1 2 M 3 D H S C R Software High Speed Counter Reset ○ ○ ○ ○ Devices Operand UnG K,H KnX KnY " $" = C235~C255 If D designates to Y, should use Y0~Y7 D can also designate to a Software High Speed Counter but the D and S must use the same SHSC S1 : the set value of comparison S2 : the ID No.
- Page 190 1 2 M 3 Software High Speed Counter D H S Z Zone Compare ○ ○ ○ ○ Devices Operand UnG K,H KnX KnY " $" S=C235~C255 D occupies 3 consecutive components, should use Y0~Y5 if the D designates to a Y : the set value of the lower limit at the zone compare M9000 : the set value of the upper limit at the zone compare...
- Page 191 Use the HSZ instruction to perform high speed, low speed and stop control C251 is an A/B phase high speed counter, X0 is an A-phase pulse input, and X1 is a B-phase pulse input. C251 X20 is the signal input point for activation. ZRST Y0 Y2 M9000 K9000...
- Page 192 1 2 M 3 S P D Speed Detection ○ ○ ○ ○ Devices Operand UnG K,H KnX KnY " $" = X0~X7 D occupies 3 consecutive components : the external pulse input point : the sampling time for to count pulses (unit: ms) SPD X0 K1000 D0 D : the detection result Within the designated...
- Page 193 1 2 M 3 P L S Y Pulse Y Output ○ ○ ○ ○ Devices Operand UnG K,H KnX KnY " $" VS1 / VS2 series S = 1~50,000 VS2 / VS3 series S = 1~200,000 VSM-28ML S = 1~1,000,000 16-bit instruction S = 1~32,767 32-bit instruction S...
- Page 194 The related special devices are summarized below: : Means read only.) ■ Relay ID No. Description Y0 axis's status. “OFF” means the Y0 is in the READY status, it is available for a positioning instruction; ■ M9340 while “ON” = BUSY, the Y0 has been occupying. Y0 axis's pulse output monitor.
- Page 195 1 2 M 3 P W M Pulse Width Modulation ○ ○ ○ ○ Devices Operand UnG K,H KnX KnY " $" =0~32767 =1~32767 D=Y0~Y3 : the width of “ON” at an output pulse, t = 0~32,767 × time base : the entire period of an output pulse, T = 1~32,767 ×...
- Page 196 1 2 M 3 P L S R Pulse Ramp ○ ○ ○ ○ Devices Operand UnG K,H KnX KnY " $" VS1 / VS2 series S = 1~50,000 VS2 / VS3 series S = 1~200,000 VSM-28ML S = 1~1,000,000 =1~2,147,483,647 =0~5,000 D=Y0~Y3...
- Page 197 There is no limitation on the using number of this instruction in a program, and the different output points Y0~Y3 can generate pulses at the same time. Since the pulse output function of Y0~Y3 are the same, below we use the Y0 as an example to describe the related special devices.
- Page 198 The related special devices are summarized below: : Means read only.) ■ Relay ID No. Description Y0 axis's status. “OFF” means the Y0 is in the READY status, it is available for a positioning instruction; ■ M9340 while “ON” = BUSY, the Y0 has been occupying. Y0 axis's pulse output monitor.
-
Page 199: Handy Instructions
6-8 Handy Instructions Applicable VS Mnemonic in Ladder Diagram Function Description 1 2 M 3 S E R ○ ○ ○ ○ Search a Data Stack A B S D Absolute Drum Sequencer ○ ○ ○ ○ N C D Incremental Drum Sequencer ○... - Page 200 1 2 M 3 S E R Search a Data Stack ○ ○ ○ ○ Devices Operand UnG K,H KnX KnY " $" The 16-bit instruction, n = 1~256, S1 occupies n components, D occupies 5 components. The 32-bit instruction, n = 1~128, S1 occupies (2×n) components, D occupies 10 components : the head device ID number of a defined data stack to be searched SER D0 D10 D20 K10...
- Page 201 1 2 M 3 A B S D Absolute Drum Sequencer ○ ○ ○ ○ Devices Operand UnG K,H KnX KnY " $" The 16-bit instruction, S occupies (2×n) components, D occupies n components. When S designates to Kn X, Kn Y, Kn M or Kn S, that Kn must be K4 and the ID number of the X, Y, M or S must be a multiples of 8 The 32-bit instruction, S occupies (4×n) components, D occupies (2×n) components.
- Page 202 A Program Example Suppose that a drum-controlled rotor sends a pulse to the input terminal X0 when it rotates by one degree, then the following program will perform the checkup and control actions of the drum degree. When X1= “ON”, it activate the Multi-Section Compare ABSD D100 C0 M100 K5 This section of program that enables the C0 to be the counter of rotor K360...
- Page 203 1 2 M 3 N C D Incremental Drum Sequencer ○ ○ ○ ○ Devices Operand UnG K,H KnX KnY " $" n = 1~64 occupies n components = C0~C198 D occupies n components When S designates to Kn X, Kn Y, Kn M or Kn S, that Kn must be K4 and the ID number of the X, Y, M or S must be a multiples of 8 : the head device ID number of the comparison table : the ID number of the counter for the comparison...
- Page 204 1 2 M 3 T T M R Teaching Timer ○ ○ ○ ○ Devices Operand UnG K,H KnX KnY " $" D occupies 2 components n = 0~2 D : the ID number of the register which can store the timed data of “ON”...
- Page 205 1 2 M 3 S T M R Special Timer ○ ○ ○ ○ Devices Operand UnG K,H KnX KnY " $" m=1~32,767 S=T0~T199 D occupies 4 components S : the ID number of designated Timer m : the setting value of the Timer (unit=100ms) STMR T0 K20 Y20 D : the head ID number of the output device The STMR instruction is operated exclusively to produce the OFF-delay, the delay trigger and a flashing circuit.
- Page 206 1 2 M 3 A L T Alternate State ○ ○ ○ ○ Devices Operand UnG K,H KnX KnY " $" D : the destination device ALTP M0 When X20= “OFF “ → “ON” for the first time, M0= “ON”; while X20= “OFF” → “ON” for the second time, M0= “OFF”.
- Page 207 1 2 M 3 R A M P Ramp Variable Value ○ ○ ○ ○ Devices Operand UnG K,H KnX KnY " $" D occupies 2 components n = 1~32,767 : the initial value of the ramp variation : the destination value of the ramp variation RAMP D0 D1 D2 K500 D : the value of the course of the ramp variation n : to assign the using number of times that ramp...
- Page 208 Operation Modes (Swappable by Flag M9026) When the RAMP instruction is performed, the operation mode will depend on the status of Special Relay M9026. If M9026 = “OFF”, it will generate contiguous If M9026 = “ON” , it will generate only one ramp results.
- Page 209 1 2 M 3 S O R T Sort Tabulated Data ○ ○ ○ ○ Devices Operand UnG K,H KnX KnY " $" Each of the S and D respectively occupie (m ×m ) components =1~32 n 1 m S : the head register ID number of the original data array : the number of data record sets to be sorted SORT D0 K5 K4 D100 D200 : the number of data at an arrangement for each set...
-
Page 211: External Setting And Display Instructions
6-9 External Setting and Display Instructions Applicable VS Mnemonic in Ladder Diagram Function Description 1 2 M 3 T K Y Ten Key Input ○ ○ ○ ○ H K Y Hexadecimal Key Input ○ ○ ○ ○ D S W Digital Switch (Thumbwheel) Input ○... - Page 212 1 2 M 3 T K Y Ten Key Input ○ ○ ○ ○ Devices Operand UnG K,H KnX KnY " $" S occupies 10 components occupies 11 components S : the initial device of the key input : to place where the key input value is stored TKY X20 D0 M0 : the initial destination device of the keys' status outputs The instruction designates consecutive ten input devices and those are starting from...
- Page 213 1 2 M 3 H K Y Hexadecimal Key Input ○ ○ ○ ○ Devices Operand UnG K,H KnX KnY " $" S occupies 4 components occupies 4 components occupies 8 components S : multiplex scanning initial point of the inputs from the keyboard : multiplex scanning initial point of the outputs to the keyboard HKY X20 Y20 D0 M0 : to place where the keyboard input value is stored...
- Page 214 Function Key Input The A~F keys are defined as function keys. Function Keys If a function key is pressed, the corresponding key's status output will turn “ON” and remain the same status, Keys' Status Outputs M5 M4 M3 M2 M1 M0 until other function key has been pressed then the previous output will change ”ON”...
- Page 215 1 2 M 3 D S W Digital Switch (Thumbwheel) Input ○ ○ ○ ○ Devices Operand UnG K,H KnX KnY " $" n=1~2 When n = 1, S occupies 4 components and D occupies 4 components, D occupies 1 components When n = 2, S occupies 8 components and D occupies 4 components, D occupies 2 components...
- Page 216 1 2 M 3 S E G D Seven Segment Decoder ○ ○ ○ ○ Devices Operand UnG K,H KnX KnY " $" S : the source device to be decoded D : devices of decoded outputs SEGD D0 K2Y20 When X20=“ON”, decode the content value (nibble format 0~F) of D0's lowest four bits (b0~b3) into a code for a seven-segment display and output it through Y20~Y27.
- Page 217 1 2 M 3 S E G L Seven Segment with Latch ○ ○ ○ ○ Devices Operand UnG K,H KnX KnY " $" When n = 0~3, S occupies 1 component and D occupies 8 components n = 0~7 When n = 4~7, S occupies 2 components and D occupies 12 components S : the source decimal value to be shown in the seven segment display D : the initial point for the scan outputs of the seven segment display...
- Page 218 1 2 M 3 A S C Convert Letters to ASCII Code ○ ○ ○ ○ Devices Operand UnG K,H KnX KnY " $" Key-in eight English letters from computer D occupies (the inputted numbers of English letters in S ÷ 2) components S : the source of English letters will be converted to ASCII codes D : the device where ASCII codes are stored ASC ABCDEFGH D0...
- Page 219 1 2 M 3 Print ASCII Code ○ ○ ○ ○ Devices Operand UnG K,H KnX KnY " $" S occupies 4 components D occupies 10 components S : the source devices where ASCII codes are stored D : the output points to export the ASCII codes PR D0 Y20 The instruction will read ASCII codes of 4 (or 8) source registers (started from and each coed will take a byte).
- Page 220 D : the initial device of storage space for reading up BFMs n : the number of BFMs to be read from the special module The Main Unit of the VS Series PLC uses this instruction to read BFMs data of the Special Module. Since the...
- Page 221 S : the initial device of data source storage space n : the number of BFMs to be written to the special module The Main Unit of the VS Series PLC uses this instruction to write data into BFMs at the Special Module. Since the...
-
Page 223: Serial Communication Instructions
6-10 Serial Communication Instructions Applicable VS Mnemonic in Ladder Diagram Function Description 1 2 M 3 Receive/Send Communication ○ ○ ○ ○ Instruction P R U N Parallel Run (Octal Mode) ○ ○ ○ ○ A S C I Convert HEX to ASCII ○... - Page 224 As shown in the gure below, use the Ladder Master S to set the communication port's “Application type:” of the VS Series PLC as the “Non Protocol” and at the same page to set other relevant parameters. Set the station No.
- Page 225 The related special devices are summarized below: ( : Means read only.) ■ Relay ID No. Description CP1 RS instruction data sending out request ag. M9100 CP1 RS instruction data receive completed ag. M9101 CP1 RS instruction data receive time-out ag. M9102 CP1 RS / LINK / MBUS instruction on communication abnormal ag.
- Page 226 Sequence of Data Sending and Receiving (Using the CP1 as an example) RS D0 D200 D100 D201 K1 Edit the data string which is beginning from the D0 to be sent and the Fill the data string to be sent length of data string is specified by the D200.
- Page 227 Description of Data Sending / Receiving (by the CP1): 16-bit Mode (M9161 = "OFF") A 16-bit data Divide the 16-bit data into two Bytes of data: Upper 8 bits Upper 8 bits Lower 8 bits RS D0 K5 D100 K10 K1 data and Lower 8 bits data.
- Page 228 Description of Data Sending / Receiving (by the CP1): 8-bit Mode (M9161 = "ON") A 16-bit data The Lower 8 bits of the 16-bit data is treated as one Byte data. Useless Lower 8 bits RS D0 K5 D100 K10 K1 (the Upper 8 bits data are useless) Conditional contact X20 to active the...
- Page 229 1 2 M 3 P R U N Parallel Run (Octal Mode) ○ ○ ○ ○ Devices Operand UnG K,H KnX KnY " $" The ID number of the X, Y or M in the Kn X, Kn Y or Kn M must assign to a number which the last digit is a zero “0”. When S = Kn X, D must be Kn M;...
- Page 230 1 2 M 3 A S C I Convert HEX to ASCII ○ ○ ○ ○ Devices Operand UnG K,H KnX KnY " $" When S or D is designated to the Kn X, Kn Y, Kn M or Kn S, that Kn has to be K4 n = 1~256 S : the head ID of data source D : the head ID of the device where conversion results are stored...
- Page 231 1 2 M 3 H E X Convert ASCII to HEX ○ ○ ○ ○ Devices Operand UnG K,H KnX KnY " $" When S or D is designated to the Kn X, Kn Y, Kn M or Kn S, that Kn has to be K4 n = 1~256 S : the head ID number of data source D : the head ID number of the position where conversion...
- Page 232 1 2 M 3 C C D Check Code ○ ○ ○ ○ Devices Operand UnG K,H KnX KnY " $" When S or D is designated to the Kn X, Kn Y, Kn M or Kn S, that Kn has to be K4 n = 1~256 D occupies 2 components S : the head ID of continuous data source...
- Page 233 : to designate the communication port, 1~5 = CP1~CP5 The VS Series PLC uses this instruction to share the particular data via its Communication Port CP1~CP5 with other VS PLCs, that achieved the purpose of distributed control. The main character of the CPU LINK is to share instant data.
- Page 234 Use the Ladder Master S to set up a CPUL communication table and through its interactive window can set up and edit a communication table easily. In the structure of VS Series PLC, the communication tables are a part of the project. When the programmer to copy or access the project, those tables will be duplicated automatically with the program.
- Page 235 1 2 M 3 PID Control Loop ○ ○ ○ ○ Devices Operand UnG K,H KnX KnY " $" occupies 25 components : the set point value (SV) : the measured present value (PV) PID D0 D1 D100 D200 : the initial register ID of the parameters D : the control output value (MV) This instruction takes a current value from and compares it to a predefined set value...
- Page 236 The Equations of the PID Instruction This instruction is according to the differential of speed, to operation the PID instruction, the equations are shown in the table below: Direction of Operation The Equations of the PID Instruction △ MV=K { (EVn Dn }...
- Page 237 The description of the parameter block ( +24) Para- Parameter Description Available Range meter Name/Function The time interval should longer than the PLC’s Scan Time Sampling time (Ts) 1 ~ 32767ms and the update period of the measuring system 0 : Forward operation 1 : Reverse operation 0 : Disable the Process Value (PVn ) input deviation...
- Page 238 The Description of the Forward or Reverse Operation If the parameter of +1’s b0= “OFF” then the PID instruction will process the forward operation; If the parameter of +1’s b0=”ON” then the PID instruction will process the reverse operation. When the measured input Process Value (PVn ) >...
- Page 239 The Error Information of the PID Instruction If a setting value of parameter is not correct or the operation of a PID instruction occurs error, the Special Relay M9067 will be turned “ON”. And the Special Register D9067 will store the error code. Error Code Error Cause Effect to the Instruction...
- Page 240 50×L R×L Auto-Tuning Function The VS series provided the Auto-Tuning function which can uses some PID correlative parameters from user (such as: the operational direction at +1, Sampling Time Ts, Input Filter (α), Derivative Filter Gain K Set Point Value ) then via the PID instruction executes the Auto-Tuning function, the system will get three important parameters of PID.
- Page 241 (ex: executor. Relay output, by control the switch current output or At the VS series PLC, can use of heater or the valve potential output the Main Unit + Temperature of cooling water) to Expansion Card or Temperature...
- Page 242 The PID Parametric Explanations (1) P (Proportional Control) Action The control action is used for obtaining the output in proportion to the input. This control operation is to generate an output rate that is related to the difference between the set point and the measured temperature, by way of the multiplication product of the difference and the proportional gain.
- Page 243 (4) PID Control PID control is a combination of P(proportional), I (integral) and D (derivative) control actions, in which the temperature is controlled smoothly by proportional control action without hunting, automatic offset adjustment is made by integral control action, and quick response to an external disturbance is made possible by derivative control action.
- Page 244 Auto-Tuning All PID process/temperature controllers require the adjustment of the P , I, D and other parameters in order to allow accurate control of the load. There have been a variety of conventional methods but the Auto-Tuning methods make it possible to obtain PID constants suitable to a variety of objects automatically. Adjust the PID Parameters It is convenient while the PID constants calculated via the Auto-Tuning operation and normally they are more correct than tuning by manual.
- Page 245 The Example of PID Temperature Control When design a PID temperature control program, the method below is the recommendable procedure to perform the PID instruction. Start using the To correct the PID control system parameters Is it an Executes the Auto-Tuning According to the PID The PID instruction is Controlled object...
- Page 246 4 registers n : to designate the communication port, 1~5=CP1~CP5 The VS Series PLC uses this instruction to transmit or get the designated data via its Communication Port CP1~ CP5 with other VS PLCs. The CP1~CP5 are multi-functional communication ports. Each port can choose an appropriate communication type from its various functions.
- Page 247 Use the Ladder Master S to set up a LINK communication table and through its interactive window can set up and edit a communication table easily. In the structure of VS Series PLC, the communication tables are a part of the project. When the programmer to copy or access the project, those tables will be duplicated automatically with the program.
-
Page 249: Handy Instructions
6-11 Handy Instructions Applicable VS Mnemonic in Ladder Diagram Function Description 1 2 M 3 D B R D Read Data From Data Bank ○ ○ ○ ○ D B W R Write Data Into Data Bank ○ ○ ○ ○... - Page 250 1 2 M 3 D B R D Read Data From Data Bank ○ ○ ○ ○ Devices Operand UnG K,H KnX KnY " $" S is a 32-bit component, S = 0~655,359 When S designates to D or R as the object, that occupies 2 registers. When S uses K or H and modies by V, Z index, that occupies a pair of V, Z index registers.
- Page 251 1 2 M 3 D B W R Write Data Into Data Bank ○ ○ ○ ○ Devices Operand UnG K,H KnX KnY " $" S is a 16-bit component, but when uses V, Z index to modify, that occupies a pair of V, Z index registers. D is a 32-bit component, D = 0~655,359 When D designates to D or R as the object, that occupies 2 registers.
- Page 252 1 2 M 3 T P D Temperature PID Control ○ ○ ○ ○ Devices Operand UnG K,H KnX KnY " $" and S individually occupie n consecutive registers occupies (10×n)+10 consecutive registers occupies 6×n consecutive registers n = 1~16 : the initial register ID of the Set Value (SV) block : the initial register ID of the Present Values (PV) TPID D7000 D0 D100 D7100 K16...
- Page 253 The description of the parameter block Para- Parameter Description Available Range meter Name/Function To assign the outputs period interval (the length of one ON/OFF × Control Cycle Setting 10~32767 10ms cycle) To assign the responsive level of the instruction which is for all Responsive Sensitivity 0~3 channels (“0”: Fast / ..
- Page 254 Each bit at +3 is for set up Auto/Manual control of every single object channel. “0” stands for PID automatic control; “1” stands for manual control. When using the manual control mode, should input the expected output value (0 ~ 1000) directly to relative register. To assign the A / M method of the first object channel To assign the A / M method of the second object channel To assign the A / M method of the sixteenth object channel...
- Page 255 Each bit at +6 is for storage the status of Limitation Alarm of every single object channel. The status of Limitation Alarm from the first object channel The status of Limitation Alarm from the second object channel The status of Limitation Alarm from the sixteenth object channel A object channel has a set value of Limitation Alarm which is put in +(6×m +4) (m=0 ~ n–1);...
- Page 256 The exposition of parameter block & other set values ) Para- Parameter Description Available Range meter Name/Function Proportional Gain (K The P (Proportional) part of the PID loop 1~32767×0.01 of the First Object Channel Integral Time Constant (T The I (Integral) part of the PID loop, (this parameter 0~32767×100ms of the First Object Channel disables the I effect if it is “0”)
- Page 257 TPID Instruction Temperature Control Example I When design a PID temperature control program, the method below is the recommendable procedure to perform the TPID instruction. To adjust the PID Start to use the control system parameters by user Executes the Auto-Tuning (AT) The TPID instruction is According to the PID Is it an...
- Page 258 TPID Instruction Temperature Control Example II Below provides an example of an 8 channel PID temperature control. This needs a 32 point VS2 Series Main Unit and 2 of the VS-4TC-EC expansion cards. Also, a human-machine interface (HMI) is required to proceed for data setting and status display.
- Page 259 Compared with that, the VS series substitute the File Register to the Data Table to store a huge of preset data for the parameters and the reference data. The new structure of Data Table can have many tables and be named for each purpose.
- Page 260 M9000 ZPOP D0 The VS series PLC has 16 Index Registers (Z0~Z7 and V0~V7). If those are reused in the program and may disturb to the results of each other, it is necessary to manage the Index Registers. The purpose of the ZPUSH and ZPOP instructions are to manage the Index Registers conveniently.
-
Page 261: Floating Point Arithmetic Instructions
6-12 Floating Point Arithmetic Instructions Applicable VS Mnemonic in Ladder Diagram Function Description 1 2 M 3 Compare Two BIN Floating Point D E C M P ○ ○ ○ ○ Numbers Compare a BIN Float Number to D E Z C P ○... - Page 262 1 2 M 3 Compare Two BIN Floating Point D E C M P Numbers ○ ○ ○ ○ Devices Operand UnG K,H KnX KnY " $" D occupies 3 consecutive devices : the compare value #1 : the compare value #2 DECMP D0 D10 M0 D : the compare result;...
- Page 263 1 2 M 3 Compare a BIN Float Number to D E Z C P BIN Float Zone ○ ○ ○ ○ Devices Operand UnG K,H KnX KnY " $" D occupies 3 consecutive devices ≦ S : the lower limit of zone compare : the upper limit of zone compare DEZCP D0 D2 D10 M0 S : the compare value...
- Page 264 1 2 M 3 D E M O V Move Floating Point Data ○ ○ ○ ○ Devices Operand UnG K,H KnX KnY " $" S : the source device to be transferred D : the destination device DEMOV D0 D10 To copy the designated value from The content value of the BIN oating point format in D1, D0 will be copied to D11, D10 when the X0 = “ON”.
- Page 265 1 2 M 3 Convert BIN Floating Point to D E S T R Character String ○ Devices Operand UnG K,H KnX KnY " $" : the source of BIN floating point number : the devices to appoint the conversion format DESTR D20 D10 D0 D : the head ID of the converted storage devices This instruction uses a BIN floating point number at the...
- Page 266 By the exponential notation: To assign the process is by the exponential notation =(D21, D20) The expanded number during the conversion 123.4567 2 3 5 E Lower Upper Lower Upper Lower Upper Lower Upper Lower Upper Lower Upper 8 bits 8 bits 8 bits 8 bits...
- Page 267 1 2 M 3 Convert Character String to D E V A L BIN Floating Point ○ Devices Operand UnG K,H KnX KnY " $" S : the head ID of the character string to be converted D : the storage device for the BIN floating point result DEVAL D0 D100 This instruction uses a string started from the to perform the BIN floating point number conversion, then stores...
- Page 268 1 2 M 3 D E B C D Convert BIN to DEC Floating Point Format ○ ○ ○ ○ 1 2 M 3 D E B N Convert DEC to BIN Floating Point Format ○ ○ ○ ○ Devices Operand UnG K,H "...
- Page 269 1 2 M 3 D E A D D BIN Floating Point Addition ○ ○ ○ ○ Devices Operand UnG K,H KnX KnY " $" : the summand : the addend DEADDP D0 D2 D10 D : the total When X0 = “OFF” → “ON”, the summand (D1, D0) will be added to the addend (D3, D2), and the total will be stored at the specied destination device (D11, D10).
- Page 270 1 2 M 3 D E S U B BIN Floating Point Subtraction ○ ○ ○ ○ Devices Operand UnG K,H KnX KnY " $" : the minuend : the subtrahend DESUBP D0 D2 D10 D : the difference When X0 = “OFF” → “ON”, the subtrahend (D3, D2) will be subtracted from the minuend (D1, D0), and the difference will be stored at the destination device (D11, D10).
- Page 271 1 2 M 3 D E M U L BIN Floating Point Multiplication ○ ○ ○ ○ Devices Operand UnG K,H KnX KnY " $" : the multiplicand : the multiplier DEMUL D0 D2 D10 D : the product (of a multiplication) When X0 = “ON”, the multiplicand (D1, D0) will be multiplied by the multiplier (D3, D2), and the product will be stored at the destination device (D11, D10).
- Page 272 1 2 M 3 D E D V BIN Floating Point Division ○ ○ ○ ○ Devices Operand UnG K,H KnX KnY " $" : the dividend : the divisor DEDIVP D0 D2 D10 D : the quotient When X0 = “OFF” → “ON”, the dividend (D1, D0) will be divided by the divisor (D3, D2), and the quotient will be stored at the destination device (D11, D10).
- Page 273 1 2 M 3 D E X P BIN Floating Point Number Exponent ○ ○ ○ ○ Devices Operand UnG K,H KnX KnY " $" S : the source device of the exponent at the function D : the destination device to store the exponent result DEXPP D0 D10 This instruction performs the exponential function on a BIN oating point number that is designated by stores the BIN oating point format result in the...
- Page 274 1 2 M 3 D L O G E BIN Floating Point Nature Logarithm ○ ○ ○ ○ Devices Operand UnG K,H KnX KnY " $" S>0 S : the source device to be performed the natural logarithmic operation D : the destination device to store the natural logarithmic result DLOGEP D0 D10 This instruction performs the natural logarithmic operation on a BIN oating point number that is designated by and stores the BIN oating point format result in the...
- Page 275 1 2 M 3 D L O G 1 0 BIN Floating Point Common Logarithm ○ ○ ○ ○ Devices Operand UnG K,H KnX KnY " $" S>0 S : the source device to be performed the common logarithmic operation DLOG10P D0 D10 D : the destination device to store the common logarithmic result...
- Page 276 1 2 M 3 D E S Q R BIN Floating Point Square Root ○ ○ ○ ○ Devices Operand UnG K,H KnX KnY " $" S : the source device to be performed the square root operation D : the destination device to store the square root result DESQR D0 D10 This instruction performs the square root operation on a BIN oating point number that is designated by stores the BIN oating point format result in the...
- Page 277 1 2 M 3 D E N E G BIN Floating Point Negation ○ ○ ○ ○ Devices Operand UnG K,H KnX KnY " $" D : the device to be positive/negative inverted DENEGP D0 This instruction inverts a BIN oating point format number which is designed by into its negative value and stores the result back into When X0 = “OFF”...
- Page 278 1 2 M 3 I N T BIN Floating Point → BIN Integer Format ○ ○ ○ ○ Devices Operand UnG K,H KnX KnY " $" The 16-bit instruction, D occupies 1 component The 32-bit instruction, D occupies 2 components S : the source device to be performed the converting operation D : the destination device to store the converted result INT D0 D10...
- Page 279 1 2 M 3 D S N Calculate Sine ○ ○ ○ ○ Devices Operand UnG K,H KnX KnY " $" S : the source device for input the angle in radians D : the calculated result DSIN D0 D10 This instruction performs the mathematical sine operation on the designated BIN oating point radians of angle, and the result is stored in the...
- Page 280 1 2 M 3 D C O S Calculate Cosine ○ ○ ○ ○ Devices Operand UnG K,H KnX KnY " $" S : the source device for input the angle in radians D : the calculated result DCOS D0 D10 This instruction performs the mathematical cosine operation on the designated BIN oating point radians of angle, and the result is stored in the...
- Page 281 1 2 M 3 D T A N Calculate Tangent ○ ○ ○ ○ Devices Operand UnG K,H KnX KnY " $" S : the source device for input the angle in radians D : the calculated result DTAN D0 D10 This instruction performs the mathematical tangent operation on the designated BIN oating point radians of angle, and the result is stored in the...
- Page 282 1 2 M 3 D A S N Calculate Arc Sine ○ ○ ○ ○ Devices Operand UnG K,H KnX KnY " $" - 1.0≤S≤1.0 S : the source device for input the value of sine D : the device to store the calculated result (unit: radian) DASIN D0 D10 This instruction performs the mathematical Arcsine (inverse sine or sin ) operation by the designated BIN...
- Page 283 1 2 M 3 D A C O S Calculate Arc Cosine ○ ○ ○ ○ Devices Operand UnG K,H KnX KnY " $" - 1.0 ≦ S ≦ 1.0 S : the source device for input the value of cosine D : the device to store the calculated result (unit: radian) DACOS D0 D10 This instruction performs the mathematical Arccosine (inverse cosine or cos ) operation by the...
- Page 284 1 2 M 3 D A T A N Calculate Arc Tangent ○ ○ ○ ○ Devices Operand UnG K,H KnX KnY " $" S : the source device for input the value of tangent D : the device to store the calculated result (unit: radian) DATAN D0 D10 This instruction performs the mathematical Arctan (inverse tangent or tan ) operation by the designated BIN...
- Page 285 1 2 M 3 D R A D Convert Angle From Degrees to Radian ○ ○ ○ ○ Devices Operand UnG K,H KnX KnY " $" S : the source device for input the angle in degrees D : the calculated result in radians DRAD D0 D10 This instruction performs the mathematical converting operation on the designated BIN oating point degrees...
- Page 286 1 2 M 3 D D E G Convert Angle From Radian to Degrees ○ ○ ○ ○ Devices Operand UnG K,H KnX KnY " $" S : the source device for input the angle in degrees D : the calculated result in radians DDEG D0 D10 This instruction performs the mathematical converting operation on the designated BIN oating point radians...
-
Page 287: Advanced Data Processing And Mbus Instructions
6-13 Advanced Data Processing and MBUS Instructions Applicable VS Mnemonic in Ladder Diagram Function Description 1 2 M 3 W S U M ○ Sum of Word Data W T O B Split Word to Byte ○ B T O W Combine Byte to Word ○... - Page 288 1 2 M 3 W S U M Sum of Word Data ○ Devices Operand UnG K,H KnX KnY " $" For a 16-bit instruction, S occupies n components, D occupies 2 components n >0 For a 32-bit instruction, S occupies (2×n) components, D occupies 4 components S : the head ID of source devices to be added up D : the destination device to store the amount WSUM D10 D100 K5...
- Page 289 1 2 M 3 W T O B Split Word to Byte ○ Devices Operand UnG K,H KnX KnY " $" D occupies n components S occupies (n/2) components n ≧ 0 S : the head ID of source devices to be split D : the head ID of storage devices for the split result WTOBP D10 D20 K5 n : the number of bytes to be split...
- Page 290 1 2 M 3 B T O W Combine Byte to Word ○ Devices Operand UnG K,H KnX KnY " $" D occupies (n/2) components S occupies n components n ≧ 0 S : the head ID of source devices to be combined D : the head ID of storage devices for the combined result BTOWP D10 D20 K5 n : the number of bytes to be combined...
- Page 291 1 2 M 3 U N I Combine 4-bit Nibble to Word ○ Devices Operand UnG K,H KnX KnY " $" n = 0~4 S occupies n components S : the head ID of source devices to be combined D : the head ID of storage devices for the combined result UNIP D10 D20 K3 n : the number of 4-bit nibbles to be combined This instruction takes all the lowest nibbles of the devices that started from the...
- Page 292 1 2 M 3 D I S Separate Word to 4-bit Nibble ○ Devices Operand UnG K,H KnX KnY " $" n = 0~4 D occupies n components S : the source device to be split D : the head ID of storage devices for the split result DISP D10 D20 K4 n : the number of 4-bit nibbles to be split This instruction separates the source device...
- Page 293 1 2 M 3 S W A P Swap High / Low Byte ○ ○ ○ ○ Devices Operand UnG K,H KnX KnY " $" D : the Upper / Lower 8 bits of the device to be swapped SWAPP D0 When X20 = “OFF”...
- Page 294 1 2 M 3 S O R T 2 Sort Tabulated Data 2 ○ ○ ○ ○ Devices Operand UnG K,H KnX KnY " $" For a 16-bit instruction, each of the S and D respectively occupy (m ×m ) components For a 32-bit instruction, each of the S and D respectively occupy (2×m ×m ) components...
- Page 295 When M9165 = “ON”, the data sorting is in descending order. Sorted Data Result Array if the D200 = 3 Sorted Data Result Array if the D200 = 1 (Starting from the appointed register (Starting from the appointed register Data Arrangement Data Arrangement Philology History...
- Page 296 (1~247) for every device and make the other parameters identical. Besides, use the Ladder Master S to open the project of the VS series PLC and write this MBUS instruction in the Master PLC's program, then set the port's “Application type:”...
- Page 297 Use the Ladder Master S to set up a MBUS communication table and through its interactive window can set up and edit a communication table easily. In the structure of VS Series PLC, the communication tables are a part of the project. When the programmer to copy or access the project, those tables will be duplicated automatically with the program.
-
Page 299: Real Time Clock Related Instructions
6-14 Real Time Clock Related Instructions Applicable VS Mnemonic in Ladder Diagram Function Description 1 2 M 3 T C M P Time Compare ○ ○ ○ ○ T Z C P Time Zone Compare ○ ○ ○ ○ T A D D Time Addition ○... - Page 300 1 2 M 3 T C M P Time Compare ○ ○ ○ ○ Devices Operand UnG K,H KnX KnY " $" =0~23 =0~59 =0~59 S occupies 3 components D occupies 3 components : the “Hour” for comparison : the “Minute” for comparison TCMP K8 K30 K20 D0 M0 : the “Second”...
- Page 301 1 2 M 3 T Z C P Time Zone Compare ○ ○ ○ ○ Devices Operand UnG K,H KnX KnY " $" All the S1, S2, S and D occupies 3 components respectively ≦ S : the lower setting of the time period combination : the upper setting of the time period combination TZCP D0 D10 D20 M0 S : the registers of the time combination to do the...
- Page 302 1 2 M 3 T A D D Time Addition ○ ○ ○ ○ Devices Operand UnG K,H KnX KnY " $" All the S and D occupies 3 components respectively : the summand of the time combination : the addend of the time combination TADD D0 D10 D20 D : the sum of the time combination The designated time combination of the summand...
- Page 303 1 2 M 3 T S U B Time Subtraction ○ ○ ○ ○ Devices Operand UnG K,H KnX KnY " $" All the S and D occupies 3 components respectively : the minuend of the time combination : the subtrahend of the time combination TSUB D0 D10 D20 D : the difference of the time combination The designated time combination of the minuend...
- Page 304 1 2 M 3 H T O S Convert Hour to Second ○ ○ ○ ○ Devices Operand UnG K,H KnX KnY " $" S occupies 3 components S : the head register of the time combination to be transferred D : the transferred result HTOS D0 D10 The designated time combination...
- Page 305 1 2 M 3 S T O H Convert Second to Hour ○ ○ ○ ○ Devices Operand UnG K,H KnX KnY " $" D occupies 3 components S : the decimal seconds to be transferred D : the transferred head register of the STOH D10 D20 time combination result The decimal seconds at...
- Page 306 1 2 M 3 T R D Read RTC Data ○ ○ ○ ○ Devices Operand UnG K,H KnX KnY " $" D occupies 7 components D : the head register that stores the present value of the RTC TRD D0 When the Main Unit has installed a VS-MCR multi-function memory card, the PLC will provide with the real time clock (RTC) function.
- Page 307 1 2 M 3 T W R Set RTC Data ○ ○ ○ ○ Devices Operand UnG K,H KnX KnY " $" S occupies 7 components S : the head register that stores the set time data of the RTC TWR D0 When the Main Unit has installed a VS-MCR multi-function memory card, the PLC will provide with the real time clock (RTC) function.
-
Page 309: Code Conversion And Timer Instructions
6-15 Code Conversion and Timer Instructions Applicable VS Mnemonic in Ladder Diagram Function Description 1 2 M 3 H O U R ○ ○ ○ ○ Hour Meter G R Y Convert BIN to Gray Code ○ ○ ○ ○ G B N Convert Gray Code to BIN ○... - Page 310 1 2 M 3 H O U R Hour Meter ○ ○ ○ ○ Devices Operand UnG K,H KnX KnY " $" For a 16-bit instruction, D occupies 2 components For a 32-bit instruction, D occupies 3 components S : the set value of the timer (Unit: hour) : the present value of the timer (Unit: hour) HOUR K1000 D7000 Y0 : the output contact of the timer...
- Page 311 1 2 M 3 G R Y Convert BIN to Gray Code ○ ○ ○ ○ Devices Operand UnG K,H KnX KnY " $" For a 16-bit instruction, S = 0~32,767 For a 32-bit instruction, S = 0~2,147,483,647 S : the source device (by the decimal BIN value) to be converted GRY D0 K4Y20 D : the destination device where the converted Gary...
- Page 312 1 2 M 3 G B N Convert Gray Code to BIN ○ ○ ○ ○ Devices Operand UnG K,H KnX KnY " $" For a 16-bit instruction, S = 0~32,767 For a 32-bit instruction, S = 0~2,147,483,647 S : the source device (by the Gary Code) to be converted D : the destination device where the converted decimal GBIN K4X20 D0 BIN value is stored...
- Page 313 1 2 M 3 T F T Timer (10 ms.) ○ ○ ○ ○ Devices Operand UnG K,H KnX KnY " $" S = 0~32,767, will be treated as 0 if it is exceeding this range. : the present value of the timer (Unit: 10 ms.) S : the set value of the timer (Unit: 10 ms.) TFT D0 K100 M0 : the output contact of the timer...
- Page 314 1 2 M 3 T F H Timer (100 ms.) ○ ○ ○ ○ Devices Operand UnG K,H KnX KnY " $" S = 0~32,767, will be treated as 0 if it is exceeding this range. : the present value of the timer (Unit: 100 ms.) S : the set value of the timer (Unit: 100 ms.) TFH D0 K100 M0 : the output contact of the timer...
- Page 315 1 2 M 3 T F K Timer (1 sec.) ○ ○ ○ ○ Devices Operand UnG K,H KnX KnY " $" S = 0~32,767, will be treated as 0 if it is exceeding this range. : the present value of the timer (Unit: second) S : the set value of the timer (Unit: second) TFK D0 K100 M0 : the output contact of the timer...
-
Page 317: Rnd, Duty, Crc And Hhcmv Instructions
6-16 RND, DUTY, CRC and HHCMV Instructions Applicable VS Mnemonic in Ladder Diagram Function Description 1 2 M 3 R N D ○ ○ ○ ○ Generate Random Number D U T Y Timing Pulse Generation ○ C R C Cyclic Redundancy Check - 16 ○... - Page 318 1 2 M 3 R N D Generate Random Number ○ ○ ○ ○ Devices Operand UnG K,H KnX KnY " $" D : the destination device where the generated random number is stored RNDP D0 This instruction uses the content value at the (D9161, D9160) and by its calculation to generate a pseudo-random number that the range of the number is from 0 to 32,767, then the instruction stores the result to the designated device When X0 = “OFF”...
- Page 319 1 2 M 3 D U T Y Timing Pulse Generation ○ Devices Operand UnG K,H KnX KnY " $" D=M9330 〜 M9334 >0 >0 : the number of Scan Times to output “ON” in a pulse cycle : the number of Scan Times to output “OFF” in a pulse cycle DUTY K10 K5 M9330 D : the timing pulse output destination device At the destination point...
- Page 320 1 2 M 3 C R C Cyclic Redundancy Check - 16 ○ ○ ○ ○ Devices Operand UnG K,H KnX KnY " $" n = 1 When S or D is designated to the Kn X, Kn Y, Kn M or Kn S, that Kn has to be K4 〜...
- Page 321 1 2 M 3 D H H C M V Hardware High-Speed Counter Data Move ○ ○ ○ ○ Devices Operand UnG K,H KnX KnY " $" When the S or D is assigned to a HHSC related Special Register, not has the V, Z index function. S : the source device to be transferred D : the destination device DHHCMVP D9226 D0...
-
Page 323: Block Data Handling Instructions
6-17 Block Data Handling Instructions Applicable VS Mnemonic in Ladder Diagram Function Description 1 2 M 3 ○ Block Data Addition Block Data Subtraction ○ B K C M P = Block Data Compare (S1) = (S2) ○ B K C M P > Block Data Compare (S1) >... - Page 324 1 2 M 3 Block Data Addition ○ Devices Operand UnG K,H KnX KnY " $" For a 16-bit instruction, S and D occupies n components individually (except that S is using K or H) For a 32-bit instruction, S and D occupies (2×n) components individually (except that S is using K or H) : the head ID of the summand block...
- Page 325 1 2 M 3 Block Data Subtraction ○ Devices Operand UnG K,H KnX KnY " $" For a 16-bit instruction, S and D occupies n components individually (except that S is using K or H) For a 32-bit instruction, S and D occupies (2×n) components individually (except that S is using K or H) : the head ID of the minuend block...
- Page 326 1 2 M 3 B K C M P = Block Data Compare (S1) = (S2) ○ 1 2 M 3 B K C M P > Block Data Compare (S1) > (S2) ○ 1 2 M 3 B K C M P < Block Data Compare (S1) <...
-
Page 327: Character String Handling Instructions
6-18 Character String Handling Instructions Applicable VS Mnemonic in Ladder Diagram Function Description 1 2 M 3 S T R BIN to Character String Conversion ○ V A L Character String to BIN Conversion ○ Join Up Two Character Strings ○... - Page 328 1 2 M 3 S T R BIN to Character String Conversion ○ Devices Operand UnG K,H KnX KnY " $" : the devices to appoint the conversion format : the source of a BIN number STR D10 D20 D0 D : the head ID of the devices where conversed character string is stored This instruction uses the format parameters at the...
- Page 329 Assume the content value of the 32-bit instruction's D10=13, D11=8 and (D21, D20)=-123450, the instruction will be executed as follows: DSTR D10 D20 D0 Length of the converted string Number of digits after the decimal point – ( D21, D20) –123450 0 0 1 2 3 4 5 0 Negative sign...
- Page 330 1 2 M 3 V A L Character String to BIN Conversion ○ Devices Operand UnG K,H KnX KnY " $" S : the head ID of the devices where character string is stored : the format of the character string VAL D0 D10 D20 : the converted BIN number result This instruction uses a string started from the...
- Page 331 When to execute the 32-bit instruction, the results will as follows: DVAL D0 D10 D20 Positive (20H) Ignore the space Value of the pure number part is 123456 string 1 2 3 123456 ( D21, D20) Length of the source string Number of digits after the decimal point at the string Ignore...
- Page 332 52H R 45H(E) 4BH K 20H( ) 56H(V) 20H( ) 47H(G) 49H I " I " " VIGOR" LIKE 52H R 4FH O 0000H The code for end of string will be added. " I LIKE VIGOR" The instruction will add the end of string at the tail of automatically.
- Page 333 45H( E) 4BH K X0=ON 20H( ) 56H(V) D100 47H(G) 49H I 52H R 4FH O " I LIKE VIGOR" If the length of the string is more than 32,767 characters, the PLC will regard that as an operational error.
- Page 334 49H I 4FH O 47H(G) 52H R 4FH O 52H R " VIGOR" " I LIKE VIGOR" The instruction will add the end of string at the tail of result automatically. If the is equal to 0 or an even number, the end of string “0000H”...
- Page 335 52H R 4FH O " I LIKE VIGOR" The instruction will add the end of string at the tail of result automatically. If the is equal to 0 or an even number, the end of string “0000H” will be added; if the is an odd number, the end of string is “00H”.
- Page 336 4FH O " I LIKE VIGOR" If the D21 = 0, this instruction will not execute. If the D21 = –1, this instruction will extract a part of source string which is starting from the third position to the last character.
- Page 337 20H( ) 56H(V) 56H(V) 47H(G) 49H I 47H(G) 49H I 52H R 4FH O 52H R 4FH O " I " I LIKE VIGOR" LOVE VIGOR" If the D21 ( +1) is equal to 0, the instruction will not execute.
- Page 338 4FH O 45H( E) " I LIKE VIGOR" If the operation has one of the following situation, the PLC will regard that as an operational error. 1. The string from which does not have the end of string code “00H”.
- Page 339 The instruction will get the result = D20=8. INSTR “VIGOR” D10 D20 K3 If the operation has one of the following situation, the PLC will regard that as an operational error. 1. The string from which does not have the end of string code "00H".
- Page 340 4FH O 47H(G) 52H R 52H R " VIGOR" The code of the end of string In the example above, the source string has 5 characters that length is an odd number, thus the instruction will add the end of string "00H" at the tail of result automatically.
-
Page 341: Data Table Handling And Shift Instructions
6-19 Data Table Handling and Shift Instructions Applicable VS Mnemonic in Ladder Diagram Function Description 1 2 M 3 Delete Data from Specic Location F D E L ○ of Table Insert Data into Specic Location F N S ○ of Table Shift the Last Register Read P O P... - Page 342 1 2 M 3 Delete Data from Specic Location F D E L of Table ○ Devices Operand UnG K,H KnX KnY " $" n>0 S : the register is to store the split data from the data table D : the head ID of the data table to be shortened FDELP D0 D2 D1 n : to appoint the point at the table to be cut This instruction uses a series of word components starting with the...
- Page 343 1 2 M 3 Insert Data into Specic Location F N S of Table ○ Devices Operand UnG K,H KnX KnY " $" n>0 S : the register is to store the split data from the data table D : the head ID of the data table to be shortened FINSP D0 D2 D1 n : to appoint the point at the table to be cut This instruction uses a series of word components starting with the...
- Page 344 1 2 M 3 Shift the Last Register Read P O P (FILO Last Read) ○ Devices Operand UnG K,H KnX KnY " $" = S occupies n components 2~512 S : the header ID of the FILO data stack D : the destination device for storing read data POPP D0 D101 K10 from a FILO data stack...
- Page 345 Shift n Bit Right in 16-bit Word Data S F R with Carry ○ Shift n Bit Left in 16-bit Word Data S F L with Carry ○ Devices Operand UnG K,H " $" KnX KnY = 〜 D : the word data device to be shifted n : the number of the bits to be shifted SFRP D0 K4 The bit format of the designated device...
-
Page 347: In-Line Comparison Instructions
6-20 In-Line Comparison Instructions Applicable VS Mnemonic in Ladder Diagram Function Description 1 2 M 3 Initial In-line Compare, Connect Up if ○ ○ ○ ○ (S1) = (S2) Initial In-line Compare, Connect Up if > ○ ○ ○ ○ (S1) >... - Page 348 Initial In-line Compare, Connect Up if (S1) = (S2) ○ ○ ○ ○ Initial In-line Compare, Connect Up if > (S1) > (S2) ○ ○ ○ ○ Initial In-line Compare, Connect Up if < (S1) < (S2) ○ ○ ○ ○...
-
Page 349: Handy Instructions And Dabin, Binda, Hsct Instructions
6-21 Handy Instructions and DABIN, BINDA, HSCT Instructions Applicable VS Mnemonic in Ladder Diagram Function Description 1 2 M 3 L M T ○ Limit Control B A N D Dead Band Control ○ Z O N E Zone Shift Control ○... - Page 350 1 2 M 3 L M T Limit Control ○ Devices Operand UnG K,H KnX KnY " $" >S : the lower limit value : the upper limit value LIMIT K500 K1000 D0 D1 : the input value D : the output value Output Use the lower limit and the upper limit...
- Page 351 1 2 M 3 B A N D Dead Band Control ○ Devices Operand UnG K,H KnX KnY " $" <S : the lower unresponsive value of the dead band : the upper unresponsive value of the dead band BAND K-5000 K5000 D0 D1 : the input value of the dead band control D : the output value of the dead band control Output...
- Page 352 1 2 M 3 Z O N E Zone Shift Control ○ Devices Operand UnG K,H KnX KnY " $" <S : the negative bias value of the shift control : the positive bias value of the shift control ZONE K-5000 K5000 D0 D1 : the input value of the zone shift control D : the output value of the zone shift control Output...
- Page 353 1 2 M 3 S C L Scaling (Coordinate by Point Data) ○ ○ ○ ○ 1 2 M 3 S C L 2 Scaling 2 (Coordinate by X/Y Data) ○ ○ ○ ○ Devices Operand UnG K,H " $" KnX KnY : the source device to store the input value of scaling (X coordinate)
- Page 354 Application example: To transform the position from a linear potentiometer Use the 1 channel of a VS-4AD module to connect with a 500 mm stroke linear potentiometer for measuring the position. This application in the machine just needs to use a part of the potentiometer (50 mm to 450 mm). The request is to get a value which is between 0 to 4,000 (unit: 0.1 mm).
- Page 355 1 2 M 3 Convert Decimal ASCII String to D A B N BIN Number ○ Devices Operand UnG K,H KnX KnY " $" For a 16-bit instruction, S occupies 3 components For a 32-bit instruction, S occupies 6 components S : the head ID of the devices where the decimal ASCII string is stored DABIN D0 D10...
- Page 356 1 2 M 3 Convert BIN Number to Decimal B N D A ASCII String ○ Devices Operand UnG K,H KnX KnY " $" For a 16-bit instruction, D occupies 4 components For a 32-bit instruction, D occupies 6 components S : the source BIN number to be converted D : the head ID of the converted decimal ASCII string BINDA D10 D0...
- Page 357 1 2 M 3 Software High Speed Counter Table D H S C T Compare ○ ○ ○ ○ Devices Operand UnG K,H KnX KnY " $" 1≤m≤16 = C235~C255 When D is assigned to Y, only Y0~Y7 have instant response ability 1≤n≤16 : the head register ID of the comparison table m : the number of data sets to be compared...
- Page 358 Program Example: This example uses the C235, it will count the number of pulses from the input point X0. The program arranges the C235 become an increasing cycle counter and limits its present value between 0 to 1000. During the counting process, the DHSCT instruction generates output signals according to the contents in the comparison table.
-
Page 359: Positioning Control Instructions
6-22 Positioning Control Instructions The VS series PLCs are provided with 4 axes control function. Given that to use positing control function is more than understanding positioning control instructions, more professional description is needed. Thus, this manual provides a special chapter 8 “Statement of Positioning Control Functions” for detailed description about the function. -
Page 361: Statement Of Communication Functions
(such as thermostat, inverter, etc.). Therefore, these create a complete control system. Compared to the company's previous products, the VS series PLC has made great progress in increasing the number of communication ports, communication speeds, the exibility of application types and user-friendliness. -
Page 362: Notes For Constructing Communication Systems
Terminal device Terminal device All of the VS series communication cards have built-in terminal resistances, user can be enabled the function by short connect the TR terminals. For those communication devices which have no built-in terminal resistances, take special note during wiring to ensure that the external terminal resistance is well connected. - Page 363 Misconception about communication speed. The communication systems are built for various purposes and applications. Most people feel that faster communication means better. In fact, this concept is not necessarily correct. The reason is that faster communication speed relies on the higher communication quality to support, which also means that higher communication construction costs may be required.
-
Page 364: Structure Of Communication System
The VS Series PLC Main Unit not only has a built-in CP1 communication port, but also the EC1 Expansion Card Socket is available to install a communication expansion card. Thus, by the EC1 socket, the VS1 could get the CP2; the VS2 and VSM could have the CP2 and CP3. - Page 365 485A 485A RS-485 RS-485 RX TX RX TX RX TX RX TX DC IN DC IN 24V 0V 24V 0V RS-485 RS-485 D485 D485A D485 D485A RX TX RX TX RX TX RX TX RX TX RX TX RX TX RX TX RS-485 RS-485...
- Page 366 The communication application types supported by the VS series PLC are briey introduced below: The VS Computer Link Slave (hereby referred to as the VS Slave) When the VS PLC’s communication port has been set to the application type of the “VS Computer Link Slave”, the human-machine interface (HMI) or supervisory control and data acquisition system (SCADA) can access the VS PLC’s data through the “VS Computer Link protocol”...
- Page 367 RS- 485 The CPU Link The VS Series PLC uses this application to share instant data between VS PLCs to serve the purpose of distributed control. When the communication ports of VS PLCs have been set the application for to share instant data between PLCs, select one of the PLC to cooperate with the CPUL instruction and CPUL communication table, through its particular protocol to share instant data.
-
Page 368: Main Unit Built-In Communication Port
VS PLC. VIGOR provides the VSPC-200 noise suppression USB cable that is designed for industrial environment use, could reduce the USB communication failed. Therefore, use a computer to do the programming can acquire stable and rapid communication quality. -
Page 369: Vs-485-Ec Communication Expansion Card
7-2-2 VS-485-EC Communication Expansion Card The VS-485-EC Communication Expansion Card offers one set of non-isolated RS-485 port. By way of the parameter setting and well planned program at the VS Series PLC Main Unit, the port can perform one of various communication functions. -
Page 370: Vs-485A-Ec Communication Expansion Card
7-2-3 VS-485A-EC Communication Expansion Card The VS-485A-EC Communication Expansion Card offers one set of isolated RS-485 port. By way of the parameter setting and well planned program at the VS Series PLC Main Unit, the port can perform one of various communication functions. -
Page 371: Vs-D485-Ec Communication Expansion Card
7-2-4 VS-D485-EC Communication Expansion Card The VS-D485-EC Communication Expansion Card offers two sets of non-isolated RS-485 port. By way of the parameter setting and well planned program at the VS Series PLC Main Unit, each port can separately perform one of various communication functions. -
Page 372: Vs-D485A-Ec Communication Expansion Card
7-2-5 VS-D485A-EC Communication Expansion Card The VS-D485A-EC Communication Expansion Card offers two sets of isolated RS-485 port. By way of the parameter setting and well planned program at the VS Series PLC Main Unit, each port can separately perform one of various communication functions. -
Page 373: Vs-D232-Ec Communication Expansion Card
7-2-6 VS-D232-EC Communication Expansion Card The VS-D232-EC Communication Expansion Card offers two sets of non-isolated RS-232C port. By way of the parameter setting and well planned program at the VS Series PLC Main Unit, each port can separately perform one of various communication functions. -
Page 374: Vs-D52A-Ec Communication Expansion Card
The VS-D52A-EC Communication Expansion Card offers one isolated RS-485 port and one non-isolated RS-232C port. By way of the parameter setting and well planned program at the VS Series PLC Main Unit, each port can separately perform one of various communication functions. -
Page 375: Vs-Enet-Ec Communication Expansion Card
The VS-ENET-EC Communication Expansion Card is a dual port card. It offers one Ethernet port (with an additional non-isolated RS-485 interface) and one non-isolated RS-485 port. By way of the parameter setting and well planned program at the VS Series PLC Main Unit, each port can separately perform one of various communication functions. -
Page 376: Communication Types
7-3 Communication Types The VS Series PLCs have a complete selection of communication functions. They can be connected with a maximum of ve communication ports CP1~CP5. Furthermore, each one is a multi-functional communication port and can be applied separately to a variety of communication application types. Each communication operating type will be introduced below. -
Page 377: Vs Computer Link Slave
VS PLCs to construct a monitoring area network. Some software or HMI may not be equipped with the driving program of the VS Series PLC. In this case, the “MODBUD Slave” application type can be used to connect them. Please refer to the section “7-3-5 MODBUD Slave”... - Page 378 In this example, a computer uses its USB port to connect with an USB to RS-485 converter to transfer the communication signal to the RS-485 interface. Then, the RS-485 is connected to two VS series PLC’s CP1 those station numbers are assigned to #1 and #2. After that, executes the Ladder Master S programming software on the computer to connect with the station #1 and station #2 PLCs for to read the project, control STOP/RUN and monitor those PLCs.
- Page 379 ② Edit the project of PLC Station #2 Use the Ladder Master S to set the CP1's parameters of PLC Station #2 and compile relevant program. Then, connect to the USB programming port of Station #2 and write the project into the PLC Station #2. The program writes to the PLC Station #2.
- Page 380 To set the connection method To set the connection device To set the baud rate This example is using the USB to In this example, the given port is RS-485 converter, thus the “USB” COM4 after the USB to RS-485 is selected.
-
Page 381: Vs Computer Link Master
CP2~CP5: VS-D485-EC, VS-D485A-EC Linking Equipment CP3, CP5: VS-D52A-EC(CH2) CP2, CP4: VS-485-EC, VS-485A-EC, VS-D52A-EC(CH1) CP3, CP5: VS-ENET-EC(CH2) VS Series PLC (including VS1, VS2, VSM and VS3) Available Model All the X, Y, M, S, T, C, D, R are included Transferable Device... - Page 382 4 registers n : to designate the communication port, 1~5=CP1~CP5 The VS Series PLC uses this instruction to transmit or get the designated data via its Communication Port CP1~ CP5 with other VS PLCs. The CP1~CP5 are multi-functional communication ports. Each port can choose an appropriate communication type from its various functions.
- Page 383 Use the Ladder Master S to set up a LINK communication table and through its interactive window can set up and edit a communication table easily. In the structure of VS Series PLC, the communication tables are a part of the project. When the programmer to copy or access the project, those tables will be duplicated automatically with the program.
- Page 384 Application Example In this example, those CP1s of three VS PLCs are connected by the RS-485 interface and execute the VS Computer Link. In the following gure, let the rst one from the left be the Master station of VS Computer Link to execute the “VS Computer Link Master”...
- Page 385 ② Edit the project of Slave PLC #2 Use the Ladder Master S to set the CP1's parameters of Slave PLC #2 and compile relevant program. Then, connect to the USB programming port of Slave #2 and write the project into the PLC. The program writes to the Slave PLC #2 M9000 Send the content value of D0 to the...
- Page 386 Open a new LINK communication table at the Master PLC. Name this LINK communication table as “LINK_TEST” first, and then compile its contents. Edit the program for the Master PLC. M9000 The LINK instruction bases on the contents of the “LINK_TEST” table to LINK LINK_TEST D100 K1 operate communication.
- Page 387 ④ After sequentially edit and load the projects to those PLCs, do the wiring jobs between three PLCs. Then, connect the computer to the USB programming port of the Master PLC, to test and monitor the process through the Ladder Master S. ⑤...
-
Page 388: Vb Computer Link Slave
1. When the old versions of HMI or SCADA can only support the “M, VB and VH Protocol” but not support the “VS Computer Link Protocol”. 2. When the existed “VB Protocol” network is added with a new VS series PLC, the added VS PLC must work under this application type. -
Page 389: Modbus Slave
(HMI) or the supervisory control and data acquisition system (SCADA) all support the “MODBUS protocol”. Nonetheless, if the selected HMI or SCADA does not support the “VS Protocol”, use the “MODBUS protocol” to connect it with the VS Series PLC’s. VS series... -
Page 390: Modbus Master
CP2~CP5: VS-D485-EC, VS-D485A-EC Linking Equipment CP3, CP5: VS-D52A-EC(CH2) CP2, CP4: VS-485-EC, VS-485A-EC, VS-D52A-EC(CH1) CP3, CP5: VS-ENET-EC(CH2) VS Series PLC (including VS1, VS2, VSM and VS3) Available Model All the X, Y, M, S, T, C, D, R are included Transferable Device... - Page 391 (1~247) for every device and make the other parameters identical. Besides, use the Ladder Master S to open the project of the VS series PLC and write this MBUS instruction in the Master PLC's program, then set the port's “Application type:”...
- Page 392 Use the Ladder Master S to set up a MBUS communication table and through its interactive window can set up and edit a communication table easily. In the structure of VS Series PLC, the communication tables are a part of the project. When the programmer to copy or access the project, those tables will be duplicated automatically with the program.
- Page 393 Application Example In this example, those CP1s of three VS PLCs are connected by the RS-485 interface and execute the MODBUS communication. In the following gure, let the rst one from the left be the Master station of MODBUS communication to execute the “MODBUS Master”...
- Page 394 ② Edit the project of Slave PLC #2 Use the Ladder Master S to set the CP1's parameters of Slave PLC #2 and compile relevant program. Then, connect to the USB programming port of Slave #2 and write the project into the PLC. The program writes to the Slave PLC #2 M9000 Send the content value of D0 to the...
- Page 395 Open a new MBUS communication table at the Master PLC Name this MBUS communication table as “MBUS_TEST” first, and then compile its contents. Edit the program for the Master PLC. M9000 The MBUS instruction bases on the contents of the “MBUS_TEST” MBUS MBUS_TEST D100 K1 table to operate communication.
- Page 396 ④ After sequentially edit and load the projects to those PLCs, do the wiring jobs between three PLCs. Then, connect the computer to the USB programming port of the Master PLC, to test and monitor the process through the Ladder Master S. ⑤...
-
Page 397: Cpu Link
7-3-7 CPU Link The VS Series PLC uses this application to share instant data between VS PLCs to serve the purpose of distributed control. When the communication ports of VS PLCs have been set the application for to share instant data between PLC’s, select one of the PLC to cooperate with the CPUL instruction and CPUL communication table, through its particular protocol to share instant data. - Page 398 : to designate the communication port, 1~5 = CP1~CP5 The VS Series PLC uses this instruction to share the particular data via its Communication Port CP1~CP5 with other VS PLCs, that achieved the purpose of distributed control. The main character of the CPU LINK is to share instant data.
- Page 399 Use the Ladder Master S to set up a CPUL communication table and through its interactive window can set up and edit a communication table easily. In the structure of VS Series PLC, the communication tables are a part of the project. When the programmer to copy or access the project, those tables will be duplicated automatically with the program.
- Page 400 Application Example In this example, those CP1’s of three VS PLC’s are connected by the RS-485 interface and execute the CPU Link communication. In the following gure, let the rst one from the left be the station #0 of the CPU Link communication to execute the “CPU Link”...
- Page 401 Open a new CPUL communication table at the VS PLC #0 Name this CPUL communication table as the “CPUL_TEST” rst, and then compile its contents. Edit the program for the VS PLC #0. M9000 The CPUL instruction bases on the contents of the “CPUL_TEST” table CPUL CPUL_TEST D100 K1 to operate communication.
- Page 402 ② Edit the project of VS PLC #1 Use the Ladder Master S to set the CP1's parameters of VS PLC #1 and compile relevant program. Then, connect to the USB programming port of VS PLC #1 and write the project into the PLC. The program writes to the VS PLC #1.
-
Page 403: Non Protocol
CP2~CP5: VS-D485-EC, VS-D485A-EC Linking Equipment CP3, CP5: VS-D52A-EC(CH2) CP2, CP4: VS-485-EC, VS-485A-EC, VS-D52A-EC(CH1) CP3, CP5: VS-ENET-EC(CH2) VS Series PLC (including VS1, VS2, VSM and VS3) Available Model Transferable Device All the X, Y, M, S, T, C, D, R are included... - Page 404 As shown in the gure below, use the Ladder Master S to set the communication port's “Application type:” of the VS Series PLC as the “Non Protocol” and at the same page to set other relevant parameters. Set the station No.
- Page 405 The related special devices are summarized below: ( : Means read only.) ■ Relay ID No. Description CP1 RS instruction data sending out request ag. M9100 CP1 RS instruction data receive completed ag. M9101 CP1 RS instruction data receive time-out ag. M9102 CP1 RS / LINK / MBUS instruction on communication abnormal ag.
- Page 406 Sequence of Data Sending and Receiving (Using the CP1 as an example) RS D0 D200 D100 D201 K1 Edit the data string which is beginning from the D0 to be sent and the Fill the data string to be sent length of data string is specified by the D200.
- Page 407 Description of Data Sending / Receiving (by the CP1): 16-bit Mode (M9161 = "OFF") A 16-bit data Divide the 16-bit data into two Bytes of data: Upper 8 bits Upper 8 bits Lower 8 bits RS D0 K5 D100 K10 K1 data and Lower 8 bits data.
- Page 408 Description of Data Sending / Receiving (by the CP1): 8-bit Mode (M9161 = "ON") A 16-bit data The Lower 8 bits of the 16-bit data is treated as one Byte data. Useless Lower 8 bits RS D0 K5 D100 K10 K1 (the Upper 8 bits data are useless) Conditional contact X20 to active the...
- Page 409 “VS Compurter Link Protocol” (hereby referred to as VS Protocol) format to access the right side PLC's data. Actually, there are simpler ways to exchange data between VS Series PLC’s in the real applications. This main purpose of this example is to demonstrate the usage of the “Non Protocol” and the RS instruction.
- Page 410 Please follow the procedures below to operate the test: ① Edit the project of Slave PLC #1 Use the Ladder Master S to set the CP1's parameters of Slave PLC #1 and compile relevant program. Then, connect to the USB programming port of Slave #1 and write the project into the PLC. Set the application type: VS Computer Link Slave Set the baud rate: 19200 bps Set the station No.: Station #1...
- Page 411 Edit the program for the left PLC (Master). M9000 Assign the RS, CCD... instructions to operate in the 8-bit mode M9161 Assign the SMOV instruction to operate in the HEX mode M9168 M9002 D100 stores the Slave's station No. to be communicated, in MOV K1 D100 this example it is 1.
- Page 412 MOV K10 D50 Set the number of data bytes to be received Set the number of data bytes to be sent MOV H10 D1 MOV H02 D2 The command data string from the Master MOV D100 D3 D L E DMOV H09 D4 Station No.
- Page 413 By the USB programming port, the project is written into the Master PLC. VS1-32MR STOP X0 1 2 3 4 5 6 7 11 12 13 14 15 16 17 21 22 23 Y0 1 2 3 4 5 6 7 10 11 12 13 VSPC-200A DC24V...
-
Page 414: Vs Series Plc Communication Protocol
7-4 VS Series PLC Communication Protocol A. The relevant communication parameters Bits-per-character: 8 bits Parity check: None Stop bit: 1 bit Baud rate: 300/600/1200/2400/4800/9600/19200/34800/57600/115200 bps. selectable (default: 19200 bps.) Syntax of a communication character DATA 8 bits START STOP bit... - Page 415 B. Communication protocol data format The communication command string is sent to the Slave PLC Number of Header data Bytes Terminator SUM Check Function ASCII CODE ASCII Code ASCII Code code Station No. Data block 0~FFH The total number of bytes Sum up those HEX values and store at the last 2 digits by the ASCII codes The communication feedback string from the Slave PLC...
- Page 416 C. Statement of the Device code Mapping the head device's “Device code” is often needed for the data block access, following describes the coding rules. The Device code takes four Bytes. The rst Byte represents the device type and the second to fourth Bytes represent the number of the device.
- Page 417 D. Statement of the communication command The sending equipment will bind the codes together that includes the header, terminator and check code in a communication command string. Except those three special purpose codes, if the content data include with the code 10H in the string, the code 10H should be repeated once.
- Page 418 Function code 20H: to read word devices (up to 64 words can be read at one command). Number Head Number of data number Check Bytes of devices devices Command to PLC 10H 02H FFH 20H XXH 10H 03H Number Data Data of data Check...
- Page 419 Function code 21H: to read bit devices (up to 1024 bits can be read at one command). Number Head Number of data number Check Bytes of devices devices Command to PLC 10H 02H FFH 21H XXH 10H 03H Number Data block of data (Transmit unit: Byte) Check...
- Page 420 unction code 28H: to write word devices (up to 64 words can be write at one command). Number Head Number Data Data of data number Check to be to be Bytes of devices devices written written ..Command to PLC 10H 02H FFH 10H 03H...
- Page 421 Function code 29H: to write bit devices (up to 1024 bits can be write at one command). Number Head Number Data block of data number (Transmit unit: Byte) Check Bytes of devices devices Command to PLC ..10H 02H FFH 10H 03H Number of data...
-
Page 423: Statement Of Positioning Control Functions
8. Statement of Positioning Control Functions The VS series PLC Main Unit provided with four high-speed pulse output points, and thus can operate four axis controls. In the multi-axis positioning control applications, it is very suitable and effective. The pulse output frequency of the VS1 and VS2 Series transistor PLCs can reach up to 50 kHz, can be used to complete various of basic positioning control. -
Page 424: Positioning Parameter Setup
8-1 Positioning Parameter Setup The Ladder Master S provides the Positioning Parameter Setup function to simplify the VS series PLC’s process of setting relevant parameters. The contents of positioning parameters will be written onto the PLC with the project. After that, only the appropriate positioning control instructions are needed to complete the positioning control work easily. -
Page 425: Assign The Positioning Units
8-1-1 Assign the positioning Units The VS series PLC’s positioning control functions are through the high-speed pulse output points, to operate the motor positioning control drives. Thus, the basic unit of operating speed is the output pulse frequency (Hz) and the position is the number of pulses (PLS). -
Page 426: Basic Parameters
8-1-2 Basic Parameters The VS series PLC provides the positioning control with the acceleration and deceleration functions, as shown in the following diagram. It is necessary to set relevant parameters before to use the positioning control instructions, thus can perform the operation correctly. The parameters in the diagram below uses Y0 output axis as an example. -
Page 427: Positioning Operation Setting Up
Demonstrated below is the brief conguration of a general positioning control system, which we will use to illustrate the related parameter settings for the positioning control. Pulse output Direction output VS series Servo motor drive Clear signal Zero point signal... - Page 428 DOG Front End home positioning Speed Direction of home positioning DOG Front End, start to slow down Home positioning speed Motor reversed (opposite to the direction of home positioning) Home positioning creep speed Time Direction signal to the motor → →...
- Page 429 DOG Front End with PG0 count home positioning Speed Direction of home positioning DOG Front End, start to slow down Home positioning speed Instantly stops when the PG0’s Home positioning creep speed counting set value is reached Time Starts to count PG0 signals after DOG’s Front End is appeared.
- Page 430 (3) If the starting point is located on the right of the DOG switch: The home positioning is moving the sliding table by the home positioning speed and the direction of home positioning. Until the limit switch is reached, the speed slowing down and then stop. After that, moving the sliding table by the home positioning speed and the opposite direction of home positioning until the Rear End of the DOG is separated (the signal turns from “ON”...
-
Page 431: Special Components Related To Positioning Control Instructions
8-2 Special Components Related to Positioning Control Instructions In the tables below, the symbo “ ■ ” represents that the component is not allowed to use an instruction in the program to drive the relay or write data to the register. Relay ID Description Series... - Page 432 Relay ID Description Series Y3 Axis's Positioning Control Flag VS1 VS2 VSM VS3 Y3 axis's M-code active ag. M9408 ■ ○ ○ ○ ○ Y3 axis's M-code clear command. M9409 ○ ○ ○ ○ Y3 axis's external interrupt trigger type. When M9410=“OFF”, the interrupt is triggered by a rising M9410 ○...
- Page 433 Register Description Series ID No. Y2 Axis's Positioning Control The Y2's maximum speed (by user unit). Lower 16 bits D9380 (Convert it to the real frequency that should appropriate to the PLC's range: ○ ○ ○ ○ Upper 16 bits D9381 VS1, VS2 is 1~50kHz;...
-
Page 435: Positioning Control Instructions
8-3 Positioning Control Instructions Applicable VS Function Description Mnemonic in Ladder Chart 1 2 M 3 Z R N ○ ○ ○ ○ Zero Return (Home positioning) J O G F Jog Forward ○ ○ ○ ○ J O G R Jog Reverse ○... - Page 436 (D9347, D9346) will be duplicated to the present value of Y0 axis (D9355, D9354). The VS series PLC provides with 5 home return modes (DOG Rear End home positioning / DOG Front End home positioning / DOG Rear End with PG0 count home positioning / DOG Front End with PG0 count home positioning and Data-set type home return).
- Page 437 is for to assign the creep speed when the DOG near point is triggered. The available range is from the bias speed (D9342) to the equivalent speed of 30 kHz. When < the bias speed, it will be regarded as the bias speed; when >...
- Page 438 1 2 M 3 J O G F Jog Forward ○ ○ ○ ○ 1 2 M 3 J O G R Jog Reverse ○ ○ ○ ○ Devices Operand UnG K,H " $" KnX KnY = 0~5,000 = Y0~Y3 If the D2 is assigned to a Y, it must use Y0~Y7 : the start delay time (Unit: ms.) : the operating speed (by user unit)
- Page 439 When the M0 turns from “OFF” to “ON”, the JOGF or JOGR instruction uses the parameters of the bias speed (D9342), the maximum speed (D9341, D9340), the acceleration time (D9343), the deceleration time (D9344), the start delay time, the operating speed and the speed multiple ratio (D9348) to decide the jog positioning procedures.
- Page 440 1 2 M 3 D R V R Drive to Relative Position ○ ○ ○ ○ Devices Operand UnG K,H KnX KnY " $" = Y0~Y3 If the D is assigned to a Y, it must use Y0~Y7 : the moving distance (by user unit) : the operating speed (by user unit) DRVR D10 D20 Y0 Y4 : the output point of generated pulse string...
- Page 441 When the M0 turns from “OFF” to “ON”, this DRVR instruction uses the parameters of the bias speed (D9342), the maximum speed (D9341, D9340), the acceleration time (D9343), the deceleration time (D9344), the moving distance, the operating speed and the speed multiple ratio (D9348) to decide the positioning procedures. During the instruction is in operation, could change the value of the operating speed or the speed multiple ratio (D9348) to modify the real operating speed, but to change other parameters above will be regarded as invalid.
- Page 442 1 2 M 3 D R V A Drive to Absolute Position ○ ○ ○ ○ Devices Operand UnG K,H KnX KnY " $" D1 = Y0~Y3 If the D2 is assigned to a Y, it must use Y0~Y7 : the moving target (by user unit) : the operating speed (by user unit) DDRVA D10 D20 Y0 Y4 : the output point of generated pulse string...
- Page 443 When the M0 turns from “OFF” to “ON”, this DRVA instruction uses the parameters of the bias speed (D9342), the maximum speed (D9341, D9340), the acceleration time (D9343), the deceleration time (D9344), the moving target , the present value (PV, D9355, D9354), the operating speed and the speed multiple ratio (D9348) to decide the positioning procedures.
- Page 444 1 2 M 3 D V 2 R Drive to Relative Position by 2 Stages ○ ○ ○ ○ Devices Operand UnG K,H KnX KnY " $" and S occupy 2 components respectively D1 = Y0~Y3 If the D is assigned to a Y, it must use Y0~Y7 : the head register of moving distances (by user unit) : the head register of operating speeds (by user unit) DV2R D10 D20 Y0 Y4...
- Page 445 When the M0 turns from “OFF” to “ON”, this DV2R instruction uses the parameters of the bias speed (D9342), the maximum speed (D9341, D9340), the acceleration time (D9343), the deceleration time (D9344), the moving distances the operating speeds and the speed multiple ratio (D9348) to decide the positioning procedures. During the instruction is in operation, could change the value of the operating speeds or the speed multiple ratio (D9348) to modify the real operating speed, but to change other parameters above will be regarded as invalid.
- Page 446 1 2 M 3 D V 2 A Drive to Absolute Position by 2 Stages ○ ○ ○ ○ Devices Operand UnG K,H KnX KnY " $" and S occupy 2 components respectively = Y0~Y3 If the D is assigned to a Y, it must use Y0~Y7 : the head register of moving targets (by user unit) : the head register of operating speeds (by user unit) DDV2A D10 D20 Y0 Y4...
- Page 447 is for to assign the output point of direction control signal. When the output of direction control signal is “ON”, the motor moves forward; conversely, “OFF” moves reverse. Besides, the “ON”/“OFF” status of the direction control signal is decided by both the +/− numerical value of the error at the stage and the parameter of the rotational direction (increase present value when forward / backward) are executed.
- Page 448 1 2 M 3 D V T I Interrupt Constant Quantity Positioning ○ ○ ○ ○ Devices Operand UnG K,H KnX KnY " $" = Y0~Y3 If the D is assigned to a Y, it must use Y0~Y7 : the distance to be moved after the interrupt is input (by user unit) : the operating speed (by user unit) DVIT D10 D20 Y0 Y4 : the output point of generated pulse string...
- Page 449 is for to assign the output point of direction control signal. When the output of direction control signal is “ON”, the motor moves forward; conversely, “OFF” moves reverse. Besides, the “ON”/“OFF” status of the direction control signal is decided by both the +/– numerical value of the and the parameter of the rotational direction (increase present value when forward / backward) are executed.
- Page 450 1 2 M 3 2 Stages Interrupt Constant D V 2 I Quantity Positioning ○ ○ ○ ○ Devices Operand UnG K,H KnX KnY " $" occupies 2 components = Y0~Y3 If the D is assigned to a Y, it must use Y0~Y7 : the distance to be moved after the interrupt is input (by user unit) : the head register of operating speeds (by user unit) DV2I D10 D20 Y0 Y4...
- Page 451 is for to assign the output point of generated pulse string. It can only appoint to a point between Y0~Y3, and must use a transistor or line driver output Main Unit. is for to assign the output point of direction control signal. When the output of direction control signal is “ON”, the motor moves forward;...
- Page 452 1 2 M 3 Interrupt to Stop or Drive to D V S R Relative Position ○ ○ ○ ○ Devices Operand UnG K,H KnX KnY " $" = Y0~Y3 If the D is assigned to a Y, it must use Y0~Y7 : the moving distance (by user unit) : the operating speed (by user unit) DVSR D10 D20 Y0 Y4...
- Page 453 is for to assign the output point of direction control signal. When the output of direction control signal is “ON”, the motor moves forward; conversely, “OFF” moves reverse. Besides, the “ON”/“OFF” status of the direction control signal is decided by both the +/– numerical value of the distance and the parameter of the rotational direction (increase present value when forward / backward) are executed.
- Page 454 1 2 M 3 Interrupt to Stop or Drive to D V S A Absolute Position ○ ○ ○ ○ Devices Operand UnG K,H KnX KnY " $" = Y0~Y3 If the D is assigned to a Y, it must use Y0~Y7 : the moving target (by user unit) : the operating speed (by user unit) DDVSA D10 D20 Y0 Y4...
- Page 455 is for to assign the output point of generated pulse string. It can only appoint to a point between Y0~Y3, and must use a transistor or line driver output Main Unit. is for to assign the output point of direction control signal. When the output of direction control signal is “ON”, the motor moves forward;...
- Page 456 1 2 M 3 P L S V Variable Speed Pulse Output ○ ○ ○ ○ Devices Operand UnG K,H KnX KnY " $" = Y0~Y3 If the D is assigned to a Y, it must use Y0~Y7 S : the operating speed (by user unit) : the output point of generated pulse string PLSV D0 Y0 Y4...
- Page 457 If the operating speed changes and that +/– numerical value through this change is opposite, it will gradually slow down then stop. After a brief pause, carry on the operation of the opposite direction immediately. This instruction can be written as many times as required and the points Y0~Y3 can be used to generate pulses individually at the same time.
- Page 458 1 2 M 3 D T B L Data Table Positioning ○ ○ ○ ○ Devices Operand UnG K,H KnX KnY " $" Using a Table Code Q0~Q31 (V, Z index modiable) or a Table Nickname (by user-dened 16 English characters) = Y0~Y3 If the D is assigned to a Y, it must use Y0~Y7...
- Page 459 Control Code: This code is to assign a positioning function for each step, which has 6 different functions to choose from. Control Description Control Function Code One procedure table can store many positioning steps (each step needs 4 components to describe), then the END is the nish code to close this table. When the END code is executed, the Execution Completed Flag M9029 will "ON"...
- Page 460 The Continuous Relative Positioning and Continuous Absolute Positioning Functions This example is using the continuous relative positioning Step No. Speed Data Control Code Position Data M-code Data Continuous relative positioning (3) 1,800 10,000 Continuous relative positioning (3) 2,000 1,200 –1 Continuous relative positioning (3) 1,000 10,002...
- Page 461 M-code Data: The M-code Data is the source of the M-code register, that mechanism can be used to connect the executive status of the DTBL instruction with other applications. The available range at the M-code Data is -1~32,767. The DTBL instruction can give a number into the M-code register and turn "ON" the M-code active ag to tell a new event happening.
- Page 462 is the working area for the instruction. Description To appoint the starting step number of the DTBL instruction. D100 Displays a step number at the table of the DTBL instruction which is being performed. D101 The working area is required for the system when this instruction is performed. D102 〜...
- Page 463 M9349 is the M-code clear command of the Y0. (M9369, M9389, M9409) Trigger the M-code clear command “OFF” → “ON” can reset the M-code register become –1 (OFF) and the M-code active flag "OFF". Forward / Reverse limit switch (under the “Positioning Parameter Setup” of the Ladder Master S). When the forward / reverse limit switch is active, that limits all the forward / reverse actions.
- Page 464 1 2 M 3 D A B S Absolute Current Value Read ○ ○ ○ ○ Devices Operand UnG K,H KnX KnY " $" S occupies 3 components occupies 3 components occupies 2 components S : the points to receive the signal from the servo drive : the points to send the request signal to the servo drive DABS X10 Y10 D9352 : the device to store the decoded data (32-bit)
- Page 465 : to assign the combination of pulse input points : to assign work parameters, occupying 3 registers in total MPG K0 D100 Y0 Y4 : the output point of generated pulse string : the output point of direction control signal VS Series PLC A-phase Servo drive pulse -phase pulse When M0 = “ON”, the instruction is activated.
- Page 466 The pulse output frequency of this instruction is proportionate to the frequency of pulses input and the electronic gear ratio only, other parameters are ineffectual. The positioning speed multiple ratio will not affect to the output frequency. The number of output pulses of this instruction is proportionate to the number of input pulses and the electronic gear ratio only, other parameters are ineffectual.
- Page 467 Program example: This example uses an electronic handwheel which with an X/Y axis switch and an ×1/×10/×100 switch to perform the 2-axis handwheel control. Connect the MPG control operational switch to the input X7. Connect the A-phase signal of the handwheel to the input X3. Connect the B-phase signal of the handwheel to the input X4.
- Page 468 1 2 M 3 Relative Linear Interpolation ○ ○ ○ ○ Devices Operand UnG K,H KnX KnY " $" The 16-bit instruction, S occupies 9 components The 32-bit instruction, S occupies 18 components D = 0 or 1 (it uses Y0, Y1, Y4 and Y5 if D = 0; it uses Y2, Y3, Y6 and Y7 if D = 1) S : the head register of the parameter block D : the parameter to set the executing output points LIR D1000 K0...
- Page 469 For example, before the instruction executes, the current position CP of start-up point is (X , Y ) = (2000,1000), D1000 = K1000 (Composite initial speed Hz), D1001 = K3000 (Composite operating speed Hz), D1002 = K300 (Acceleration/Deceleration time ms.), D1003 = K4000 (Distance to be moved at the X-axis) and D1004 = K3000 (Distance to be moved at the Y-axis).
- Page 470 During the instruction is in operation, to change any related parameter will be regarded as invalid. Therefore, all the necessary data at the parameter block should be set up completely before it starts. When this instruction completes the movement of specic distances at both axes, that will let the positioning completed ag M9342 and M9362 both = “ON”.
- Page 471 1 2 M 3 Absolute Linear Interpolation ○ ○ ○ ○ Devices Operand UnG K,H KnX KnY " $" The 16-bit instruction, S occupies 9 components The 32-bit instruction, S occupies 18 components D = 0 or 1 (it uses Y0, Y1, Y4 and Y5 if D = 0; it uses Y2, Y3, Y6 and Y7 if D = 1) S : the head register of the parameter block D : the parameter to set the executing output points LIA D1000 K1...
- Page 472 For example, before the instruction executes, the current position CP of start-up point is (X , Y ) = (2000,1000), D1000 = K1000 (Composite initial speed Hz), D1001 = K3000 (Composite operating speed Hz), D1002 = K300 (Acceleration/Deceleration time ms.), D1003 = K6000 (Target point at the X-axis) and D1004 = K4000 (Target point at the Y-axis).
- Page 473 During the instruction is in operation, to change any related parameter will be regarded as invalid. Therefore, all the necessary data at the parameter block should be set up completely before it starts. When this instruction completes the movement to the target point at both axes, that will let the positioning completed ag M9382 and M9402 both = “ON”.
-
Page 474: Positioning Program Example
8-4 Positioning Program Example 8-4-1 Positioning Program Example for the VS1 or VS2 Series PLC This example uses the combination of the VS1 or VS2 transistor Main Unit and a stepper motor drive to complete a positioning control system. This control example carries out the home position return, forward JOG, reverse JOG and single-speed positioning functions. - Page 475 The wiring example between the VS1 transistor Main Unit and a stepper servo drive VS1-32MT Stepper motor drive Near point signal (DOG) Home position return JOG+ Stepper motor Move back to zero point Single-speed positioning Stop Forward limit switch AC110 110V AC Reverse limit power...
-
Page 476: Positioning Program Example For The Vsm Or Vs3 Series Plc
8-4-2 Positioning Program Example for the VSM or VS3 Series PLC This example uses the combination of the VSM or VS3 transistor Main Unit and a Mitsubishi servo drive (MR-J2) to complete a positioning control system. This control example carries out the home position return, forward JOG, reverse JOG and single-speed positioning functions. - Page 477 The wiring example between the VSM transistor Main Unit & Mitsubishi servo drive (MR-J2) VSM-32MT MR-J2 series servo motor drive Near point signal (DOG) Home position return JOG+ Move back to zero point Single-speed positioning Stop SON : Servo ON RES : Alarm reset LSP : Forward limit Forward limit...
-
Page 478: Axes Positioning Program Example
8-4-3 8 Axes Positioning Program Example One VS series transistor or line driver Main Unit can support 4 axes position control. If the control is required more than 4 axes, one unit is not enough. However, we can use the character of the CPU LINK communication to immediately transfer data to other PLCs. - Page 479 Section 2: To complete the related setting at the Station No. 1 for the #5~#8 axes. According to the positioning mission to ll in the parameters of the Y0~Y3 (#5~#8 axes). The diagram and picture are the brief wiring and setup example for the Y0 (#5 axis). VSM-32MT(Station No.
- Page 480 And then, edit the user program to control each axis. Since the control procedure is according to the command from the Station No. 0, the program in this Station No. 1 is to receive the command then generates the real control pulses. Also, the construct for all the Y0~Y3 are the same, the tiny differences are the allocated components (please refer to the previous Section 1).
- Page 481 Section 3: To edit the related program and setting at the master Station No. 0. Create the communication table “CPUL0” for the CPU LINK and add the CPUL instruction into the program of the master Station No. 0, thus the station No. 0 and No. 1 will transfer the related data to each other automatically.
- Page 482 This brief positioning example is in the master Station No. 0 to control the #5 axis at the Station No. 1. #5 axis uses D100~119 DD100=JOG spd; DD102=ZRN spd; DD104=ZRN creep spd; DD106=Target#1; DD108=Target#2; DD110=Spd#1; DD112=Spd#2; D114=Command; D115=Status; DD116=Current spd; DD118=Current location D115 delivers the operation status of #5 b0=READY/BUSY ag;...
- Page 484 Index of Application Instructions Page Page Page Page Mnemonic Mnemonic Mnemonic Mnemonic DV2R LD> STMR DV2A LD< SORT DVIT LD<> SEGD ABSD DV2I LD<= SEGL DVSR LD>= DVSA L M T SWAP ASCI DTBL SORT2 ASIN STOH ACOS ENCO ATAN ECMP AND= EZCP...
Need help?
Do you have a question about the VS Series and is the answer not in the manual?
Questions and answers