
Summary of Contents for Formulatrix MANTIS
- Page 1 MANTIS Liquid Handler ® User’s Guide Original Instructions Applies to Continuous Flow, LAM, ACC, LC3, RFID models January 2018 MAG-V40R018 © 2018 FORMULATRIX. All Rights Reserved.
- Page 2 Formulatrix.com FORMULATRIX Corporate Headquarters 10 DeAngelo Drive, Bedford, MA 01730 USA Phone: +1 781 788 0228 For information requests, email info@formulatrix.com. For sales inquiries, email sales@formulatrix.com. For support, email support@formulatrix.com. To comment on FORMULATRIX documentation, email publications@formulatrix.com. FORMULATRIX European Representative...
-
Page 3: Table Of Contents
Chapter 7: Software Overview...........................................30 Main Software Overview..................................................30 Device Control Panel...................................................32 Input Control Panel....................................................35 Dispense List Designer..................................................41 Well Selection Patterns..................................................43 Status Bar........................................................43 Chapter 8: Setting Up the Hardware........................................44 Chapter 9: Dispensing With the MANTIS.......................................47 Designing a Dispense..................................................47 Designing a Multi-Plate Dispense.............................................49... - Page 4 Chapter 10: Large Capacity Chip Changer (LC3)....................................88 LC3 Components....................................................88 Setting Up the LC3 for a Dispense............................................91 Tuning the LC3 Carousel..................................................92 Chapter 11: MANTIS Radio-Frequency Identification (RFID)................................95 Using the RFID Functionality in MANTIS..........................................97 Chapter 12: MANTIS Configuration........................................101 Configuring MANTIS-ROCK MAKER Integration......................................101 Configuring MANTIS-FORMULATOR Integration.......................................104...
-
Page 5: Chapter 1: Introduction
The unique design of this small machine minimizes dead volume and accepts pipette tip or tube inputs. Your MANTIS must be used in the manner described in this user’s guide. Any other use may result in damage to your MANTIS or personal injury. FORMULATRIX, Inc. is not responsible... -
Page 6: Symbols And Conventions
MANTIS User's Guide | Chapter 1: Introduction Symbols and Conventions This icon denotes a caution and advises you of precautions to take. This icon denotes a prohibited action. This icon denotes a compulsory action and advises you of actions you must take. -
Page 7: Chapter 2: Safety Information
Introduction The safety recommendations in this guide are basic guidelines. If the lab where the MANTIS is to be kept has additional safety guidelines they should be followed as well, along with all applicable national and international safety codes. Regulatory Compliance FORMULATRIX products are CE (Conformité... -
Page 8: Equipment Safety Guidelines
Equipment Safety Guidelines ü Read all safety and operating instructions before operating the MANTIS. ü Do not place the MANTIS connections (power, waste lines, and communications cables) where they could cause a safety hazard. ü Do not place the product in a location where it may be subject to physical damage. -
Page 9: Chapter 3: Specifications
Specifications Chapter 3 Physical Dimensions MANTIS ● Width: 354 mm or 13.9” (smaller without ACC or reagent holders) ● Height: Full Extension: 226 mm or 8.9” (not including pipette tip input) ● Height: No Extension: 193 mm or 7.6” (not including pipette tip input) ●... - Page 10 240 mm 284 mm MANTIS with Large Capacity Chip Changer (LC3) ● Width: 449 mm or 17.7” (MANTIS with LC3) ● Height: Full Extension: 284 mm or 11.2” (not including pipette tip input) ● Depth: 240 mm or 9.4” Front...
-
Page 11: Computer Requirements
MANTIS User's Guide | Chapter 3: Specifications Computer Requirements ● Computer OS: Windows XP Home Edition SP3 32-bit/Windows 7 Home Basic 64-bit/Windows Vista 32-bit/Windows 8/Windows 10 ● 1 open USB Port ● Dual Core 1 GHz processor ● At least 1 GB RAM ●... -
Page 12: Chapter 4: Overview
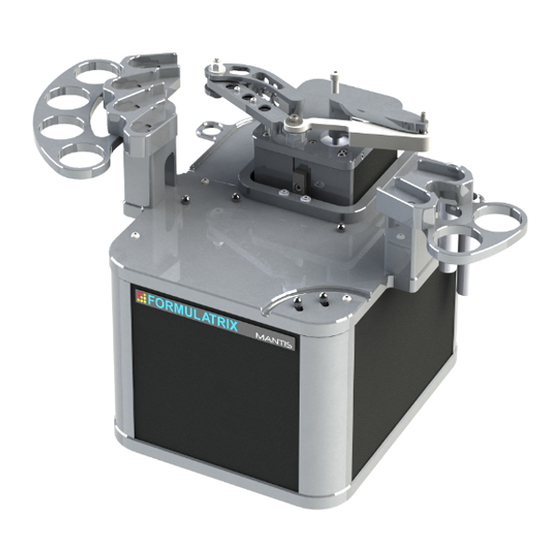
MANTIS is the smallest liquid handling robot made by FORMULATRIX and boasts one of the smallest footprints on the market. With a base that fits on a standard mouse pad, the MANTIS can fit in nearly any workspace while remaining robot accessible for automation. - Page 13 Extended Plate Height Clearance for Deep Well Blocks The dispense head of the MANTIS has clearance of up to 54 mm for dispensing into deep well blocks.
-
Page 14: Chapter 5: Hardware Overview
Plate Holder Plate Clamp MANTIS Front View Arms The MANTIS arms control the hand movements when dispensing, loading and unloading chips. Hand The hand holds the High Volume (HV), Low Volume (LV), High Volume PFE, Low Volume PFE, or High Volume Continuous... - Page 15 If you are running 3- step Wash, wash solution should go in Wash Station 2, on the right side of the MANTIS with the two chip stations. Otherwise, it can go in Wash Station 1.
- Page 16 USB Ports The USB ports are where you plug the USB flash drive into the MANTIS. Two of these ports are included for future expansion. The last USB port (located at the bottom) is used for connecting the MANTIS hardware to your computer. The other end of the USB cable should be plugged into your computer.
-
Page 17: Chapter 6: Initial Setup
Chapter 6 Setting Up the MANTIS Setting up the MANTIS for initial use means connecting all of the cables, setting up the wash and waste tubes and installing the .NET framework as well as the FTDI drivers to your computer. -
Page 18: Adding Plate Types To The Plate Type Library
USB port, the original desktop shortcut will no longer work. Adding Plate Types to the Plate Type Library Plate definitions are the files that define the geometry of the labware to the MANTIS. Having a correct plate definition can be an important factor influencing the outcome of a dispense. - Page 19 Plate Type Editor Wizard 4. Place your new plate on the plate holder. 5. MANTIS needs to pick up a chip in order to proceed with the plate tuning procedure. The reagent assigned to that chip can optionally be used to dispense test drops while tuning your plate.
- Page 20 7. Set the top-left well position by clicking the arrows, or use keyboard keys to control the MANTIS hand to aim the nozzle tip at the top-left well. Then click the Dispense button to dispense the test drop. If you are satisfied with the position, click Next.
- Page 21 12. Check the MANTIS dispense location settings: Click the Generated Well Map tab, and then click on any of the blue underlined text location links. The MANTIS will move its arms to the selected location (corner wells are the most indicative of any errors).
- Page 22 Use the Motion Control Pad at the lower right of the Plate Type Editor to modify the A1 well position. Use the arrow keys to maneuver the MANTIS hand to the A1 location of your plate. View the plate from both the side and the front to ensure your center location is correct.
- Page 23 MANTIS User's Guide | Chapter 6: Initial Setup Note: This feature is useful for preventing splashing when dispensing into round-or conical bottomed plates. If splashing occurs, setting this number to 5 or higher will greatly reduce or eliminate splashing. ● Velocity limits the arm movement speed to the specified percentage of the maximum velocity.
- Page 24 Modifying an Existing Plate Type Occasionally, you might want to modify the settings on an existing plate type in MANTIS plate type library. You will need to follow the following steps if, for example, you find that the drop location is inaccurate or when you want to adjust the row pitch and column pitch values.
- Page 25 Advanced Options 4. To modify the A1 dispense location: a. MANTIS needs to pick up a chip in order to proceed with the plate tuning procedure. The reagent assigned to that chip can optionally be used to dispense test drops while tuning your plate. Choose one of the following options: ●...
- Page 26 5. Check the MANTIS dispense location settings: Click the Generated Well Map tab, and then click on any of the blue underlined text location links. The MANTIS will move its arms to the selected location (corner wells are the most indicative of any errors).
-
Page 27: Adding Circular Plates To The Plate Type Library
2. Go to the File menu, point to New, and then select Circular Plate. 3. Click the Lock Plate Clamp button 4. Place your circular plate with the plate adapter on the MANTIS plate holder. 5. Type the name of your plate in the Plate Type Name. - Page 28 Use the Motion Control Pad at the lower right of the Plate Type Editor to modify the A1 well position. Use the arrow keys to maneuver the MANTIS hand to the A1 location of your plate. View the plate from both the side and the front to ensure your center location is correct.
- Page 29 Set the well naming convention by typing a number in the Repeat numbering every wells box. For example, if you type ‘6’, then the MANTIS will name the first well A1, and after well A6 it will start naming wells with B1 until B6, and so on.
-
Page 30: Adding Stock Reagents To The Reagent List
MANTIS User's Guide | Chapter 6: Initial Setup Adding Stock Reagents to the Reagent List There are two ways to add reagents to the MANTIS memory: via the Reagent List or during Dispense List creation. ● The Reagent List is a list of reagents stored in the MANTIS software's memory to be used at any time, in any dispense list. -
Page 31: Calibrating The Chip Port Positions
MANTIS User's Guide | Chapter 6: Initial Setup Calibrating the Chip Port Positions If the MANTIS is unable to smoothly pick the chip up from the chip port or your dispense locations are no longer accurate, you may need to tune the chip port position. -
Page 32: Default Volume And Tubing Length Recommendation
MANTIS User's Guide | Chapter 6: Initial Setup Default Volume and Tubing Length Recommendation The following values for your chip input settings are a good starting point to design your dispense for the first time, but may require some changes depending on your application and length of tubing. - Page 33 MANTIS User's Guide | Chapter 6: Initial Setup Pipette Tip Input Source Type Pipette Tip - Low Volume PFE Chip Type Input Source Type Default volume values for pipette tip input source Low Volume High Volume Chip Type Low Volume High Volume Prime Volume (µL)
-
Page 34: Chapter 7: Software Overview
Software Overview Chapter 7 MANTIS Interface Main Software Overview The MANTIS control software is made up of three main panels and a status bar. - Page 35 Section 1 is the top section of the Device Control panel. This is where you execute commands in the MANTIS hardware using the buttons at the top, and view information about your plate definition, the total volume per well (µL) and number of plates to be dispensed.
-
Page 36: Device Control Panel
Dispense List Designer page 41. Dispense List Designer STATUS BAR The Status Bar shows you what's going on with your MANTIS. For more information, see Status Bar on page 43. Device Control Panel The Device Control panel provides access to controls for operating the MANTIS device. - Page 37 Clicking the Run Dispense with Protocol button starts the plate dispense using the saved protocols available. The Skip Dispense button tells the MANTIS to skip to the next reagent on – the dispense list (not visible for ACC MANTIS).
- Page 38 When you run the dispensing process, it takes two seconds (by default) for the air pump to start. The air pump will need to stabilize the pressure and vacuum before the MANTIS runs the dispensing process.
-
Page 39: Input Control Panel
MANTIS User's Guide | Chapter 7: Software Overview Input Control Panel The Input Control panel is represented by the image of the MANTIS at the bottom of the Device Control panel. This is where you will tell the MANTIS which chips are connected to specific reagents, run priming and washing processes, and execute the reagent recovery process. - Page 40 Field. Recovering a reagent will return most of the liquid in the chip and tubing to the source container. Besides the above buttons, MANTIS also provides you with the two check bottle leak buttons, which only appear when Continuous Flow is active.
- Page 41 MANTIS hand to the chip changer station. In the image above, you will also see the LC3 attached on the left side of the MANTIS. It will only appear if you have the LC3 instrument in your system.
- Page 42 MANTIS User's Guide | Chapter 7: Software Overview Clicking the Input button enables you to change the input source type (tube or pipette tip), chip type (Low Volume, High Volume, Input Button Low Volume PFE, High Volume PFE, or High Volume Continuous Flow), and configure the prime volume, wash volume, and recovery volume, and pre-dispense volume.
- Page 43 (pipette tip or tube) in the Recovery Volume box. Wash Step(s). Select the wash steps you want to execute. ● 1 (Station 1) — This option enables MANTIS to wash the chip using only the wash liquid available in Wash Station 1.
- Page 44 (total 1920 μL) you can set the reagent volume to 950 μL. That will cause the MANTIS to pause for a top-up roughly half-way through the plate. Filling the tip with 10% extra sample is advised to prevent the reagent from running out.
-
Page 45: Dispense List Designer
You can also access, modify and change the Input configuration through the Configuration All Input Settings button If your MANTIS is equipped with RFID, click the Scan All Scan All RFID Chips RFID Chips button to scan all RFID chips at once, see MANTIS Radio-Frequency Identification (RFID) on page 95. - Page 46 MANTIS User's Guide | Chapter 7: Software Overview Plate Designer The Plate Designer is used to design the plate dispense. You can click on a single well to select it; click and drag to select an area of wells, or hold down the Ctrl key on your keyboard while clicking wells to select non-adjacent wells.
-
Page 47: Well Selection Patterns
Status Bar The icons in the indicator box vary depend on the MANTIS hardware models used by user. The indicator box will appear as either green, yellow, or red. If the indicator box is green, the MANTIS software is connected to the MANTIS hardware. -
Page 48: Chapter 8: Setting Up The Hardware
Setting Up the Hardware Chapter 8 To set up the MANTIS for a dispense: 1. Insert the High Volume (HV), Low Volume (LV), High Volume PFE, Low Volume PFE, or Continuous Flow (CF) chip into the chip pallet. Tube Input Adapter... - Page 49 MANTIS User's Guide | Chapter 8: Setting Up the Hardware If you are dispensing to deep well blocks, you will need pressurized bottles and continuous flow chips. You will also need to calibrate the reagents for continuous flow use. ● Insert the tubes into the holes in the CF chip.
- Page 50 Make sure that the wash container(s) contain enough water or wash solution and they are properly placed in the wash stations located at the back sides of the MANTIS. Note: Acceptable wash solutions include: Low molar (~0.1N) NaOH, 10% bleach, or 70% ethanol.
-
Page 51: Chapter 9: Dispensing With The Mantis
Dispensing With the MANTIS Chapter 9 Designing a Dispense Once you have set up the hardware, you will use the MANTIS control software to either open a dispense list or design a dispense. Prerequisites ● You have at least one plate type already set up in the software. - Page 52 28. 5. Drag the reagent name from the Dispense List to either the text box next to the chip position, or the chip position on the image of the MANTIS. Drag Reagent to the Device Control Panel Click the Assign To Input button to assign all reagents from the Dispense List at once.
-
Page 53: Designing A Multi-Plate Dispense
Assign To Input button will not work. The amount of reagents should be less or same as the number of chip stations. Designing a Multi-Plate Dispense Once you have set up the hardware, you will use the MANTIS control software to either open a dispense list or design a dispense. Prerequisites ●... - Page 54 MANTIS User's Guide | Chapter 9: Dispensing With the MANTIS 5. Drag the reagent name from the Dispense List to either the text box next to the chip position, or the chip position on the image of the MANTIS. Drag Reagent to the Device Control Panel...
-
Page 55: Viscous Dispensing Tips And Tricks
(CF) chip. Note: Pressure settings can only be applied to MANTIS V3 and later. Proceed to “Timing” if you are using a V2 MANTIS. 1. Go to the Tools menu and select Reagent List. - Page 56 MANTIS User's Guide | Chapter 9: Dispensing With the MANTIS Adjusting diaphragm timing for high viscosity reagent dispensing One way to improve accuracies and CVs for higher viscosity reagent dispensing is by running the diaphragm chips at a slower rate. By doing so, you will achieve a more complete filling and emptying of the diaphragms.
-
Page 57: Adding A Dispense Delay
(s) field. You can also leave a message in the Message box to be displayed when the dispense delay is running. Note: By default, the MANTIS will automatically turn off the pump for any dispense delay lasting for longer than five minutes. To disable this feature,... -
Page 58: Creating And Using Protocols
X, you will be asked if you want to save your changes. Click Yes. 4. Please be patient while MANTIS reads your changes and renders them in the MANTIS software. Once the conversion is complete, your dispense list is unlocked and you may interact with your design in the MANTIS Designer View. -
Page 59: Creating And Using Reagent Configurations
MANTIS User's Guide | Chapter 9: Dispensing With the MANTIS Creating and Using Reagent Configurations A Reagent Configuration enables you to save, load, and modify the hardware setup for each of your reagents. This configuration contains all of the reagent settings and information that you might need for any future dispense process. -
Page 60: Priming The Chips
MANTIS User's Guide | Chapter 9: Dispensing With the MANTIS 7. Go to the File menu, point to Reagent Configuration, and then select Save. 8. Browse the file directory where you want to save your files. 9. Type a name for the reagent configuration in the File Name box and click Save. -
Page 61: Executing A Plate Dispense
Continue. Click Stop to abort the dispense. Change Plate Dialog MANTIS now enables you to see which reagent or well is currently dispensing on the Plate Designer. Each active well on the Plate Designer will flash and highlight during the dispense. -
Page 62: Recovering Excess Reagent Volume
MANTIS User's Guide | Chapter 9: Dispensing With the MANTIS 4. Click OK to apply the changes. Dispense Indicator Recovering Excess Reagent Volume The reagent recovery process forces reagent out of the chip into the input tube or pipette tip. Run Reagent Recovery when you want to conserve reagent volume. -
Page 63: Importing Dispense Data
In this section, you will learn how to import your .CSV file for dispense using the MANTIS. The two options for the .CSV file format are: 1. Well Name Based format defines the dispense information with data arranged in rows, with one row per well/reagent combination. - Page 64 MANTIS User's Guide | Chapter 9: Dispensing With the MANTIS Importing the experiment design data from a Well Name Based .CSV file To import the dispense data from a Well Name Based file: 1. Go to the File menu, and select Import Dispense Data on the Import Dispense Data menu.
- Page 65 MANTIS User's Guide | Chapter 9: Dispensing With the MANTIS 4. In the File Settings option: ● The Column Delimiter determines the separator between values in the .CSV file. Type the separator used in your file. ● If your .CSV file has a header and the column names are in the first row, select the Column Names are in the first row box.
- Page 66 Note: You can also select the Suggest Chip Type option on the right corner of the Converted Data (μL) panel, which enables MANTIS to suggest a chip type for each reagent, based on the volume data, while maximizing speed and minimizing error.
- Page 67 11. Then, click the Load button to load the data into a Dispense List. Note: If you choose a Continuous Flow chip and you have not calibrated your reagents, the MANTIS Continuous Flow calibration window will appear after you click the Load button. Follow the on-screen instructions to calibrate your chips. For...
- Page 68 MANTIS User's Guide | Chapter 9: Dispensing With the MANTIS 3. Click the Browse button next to the Input File box and locate the file you want to import. Modifying the File Settings 4. In the File Settings option: ● The Column Delimiter determines the separator between values in the .CSV file.
- Page 69 MANTIS User's Guide | Chapter 9: Dispensing With the MANTIS q Well increments by Column: A1, B1, C1 means the wells in your plate design are numbered top-to-bottom in columns. For example, wells A1 through H1 are numbered 1 to 8 and are represented by the first 8 data rows of your .CSV file.
- Page 70 MANTIS User's Guide | Chapter 9: Dispensing With the MANTIS ● Volume (μL) Data: If your current data is a list of volumes in μL, select this option and proceed to step 10. Data Preview Options 9. Input the Total Well Volume (μL) and the stock concentration values of each reagent, then hit the Enter key on your keyboard to apply the values.
- Page 71 Note: You can also select the Suggest Chip Type option on the right corner of the Converted Data (μL) panel, which enables MANTIS to suggest a chip type for each reagent, based on the volume data, while maximizing speed and minimizing error.
-
Page 72: Reloading Dispense Data
Note: You may not change the names of the reagents listed in the original .CSV file. Otherwise, MANTIS will not reload it into the dispense list due to the mismatch. To reload the dispense data into the dispense list: 1. -
Page 73: Normalizing Concentration
CONSTELLATION® Digital PCR System, you can easily upload the .CSV into MANTIS to create a dispense list. Then you can use MANTIS to dispense the desired diluent into your experiment plate. Follow the instructions below to normalize your concentration data. - Page 74 MANTIS User's Guide | Chapter 9: Dispensing With the MANTIS 4. In the Target Plate option: ● Select the plate type you want to use for dispense from the plate list. ● Determine the well numbering convention by selecting either the Well number increments by Row: A1, A2, A3 or by Column A1, B1, C1 option.
- Page 75 To fix this, you can adjust either the Specified Concentration value or the Well Capacity value until no overflow is detected. Well Capacity as defined in the MANTIS software should not exceed the actual maximum well volume for your plate.
- Page 76 MANTIS User's Guide | Chapter 9: Dispensing With the MANTIS 7. Click Next to proceed. 8. Type the Diluent name in the Diluent Name box and click the Load button to load the data into a Dispense List. Type the Diluent Name 9.
-
Page 77: Cleaning The Chips
If you are running 3-step Wash, wash solutions should go in Wash Station 2, on the right side of the MANTIS with the two chip stations. Otherwise, it can go on Wash Station 1. See also Wash Step(s) on page 39. -
Page 78: Dispensing Rock Maker ® Crystallization Software Plate Designs
ROCK MAKER help files for assistance). To run ROCK MAKER experiments with MANTIS: 1. Place the MANTIS chips into the chip pallets, and attach the chip pallet to a chip changer station. 2. Attach the reagent tubes or pipette tips to the ingredient inputs at each chip. -
Page 79: Dispensing Formulator ® Screen Builder Plate Designs
4. Drag the reagents from the Dispense List Designer panel to the corresponding inputs. Drag Reagent to the Device Control 5. Attach your reagents to the MANTIS chips (if you are using pipette tips, you will need to remove the black adapter from the chip’s input first). -
Page 80: Performing A Mantis Factory Reset
You can perform a factory reset if you find corrupted data, experience an unexpected software- or hardware-related error, or accidentally change the MANTIS configuration data. Resetting the MANTIS software will revert it back to the software version that was first installed on your MANTIS system. The user data, such as dispense lists, dispense summaries, plate definitions, protocols, and reagent configurations will be preserved. -
Page 81: Resolving Dispense List Errors
MANTIS User's Guide | Chapter 9: Dispensing With the MANTIS 4. Type y on the console app window and then press Enter on your keyboard to reset the MANTIS software. 5. After the factory reset process is finished, type y and hit Enter on your keyboard to restart the MANTIS software. -
Page 82: Using The Options Menu
You will notice that there are two tabs: Options and Advanced Options. Advanced Options should be used by support technicians only. Please do not alter the options under the Advanced Options tab unless you are directed by FORMULATRIX support to do so. Options This section covers the following topics: ●... - Page 83 MANTIS User's Guide | Chapter 9: Dispensing With the MANTIS Advanced Options Important: These settings are for advanced users only! Doing something incorrectly here may render your system inoperable. Consult with FORMULATRIX support you have any questions. This section covers the following topics: ●...
- Page 84 MANTIS User's Guide | Chapter 9: Dispensing With the MANTIS Dispense Settings See the table below for detailed explanations of each option found in the Dispense area. Option Default Setting Description Enables MANTIS to automatically turn off the Disable Pump for True pump for long delay.
- Page 85 MANTIS User's Guide | Chapter 9: Dispensing With the MANTIS Integration Service (IS) Settings See the table below for detailed explanations of each option found in the Integration Service (IS) Setting area. Option Default Setting Description Integration Service The API Service host address.
- Page 86 MANTIS User's Guide | Chapter 9: Dispensing With the MANTIS Security Settings See the table below for detailed explanations of each option found in the Security area. Default Setting Option Description Set this option to True to activate the security...
-
Page 87: Using The Security Settings
Using the Security Settings If you are an administrator, you can manage the MANTIS access modes through the Security settings. Other than the default mode, there are two access modes available: administrator and general user. In the administrator mode, the administrator can create or modify dispense settings and has the ability to lock these settings. - Page 88 MANTIS User's Guide | Chapter 9: Dispensing With the MANTIS 5. Type the desired Backup email address and Password. Security Options 6. If you have finished, locate and select the Support section. 7. Configure the SMTP options as appropriate for your IT setup. For more information...
- Page 89 MANTIS User's Guide | Chapter 9: Dispensing With the MANTIS Section 2: Activating the security option This section explains how administrators can activate and deactivate the security option to manage the access modes. Activating the security option will enable the Security menu, where you can switch between the administrator and general user modes.
- Page 90 1. Go to the Security menu and then click Unlock. 2. Type the password and click OK. Note: If you forgot the password, click Forgot Password? MANTIS will reset your password and send an email to your backup email address.
- Page 91 MANTIS User's Guide | Chapter 9: Dispensing With the MANTIS 3. At this point, you will return to the administrator mode. Administrator Mode Section 4: Deactivating the security option This section explains how administrators can deactivate the security option to manage the access modes.
-
Page 92: Chapter 10: Large Capacity Chip Changer (Lc3)
Large Capacity Chip Changer (LC3) Chapter 10 LC3 Components LC3 FRONT LC3 Front View The LC3 is the base for the chip changer carousel. It has several components such as power ports, USB ports, and a barcode scanner Port. Carousel The chip changer carousel consists of chip stations and tube holders. - Page 93 The power switch turns the LC3 on and off. Power Ports There are two power ports, one for connecting the LC3 to the MANTIS — as the MANTIS can power itself off of the LC3 — and one for connecting the LC3 to a power outlet. Barcode Scanner...
- Page 94 MANTIS User's Guide | Chapter 10: Large Capacity Chip Changer (LC3) Locating Plate Locating Plates...
-
Page 95: Setting Up The Lc3 For A Dispense
88). To set up the LC3 for a dispense: 1. Locate the MANTIS on the center of locating plate by lining up the pin slots under the MANTIS base to the locating plate’s pins. 2. Locate the LC3 to the pins on the locating plate by lining up the pin slots under the LC3 base to the locating plate’s pins. -
Page 96: Tuning The Lc3 Carousel
2. Select from the options below: ● If the LC3 carousel is at the left of the MANTIS, click L1 on the Image of the LC3 carousel. In the example below, the LC3 carousel is positioned at the left of the MANTIS. - Page 97 Stand up and look down at the MANTIS. Using the motion controls, align the edges of the metal MANTIS arm with the walls of the chip station. 6. Position the MANTIS hand so that the front point of the chip is directly above the front point of the chip pallet.
- Page 98 MANTIS User's Guide | Chapter 10: Large Capacity Chip Changer (LC3) 11. Test pick-up and drop-off for both chip positions to ensure the new settings are correct. Test the Chip Position Settings Note: If you have the 18 chip carousel, you can test for position 1 and position 10.
-
Page 99: Chapter 11: Mantis Radio-Frequency Identification (Rfid)
Identification (RFID) Chapter 11 This MANTIS option uses a Radio-Frequency Identification (RFID) tag installed in each chip to provide helpful information about the chip usage and dispense process. The MANTIS instrument with RFID is fitted with six antennas for a faster RFID tag reading/writing process. - Page 100 Chip Serial Number This chip's unique ID. Dispense History After each dispense using an RFID chip, the following information will be stored directly onto your MANTIS database, tagged to the serial number of that chip. Option Description Dispense Date Dispensing process date.
-
Page 101: Using The Rfid Functionality In Mantis
Scanning RFID Chips Scanning RFID chips during Startup MANTIS now supports automatic RFID scanning during startup. This feature is useful for you to get the most up to date chip information, especially after setting up new hardware. To enable or disable this feature, follow these steps: 1. - Page 102 RFID Scanning 3. Select Apply to apply the scanning result to the MANTIS inputs and then click Yes when the confirmation message appears. Select Cancel if you want to cancel applying the scanning result to the MANTIS...
- Page 103 MANTIS User's Guide | Chapter 11: MANTIS Radio-Frequency Identification (RFID) To scan an individual chip: ● Click the Scan RFID Chip button on the desired Input box for instant scanning. Individual Chip Scanning with Scan RFID Button 1. Click the Input button in the Input Control Panel.
- Page 104 MANTIS User's Guide | Chapter 11: MANTIS Radio-Frequency Identification (RFID) Opening the Chip Dispense History Besides scanning the RFID chips, you can also open the chip dispense history to review the chip usage and dispense information. Prerequisites: ● The RFID chip has been dispensed before.
-
Page 105: Chapter 12: Mantis Configuration
● You are running ROCK MAKER 2.0 or newer. Step 1: Set up ROCK MAKER – MANTIS Integration 1. Open Mantis.exe.config in the MANTIS directory, where the MANTIS software is installed. 2. Specify the user setting location in this key <add key= “UserSettings.Location”... - Page 106 MANTIS User's Guide | Chapter 12: MANTIS Configuration Step 2: Test MANTIS – ROCK MAKER Integration 1. Open the ROCK MAKER software and create a new experiment: a. From the tree, right-click a project or a folder within a project and select New Experiment.
- Page 107 Dispensing Properties i. Click OK to confirm. 2. In the MANTIS software, point to the Tools menu and click Hand Scan (Ctrl+H). 3. Type your experiment barcode number in the Data to scan box (you only need to type the last four digits). If MANTIS successfully reads and validates the barcode, your dispense list, design and settings will display.
-
Page 108: Configuring Mantis-Formulator Integration
● DENY — The FORMULATOR will NOT be allowed to send dispense lists to the MANTIS. 3. Verify that the plates you plan to use have the same name in MANTIS as in FORMULATOR: ● On the Tools menu, click Microplate Editor. A dialog box opens. - Page 109 FORMULATOR have access to. If you are running MANTIS and FORMULATOR on the same computer, any folder will work. e. Click the blue Test MANTIS Integration Service link to test the settings. The MANTIS software must be running for MANTIS integration settings to work.
-
Page 110: Chapter 13: Deck Geometry Correction
MANTIS dispense location settings using the Drop Alignment Wizard and the reference plate. In the instructions that follow, you will learn how to tune four points on the MANTIS plate holder: A1, A12, H1, and H12. The MANTIS then interpolates these locations to determine each remaining drop location on a plate. - Page 111 (see the picture below, indicated by four red circles). Reference Plate 4. Place the reference plate on the MANTIS plate holder. Use the A1 location (indicated by the red circle) as the reference point. A1 Location 5.
-
Page 112: Chapter 14: System Maintenance
Chapter 14 Sterilizing MANTIS Chips You can sterilize the MANTIS chips if your application requires aseptic handling, if you are concerned about biological growth or cross-contamination when using the same chip for different reagents, or if you are planning to leave the chips unused for a few days or more. - Page 113 MANTIS User's Guide | Chapter 14: System Maintenance 2. Place the MANTIS chip(s) into the chip port(s) on the chip changer. 3. Attach an input tube to every chip and put the other end of the tube into a waste container (e.g.
-
Page 114: Chapter 15: Troubleshooting And Faqs
FAQs Chapter 15 Troubleshooting While the MANTIS is designed to be a reliable device, as with all hardware, problems may occur with use or over time. If you don't see your problem below, email support@formulatrix.com for assistance. Our technicians monitor this email address 24 hours a day, Monday through Friday. - Page 115 3. If MANTIS suspects one or more solenoids of being stuck, the Solenoid Check Confirmation window will appear. The Solenoid Check Confirmation process allows you to confirm whether or not a solenoid is truly stuck. Click Expected Sound to listen to what a solenoid valve should sound like when it opens and closes.
- Page 116 My computer says the drive is read-only and I can't run the software. If your computer is showing that the MANTIS USB drive is read-only, you will not be able to use the software because the software frequently writes to the USB drive. To fix this issue, copy the contents of the USB drive onto your computer, so that when you run the software you are running it locally instead of from the USB drive.
- Page 117 You see liquid in the Air Ribbon. In the case liquid being spilled on top of the chip, the liquid can enter the MANTIS Air Ribbon when the chip is being picked up or dropped off. Liquid can also enter the Air Ribbon if a chip fails catastrophically (diaphragm or valve rupture).
-
Page 118: Faqs
Please take these steps: 1. Turn the MANTIS device off. 2. Reconnect the USB cable on the MANTIS USB port to your computer. Make sure it is connected properly, and then restart the device. 3. Next, run the software; the indicator box should be green after it has detected the device. -
Page 119: Accessories
The reference plate is a clear plate that has crosshairs located at each corner. The Reference Plate crosshairs are targets for you to use if you need to tune drop position. The MANTIS software then determines the remaining drop positions from these four points. - Page 120 Items Description USB Cable The USB cable connects the MANTIS to a PC. The waste tube is a container to remove spent washing fluid. The wash tube is a Waste and Wash Tube container to hold water or other washing solutions required for washing process.
-
Page 121: Index
MANTIS User's Guide | Index: “3-step Wash” to “Factory Reset” Index 3-step Wash..................................................11 Accessories..................................................115 Adding a Dispense Delay............................................53 Automatically Turn Off Pump........................................53 Adding Plate Types to the Plate Type Library..................................14 Adding Stock Reagents to the Reagent...................................... 26 Air Pump.................................................... - Page 122 MANTIS User's Guide | Index: “Hand” to “Resolving Dispense List Errors” Hand......................................................10 Hardware Overview..............................................10 Importing Dispense Data............................................59 Initial Setup..................................................13 Input Control Panel............................................... 35 Input Source Type................................................ 39 Input Toolbar..................................................35 Key Features..................................................8 LC3 Components................................................88 Locating Plate..................................................
- Page 123 MANTIS User's Guide | Index: “Security” to “Well Selection Patterns” Security....................................................83 Select Reagent................................................15 Setting Up the Hardware............................................44 Setting Up the LC3 for a Dispense........................................91 Setting Up the MANTIS............................................. 13 Software Overview..............................................30 Specifications..................................................5 Sterilizing Mantis Chips............................................108 Symbols and Conventions............................................
Need help?
Do you have a question about the MANTIS and is the answer not in the manual?
Questions and answers