
Summary of Contents for Wells Johnson Company ELITE
- Page 1 USER'S MANUAL ELITE™ 20-5061-00 (110V) 20-5066-00 (220V) 8000 South Kolb Road Tucson, AZ 85756 Phone 800 528 1597 Fax 520885 1189 www.wellsgrp.com Email: sales@wellsgrp.com...
-
Page 2: Table Of Contents
Table Of Contents General Description/Safety Specifications Checklist Component Descriptions Infusion Pump Head Loading Pneumatic Foot Switch Infusion Tubing Infusion Handles Infusion Needles and Cannulas IV Pole Infusion Controls Vacuum Pumps Vacuum Control Volume Control Foot Switch Overflow Trap Circuit Breaker Set-up and Operation Quick Fit™... -
Page 3: General Description/Safety
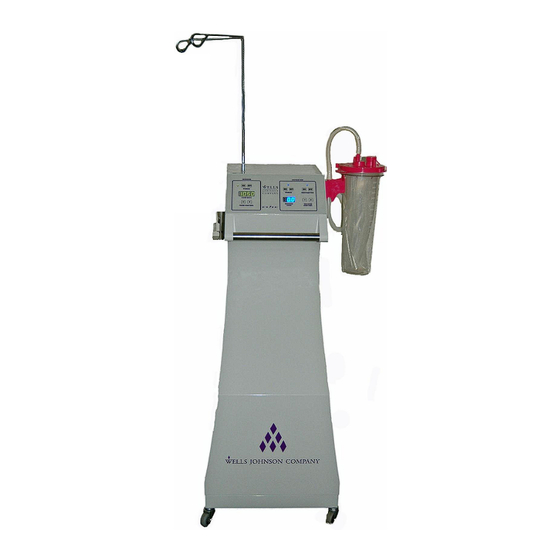
- the Hercules™ and the Wells Johnson Infiltration Pump. Aspiration in the ELITE™ is a high-powered suction system with three (3) oil-less piston vacuum pumps. The system is designed to pull a vacuum on any closed container or any open process system. -
Page 4: Specifications
Pump Type -Infusion Peristaltic Number of Rollers Checklist Carefully unpack the ELITE™ from its shipping container and check that the following accessories are included in the package and received in good condition: ELITE™ (1) Canister Holder Ring (if needed) ●... -
Page 5: Component Descriptions
COMPONENT DESCRIPTIONS Infusion Pump Head Loading Sterile solution may be pumped through Infusion Tubing using the following technique to load the pump head: 1. Spike IV bag 2. Clamp Infusion Tubing 3. Rotate the Pump Head lever counter clockwise to open the head. 4. -
Page 6: Iv Pole
IV Pole Place the IV Pole into the bracket located on back of the ELITE™. The pole can be adjusted up or down. When pole is in desired position, tighten the knob to hold it in place. Make sure the knob is tight and the pole is secure before hanging a bag. -
Page 7: Vacuum Control
OPERATION WITH FOOT SWITCH Plug the foot switch cord into the unit. Turn the Foot Switch and Power switches to the "ON" position. Press the pedal and the ELITE™ will start. Press the pedal again to stop the power of the unit. -
Page 8: Overflow Trap
This is labeled as "RESET". If there is a voltage surge or the pump motor overheats, the circuit breaker will pop out. To reset the ELITE™, turn the unit off, push in the circuit breaker, and turn the unit on. If the unit fails to start, the unit may require a cool-down period or technical repairs may be required. -
Page 9: Setup And Operation
7. After checking the vacuum, turn the ELITE™ off. NEXT: 8. The Overflow Trap and HEPA Filter come pre-installed in the ELITE ™ . You will need to unscrew the canister from the Overflow Trap and remove the ball from the packing material. -
Page 10: Quick Fit™ Canister System
Setup and Operation of Collection System Quick Fit™ Canister System (3000cc's) 1. Place canister in the canister bracket of the ELITE™ on the right side of the unit. 2. Insert a Quick Fit liner into the canister and secure the lid. -
Page 11: Sorenson™ Canister System
Sorenson™ Canister System (1900cc's) 1. Place the Sorensen Adapter into the canister bracket of the ELITE™ on the right side of the unit. Next place the canister into the slot of the adapter. 2. Insert a Sorenson liner into the canister and secure the lid. -
Page 12: Baxter™ Canister System
3. Plug the red hose on the canister into the top of the liner lid on the port marked Vacuum. 4. Attach the 9” piece of silicon tubing from the Vacuum Port on the ELITE™, to the red spout on the side of the canister. -
Page 13: Troubleshooting - Aspiration
Precaution: Before starting any suction procedure, let the ELITE™ go to full vacuum when switched on. During operation, if the ELITE™ is momentarily turned off, let the vacuum gauge indicator return to “0” before restarting the machine. Air must fill the vacuum lines before all the pumps will start again. -
Page 14: Troubleshooting - Infusion
Troubleshooting - Infusion Infusion Pump Head The black lever on each side of the pump head can be pressed inward, allowing it to slide up or down to adjust to tubing size. Sliding button upward loosens pump head grip on the infusion tubing. Tubing will have a tendency to “walk”, or bunch-up, in the pump head if the buttons are adjusted too high. -
Page 15: Maintenance
No scheduled maintenance is recommended. Follow the procedures established by your engineering department. Warnings are part of the labeling and are indicated on the ELITE™. The serial number is stamped on a small metal tag, located on the back of the unit. Record the serial number. -
Page 16: Parts List
PARTS LIST ITEM PART NO. ELITE™ (110V) 20-5061-00 ELITE™ (220V) 20-5066-00 Power Cord (AC 110V) 20-5100-00 Power Cord (AC 22V) 20-5101-00 Aspiration Foot Switch (Single) 20-5102-00 Vacuum Gauge 16-5030-00 HEPA Filters (case of 10) 20-5201-00 Overflow Trap (plastic) with 6” and 9” silicone tubing... -
Page 17: Warranty Info
WARRANTY The Wells Johnson Company will void warranty on any products indicating negligence, or noncompliance with operating and maintenance instructions. Products are warranted against defect in material and workmanship for a period of one (1) year from date of purchase. If repair or adjustment is necessary, and are not the result of abuse or misuse, please return, freight prepaid, and correction will be performed without charge. - Page 18 8000 S. KOLB RD ◊ TUCSON AZ 85756 ◊ 520.298.6069 ◊ 800.528.1597 ◊ FAX 520.885.1189 www.wellsgrp.com email: sales@wellsgrp.com ECN 582 (3122018)
Need help?
Do you have a question about the ELITE and is the answer not in the manual?
Questions and answers