Advertisement
Quick Links
Advertisement

Subscribe to Our Youtube Channel
Summary of Contents for TouchMagix MotionMagix MAGIXBOX
- Page 1 MotionMagix by TouchMagix MAGIXBOX Quick Start Guide MAGIXBOX Quick Start Guide...
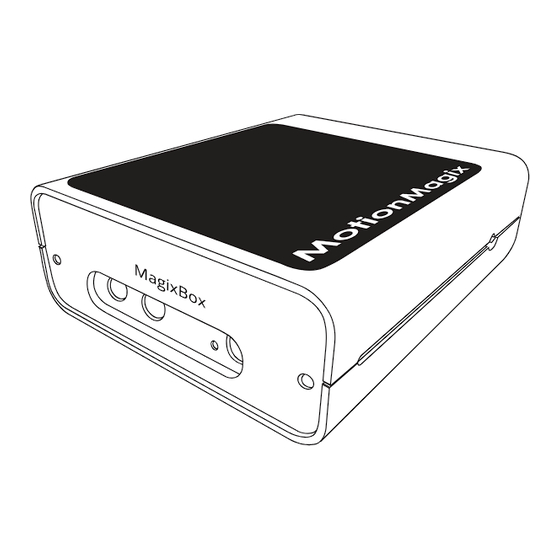
- Page 2 What’s in the box: Ankle Ceiling Plate Extendable Connector Piece Middle Piece Universal Spider Super clamp with ball socket Safety Cable Projector Mount Top Projector Mount Bottom MagixBox Adapter Four Arms, Screws and Allen Keys...
- Page 3 Interactive Wall Setup with Clamp HDMI Cable Wireless Keyboard Assembly Instructions: 1. Select desired location on the ceiling and assemble Interactive Wall Setup with separate Projector mount the projector mount on it. 2. Mount your projector. 3. Attach MagixBox on the projector mount using Super Clamp. 4.
-
Page 4: Projector Installation
Interactive Floor Setup with Clamp Projector Installation Step 1 Step 2 Rotate to fit in Attach the ceiling plate to the ceiling Fix the extendable bar by using the dry wall screws. rotating it in clockwise. Step 3 Step 4 Interactive Floor Setup with separate Projector mount Attach the four arms to the universal Attach the projector to the universal... - Page 5 MagixBox Clamping Step 9 Step 10 Step 6 Step 7 Carefully lift the MagixBox with the Loop safety cable around Insert the wireless keyboard’s dongle extension arm and use the super the extendable bar as shown and into the MagixBox’s USB port. clamp to attach it the projector mount insert and lock the carabiner on the Tightly fix in the ball socket head into...
- Page 6 4. Screw in the free end of the ball socket rod into the connector piece and secure it from the other end using a nut. MotionMagix by TouchMagix 5. Screw in the MagixBox to the ball socket end securely. 6. Screw in the new assembly to either the extension rod of the...
-
Page 7: Safety Information
ON. The strong light from the lamp may damage your eyes. Do not overload the power outlet as this can result in fire or electrical shock. MotionMagix by TouchMagix For support, call us at +91 7709152220 or please visit www.motionmagix.com/support...
Need help?
Do you have a question about the MotionMagix MAGIXBOX and is the answer not in the manual?
Questions and answers