Table of Contents
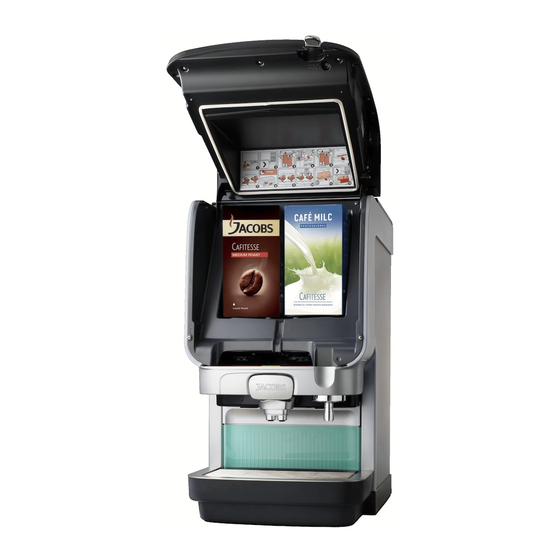
Advertisement
Advertisement
Table of Contents

Summary of Contents for Jacobs Douwe Egberts Professional Cafitesse Excellence Touch
- Page 1 Cafitesse Excellence Touch Operator Manual EXCELLENCE TOUCH - 2019-03...
- Page 2 Manufacturer: Copyright 2019 © JACOBS DOUWE EGBERTS, the Netherlands EVOCA SpA The English version is the original version of the operator manual. Via Roma 24 Other languages are translations of the original operator manual. 24030 Valbrembo (BG) Italy...
-
Page 3: Table Of Contents
TABLE OF CONTENTS 1 - PREFACE . . . . . . . . . . . . . . . . . . . . . . . . . . . . . 4 6 - PROGRAMMING . -
Page 4: Preface
1 - PREFACE About the dispenser Symbols used in this manual Thank you for choosing the Cafitesse Excellence Touch dispenser. The following symbols are used throughout this manual in The Cafitesse Excellence Touch is a high quality dispenser combination with a statement to emphasize important and critical specifically designed to deliver hot and cold* coffee, coffee based information. -
Page 5: Safety Instructions
2 - SAFETY INSTRUCTIONS General safety The equipment is not intended for use by persons (including Warning: There is the risk of being scalded, in case the cups/pots/ children) with limited psychological or physical abilities or deficiencies. To warrant their safety, they should be supervised containers fall down . -
Page 6: Transport And Storage
Transport and storage Always store and transport the dispenser in the original packaging. • The dispenser must be connected to the drinking water line in Before storing or transporting the dispenser: compliance with local regulations. In case of cold drink options, •... -
Page 7: Food Safety Instructions (Haccp)
Food safety instructions (HACCP) The dispenser is designed to comply with food safety regulations, Danger: DO NOT SPRAY OR SPLASH THE DISPENSER WITH WATER. including HACCP, as required in the food service industry. DO NOT USE A WATER JET FOR CLEANING. The operator is responsible to observe basic food safety and hygiene. -
Page 8: Overview
3 - OVERVIEW Dispenser overview 1. Connector for USB-key 9. Dispenser door 15. Condensate grid 2. Touch screen 10. Cooling compartment 16. Connection for options 3. Hot water button for free flow delivery 11. Release bar 17. Water connection 4. Door handle (lock optional) 12. -
Page 9: Dispenser Interface Overview
Dispenser interface overview For drink delivery, cleaning, and programming use the following finger operations on the touch screen, please find samples in the operating instructions: Tap on icons, features, and objects to activate them, or open context menus. Touch and hold icons and objects and move or drag them to another position. -
Page 10: Status Line
Status Line 5°C E 20 Depending on the status of the dispenser, the status line can show the following icons: 1. WATER FILTER alarm - replace the 7. Display of the TEMPERATURE water filter COOLING COMPARTMENT 2. SPECIFY COUNTRY - select language 8. -
Page 11: Operating
4 - OPERATING Fig. 4.1 - Place product pack Fig. 4.2 - Empty product pack icon Placing a product pack Empty product packs If a product pack is empty, the Caution: Never use a frozen or damaged corresponding drinks are shown as pale product pack. -
Page 12: Cup/Pot Placement
Fig. 4.3 - Cup placement Fig. 4.4 - Touch screen and drink outlets Cup/pot placement Drink delivery The dispenser provides two product outlets The Excellence Touch dispenser provides Warning: (fig. 4.4): The liquids dispensed by the several possibilities for drink delivery dispenser are hot! Avoid scalding! •... - Page 13 Fig. 4.5 - Choices of “Make your own” Fig. 4.6 - “Make your own” - strength > ratio “Make your own” menu • DRINK SIZE - tap on S(mall), • DRINK STRENGTH - move the puk, M(edium), or L(arge) (fig. 4.5) which is located in the middle of the Note: cup, to the left or to the right (coffee...
- Page 14 Fig. 4.7 - START and STOP drink delivery Fig. 4.8 - “Drinks” “Drinks” menu Warning: The liquids dispensed by the 1. Tap on the upper middle icon “Drinks” dispenser are hot! Avoid scalding! (1) on the touch screen, when the Keep hands and other body parts dispenser is in delivery mode (fig.
- Page 15 Fig. 4.9 - “Pots” Fig. 4.10 - Free flow delivery of hot water “Pots” menu Hot water button (free flow delivery) Warning: 1. Tap on the upper right icon “Pots” (1) on The liquids dispensed by the dispenser are hot! Avoid scalding! 1.
- Page 16 Fig. 4.11 - Drink delivery with payment system Drink delivery with payment system When a payment system is installed and set to “payed mode”: 1. Insert a sufficient amount of cash or e-cash into the payment system, please see fig. 4.11. 2.
-
Page 17: Switching Off The Dispenser
Fig. 4.12- Heating icon Switching off the dispenser Switching on the dispenser Please take the following preparations 1. Open the water tap. Note: when the dispenser is not to be used for a 2. Insert the power plug. Heating the water inside the boiler long period, e.g. -
Page 18: Various Settings And Information
Fig. 4.13 - Language and Country Fig. 4.14 - Nutrition facts Various Settings and Information Nutrition facts • Tap on the nutrition facts icon in the Language and country specific settings lower left corner of the delivery mode 1. Tap on the world icon in the lower left touch screen (fig. -
Page 19: Cleaning
5 - CLEANING Fig. 5.1 - Remove cup & drip trays Exterior cleaning Cleaning procedures There are two different cleaning programs: Note: It is advised to clean the exterior of • "Flushing" the drink outlets the dispenser daily. • "Complete Cleaning" the cooling 1. -
Page 20: When To Clean The Dispenser
Fig. 5.2 - Cleaning icon Fig. 5.3 - Pull red release bar Fig. 5.4 - Insert Rinza cleaning tablets When to clean the dispenser Flushing Run the cleaning program when the Note: Note: Only Milk-Coffee and Choco-Coffee cleaning icon appears in the display Flush the dispenser at any time by (fig. 5.2). - Page 21 Fig. 5.5 - Place container Fig. 5.6 - Tap on OK during flushing/complete cleaning Follow the instruction on the screen: Follow the instruction on the screen: 7. Place a container under the drink and Warning: hot water outlets (fig. 5.5) The liquids dispensed by the dispenser are hot! Avoid scalding! 8.
-
Page 22: Complete Cleaning
Fig. 5.8 - Remove packs Fig. 5.9 - Clean cooling compartment Fig. 5.10 - Remove mixing bowls Complete cleaning Note: Note: 5. Place the product packs back if they Only Milk-Coffee and Choco-Coffee Do the complete cleaning of the have not passed the expiry date. Else, dispensers require Rinza cleaning dispenser at any time by starting the place new product packs. - Page 23 Fig. 5.11 - Remove internal drip tray Fig. 5.12 - Mixing bowl sealing ring c. Remove the internal drip tray and h. Place the internal drip tray back (if Note: clean it, if necessary (fig. 5.11). Comply with the safety instructions removed).
- Page 24 Follow the instruction on the screen: Follow the instruction on the screen: 7. Place a container under the drink and Warning: hot water outlets (fig. 5.5) The liquids dispensed by the dispenser are hot! Avoid scalding! 8. Tap on “OK” to confirm (fig. 5.6), that Keep hands and other body parts Rinza cleaning tablets are inserted and away from the dispenser .
-
Page 25: Programming
6 - PROGRAMMING Introduction The following menus can be available: This chapter lists the menus and functions, • Counters (statistics) - read out drink which are available in the dispenser. counters • Change drink volume/strength The service technician can enable or disable •... -
Page 26: Programming Home Menu
Programming Home Menu The programming menu is displayed. By default, the touch screen shows both, the side navigation menu and function parameters. • Scroll through the screens, if functions and/or parameters are not fully shown, e.g. in case of customization. Search Field (1) Allows to search for a function by name. - Page 27 Exit Icon (3) Keypad (5) Message Area (8) Tap on the exit icon to leave the Use the keypad, e.g. to enter a code to Displays some information, such as statistics programming menu without saving. access the programming menu according on the most popular selections, ...
-
Page 28: Entering The Values
Fig. 6.3 - Keyboard Fig. 6.4 - Keypad Fig. 6.5 - Checkbox, Drop Down List, Value Picker Entering the Values 7. Confirm the values Checkbox (fig . 6 .5, detail 1) 8. Cancel the entered values and closes • Tap on the checkbox to enable/disable The values in the programming menu can the keyboard the option. -
Page 29: Daily Action (Menu Section 1)
Daily Action (menu section 1) Cleaning • Tap on menu items 1 > 1.1 • Follow the instructions in sections “Flushing” and “Complete Cleaning”, see chapter “Cleaning” (fig. 6.6). Filling • Tap on menu items 1 > 1.2 • Enable the management of product pack levels. -
Page 30: Drinks Settings (Menu Section 2)
Drinks Settings (menu section 2) Drinks display • Tap on menu items 2 > 2.1 The drinks, which are enabled on your dispenser for delivery, are listed on the touch screen (fig. 6.7). • Tap on fields “1x2”, “1x3”, “1x4”, or “2x5” to set the drinks layout of the delivery mode. - Page 31 Make your own display You can modify the default drink selection for this menu. • Tap on menu items 2 > 2.2 The drinks, which are enabled on your dispenser for delivery, are listed on the touch screen (fig. 6.8). •...
- Page 32 Recipe Editor (Volume / Strength) • Tap on menu items 2 > 2.5 > 2.5.4 The drinks, which are enabled on your dispenser, are listed on the touch screen. Adjust the preset volume and strength of a drink: • Tap on the icon of the drink, you would like to modify.
- Page 33 Product Packs Settings • Tap on menu items 2 > 2.6 • Tap on the requested product pack on the screen (fig. 6.10) to • start the calibration of the product pack • set/change the color of the product pack •...
- Page 34 Pot display • Tap on menu items 2 > 2.8 A checkbox for freeflow delivery and the drinks, which are enabled for pot delivery on your dispenser, are listed on the touch screen (fig. 6.11). • Tap on the checkbox to define, if pots should be filled in freeflow mode (a check mark is shown) or not.
-
Page 35: Machine Settings (Menu Section 3)
Machine Settings (menu section 3) Text / Feed Level of Product Packs Display General Settings • Tap on menu items 3 > 3.3 > 3.3.5 • Tap on menu items 3 > 3.4 > 3.4.1 • Tap on menu items 3 > 3.3 > 3.3.3 In normal operation and during the delivery Enables / disables the level counters of the Set the brightness of the touch screen with... - Page 36 Change Filter • Tap on menu items 3 > 3.6 > 3.6.1 Do the following settings (fig. 6.12): • Enable the Change Filter function, if you use a water filter. • Set, if the failure (counter value > water limit) should block the drink delivery or not.
- Page 37 Descaling • Tap on menu items 3 > 3.6 > 3.6.2 • Enable the Descaling function, if you prefer a desaling of the boiler and other equipment in regular intervals (fig. 6.13). • Set the water limit of hot and cold water for descaling.
- Page 38 Cleaning days Determine cleaning days Note: • Tap on menu items 3 > 3.6 > 3.6.5 If you have a Coffee-Coffee version, the You can always set more days dispenser only needs to run the “Complete for “Complete Cleaning” and/ Cleaning”...
-
Page 39: Drink Counters / Statistics (Menu Section 4)
Drink counters / Statistics (menu section 4) Show Statistics • Tap on menu items 4 > 4.2 > 4.2.1 Displays drink counters showing: • the number of dispensed drinks • date and time of last dispensing Reset Statistics • Tap on menu items 4 > 4.2 > 4.2.2 Reset a counter: •... - Page 40 Total Water Counter • Tap on menu items 4 > 4.2 > 4.2.6 • Tap on “previous” to leave the menu without change • Tap on “Reset Hot Water counter” to set the hot water counter to zero (fig. 6.14) •...
- Page 41 Drink Counters • Tap on menu items 4 > 4.2 > 4.2.7 • Tap on the pull down menu “Beverage” to select the requested drink (fig. 6.15). The water, ingredient, and ready to drink quantities of the selected drink are shown.
-
Page 42: Energy Saving (Menu Section 5)
Energy Saving (menu section 5) • set the lowered temperature of the The energy saving function allows to boiler in the energy saving phase enable, change the parameters, and set the time frames of the dispensers’ energy • set the brightness of the touch screen saving. - Page 43 Energy Saving Timebands • Tap on menu items 5 > 5.2 Set the time frames of an energy saving profile (fig. 6.16): • Tap on the requested weekday to set the time frame. • Tap on “Add event” . • Tap on the profile line (normal/soft/deep) to place a time frame.
-
Page 44: Payment Systems (Menu Section 6)
Payment Systems (menu section 6) System (menu section 8) Languages For any functions and adjustment Date / Time Settings descriptions about payment systems, see • Tap on menu items 8 > 8.4 • Tap on menu items 8 > 8.3 chapter “7 Payment Systems”. -
Page 45: Payment Systems
7 - PAYMENT SYSTEMS Introduction Various payment functions Show Audit (menu 4 .2 .3) This chapter describes the operation and Cash Action (menu 1 .3) range of functions of the payment units • Tap on menu items 4 > 4.2 > 4.2.3 Note: used in connection with an Excellence- Enabled only for models with... -
Page 46: Prices (Menu Section 6)
Prices (menu section 6) Currency Symbol • Tap on menu items 6 > 6.2 > 6.2.1 • Set up the currency symbol for the credit display. Global Drink Prices The factory settings define the same price for all drinks (global price): •... - Page 47 Prices Timebands management • Tap on menu items 6 > 6.2 > 6.2.5 Set the time frames of a price profile (fig. 7.2): • Tap on the requested weekday to set the time frame. • Tap on “Add event” . • Tap on the profile line (Standard, Timeband 1, 2, or 3) to place a time frame.
-
Page 48: Payment System Protocols (Menu Section 7)
Payment system protocols (menu section 7) Line/value association Executive: When the display is positioned on the “LINE- Coinmechanism version You can set the following protocols for the VALUE ASSOC. ” function (line programming) You have to choose among the following available payment systems, and manage of the “programming”... - Page 49 BDV: Credit return (escrow lever) Accepted coins Immediate change (default: disabled) To enable/disable the credit return (by To define which coins shall be accepted pressing the change return key) if no among those recognised by the validator. The amount relative to a selection is dispensing has been performed.
- Page 50 Exact change equation Distribution buttons VMC free sale To define the combination of empty tubes Use this function to enable or disable the Most of the payment systems complete intended to set the coin mechanism to buttons arranged on the coin mechanism in with a BDV protocol is intended to manage the “exact amount”...
- Page 51 MDB: Type of dispensing Maximum change Immediate change (default: disabled) To set the operation mode by multiple You can set a limit on the total amount of or single dispensing. In case of multiple the change the coin mechanism will pay as The amount relative to a selection is dispensing, the change is not automatically soon as you press the change button or...
- Page 52 Accepted bills Residual credit Exact change equation To define which bills shall be accepted You can decide whether to cash any credit To choose among 15 different control among those recognised by the reader. exceeding the selection amount after a algorithms to enable the dispenser to give For the bill/value correspondence check the well-defined time interval (deleted later)
- Page 53 9 = A and B Maximum cashless key recharged 10 = A and B and C and D The function is used to set up the maximum 11 = A and C or A and D credit you can charge on a key or card 12 = A only or C and D system.
-
Page 54: Troubleshooting
8 - TROUBLESHOOTING Display message Cause Action The product pack is: 1. Replace the empty product pack, see page 11. 1. empty 2. Check whether the product pack is inserted correctly, see page 2. incorrectly positioned 3. or not present 3. - Page 55 Display message Cause Action Water system error • Check the water supply line to the dispenser is blocked, open Err 17/18/19 the water tap completely. • Tap on the “Active Failures List” in the programming home menu and then tap on the “Reset Failures” icon. Contact service if the error remains.
-
Page 56: Specifications
9 - SPECIFICATIONS Milk-Coffee Coffee-Coffee Versions* (install kit „Conversion Coffee-Coffee“) Dimensions Height Door closed: 692 mm / 27.24 in (Door open: 920 mm / 36.2 in) Width 380 mm / 14.96 in Depth 524 mm / 20.63 in Weight empty 38.5 kg / 86 lbs filled 49 kg / 108 lbs... - Page 57 Standard water connection 1/2" or 3/8" supply line with 3/4" BSP connecting piece Drinking water line with stop valve Max. water inlet temperature 60°C / 140°F Dynamic pressure Min. 0.8 bar at 10 l/min - 11 psi at 2.6 gal/min Static pressure Max.
- Page 58 APPENDIX A - INTERNATIONAL LISTING OF POWER PLUGS Country Plug type Manufacturer/ Type/model Technical data Standard Mark(s) of conformity trademark Type G Patelec Elpena/Ningbo 3G0,75/1/1,5 BS 1363-1 BSI/HAR Japan Type B Patelec Ningbo 3x0,75/1,25/2 JIS C8303, PSE/JET JIS C8306 Australia Type I Patelec Elpena/Ningbo 161-165...
Need help?
Do you have a question about the Cafitesse Excellence Touch and is the answer not in the manual?
Questions and answers