Advertisement
Quick Links
Advertisement

Related Manuals for Lockly PGH200


Summary of Contents for Lockly PGH200
- Page 1 REV: 0.1 2915C 445C Designed:Ou Date:2019-02-27 PGH200 Installation & User Manual...
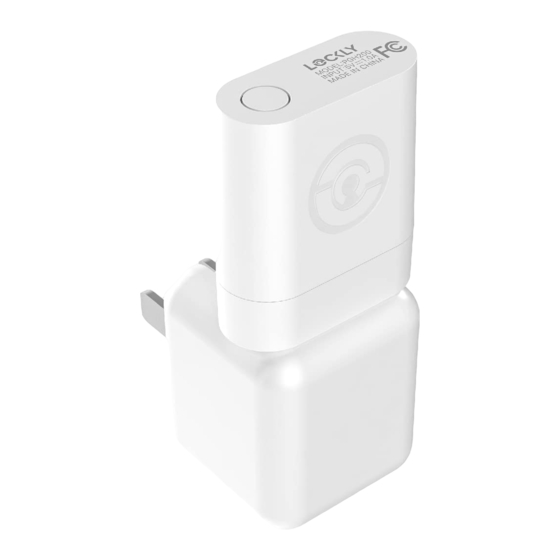
- Page 2 USB 5V 1A AC Adaptor* Wireless Door Sensor The Lockly™ Secure Link Wi-Fi Hub comes in two parts. Each part of the Secure Link is crucial to enable voice assistant features and live monitoring and control of your Lockly™ device.
- Page 3 (recommended). For best connectivity, the Secure Link Wi-Fi Hub must be installed within 10 feet of your Lockly™ Smart Lock. You may experience delayed or intermittent connectivity if the Secure Link Wi-Fi Hub is installed further than 10 feet away from the Lockly™ Smart Lock.
- Page 4 Setup Button Once you have confirmed that your Secure Link Wi-Fi Hub is ready to connect to your lock, open the Lockly™ app to get started. In case you have not downloaded our app, you can scan the QR code to the left or visit https://lockly.com/app...
- Page 5 Secure Link Wi-Fi Hub Before you set up your Wi-Fi Hub, make sure you are standing in between your Lockly Smart Lock and Secure Link Wi-Fi Hub. For best connection, the distance between the Wi-Fi Hub and your smart lock should be 10 feet or less.
-
Page 6: Installation Checklist
Secure Link Installation Checklist. I’m excited for my new Lockly smart lock, now compatible with Alexa and Google Assistant.* You have a Lockly Smart Lock already, and now adding the Wi-Fi Hub The Secure Link Wi-Fi Hub is installed within 10 feet of your Lockly Smart Lock You have the Lockly App installed on your iOS or Android device. - Page 7 First, make sure the smartphone you are using to add the Wi-Fi Hub is connected to your 2.4 GHz Wi-Fi Network. Next, open your Lockly App and select the main menu from the upper left corner. (Image shown with iOS demo). Once the menu opens go ahead select “Set up a New Device”...
- Page 8 3 Seconds If you don’t see anything appear with a Bluetooth icon and a name starting with PGH200... simply click the Refresh button on the upper right to rescan. Make sure your Wi-Fi Hub is showing a flashing LED indicator and the Wi-Fi Hub is within the optimal distance of 10 feet from your lock.
- Page 9 If you are already connected to a 2.4 Ghz compatible Wi-Fi network, it should display the network name. (See example below) Enter your Wi-Fi password in the next line next to the icon, then click “Next Step” to continue. Select if your Wi-Fi Hub LED Indicator light is ON and solid.
- Page 10 Congratulations! Your Secure Link Wi-Fi Hub is now set up. Below are some quick information for troubleshooting. No Indicator Light Your Wi-Fi Hub has no power. Check your the power supply. Slow Flashing Indicator Light Your Wi-Fi Hub has power. It’s not connected to any wireless network.
- Page 11 4. Adding the Door Sensor Adding the door sensor (Part B) is optional, however we strongly recommend installing the Door Sensor as it provides the ability to verify that your door is securely closed and not ajar and also send push notifications to your phone on the status of your door when someone opens and closes the door.
- Page 12 Keep the Door Sensor away from direct sunlight, high heat locations and large metal objects that may interfere with wireless signals. KEEP AWAY The optimal location to install the Door Sensor is on the upper corners of your door, away from the reach of children and pets. WHEN FACING YOUR DOOR WHEN FACING YOUR DOOR FROM THE INSIDE, DOOR HINGES...
- Page 13 When you are installing the Door Sensor, make sure the arrows on the Door Sensor is placed next to the arrow from the Door Frame Sensor. When installed on your door, the distance between the Door Sensor and the Door Frame Sensor must be less than 3/4” in order for the sensor to work.
- Page 14 Amazon Alexa or Google Home Assistant app and add a new skill with Amazon Alexa or an Action with Google Home Assistant. Add the “Lockly” Skill (Alexa) and Action (Google) then follow on screen instructions to finish set up.
- Page 15 Certified Warning: This device complies with Part 15 of the FCC Rules. Operation is subject to the following two conditions:(1) This device may not cause harmful interference, and (2) this device must accept any interference received, including interference that may cause undesired operation.
Need help?
Do you have a question about the PGH200 and is the answer not in the manual?
Questions and answers