Table of Contents
Advertisement
Available languages
Available languages
Quick Links
Advertisement
Chapters
Table of Contents

Summary of Contents for Magic Chief MCC3GSM-2
- Page 1 Granita/Slush Machine User's Manual PULL PULL PULL PULL PULL PULL Model MCC3GSM-1/MCC3GSM-2/MCC3GSM-3 PLEASE READ THIS MANUAL CAREFULLY BEFORE USING YOUR GRANITA/ SLUSH MACHINE AND KEEP IT FOR FUTURE REFERENCE.
-
Page 2: Product Registration
PRODUCT REGISTRATION Thank you for purchasing a Magic Chef® Commercial product. The first step to protect your new product is to complete the product registration on our website: www.mcappliance.com/register. The benefits of registering your product include the following: 1. Registering your product will allow us to contact you regarding a safety notification or product update. 2. -
Page 3: Table Of Contents
TABLE OF CONTENTS PRODUCT REGISTRATION ................2 GENERAL INFORMATION . -
Page 4: General Information
GENERAL INFORMATION Read This Manual Carefully This user manual is intended to help you operate and maintain your new appliance properly. Keep it handy to answer your questions. If you do not understand certain aspects or you need additional help, please call Magic Chef®... -
Page 5: Parts
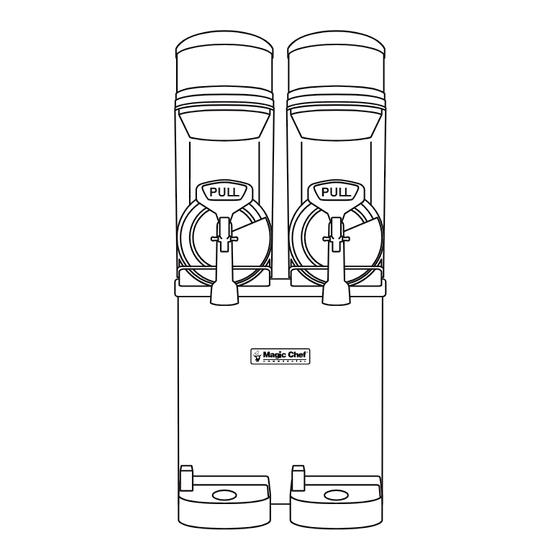
Light Switch appliance. Mixing Motor Switch Freeze/Cool Selection Switch Drip Tray Left: MCC3GSM-2 Right: MCC3GSM-3 Double and triple the quantity of all the parts and switches indicated above for models PULL PULL PULL PULL PULL MCC3GSM-2 and MCC3GSM-3, respectively. ENG-5... -
Page 6: Specifications
SPECIFICATIONS MCC3GSM-1 MCC3GSM-2 MCC3GSM-3 Product Title Granita/Slush Machine Product Dimensions 8.4" x 32.8" x 18.9" 15.8" x 35.2" x 18.9" 23.6" x 35.2" x 18.9" (Width x height x Depth) 213 mm × 833 mm × 480 mm 400 mm × 894 mm × 480 mm 600 mm ×... -
Page 7: Circuit Diagram
CIRCUIT DIAGRAM MCC3GSM-1 CIRCUIT DIAGRAM SyMbOL COLOR bLACK bROWN ORANGE yELLOW GREEN bLUE VIOLET GRAy WhITE MCC3GSM-2 CIRCUIT DIAGRAM SyMbOL COLOR bLACK bROWN ORANGE yELLOW GREEN bLUE VIOLET GRAy WhITE ENG-7... - Page 8 MCC3GSM-3 CIRCUIT DIAGRAM SyMbOL COLOR bLACK bROWN ORANGE yELLOW GREEN bLUE VIOLET GRAy WhITE ENG-8...
-
Page 9: Safety
SAFETY Read and understand all safety precautions. Failure to follow all instructions described in this user manual may result in electric shock, fire and/or serious personal injury. The warnings, cautions and instructions discussed in this user manual cannot cover all possible conditions and situations that may occur. It must be understood by the user that common sense and caution are attributes which cannot be built into the appliance, but must be supplied by the user. - Page 10 3-Slot Receptacle Receptacle Box Cover 3-Prong Plug This appliance requires a standard 120 Volt, 60 hz electrical outlet with a 3-slot ground receptacle. To prevent accidental injury, the cord should be secured behind the appliance and not left exposed or dangling. WARNING: Improper use of the grounding plug and/or outlet can result in a risk of electric shock.
- Page 11 WARNING: NEVER unplug the appliance by — before supplying power, check whether the pulling the power supply cord. ALWAyS grip the voltage is the same as the one on the nameplate. — This appliance must be grounded. In the event of plug firmly and pull straight out from the receptacle.
- Page 12 DANGER: If a gas leak occurs near the appliance, CAUTION: For maximum performance, please DO NOT touch the appliance whatsoever. Opening operate the appliance in the recommended ambient the door or disconnecting the power plug may temperatures between 41°F/5.0°C ~ 85°F/29.5°C cause an explosion due to an electric spark.
-
Page 13: Assembly
ASSEMBLY Assembling the Appliance Figure 1 1. Attach drip tray to its original front bottom position located underneath the spout of the chamber. 2. Apply grease to the two piston rings and spiral using the supplied grease from the manufacturer or purchase commercially approved edible grease. - Page 14 7. After the chambers are washed and rinsed of all sterilizing solution, use a clean, damp cloth and wipe down all areas to remove any remaining liquids. CAUTION: To reuse the appliance after an extended period of time, reapply edible grease to the packing cushion.
-
Page 15: Installation
INSTALLATION WARNING: DO NOT install the appliance near a CAUTION: Use extreme caution when moving heat generating source. the appliance. — If you do not follow these instructions, it may — If you do not follow these instructions, it may cause a fire or the appliance to fail. -
Page 16: Use
1. Clean and sterilize the appliance parts according to the instructions in this manual. See "Care and Maintenance" on page 18. 2. Fill up the granita or slush mixture up to the level specified on the chamber. NEVER overfill it. The optimal quantity (in liters or gallons) is written on the surface of the chamber. - Page 17 STOP COOL COOL COOL MCC3GSM-1 MCC3GSM-2 MCC3GSM-3 The switches in Figure 13 function as follows: C. Mixing Motor Switch • Position "OUTPUT": The spiral motor is running and the Freeze/Cool Selection Switch is activated. • Position "STOP": The fan motor is turned off.
-
Page 18: Care And Maintenance
CARE AND MAINTENANCE IMPORTANT: Only procedural instructions are provided in this manual. 1. To ensure optimal performance and taste, the appliance should be periodically cleaned and sterilized. 2. before disassembly and cleaning, be sure to remove all granita or slush mixtures from the chambers by following these steps: • Place the Master Power Switch in the position "ON ( )". - Page 19 8. be sure to remove and clean the screen filter located on the side panel on a monthly basis using lukewarm water at around 77°F/25.0°C or with a neutral detergent solution. Dry the filter and reinstall it into its original position. If proper ventilation is not maintained, dust will accumulate and eventually appliance failure may follow, resulting expenses not covered under warranty.
- Page 20 5. Use fresh, clean water to remove the remaining sterilizing solution from within and on the surface of the chamber. Afterwards, DO NOT rinse the sterilized parts again. Repairs CAUTION: Repairs are to be performed by a certified commercial appliance technician only. 1.
-
Page 21: Troubleshooting
TROUBLESHOOTING you can solve many common appliance problems easily, saving you the cost of a possible service call. Try the suggestions below to see if you can solve the problem before calling for service. Failure Cause Action If power is not Power is not supplied from the outlet. -
Page 22: Limited Warranty
LIMITED WARRANTY This warranty is subject to all of the terms and conditions stated below. Warranty Claim Proof of purchase, model number of the unit, the serial number of the cabinet, date of installation, and all pertinent information supporting the existence of the alleged defect must be supplied to validate warranty, and all claims for labor or parts must be made directly through Magic Chef Commercial. - Page 23 R-134A or R-404A Compressor Warranty The five-year compressor warranty stated above will be terminated if the following procedure is not carefully adhered to: This system contains R-134A or R-404A refrigerant and polyester lubricant which has rapid moisture absorbing qualities. The lubricant must be removed and replaced with a new one if there is long exposure to the ambient conditions. Drier must be changed with a new drier with the same capacity when a system is opened for servicing.
- Page 24 MCA Corporation 940 N. Central Ave Wood Dale, IL 60191, USA Service: 866-789-0202 / Fax: 630-938-4700 Magic Chef Commercial Sales: CommercialSales@magicchef.com Magic Chef Commercial Customer Support: CommercialSupport@magicchef.com Website: www.mcappliance.com...
- Page 25 Máquina de granizados Manual del usuario PULL PULL PULL PULL PULL PULL Modelo MCC3GSM-1/MCC3GSM-2/MCC3GSM-3 LEA ESTE MANUAL ANTES DE UTILIZAR SU MÁQUINA DE GRANIZADOS Y GUÁRDELO PARA FUTURA REFERENCIA.
- Page 26 REGISTRACIóN DEL PRODUCTO Gracias por comprar el producto Magic Chef® Commercial. El primer paso para proteger su nuevo producto es completar la forma de registración en nuestra pagina web: www.mcappliance.com/register. Los beneficios de registrar su producto incluyen lo siguiente: 1. Al registrar su producto nos permite contactarle para notificarle de un cambio de seguridad o actualización del producto.
- Page 27 TABLA DE CONTENIDOS REGiStRACióN dEL PRodUCto ..............2 iNFoRMACióN GENERAL .
-
Page 28: Información General
INFORMACIóN GENERAL Lea este manual atentamente El manual para el usuario ha sido diseñado para ayudarlo a operar y realizar el mantenimiento de su nuevo electrodoméstico de manera correcta. téngalo a mano a fin de responder preguntas. Si no comprende determinados aspectos o necesita ayuda adicional, comuníquese con el Servicio al cliente de Magic Chef®... -
Page 29: Partes
Bandeja recolectora izquierda: MCC3GSM-2 derecha: MCC3GSM-3 duplique y triplique la cantidad de todas las partes e interruptores indicados PULL PULL PULL PULL PULL más arriba para los modelos MCC3GSM-2 y MCC3GSM-3, respectivamente. SPN-5... -
Page 30: Especificaciones
ESPECIFICACIONES MCC3GSM-1 MCC3GSM-2 MCC3GSM-3 Nombre del producto Máquina de granizados dimensiones del 213 mm × 833 mm × 480 mm 400 mm × 894 mm × 480 mm 600 mm × 894 mm × 480 mm producto (ancho x alto 8.4"... -
Page 31: Diagrama Del Circuito
DIAGRAMA DEL CIRCUITO MCC3GSM-1 diAGRAMA dEL CiRCUito SÍMBoLo CoLoR NEGRo MARRóN Rojo ANARANjAdo AMARiLLo VERdE AzUL VioLEtA GRiS BLANCo MCC3GSM-2 diAGRAMA dEL CiRCUito SÍMBoLo CoLoR NEGRo MARRóN Rojo ANARANjAdo AMARiLLo VERdE AzUL VioLEtA GRiS BLANCo SPN-7... - Page 32 MCC3GSM-3 diAGRAMA dEL CiRCUito SÍMBoLo CoLoR NEGRo MARRóN Rojo ANARANjAdo AMARiLLo VERdE AzUL VioLEtA GRiS BLANCo SPN-8...
-
Page 33: Seguridad
SEGURIDAD Lea y entienda todas las medidas de precaución. Si no sigue todas las instrucciones especificadas en este manual del usuario puede producir un choque eléctrico, provocar un incendio o sufrir lesiones personales graves. Las advertencias, precauciones e instrucciones incluidas en este manual del usuario no pueden cubrir todas las condiciones y situaciones posibles que se puedan producir. - Page 34 reduce el riesgo de golpes de corriente ya que es un cable de escape para la corriente eléctrica. Este equipo está dotado de un cable de transmisión de corriente que contiene una conexión a tierra con un enchufe a tierra. El enchufe debe insertarse en un tomacorriente correctamente instalado y conectado a tierra. Receptáculo Tapa de la caja de 3 ranuras...
- Page 35 — Si no sigue estas instrucciones, es posible que el del artefacto, y haga revisar la unidad únicamente artefacto tenga inconvenientes o se produzca un por un técnico comercial certificado. golpe de corriente. — Si no sigue estas instrucciones, es posible que el artefacto tenga inconvenientes, se produzca un PRECAUCIóN: Mantenga la unidad en buenas golpe de corriente, incendio y se anule la garantía...
- Page 36 PELIGRO: Mantenga este artefacto alejado de PRECAUCIóN: No aplique intencionalmente todo material inflamable. fuerza ni se cuelgue de la palanca para jalar o del — Si no cumple con estas instrucciones, puede expendedor. producirse un incendio o explosión debido a chispas —...
- Page 37 ADVERTENCIA: No pulverice agua directamente sobre el artefacto; use un paño limpio y húmedo. — Si no sigue estas instrucciones, es posible que el artefacto tenga inconvenientes, se produzca un golpe de corriente o incendio. ADVERTENCIA: Antes de limpiar para la higiene de los alimentos, desconecte el enchufe del tomacorriente.
-
Page 38: Armado
ARMADO Armado del artefacto Figura 1 1. Coloque la bandeja de goteo en su posición delantera inferior original, debajo del pico de la cámara. 2. Aplique grasa en los dos anillos del pistón y espiral usando la grasa provista por el fabricante o compre grasa comestible aprobada comercialmente. - Page 39 6. Alinee la cámara y empújela completamente dentro de la empaquetadura y pestillo de seguridad. (Véase Figura 5) 7. después de lavar y enjuagar las cámaras para eliminar toda solución usada para esterilizar, use un paño limpio y húmedo para repasar todas las áreas y secar los restos de líquidos. PRECAUCIóN: Para volver a usar el artefacto después un período prolongado, vuelva a aplicar grasa comestible a la empaquetadura.
-
Page 40: Instalación
INSTALACIóN ADVERTENCIA: No instale el artefacto cerca de ADVERTENCIA: No instale el aparato cerca de una fuente que genere calor. una fuente de agua ni en lugares húmedos ni con — Si no sigue estas instrucciones, es posible que el polvo. -
Page 41: Uso
1. Limpie y esterilice las partes de este artefacto según las instrucciones de este manual. Consulte la sección "Cuidado y mantenimiento" de la página 20. 2. Coloque la mezcla para la máquina de granizados hasta el nivel especificado en la cámara. NUNCA llene de más. - Page 42 STOP COOL COOL COOL MCC3GSM-1 MCC3GSM-2 MCC3GSM-3 Los interruptores de la Figura 13 funcionan de la siguiente manera: C. interruptor del motor de mezcla • Posición "oUtPUt" (SALidA): El motor espiral está funcionando y el interruptor de selección Congelar/ Refrigerar está activado.
- Page 43 • Coloque el interruptor de selección congelar/refrigerar en la posición “FREEzE ( )” (CoNGELAR) para hacer granizado. • Coloque el interruptor de selección congelar/refrigerar en la posición “CooL ( )” (REFRiGERAR) para enfriar bebidas. SPN-19...
-
Page 44: Cuidado Y Mantenimiento
CUIDADO Y MANTENIMIENTO IMPORTANTE: En este manual, solo se incluyen instrucciones de procedimiento. Para asegurar su óptimo funcionamiento y sabor, el artefacto debe limpiarse y esterilizarse periódicamente. 2. Antes de desarmar y limpiar, asegúrese de eliminar todas las mezclas de granizado de las cámaras siguiendo estos pasos: • Coloque el interruptor principal de corriente en la posición "oN ( )". - Page 45 PRECAUCIóN: Cuando limpie el artefacto, evite el contacto del agua con las partes que funcionan con electricidad. Puede provocar fallas del artefacto o golpe de corriente. 5. No vierta ningún líquido sobre la tapa del motor ubicado en la parte de atrás del artefacto. 6.
- Page 46 1. Según las disposiciones que regulan la seguridad de los alimentos y las especificaciones del fabricante, debe preparar cinco litros de solución tibia (45.0°C/113°F a 60.0°C/140°F) para esterilizar (cloruro 100 sobrante o lejía). 2. Llene la cámara con solución para esterilizar. 3.
-
Page 47: Resolución De Problemas
RESOLUCIóN DE PROBLEMAS Usted puede resolver muchos de los inconvenientes comunes que se producen con el artefacto y ahorrarse el costo de llamar al servicio de mantenimiento. inténtelo con las sugerencias a continuación para ver si puede resolver los problemas antes de llamar al servicio técnico. Falla Causa Acción... - Page 48 La mezcla de El interruptor de selección congelar/ Coloque el interruptor de selección granizado está refrigerar está fijado continuamente en congelar/refrigerar en la posición congelada. "FREEzE" (CoNGELAR). "CooL" (REFRiGERAR) o "StoP" (ALto). El interruptor necesita conmutar entre "FREEzE" (CoNGELAR) y "CooL" (REFRiGERAR) para mantener una temperatura óptima de granizado.
-
Page 49: Garantía Limitada
GARANTÍA LIMITADA Esta garantía está sujeta a todos los términos y condiciones especificados a continuación. Reclamo de la garantía La prueba de compra, número de modelo de la unidad, número de serie del gabinete, fecha de instalación y toda la información perti- nente que respalde la existencia del supuesto defecto debe ser enviado para convalidar la garantía y todos los reclamos por mano de obra o repuestos deben dirigirse directamente a Magic Chef Commercial. - Page 50 Esta garantía extendida no se aplica a otras partes o componentes, incluidos los controles eléctricos, acumulador, arneses del cableado, etc., que están cubiertos por la garantía común. Garantía del compresor R-134A o R-404A La garantía de cinco años del compresor especificada anteriormente dejará de tener validez si no se cumple estrictamente con el siguiente procedimiento: Este sistema contiene refrigerante R-134A o R-404A y lubricante de poliéster que tiene cualidades de absorción rápida de la humedad.
- Page 51 MCA Corporation 940 N. Central Ave Wood Dale, IL 60191, USA Servicio: 866-789-0202 / Fax: 630-938-4700 Magic Chef Commercial Ventas: CommercialSales@magicchef.com Magic Chef Commercial Soporte al cliente: CommercialSupport@magicchef.com Sitio web: www.mcappliance.com...
Need help?
Do you have a question about the MCC3GSM-2 and is the answer not in the manual?
Questions and answers