Advertisement
Quick Links
Advertisement

Summary of Contents for Kanso HIKU
- Page 1 HIKU The Premium Hand Coffee Grinder // Use & Care Manual...
- Page 2 Thank you for your purchase of Hiku, our all-new, premium hand coffee grinder. Engineered from the grounds up, Hiku embodies in so many ways our passion for premium, our love of craft and attention to detail, and our wish to create a unique product that surprises and delights users around the world.
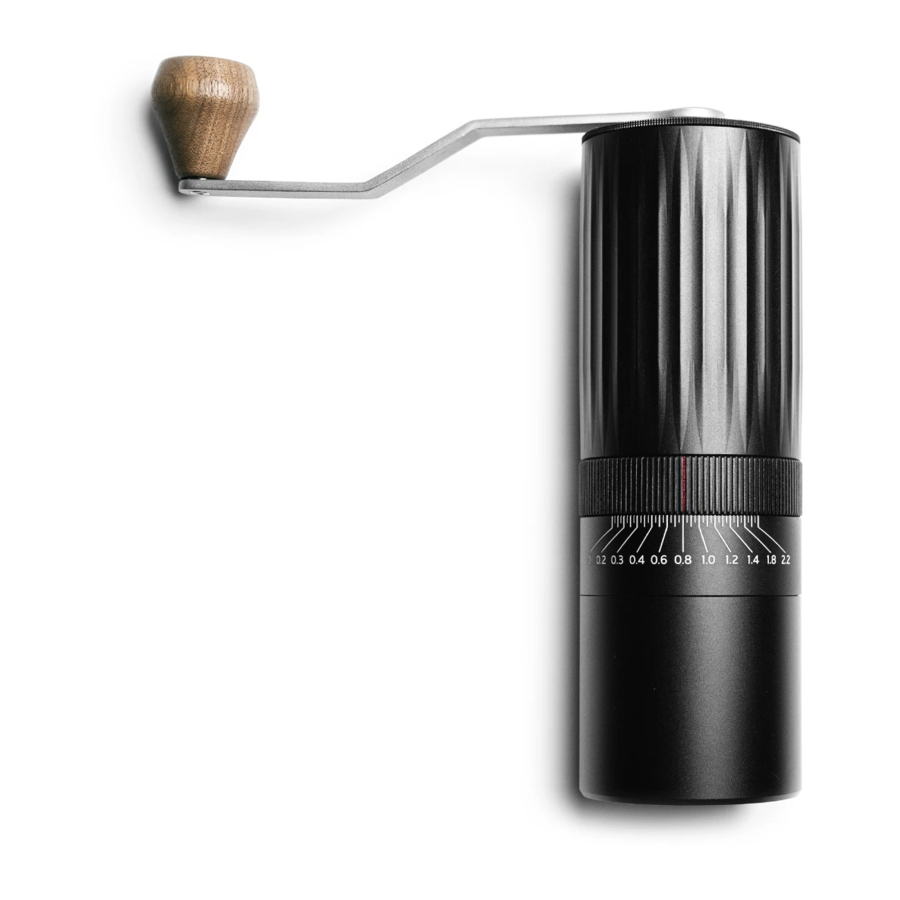
- Page 3 13. Brass washer (2 pcs) 14. Shaft 15. Outer adjustment ring 16. Inner adjustment ring with bearing 17. Ramp ring 18. Kanso outer burr 19. Lower enclosure 20. Kanso inner burr 21. Retention disc 22. Retention disc screw 23. Enclosure screw, hex drive (3 pcs) 24.
- Page 4 ASSEMBLY Handle We do not recommend disassembling Hiku completely, as Hiku has already been carefully factory calibrated. If you wish to manually calibrate, please skip ahead to Page 9. Otherwise, see assembly instructions below. Use a coin to tighten the cap.
- Page 5 ASSEMBLY Upper Body Enclosure Insert the triple spoke plate and thread it into the upper enclosure in a clockwise direction. Arrange the two brass washers and the wave spring Insert the top of the shaft into the bottom of the onto the shaft so that the wave spring sits between upper enclosure and triple spoke plate.
- Page 6 Slide the inner adjustment ring onto the shaft and the enclosure assembly. clip notch Place the outer adjustment ring on top of the enclosure assembly. Match the three clips of the outer adjustment ring with the three notches of the inner adjustment ring so that it sits flush with the enclosure.
- Page 7 ASSEMBLY Lower Body Enclosure Insert the outer burr and the ramp ring into the lower cylinder to form the lower body enclosure.
-
Page 8: Main Enclosure
ASSEMBLY Main Enclosure Align the lower body enclosure assembly with the shaft of the upper body enclosure assembly so that the red indicator line is pointing at the scale markings. Using the provided hex key, tighten the three black enclosure screws into the assembly to lock them together. - Page 9 BURR ALIGNMENT Calibration After assembling the main enclosure, the burrsets may need further calibration to prevent excess rubbing and misalignment during grinding. Using the provided hex key, tighten or loosen the three black enclosure screws until the outer burr and the inner burr are flush with each other.
- Page 10 © 2018 Kanso Coffee. All Rights Reserved. Inquiries: info@kansocoffee.com DOC0088-Hiku Use and Care Manual Rev 1.0 / SEPT 2018 Specifications are subject to change without notice.
Need help?
Do you have a question about the HIKU and is the answer not in the manual?
Questions and answers