Advertisement
Quick Links
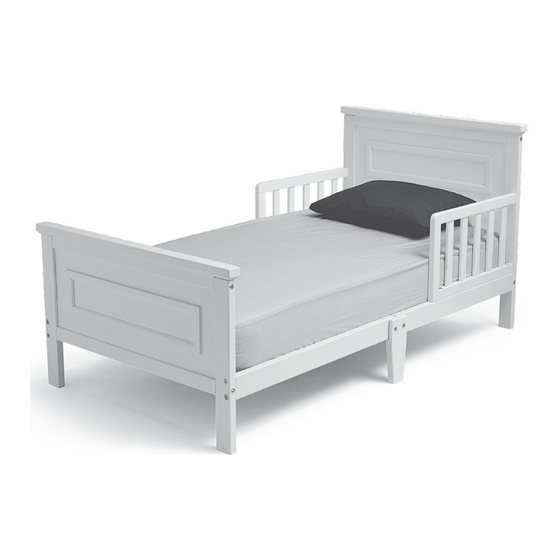
Toddler Day Bed
Cama para Bebés Classica
Read all instructions before assembly and use. Keep instructions for future use.
Adult assembly required. Due to the presence of small parts during assembly,
keep out of reach of children until assembly is complete.
Lea todas las instrucciones antes de ensamblar y usar. Mantenga las instrucciones
para su uso futuro. Debe ser ensamblado por un adulto. Debido a la presencia de
piezas pequeñas durante el ensamblaje, mantenga fuera del alcance de los niños
No drill required.
Do not use power screwdriver
No necesita taladros. No utilice
destornilladores eléctricos
hasta que complete el ensamblaje.
Style #:
___________
Lot:
___________
Date:
___________
25915- R0 - 12-Mar-2015
Advertisement

Related Manuals for Babies R' Us nextsteps

Summary of Contents for Babies R' Us nextsteps
- Page 1 Toddler Day Bed Cama para Bebés Classica Read all instructions before assembly and use. Keep instructions for future use. Adult assembly required. Due to the presence of small parts during assembly, keep out of reach of children until assembly is complete. Lea todas las instrucciones antes de ensamblar y usar.
-
Page 2: Warranty
Consumer Care: www.DeltaChildren.com Delta Children’s Products 114 West 26th Street New York, NY 10001 Tele.212-645-9033 ©2015 DELTA ENTERPRISE CORP. THIS PRODUCT IS NOT INTENDED FOR INSTITUTIONAL OR COMMERCIAL USE. CE PRODUIT NE PAS DESTINE A UN USAGE INSTITUTIONNEL OU COMMERCIAL Warranty: This Delta product is warranted to be free from defects for a period of 90 days from the date of purchase under normal use. - Page 3 TODDLER BED WARNING INFANTS HAVE DIED IN TODDLER BEDS FROM ENTRAPMENT. Openings in and between bed parts can entrap head and neck of a small child. NEVER use bed with children younger than 15 months. ALWAYS follow assembly instructions. The maximum user weight is 50lbs (22.7kg) WARNING STRANGULATION HAZARD NEVER place bed near windows where cords from blinds or drapes may strangle a child.
- Page 4 ADVERTENCIA HAN FALLECIDO BEBÉS Y NIÑOS EN CAMAS DE NIÑOS PEQUEÑOS AL QUEDARSE ATRAPADOS. La cabeza y el cuello de los niños pequeños pueden quedar atrapados en aberturas de alguna parte de la cama de niños o entre componentes de la misma. NUNCA utilice la cama de niños para niños de menos de 15 meses.
- Page 5 PARTS: MAKE SURE THAT ALL PRE-ASSEMBLED PARTS ARE TIGHT. PIEZAS: ASEGÚRESE DE QUE TODAS LAS PIEZAS PRE-ENSAMBLADAS ESTÉN APRETADAS. A. End Top Rail x 2 Barandilla superior # 24423 Inside Label Warning Label C. Headboard Bottom Rail x 1 Barandilla inferior de la cabecera # 25914 B.
- Page 6 Hardware kit part #24434 PARTS: PIEZAS: Kit de Piezas # 24434 T. M6 x 85 mm Bolt x 8 No drills necessary. Do not Pernos M6 x 85mm use power screwdriver. #5474 No necesita taladros. No utilice destornilladores eléctricos. U. M6 x 60 mm Bolt x 16 Flat Head Screwdriver Pernos M6 x 60mm (not supplied)
- Page 7 Step 1 / PASO #1 Parts and tools required to complete step. D. Left Headboard Post x 1 Poste izquierdo de la cabecera M4 Allen Wrench Inside Label Llave Allen M4 T. M6 x 85 mm Bolt x 2 Pernos M6 x 85mm Warning Label C.
- Page 8 Step 2 / PASO #2 Parts and tools required to complete step. H. End Top Panel x 2 Panel superior J. Headboard Bottom Panelx 1 From Step 1 B. Headboard Middle Rail x 1 Panel inferior de la cabecera del Paso 1 Barandilla intermedia de la cabecera Insert (1) Headboard Middle Rail (Part B) as shown.
- Page 9 Step 3 / PASO #3 Parts and tools required to complete step. E. Right Headboard Post x 1 Poste derecho de la cabecera M4 Allen Wrench Llave Allen M4 T. M6 x 85 mm Bolt x 2 Pernos M6 x 85mm W.
- Page 10 Step 4 / PASO #4 Parts and tools required to complete step. M4 Allen Wrench Llave Allen M4 Inside Label Product Label W. M6x13 mm Barrel Nut x 2 AA. Footboard Bottom Rail x 1 Barandilla inferior de los pies Tuercas de Barril M6 x 13mm A.
- Page 11 Step 5 / PASO #5 Parts and tools required to complete step. H. End Top Panel x 2 Panel superior From Step 4 del Paso 4 Slide End Top Panel (Part H) into End Top Rail (Part A) and End Bottom Rail (Part C) Grooves as shown. Deslice el panel superior (pieza H) hacia la barandilla superior (pieza A) y ranuras de la barandilla inferior (pieza C), como se indica.
- Page 12 Step 6 / PASO #6 Parts and tools required to complete step. M4 Allen Wrench Llave Allen M4 T. M6 x 85 mm Bolt x 2 Pernos M6 x 85mm G. Right Footboard Post x W. M6x13 mm Barrel Nut x 2 From Step 5 Poste derecho de los pies1 Tuercas de Barril M6 x 13mm...
- Page 13 Step 7 / PASO #7 Parts and tools required to complete step. From Step 3 del Paso 3 U. M6 x 60 mm Bolt x 2 Pernos M6 x 45mm W. M6x13 mm Barrel Nut x 2 Tuercas de Barril M6 x 13mm L.
- Page 14 Step 8 / PASO #8 Parts and tools required to complete step. N. Cross Slat x 5 Listón cruzado From Step 7 del Paso 7 Insert (5) Cross Slats (Part N) as shown. Inserte (5) listones cruzados (pieza N), tal como se indica.
- Page 15 Step 9 / PASO #9 Parts and tools required to complete step. From Step 8 del Paso 8 U. M6 x 60 mm Bolt x 2 Pernos M6 x 45mm W. M6x13 mm Barrel Nut x 2 Tuercas de Barril M6 x 13mm K.
- Page 16 Step 10 / PASO #10 Parts and tools required to complete step. U. M6 x 60 mm Bolt x 2 From Step 6 Pernos M6 x 45mm del Paso 6 W. M6x13 mm Barrel Nut x 2 Tuercas de Barril M6 x 13mm M.
- Page 17 Step 11 / PASO #11 Parts and tools required to complete step. From Step 10 del Paso 10 N. Cross Slat x 5 Listón cruzado Insert (5) Cross Slats (Part N) as shown. Inserte (5) listones cruzados (pieza N), tal como se indica.
- Page 18 Step 12 / PASO #12 Parts and tools required to complete step. U. M6 x 60 mm Bolt x 2 Pernos M6 x 45mm M. Front Side Rail x 1 Barandilla lateral frontal W. M6x13 mm Barrel Nut x 2 Tuercas de Barril M6 x 13mm From Step 11 del Paso 11...
- Page 19 Step 13 / PASO #13 Parts and tools required to complete step. From Step 9 X. Φ8x40 mm Wood Dowel x 4 del Paso 9 Tarugos de Madera Φ8x40 mm P. Center Cross Slat x 1 From Step 12 Listón cruzado central del Paso 12 Inserte (1) listón cruzado central (pieza P) en Insert (1) Center Cross Slat (Part P) in the grooves...
- Page 20 Step 14 / PASO #14 Parts and tools required to complete step. U. M6 x 60 mm Bolt x 2 Pernos M6 x 45mm R. Center Leg x 2 Pata central W. M6x13 mm Barrel Nut x 2 Tuercas de Barril M6 x 13mm From Step 13 Y.
- Page 21 Step 15 / PASO #15 Parts and tools required to complete step. U. M6 x 60 mm Bolt x 4 Pernos M6 x 60mm S. Guard Rail x 2 V. M6 x 45 mm Bolt x 2 Barandilla de protección Pernos M6 x 45mm W.
- Page 22 Consumer Care: www.DeltaChildren.com Delta Children’s Products 114 West 26th Street New York, NY 10001 Tele.212-645-9033 KIDS “R” US™ is a trademark of Geoffrey, LLC, a subsidiary of Toys“R”Us, Inc. © 2012 Geoffrey, LLC...
Need help?
Do you have a question about the nextsteps and is the answer not in the manual?
Questions and answers