Table of Contents
Advertisement
Quick Links
Advertisement
Table of Contents

Related Manuals for Crown CR-48


Summary of Contents for Crown CR-48
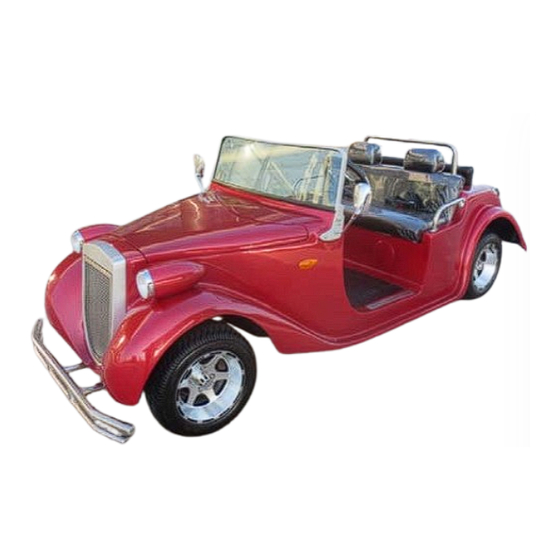
- Page 1 Owner’s Manual CROWN CARTS CR-48 ROADSTER SERIES Model No.: DN-4DS...
-
Page 2: Table Of Contents
TABLE OF CONTENTS 1. Main technique data … … …… … … … …… ………………4 2. Operation 2.1 Operation layout … … … … … … … … … … …………….5 2.2 Dashboard … … … … … … … … … … … … … … ……...6 2.3 Switch…... - Page 3 7.2 Battery Maintenance…… … … … … … …………… …..16 7.3Charging for the battery group… … … … … … … … …18 7.4 Brake system maintenance… …… ……………………….22 7.5 Steering system maintenance… ………………. ………….23 7.6 motor maintenance….. ….. ….. ….. ….. ….. ….. ….. ….. .23 7.7Lubrication maintenance …...
-
Page 4: Main Technique Data
Main technique data DN-4D Item Data Dimension(L×W×H) 3140*1235*1300(mm) Passengers Front/rear tread 940/990 wheelbase 2220(mm) 500kg) Weight include battery Total weight and capacity 750(kg) Turing Radius <3.5m Ground Clearance 150mm max speed 28km/h Climbing capacity ≤30% Brake Distance ≤5m motor 48V3KW battery group 48V170AH charger... -
Page 5: Operation Layout
2. Operation system 2.1 Operation layout DN-4D 1. Dashboard 2. Steering wheel 3. Combination switches 4. CD player 5. Brake pedal 6. Forward/backward switch 7. Accelerator pedal 8. Key switch 9. Cigarette lighter 10. Speaker 11. Charger socket... -
Page 6: Switch
2.2 Dashboard 1. Speed finger 2. speed level 3. front light 4. Left turning 5. Power display 6. Right turning 7. Brake trouble Notes: ① Battery low voltage alarm light----Red, When the voltage of battery is low, the indicator light on ②... - Page 7 2.3 Switch 2.3.1 Key switch : it is the normal parking position, only at this position you can take out the key。 AC :All the power of your car is connected when you turn the key to this position. !WARNING ! ●...
- Page 8 !WARNING ! ● Strictly prohibit shifting forward and backward directly when the vehicle is running, or it will damage the transmission system badly. 2.3.3 Turning switch Push the operation bar forward, right Signal light will be on; draw it back , the left signal light will be on.
-
Page 9: Pedal
2.4 Pedal Parking pedal Brake pedal Accelerator pedal 2.4.1 Parking Parking pedal: The parking pedal will hitch the limited plate when press the parking pedal, which makes parking function in operation. Release the parking when press the accelerator pedal. 2.4.2 Barking brake pedal :Depress the brake pedal and make it goes into effect. -
Page 10: Charging
WARNING ●Before you leaving the cart please keep the Forward/ Backward switch on neutral position, at the time make parking effective. The Forward/ Backward switch should be on neutral position when release the parking. ● Before run the parking should be released, or may seriously damage the brake system and related parts. -
Page 11: Cigarette Lighter
on).The 10 circle shows trouble (red indicator flicker) when the charging has problem. 2.6 Cigarette lighter The ignition power is DC12V。 3. User information 3.1 Driver qualification The driver should pass the professional train. 3.2 note Read the specification of vehicles, and use vehicles according to manufacturer recommendation. -
Page 12: Operation Procedure
recommended that no persons be allowed to operate the vehicle except those persons who posses a valid motor vehicle drivers license. ★ The driver should pay high attention to road condition, passerby and the other vehicles nearby. ★Don not forget to remind the passengers not to leave the seats and put any parts of their bodies out of the cart when the cart is moving. -
Page 13: Parking Notes
frequently or it will shorten the life of accelerator and controller system. ★ Don’t start, stop or turn in high speed suddenly. Better not to keep the steering in extremely position in avoid any accident. ★ Do not pass another vehicle traveling in the same direction at intersections, blind spots, or at other dangerous locations. -
Page 14: Before Initial Use
★ Please fix the wheels when parking the cart on the slope. ★ Keep the vehicle stored inside of the house. Don’t leave it outside in snowy or rainy days, or the rain water may get into the inside of the cart and leads to electric problems, and the frame may rust as well, which will shorten the life of the cart. -
Page 15: Run-In Period Regulations
★ Check if there any damage or wire tapping between the wiring and other easy-rubbing locations. Run-in period The lifespan, reliability and efficiency of the vehicles depend on the initial run-in period. The distance of run-in period is about 800 miles. All new vehicles needs to experience run- in period, during this time, the vehicle should run at low speed, not full-loaded and overloaded. -
Page 16: Maintenance
★ If the distance can’t cover 80% of the rated distance in the initial operation, please stop using the vehicle and report it to after-sale department to check out the reasons. 7. Maintenance 7.1 Guidance of maintenance ★ Turn off the electricity, take off the key and take on the hand brake. -
Page 17: Battery Maintenance
★ Check the battery cover as per the right methods. ★ Keep the clearness of vehicles, avoiding sparks, in order to easily check the loose and damaged parts. 7.2 Battery Maintenance The batteries for this vehicle are with high current, high capacity and long life time characteristic. - Page 18 or sparkle even hydrogen –explode. ▲ Note: Don’t over tighten terminals. ★ Charge the battery immediately after discharge, don’t leave it over night or charge it after 24 hours. Or it will affect the battery life. Charge the batteries that are in long storage or non-fully charged separately.
- Page 19 the range requirement. The detailed replacement way can be consulted with the supplier. Remove battery hold downs and cables. Lift out batteries with a commercially available lifting device. If the batteries have been cleaned and any acid in the battery rack area neutralized as recommended, no corrosion to the battery racks or surrounding area should be present.
-
Page 20: Charging For The Battery Group
battery terminals and battery wire terminals with a commercially available protective coating. Fig.19 Battery Connections 7.3 Charging for the Battery group ★ In order to guarantee batteries life, please use the recommended charger to charge the cart. ★ Keep the key switch on OFF position during charging. ★... - Page 21 power will be cut-off automatically to avoid over-charging. ▲ The charging should be monitored. Note ● Don’t take off the plug connected to the vehicle prior to the AC plug.
-
Page 22: Brake System Maintenance
7.4 The maintenance for the brake system 7.4.1 Adjust the gap between the brake drum and brake shoes Dial up the adjusting ratchet wheel of the brake drum until the wheel can not hand turn freely, then dial down the ratchet wheel 7-8 teeth, no dragging brake phenomenon when turn the brake drum. -
Page 23: Steering System Maintenance
7.5 Steering system maintenance ★ Check if there any damage for the dust cover of the tie-rod, any broken one will let the water in easily and damage the tie-rod and the steering system will not flexible . Pleas replace a new one immediately once worn one is found. - Page 24 ★ When changing, first twist down the oil plug to discharge all the gear oil, clean the oil plug and refit it, then inject the new gear oil from the injection hole. 7.8 Maintained items for User ▲ Normal maintain item ★high-grade maintain item Regular maintain list Maintain item...
- Page 25 check the nut on the steering ▲ rack’s spindle Check the tighten status ▲ Of steering rack and bracket Inspect and adjust front wheel’s ▲ in(mm) checking the tighten situation for ▲ front absorber and helix spring Check the height of electrolyte ▲...
-
Page 26: Troubleshooting
checking motor bearing ▲ lubricate other parts(use general ▲ oil) Troubleshooting The authorized qualification for repair, the requirement for application, safety and the maintenance requirement should be the same. Problem Possible reason Processing methods Operation procedure Please refer to the is wrong manual wiring connector is... - Page 27 moving slowly and result in the shutting off vehicle to decrease the at last stop when for the controller when temperature for the climbing temperature reaches controller. 75℃ Open the ignition The fuse is burned or the change the fuse and lock and the contact is not well repair the relay...
- Page 28 shaft is short of lubrication. The direction shaft pin or replace joints are damaged. the tie-rod is damaged replace Turning device has not Adjust or replace been adjusted well Turning excessively abased the direction shaft is Tighten it well loose. the power of battery is Charge the battery not enough...
-
Page 29: After-Sale Services
the motor’s bearing is replace damaged Brake drum is damaged replace The brake power is the brake shoes is too keep it clean not enough dirty. The above possible causes are just for your reference and not include all causes that result in above troubles. 9.After Sale –Service Marshell will provide the friendly service and technical support for the users. - Page 30 Periodicity monthly maintenance record Record VIN NO: Date Normal Abnormal Remarks If the pressure for the tire is normal? Is there loose for the screws and nuts of the tires? Check if the batteries liquid level is normal? Any loose for the battery , controller motor wirings? If the controller system is normal?
Need help?
Do you have a question about the CR-48 and is the answer not in the manual?
Questions and answers