
Subscribe to Our Youtube Channel
Summary of Contents for Sensocar SC-A1
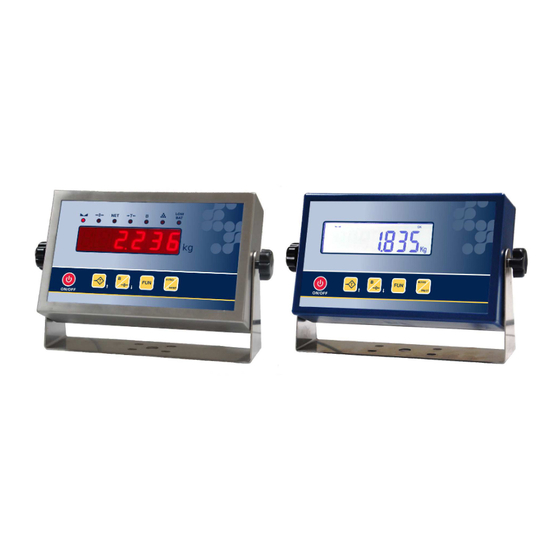
- Page 1 SC-A1 Manual User SC-A1 Advanced weighing equipment with ABS or INOX finish, high contrast LED or backlit LCD display and 5-key keyboard. 2017-02-14 COMPLETE USER MANUAL...
- Page 2 - 2 -...
- Page 3 Features Weight-Tare-Piece counter with possibility of options and add-ons. Keys exclusively for the classic weighing system, similar to previous units, in the line of SC1. Clear, intelligible weighing symbols for improved, more convenient reading of the data displayed. Printing of weight on the platform with large, notable size. Clock/Calendar fitted as standard.
-
Page 4: Table Of Contents
INDEX 1 DISPLAY AND KEYBOARD DESCRIPTION ................- 5 - 2 FUNCTIONS MENU ......................- 7 - 3 INSTRUCTIONS AND GENERAL OPERATION MODE ............- 9 - 3.1 Ordinary weighing (Net/gross tare, tare lock) ..............- 10 - 3.1.1 Quick zero: ......................... - 11 - 3.1.2 Stability .......................... -
Page 5: Display And Keyboard Description
1 DISPLAY AND KEYBOARD DESCRIPTION Piece Stability Zero Tare Tare lock Gross counter/Non- battery metrological ON / OFF: T: Tare B: Zero/Gross FUN: Function INTRO: On/Off (*) Enter/Print - 5 -... - Page 6 Environment Descriptions (standard functions) With the equipment power off, pressing the key turns the equipment on. Always ON/OFF With the equipment power on, long press the key (more than 2 seconds) turns the equipment off. Increase. Keeping it pressed down for a few seconds increases 10 by 10 when the lights scroll is completed.
-
Page 7: Functions Menu
2 FUNCTIONS MENU To enter: FUN+B (The optional ones are shaded) Option Description Actions Code of weighing in progress. -CODE- (6 alphanumeric characters). Label number. T/B to modify (0. .255 different labels). N.LABEL. (**) The 255 label is the total label. (It appears only when a labelling machine has been selected in the programming menu). - Page 8 At high speed, it will be made an elevated number of weight samples with which the weight is calculated and the average is displayed at the end of the process. LOW.BOW. (6 digits). Inferior limit of weight: -Weight values below this value are rejected. With AUTOMA=YES, waiting time T.INI is initiated when the weight exceeds this value.
-
Page 9: Instructions And General Operation Mode
3 INSTRUCTIONS AND GENERAL OPERATION MODE When starting up the unit, the ON/OFF key can be pressed to carry out an initial test, showing all the display's digits and pilots. The equipment identifier is then displayed: Then, if the equipment has dead weight (units with weight module or digital cell communication), the counter value is shown the number of times the unit's metrological (weight) parameters have been modified. -
Page 10: Ordinary Weighing (Net/Gross Tare, Tare Lock)
Both the text of the banner displayed when starting up the unit and the headers and footers of the tickets can be defined by the user using the SENSODATA program. Once complete, the unit again shows the measured weight (weight mode). 3.1 Ordinary weighing (Net/gross tare, tare lock) By defect, the unit will start up showing the weight on the platform: - 10 -... -
Page 11: Quick Zero
3.1.1 Quick zero: Whenever, without any weight on the platform, the unit shows a weight value other than zero. The zero should be manually corrected by pressing the B key. The machine can automatically reset at start-up enabling the INIT.Z option in the WEI.OPT. -
Page 12: Quick Tare
Most of the actions carried out by the display (tare, print ticket, start load Most of the actions carried out by the display (print ticket, start load or or discharge of dose, etc.) are associated with stable platform condition discharge, etc.) are associated with stable platform condition. (stable weight). -
Page 13: Gross Weight/Net Weight
3.1.4 Gross weight/net weight: With the unit tared, pressing the B key allows switching between net weight and gross weight on the display. To indicate that the weight shown on the display corresponds to gross, enable both the B pilot and the NET pilot: Tare is automatically disabled when all the weight is removed from the platform, deleting and re-displaying the gross weight: 3.1.5 Tare lock... -
Page 14: Manual Tare
The tare lock function is only available if initial zero option (INIT.Z) has been enabled in the WE.CTR programming submenu. 3.2 Manual tare The unit allows a tare value to be defined manually (*). To do this, press the FUN and T keys at the same time without leaving weight mode. -
Page 15: Extended Accumulation And Totalisation Of Weighings
3.3 Extended accumulation and totalisation of weighings The unit can account for weight (accumulate weighings), using the data to print a ticket per printer and/or label and/or send the weighing data through the serial communication ports (PORTS). The unit allows individual weighings (printing a ticket for each weighing) or multiple weighings (with several weighings in the same ticket and finalised with a total) to be done automatically (when detecting stable weight on the platform) or manually (by pressing the INTRO key when the unit displays stable weight). - Page 16 Start manual weighing by pressing the ENT key to display the message: The unit then briefly displays the number of weighings accumulated so far (in our case, the first): And the accumulated weight subtotal (which, in our case, since it is the first weighing, coincides with the weighing made) - 16 -...
- Page 17 Once weighing is complete, the unit returns to weight mode and displays the weight on the platform. If the unit is connected to a printer, and, for example, the code "100350" has been entered (using the -CODE- option in the functions menu), the following ticket will have been printed: ======================================== N.WEIGH.
-
Page 18: Automatic Accumulation
3.3.2 Automatic accumulation Automatic accumulations do not require the INTRO key to be pressed for weighing; the unit simply has to detect a stable weight value greater than the value defined as minimum weighing (*) after the last weighing has been discharged. Automatic weighing mode is selected using the AUTOAC option in the Functions menu. -
Page 19: Piece Counter
If the unit is connected to a printer, the ticket will finish, as in the following example: ======================================== N.WEIGH. CODE TARE kg NET kg ======================================== 100350 1.538 0.216 100350 0.000 0.252 100350 0.000 0.083 100350 0.252 0.081 ======================================== TOTAL WEIGHINGS TOTAL WEIGHT kg ======================================== 0.632... - Page 20 When leaving the functions menu, the unit returns to weight mode, displaying the measured weight. From this moment on, the unit can switch between weight and piece counter modes by pressing the FUN key. The unit enables the pilot to indicate that the value shown on screen corresponds to a number of pieces and not to a weight value.
- Page 21 this is done by pressing the FUN key until the unit enters edit mode and the display flashes At this point the number of pieces corresponding to the weighed pieces sample is entered. To do this, use the T key to increase the value of the flashing digit, the B key to change digit, the FUN key to cancel editing and leave without saving, and the INTRO key to validate and save the piece value entered.
-
Page 22: Accumulation And Totalisation
3.4.1 Accumulation and totalisation Accumulation and totalisation in piece counter mode is carried out in the same way as in ordinary weighing: accumulate by pressing INTRO and totalise using FUN+INT. The ticket resulting from the operations with pieces has the following format: ======================================== P.Unit: 0.0013... -
Page 23: Units With Battery
3.5 Units with Battery Whenever the unit is battery-operated and this is below the correct threshold value, the corresponding LED will come on and the screen will show: Automatically, the display illumination will be reduced to the minimum and configured to go off after 5 minutes of non-activity. - Page 24 This ticket number can be modified by pressing T key to increase the value of the flashing digit, B key to change digit, FUN key to abort and exit the option without validating, and INTRO key to validate the number displayed. Once the ticket number has been introduced, the equipment searches on the DSD memory the relative data to this ticket.
- Page 25 and the total accumulated weight. By pressing T and B keys we will be able to move through the various weighings. First of all the number of weighing is displayed and afterwards the recorded net weight: - 25 -...
- Page 26 While the total or various recorded values are displayed, by pressing INTRO key the printing of the ticket copy is initiated at the same time that the flashing message “Print” is displayed to indicate that a printing is being made. Finally, FUN key exits the data visualization mode and enables to edit a new Ticket number.
- Page 27 *Electromagnetic susceptibility has been certified in tests conducted with field strength of 10 V/m, in accordance with new regulations. - 27 -...
Need help?
Do you have a question about the SC-A1 and is the answer not in the manual?
Questions and answers