
Related Manuals for Groov-e GV-PS933

Summary of Contents for Groov-e GV-PS933
- Page 1 GV-PS933 ULTIMATE BOOMBOX PORTABLE CD, CASSETTE, USB PLAYER WITH DAB/FM RADIO & BLUETOOTH. INSTRUCTION MANUAL ...
- Page 2 English CAUTION RISK OF ELECTRIC SHOCK DO NOT OPEN CAUTION: TO REDUCE THE RISK OF ELECTRIC SHOCK The lightning flash and The exclamation point DO NOT REMOVE COVER (OR BACK). NO USER arrow head within the within the triangle is a SERVICIABLE PARTS INSIDE. REFER SERVICING TO triangle is a warning sign warning sign alerting you QUALIFIED SERVICE PERSONNEL. alerting you of dangerous of important instructions voltage inside the product accompanying the product IMPORTANT SAFETY INSTRUCTIONS: 1. Please read the instructions. All guidelines must be read before starting the device. 2. Keep the instructions for future use. 3. The device must not be used near water and avoid contact with moisture. 4. Make sure no liquid is spilled on the device and device openings. 5. Move the device carefully to avoid knocks. 6. Do not block the device outputs. 7. Do not place the device near heat sources (e.g. radiator). Do not expose it to the Sun. 8.
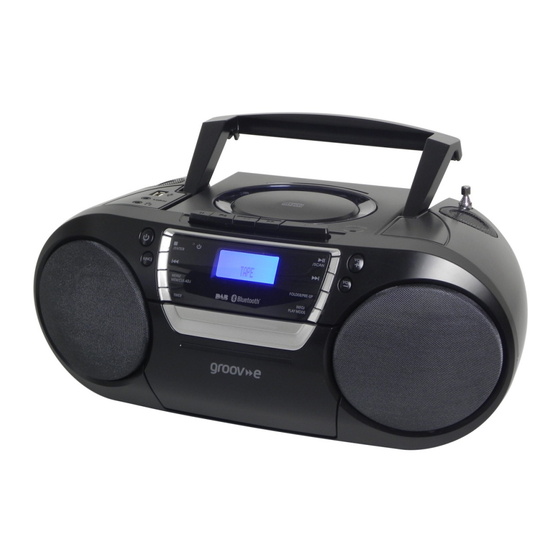
- Page 3 LOCATION OF CONTROL 1) USB socket 2) Aux in socket 3) 3.5mm headphone jack 4) Cassette buttons 5) Handle 6) FM antenna 7) CD door open/close 8) LCD display 9) Function button 10) Stop /Enter button 11) Skip/Tuning down button 12) Menu/Mem/clock‐adjust button 13) Timer button 14) Volume up/down button 15) Cassette door 16) Standby LED 17) On/Off button 18) Play/pause /Scan button ...
- Page 4 Setting the clock Set the unit to standby mode. Press and hold the “Menu/Mem/clk‐adj” button (12), the hour digit will flash on LCD display (8) Press the Skip down (11) or Skip up (19) button to set the correct hour. Press the “Menu/Mem/clk‐adj” button (12) to store the hour then the minute digit will flash. Press the Skip down (11) or Skip up (19) button to set the correct minutes. Press “Menu/Mem/Menu/clk‐adj” button (12) to store the correct hour. The preset time will be reset completely if disconnecting the main power supply. You are recommended to switch the system into standby mode for convenient use. The clock will synchronize to RDS/DAB clock once receiving the RDS/DAB signal if the clock was not set in advance. Listening to radio Operation Manual tuning Turn on the unit by On/Off button (17) and then press the Function button (9) until it reaches the “FM” mode. Press the Skip down (11) or Skip up (19) button to tune your desired station. Adjust volume up/down button (14) for the desired volume level. ...
- Page 5 This apparatus provides three dynamic range modes to match different program types in DAB mode. In DAB mode, press “Menu/Mem/clk‐adj” button (12) to enter the “Menu”, then press Skip down (11) or Skip up (19) button to select “DRC”. Press “Stop/Enter” button (10) to enter the “DRC” setting, then press Skip down (11) or Skip up (19) button to select “DRC high/low/off” mode. Then press “Stop/Enter” button (10) to confirm the setting. In any state press “Menu/Mem/clk‐adj” button (12) to quit the setting mode Preset stations You can store up to 20 radio stations in the memory (10‐FM/10‐DAB). Set to FM/DAB mode Turn to the desired radio station by “manual” or “auto” tuning method. Press and hold the “Mem/clk‐adj” button (12) to enable memory state. Press Skip down (11) or Skip up (19) button to select the desired station memory for storage. Press “Stop/Enter” button (10) to confirm the setting. Repeat step 2 to 5 to store other stations. Recall preset stations Set to FM/DAB mode Press Pre‐up button (20) to recall the stored station. Press Skip down (11) or Skip up (19) button to select the desired recall station. Press “Stop/Enter” button (10) again to confirm the recall station. DAB/FM reset: If you would like to erase all the FM/DAB staions stored. ...
- Page 6 Press the “Play mode” button (21) during playback to select repeat and random functions, a single track, single folder (MP3 only) or all the tracks can be played in different modes as follows: ‐ For CD (2) Repeat 1 Repeat all track Random Off mode Indicator Play mode on LCD display Repeat track Rep 1 Repeat all Rep A Random Rand Off mode ‐‐‐‐‐‐‐‐‐‐‐‐‐ For MP3 disc/file Repeat 1 Repeat 1 folder Repeat all tracks Random Off mode Indicator Play mode on LCD display Repeat single track Rep 1 Repeat single folder Rep F Repeat all tracks Rep A Random ...
- Page 7 If the Aux-in jack is not connected, the system will switch to BT mode automatically and “BT “with the flashing of “Pairing” will be shown on the LCD display (8). It means the Bluetooth is in searching mode. Switch on theBluetooth feature of your Bluetooth device (such as mobile phone) and select “GV-PS933” Bluetooth equipment to connect.
- Page 8 BY RECYCLING, MATERIAL RECYCLING OR OTHER FORMS OF RE‐UTILIZATION OF OLD APPLIANCES, YOU ARE MAKING AN IMPORTANT CONTRIBUTION TO PROTECT OUR ENVIRONMENT.PLEASE CONTACT YOUR LOCAL COUNCIL FOR THE AUTHORIZED DISPOSAL LOCATION AND RECYCLING FACILITIES. Unit J, Braintree Road Braintree Industrial Estate Ruislip Middlesex HA4 0EJ, UK www.groov-e.co.uk...
Need help?
Do you have a question about the GV-PS933 and is the answer not in the manual?
Questions and answers
How do I open cassette not working