
Summary of Contents for Telos Alliance VX Prime+
- Page 1 The Whole-Plant Broadcast Talkshow System USER’S MANUAL Version 1.4 April 2019 TelosAlliance.com...
- Page 2 | TELOS VX ENTERPRISE / PRIME+ MANUAL User Warnings and Cautions The installation and service instructions in this manual are for use by qualified personnel only. To avoid electric shock, do not perform any servicing other than that contained in the operating instructions unless you are qualified to do so.
- Page 3 The Telos Alliance which are mentioned in this manual or accompanying material are informational only. The Telos Alliance makes no endorsement of any particular product for any purpose, nor claims any responsibility for operation or accuracy. We reserve the right to make improvements or changes in the products described in this manual which may affect the product specifications, or to revise the manual without notice.
-
Page 4: We Support You
SERVICE You must contact Telos Alliance before returning any equipment for factory service. We will need your unit’s serial number, located on the back of the unit. We will issue a return authorization number, which must be written on the exterior of your shipping container. Please do not include cables or accessories un- less specifically requested by the Technical Support Engineer. -
Page 5: Table Of Contents
TABLE OF CONTENTS | Table of Contents User Warnings and Cautions We support you… Warranty Creating the Most Exciting Audio Experiences About this Manual Welcome The VX Enterprise and VX Prime+ Engines Overview Features The VSet Phone Controllers VSet Desktop Controller Fusion and iQ Console Controllers VSet Console Controller VX call screening software applications... - Page 6 | TABLE OF CONTENTS SIP and Network Address Translation (NAT) Regarding Codecs and SIP Studios Menu Individual Studio Configuration Pages Show Configuration Individual Show Configuration Pages Call Audio Processing Page Assigning Sounds & Tones – The Tones page On Air DTMF Configuration Ringtone Configuration SIP and DTMF Information Pages...
- Page 7 TABLE OF CONTENTS | Line Button Columns Hold Button Drop button Lock Next Button and Function Block All Numeric Keypad and GO Button Re-dial Function Fader Assign Firmware Upgrades Take it Easy Some Common Questions Appendix Basic Studio Setup with xNode I/O Physical GPIO Reference GPIO Port Wiring Setting up a Mute Ringer GPI...
- Page 8 Telephony Discussion and VoIP news sites SIP Information and suggested reading Books Specifications General Analog Inputs (with Telos Alliance xNode) Analog Outputs (with Telos Alliance xNode) Digital Audio Inputs and Outputs Frequency Response Dynamic Range Total Harmonic Distortion + Noise...
- Page 9 Linear Acoustic®, 25-Seven Systems®, and Minnetonka Audio®. We’re here to help you make your work truly shine. We hope that you enjoy your Telos Alliance product for many years to come and won’t hesitate to let us know if we can help in any way.
-
Page 10: About This Manual
About this Manual This little book we call “The Read Guy”. It means that we think that what he’s pointing at is important but might be easily missed. This is very similar to what was done in the old Bell System Practices books. -
Page 11: Welcome
WELCOME CHAPTER 1 | Welcome The VX is a telephone system designed for studio use by broadcasters. It’s different from your office phones because broadcast talent and producers have different needs than most other typical telephone users. We designed it to do exactly what you need in the studio. -
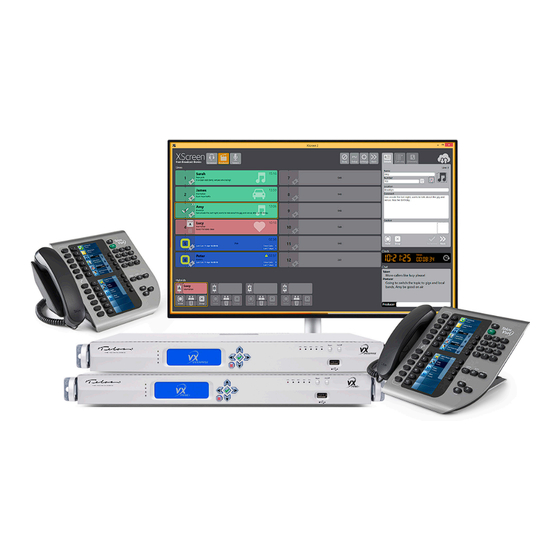
Page 12: The Vx Enterprise And Vx Prime+ Engines
WELCOME CHAPTER 1 | The VX Enterprise and VX Prime+ Engines Overview Telos VX® is the world’s first VoIP (Voice over IP) talkshow system — a broadcast phone system that’s so powerful, it can run all the on-air phones for your entire plant. Telos VX Enterprise™, with built-in support for AES67, is the next evolution of Telos VX VoIP phone system in a powerful new 1RU hardware unit. -
Page 13: The Vset Phone Controllers
♦ into Axia AoIP consoles and networks. Connect VX Enterprise to any radio console or other broadcast equipment using available Telos Alliance AES/EBU, ♦ Mixed Signal, and GPIO xNodes. Audio interfaces feature 48 kHz sampling rate and studio-grade 24-bit A/D converters with 256x oversampling. -
Page 14: Vset Desktop Controller
WELCOME CHAPTER 1 | VSet Desktop Controller The Telos VSet Desktop Controller with visual line-status indicators provides selection and control of up to 12 callers. Includes standard controls to allow fast, error-free talent operation, including Take, Drop, Hold, and Busy keys. Telos exclusive “Next Call” key speeds workflow for producers, and talent;... -
Page 15: Vset Console Controller
WELCOME CHAPTER 1 | VSet Console Controller (Custom Metalwork required) The VSet Console controller is an electronics package intended to be integrated into Audio consoles or turrets, using metalwork provided by the console manufacturer or integrator. It is an attractive and small Power over Ethernet (PoE) device with durable buttons and displays to allow Telos VX control from the board operators position. -
Page 16: The Livewire+ Aoip Network
WELCOME CHAPTER 1 | Thus, depending on the software option chosen, the one Ethernet cable is used for: ♦ Telephone audio for the softphone, via Livewire. ♦ Livewire audio for the recording of calls. ♦ Transfer of recorded call files from the producer to the studio. ♦... -
Page 17: Installation And Configuration
INSTALLATION AND CONFIGURATION CHAPTER 2 | Installation and Configuration The diagram shows a generic installation that could be used in a typical studio. Two Ethernet ports are employed on the VX engine to isolate the two networks that are present in this example. Livewire+ audio network is handled by the LAN port, while SIP and/or Internet provided network is handled by the WAN port. -
Page 18: What's Today's Equivalent Of A 'Line
INSTALLATION AND CONFIGURATION CHAPTER 2 | We’ve had the best results with full-up IP PBXs, like Asterisk and its derivatives, Cisco, Mitel, Avaya, and many others. Some PBXs do have limitations in the number of “Third Party SIP devices” that they will support and there may be also be a variety of other concerns, so it’s a good idea to arrange a call with your dealer and a Telos Applications Engineer before making any major decisions. - Page 19 INSTALLATION AND CONFIGURATION CHAPTER 2 | SIP Extensions, it’s important to assert that the VX is not a PBX. It is a collection of generic SIP endpoints that will need to register to separate extensions off a SIP PBX. In some cases, the PBX is local and in others, the PBX is hosted by the provider. In any case, the VX just registers to extensions.
- Page 20 INSTALLATION AND CONFIGURATION CHAPTER 2 | Here’s how we’d do it assuming ordinary levels of traffic for the typical music radio station: Example Option 1 – Telephone company provided (typical) From Telco or a CLEC We order: 1 or 2 T1’s carrying Primary Rate Interfaces (each carries 23 bearer channels and a D or Data channel that is used for call ♦...
- Page 21 INSTALLATION AND CONFIGURATION CHAPTER 2 | Example Option 2: Provider provisioned as generic SIP endpoints From the Provider we order: A circuit to carry our phone traffic. This could be anything from a T1 to a 10 mbps fiber circuit. This is a dedicated circuit ♦...
- Page 22 INSTALLATION AND CONFIGURATION CHAPTER 2 | Example Option 3: Service delivered over the Public Internet From the Internet Service Provider (ISP) we order a circuit to be delivered on Ethernet to be used to telephony only. ♦ Bandwidth, jitter, and a Service Level agreement should be taken into account. From the Internet Telephone Service Provider (ITSP) we need to order a trunk with an adequate number of channels and ♦...
-
Page 23: Livewire+ Is Used For Audio I/O
INSTALLATION AND CONFIGURATION CHAPTER 2 | Livewire+ is used for audio I/O The Telos VX Enterprise and VX Prime+ accepts and generates many audio channels. Using Livewire+, it’s possible to make them all available through a single simple Ethernet interface. A single Ethernet RJ-45 cable connects dozens of bi-directional audio channels and GPIO command and status indications. -
Page 24: Step-By-Step Summary
INSTALLATION AND CONFIGURATION CHAPTER 2 | Step-By-Step Summary There is a lot of information in the pages that follow. Here’s a high level and simplified view of what you need to do to get your VX system up and running: 1. - Page 25 INSTALLATION AND CONFIGURATION CHAPTER 2 | Installation Since there are a variety of rack units on the market, assembly procedures might differ slightly. You should also refer to the installation instructions that came with the rack you are using. The glide-rails included with the VX Enterprise and Prime Plus will fit a rack between 26”...
- Page 26 INSTALLATION AND CONFIGURATION CHAPTER 2 | 1. Identify the left and right outer glide rails by examining the ends, which bend outward. Match the left front outer glide rail with the left rear outer glide rail and the same for the right rails. 2.
-
Page 27: Rear Panel Connections
INSTALLATION AND CONFIGURATION CHAPTER 2 | Rear Panel Connections 1. Power Inputs: These are dual, hot-swappable, 400W OEM supplies that will take voltages from 100VAC to 240VAC at both 50 and 60 cycles per second. To use the system with one supply, remove the unused one from the chassis using the lever below the IEC socket. - Page 28 INSTALLATION AND CONFIGURATION CHAPTER 2 | Once you get the VX Engine on a network, you’ll want to finish configuring the system using the Web interface. This is done using a browser on the same network as the VX’s LAN port using the IP address configured at the front panel.
- Page 29 INSTALLATION AND CONFIGURATION CHAPTER 2 | An appeal of the Ethernet/IP approach to building studios is that you can make them as simple or elaborate as your needs require. The components of a VX system: the Engine, VSet phones and controllers, console controllers, and PCs are networked together using standard, off-the-shelf Ethernet switches properly configured for Livewire or AES67.
-
Page 30: Vset Installation
INSTALLATION AND CONFIGURATION CHAPTER 2 | VSet Installation VSets are normally connected to the Livewire/LAN Engine port via the Ethernet switch linked to this port. There are separate manuals covering the VSets that have more information in them than this manual. You can find them on our website here: https://www.telosalliance.com/Telos/Telos-VSet The VSet is powered over the Ethernet connection. -
Page 31: Studios And Shows Defined
INSTALLATION AND CONFIGURATION CHAPTER 2 | Selectable lines use an operation style like traditional Telos systems, where there was a line selector before the hybrid or hybrids. Most operators are used to the operating paradigm that the old “1A2” key phones made so prevalent, where you have a column of buttons and pressing one takes a line and drops the one that was active before. -
Page 32: Main Configuration Page
INSTALLATION AND CONFIGURATION CHAPTER 2 | Main Configuration Page This is the page you will see upon initial connection to the engines Web GUI. Select the pages you want by clicking on the menu at the left side of the page. If this is a new installation, start with the Main page, then move to the SIP page, the Studios page, and then on to the Shows page. - Page 33 INSTALLATION AND CONFIGURATION CHAPTER 2 | WAN Services chooses which services are available on the WAN port. HTTP is for web access, LWCP is for controllers, and SSH is shell access to the Linux OS in the Engine. SIP/VoIP are always enabled on the WAN port when the port is enabled. The port numbers displayed in the fields are the defaults for the system and can be changed to customized values depending on the needs of your WAN network.
-
Page 34: Sip Configuration Page
INSTALLATION AND CONFIGURATION CHAPTER 2 | Network TCP and UDP ports used by the system Active ports on WAN interface by default are: ♦ 5004 - DSP Engine ♦ 40000-41000 handset audio for Vsets and call screening software ♦ 62000 through 62513 - RTP ♦... -
Page 35: Sip Server Configuration
INSTALLATION AND CONFIGURATION CHAPTER 2 | SIP Server Configuration When a server is selected from the SIP page’s list, you will be taken to that SIP server’s configuration page. Please note that to change the server settings you have to unload any shows referencing the server. It is not possible to change them while the server is in active use. - Page 36 INSTALLATION AND CONFIGURATION CHAPTER 2 | If extensions and shows referencing them are already configured in your VX, your SIP Server page will look like the one pictured here with the extensions and shows listed. Otherwise, you will be greeted with the Add New fields. The information entered into these fields is determined by the configuration of the SIP server or PBX.
-
Page 37: Sip And Network Address Translation (Nat)
INSTALLATION AND CONFIGURATION CHAPTER 2 | SIP and Network Address Translation (NAT) As SIP messages list IP addresses and ports used to transmit audio (RTP), it doesn’t work well if the client is in a private LAN but needs to communicate with a SIP provider outside of the LAN. As messages pass through the router, it translates addresses in IP headers, but not the SIP message itself, giving the provider wrong connection info. -
Page 38: Studios Menu
INSTALLATION AND CONFIGURATION CHAPTER 2 | ♦ RFC 2671 MD5 digest authentication is supported. ♦ RFC 2833 DTMFs must be supported. ♦ Supports SRV address lookups. ♦ Has basic NAT support ♦ Unlike some other SIP devices, the VX supports non-numeric “extensions”. This is sometimes used by hosted PBX services. - Page 39 INSTALLATION AND CONFIGURATION CHAPTER 2 | STUDIO NAME allows you to name the studio. This is the name that will show up in the lists available in the VSets, Consoles and VX show profiles. AUTO ANSWER FIXED LINES enables auto answer for fixed lines in the studio. When this is enabled, fixed lines will be automagically placed on its corresponding hybrid after the first ring.
- Page 40 INSTALLATION AND CONFIGURATION CHAPTER 2 | Acoustic Echo Canceller Each studio has an ACOUSTIC ECHO CANCELLER available. The two inputs and the output are assigned to Livewire channels on this page. The output of the AEC is labeled Backfeed because the output of the AEC is what you usually would feed back to phones.
- Page 41 INSTALLATION AND CONFIGURATION CHAPTER 2 | GPIO VX supports GPIO (General Purpose Input/Output) control. It’s a useful way to control functions in the VX or to get helpful indications of VX conditions or modes. The Livewire channel assignment for this is done on this page. Electrical connections are made via Livewire GPIO xNodes.
-
Page 42: Show Configuration
INSTALLATION AND CONFIGURATION CHAPTER 2 | Show Configuration In the VX, a Show is a collection of lines that are available for a Studio. A Studio can log out of one Show and log into another bringing up a completely different (or the exact same) set of lines on the VSets and other controllers. -
Page 43: Call Audio Processing Page
INSTALLATION AND CONFIGURATION CHAPTER 2 | The SIP EXTENSION is like an extension number in a PBX system, with the difference that it is generally not required to be a number, though most often it is. It maps incoming calls to the line positions on the controllers. Together with SERVER it makes the SIP URI (address) identifying the line. -
Page 44: Assigning Sounds & Tones - The Tones Page
INSTALLATION AND CONFIGURATION CHAPTER 2 | Noise Gate. This feature will attempt to remove background caller noise by gating (turning off) the output when the audio drops below a certain threshold. We recommend leaving this setting off because it could mistake a soft-spoken caller for noise and will gate unexpectedly. -
Page 45: On Air Dtmf Configuration
INSTALLATION AND CONFIGURATION CHAPTER 2 | The files you wish to upload must be available on the PC that hosts the Web browser you are using to access the VX. Your tones can be any length, but should normally be kept short to conserve memory (and to avoid annoying listeners…). You do have the option to revert back to the default tones if you later decide to go with the default sounds. -
Page 46: Sip And Dtmf
INSTALLATION AND CONFIGURATION CHAPTER 2 | SIP and DTMF The VX uses standard SIP techniques for dialing. A SIP call setup message containing the number is sent to the IP network. The gateway to the PSTN generates the DTMF (Dual Tone Multi-Frequency) audio signal that the PSTN uses to direct the call. The VX generates DTMF audio just as sound effects really. -
Page 47: Calls Information Page
INSTALLATION AND CONFIGURATION CHAPTER 2 | Calls Information Page This page informs us of the calls that are currently active. The information provided includes local and remote URIs, which studio has the call active, what line position on the Studio’s VSet the call is on, what codec it’s using, etc. Devices Information Page The Devices page shows us what devices (VSet’s, Consoles, PCs, and other controllers) are currently connected to the VSet. -
Page 48: System Logs Page
INSTALLATION AND CONFIGURATION CHAPTER 2 | System Logs Page The VX’s logging capability is a powerful tool to track down problems –even those due to operator error – we do recognize that operator error is rare and nearly non-existent. The logger in the VX Enterprise and VX Prime+ is different from the older hardware platforms in that the logs are no longer stored in only in RAM, it writes it to internal storage and saves them there. -
Page 49: Backing Up And Restoring Engine Configuration
INSTALLATION AND CONFIGURATION CHAPTER 2 | Backing up and Restoring Engine Configuration Click Backup Settings to download a backup configuration file. The backup file for configuration settings is stored on your local machine or on a removable drive attached to it. To load a backup configuration, click the Browse button under the Restore section and navigate to the backup file on your computer. -
Page 50: Operation
OPERATION CHAPTER 3 | Operation VSet Operation There are full sets of manuals for the VSet series of controllers available on our website. This section is meant to be a quick, “Schoolhouse Rock” version of the VSet operation. If you would like more information about VSet operation and setup, refer to the product manual for the controller you have. -
Page 51: Line Name
OPERATION CHAPTER 3 | Line name The first text line. This is defined in configuration using the VX Engine’s control center web GUI. Caller ID Caller ID will be displayed on incoming calls if it is available. Outgoing calls will show the number dialed. The green arrow to the left of the text points left for incoming or right for outgoing. -
Page 52: Line Button Columns
OPERATION CHAPTER 3 | On-air On-air and locked On handset Hold Ready Hold (Screened Hold) Used Elsewhere (in another studio) Line is blocked Line Button Columns Each line has 2 associated buttons to the left of the LCD. Pressing a left column line button puts a held or ringing caller on the handset. Press the right column button to put a held or ringing line on air, dropping any other unlocked calls. -
Page 53: Hold Button
OPERATION CHAPTER 3 | Tip: You can re-order the next priority queue at any time. Put lines in Ready Hold - even those already on Ready Hold - in reverse order from the order you wish to air them. First, Screen hold the call to be aired last, then the call to be aired second to last and so on. -
Page 54: Next Button And Function
OPERATION CHAPTER 3 | Next Button and Function The Talent next priority is: ♦ longest waiting ready hold ♦ longest waiting hold ♦ longest ringing-in The producer can manually override these and assign priority as desired. The producer mode next priority is: ♦... -
Page 55: Firmware Upgrades
OPERATION CHAPTER 3 | Firmware Upgrades You can upgrade firmware for your VSet by using a web browser and downloading the firmware from Telos. Support may give you a link in email, or you can find the latest versions at the Telos website. After downloading the firmware image, point your web browser to the IP address of the VSet that you wish to upgrade (username is “user”... -
Page 56: Appendix
APPENDIX CHAPTER 4 | Appendix Basic Studio Setup with xNode I/O In cases where VX is installed into analog or AES/EBU patch-fields, audio xNodes will be needed to get audio into the system as well as GPIO xNodes for signaling. In this example, we will set up 2 caller faders with 2 separate Mix Minus inputs. We will be using a Multi-Purpose or Mixed-Signal xNode which contains I/O for Analog, AES/EBU, and GPIO. - Page 57 APPENDIX CHAPTER 4 | We’ll come back and set up Destinations in a moment. Next thing to do is set up a studio in VX. See the Studio section of this manual where we discuss the individual studio configuration pages. For this example, we have Studio A with 2 selectable channels configured: In the Selectable Channel section of the VX Studio, there is an ADVANCED RECEIVE column that will need to be activated and used for this setup.
-
Page 58: Physical Gpio Reference
APPENDIX CHAPTER 4 | Finally, return to the VX Studio page and configure the GPIO Actions and Indications as outlined in the Individual Studio Configuration section of this manual. Notes on LW Channel number assignment: In this example, the IP address of the VX Engine is 192.168.2.158 and the xNode is 192.168.2.215. We have taken the last byte of the IP addresses and made it the first three digits in the channel numbers used. -
Page 59: Gpio Port Wiring
APPENDIX CHAPTER 4 | Once you’ve set up the GPIO section in the Studio Profile, it’s time to configure the GPIO port at the xNode. A GPIO xNode, Mixed Signal xNode, QoR Engine, PowerStation Main, or PowerStation Aux can be used. The setup is the pretty much the same in all of these In the GPIO configuration page, or the GPIO section of the SIMPLE SETUP page in the Mixed Signal xNode’s web user interface, enter the channel number from the VX’s Studio profile into the Channel field of the desired port. -
Page 60: Setting Up A Ringing Indication Gpo
APPENDIX CHAPTER 4 | We will select GPIO port number 1 and will wire the N.O. contacts from a mechanical or solid state relay to it in this manner: (in this example, we are wiring to input pin #2 which is pin 12 on the connector) In the Studio page, add a new “Mute Ringer”... -
Page 61: Single Mix Minus Routing With Xnode
APPENDIX CHAPTER 4 | Once the port has been wired, we can assign it to the VX Indications as below: Once this is complete and the studio is logged back into a show, lines ringing on the VSet will activate this output. In both of these, notice how the output and input commons are wired. - Page 62 APPENDIX CHAPTER 4 | Then we’ll go to the SOURCES page and set up our Inputs and “New Mix Minus” channels. For this we’ll setup Line 1-L as the main Mix Minus input and Line 1-R as the Program on Hold input for the studio. Then we will setup SRC 7 and SRC 8 to be our “New Mix Minus”...
- Page 63 APPENDIX CHAPTER 4 | If you’re savvy, a much faster way to clear the matrix from 8x8 mono mode is to copy and paste the following text into a terminal logged in (raw) on port 93: (IN ALL CAPS) LOGIN MIX 2 17:CLEAR MIX 4 19:CLEAR MIX 6 21:CLEAR...
- Page 64 APPENDIX CHAPTER 4 | Study the matrix and you’ll see how the mix is constructed for the mix minuses. You’ll also notice that the new mix minuses are not routed to a physical output. We are just doing this to create new Livewire streams to drive the input of the VX. More on this after the following table.
-
Page 65: Operation With Fusion Consoles
APPENDIX CHAPTER 4 | A setup like this can be repeated using the remaining available sources and destinations. Keep in mind that routing mix minuses this way uses up routes in the xNode so you will have less I/O for each route that is made internally. In this setup Output Line 1’s left and right jacks will have the output of Hybrids 1 and 2 respectively. -
Page 66: Setting It Up
APPENDIX CHAPTER 4 | Setting it up If you have a 2-Fader Phone Control Module, first thing to do is to set up the Fusion Show. If you don’t have a 2-fader/phone module, skip this. The Fusion manual shows you how to do this, so we’ll be quick. Go to the PHONE page of the Fusion Show profile. -
Page 67: Ringer Mute
APPENDIX CHAPTER 4 | Ringer Mute In the previous topic, we discussed GPIO and how physical ports don’t need to be wired when a Livewire console is being used. In general, the ringer mute input in the VX Studio is going to get the same closure as the on-air tally light system. Just in case this isn’t set up yet, here’s how. -
Page 68: Ringer Mute
APPENDIX CHAPTER 4 | Remember that the show profile needs to be set up in the QOR/iQx and that the show must be reloaded on the console to see changes. Ringer Mute In the xNode GPIO reference section, we talked about how physical GPIO doesn’t need to be wired up if a Livewire console is being used. - Page 69 APPENDIX CHAPTER 4 | Let’s imagine a 2-studio facility with 3 request lines per studio and one fixed line per studio to use as a warm line. This gives us a total of 8 line positions for our VSet. Before we can create a show with the collection of these lines, we need to create a new Studio with no channels assigned;...
- Page 70 APPENDIX CHAPTER 4 | Same story over here, except that the request lines use extension ‘5002’ and the warm line is ‘5004,’ which is also removed from the busy/block all cue. We make note of all this, and go to the Configuration Shows page and begin creating a new show. Again, this can all be done during normal operation since none of the things we are doing require logging a Studio out of a Show.
-
Page 71: Creating An Asterisk Extension For Vx
APPENDIX CHAPTER 4 | Please note that this screener VSet and the actual Studio’s VSet have independent Block-All cues now. This means if the dummy studio has the lines blocked, the actual Studios won’t be able to release them. This could either be a good thing or a really bad thing. So if you don’t want the screener to be able to activate Block-All for all the request lines in the entire facility, uncheck all the boxes under “Busy All”... -
Page 72: Extension Options
APPENDIX CHAPTER 4 | This will bring you to the ADD AN EXTENSION page. In the dropdown box next to DEVICE, select Generic SIP device and click Submit. Clicking SUBMIT in the ADD AN EXTENSION window will take you to the ADD SIP EXTENSION page. USER EXTENSION: Enter the extension number for the system. -
Page 73: Did's
APPENDIX CHAPTER 4 | OUTBOUND CID: Enter the phone number you wish to be displayed on the caller ID equipment at the far end when an outgoing call is made from this extension. We’re using 555-5555 for this example, but you can use either your request line number or your business office number;... -
Page 74: Configuring Vx To Talk To Asterisk
APPENDIX CHAPTER 4 | Configuring VX to talk to Asterisk This is deep into the appendix so by this point, we presume that you have the VX installed with the WAN port on the same network as the Asterisk server. If you haven’t read that section of this manual, now is a good time. For understanding’s sake, we will repeat some of what we discussed there: First, go to the SIP page in the VX’s UI. -
Page 75: Asterisk - Rebooting And Accessing
APPENDIX CHAPTER 4 | Asterisk – Rebooting and Accessing Normally, a PBX should never need to be rebooted. But we all know that computers simply need to be rebooted from time to time. There are multiple theories about right and wrong ways to reboot a machine, so we thought we’d talk about it. If you have an Asterisk PBX built by Announcement Technologies, this note applies to you. - Page 76 APPENDIX CHAPTER 4 | These supplies can be changed without powering down the system: 1. Press the release button on the failed power supply. 2. Use the handle to gently slide the power supply out the back of the chassis. 3.
-
Page 77: Resources And Tools
APPENDIX CHAPTER 4 | Resources and Tools Internet Speed tests www.speakeasy.net www.speedtest.net/ Internet VOIP Jitter Test myspeed.visualware.com/indexvoip.php (free) Packet “sniffer” www.wireshark.org/download.html (free) VoIP Soft phone” SIP PC clients X-Lite “Soft phone” SIP PC client (free) www.counterpath.com/x-lite.html Ekiga, free open source SoftPhone - ekiga.org/ Linphone open source VOIP phone - www.linphone.org/ Open Source PBX Distributions www.digium.com... -
Page 78: Voip/Sip Equipment Suppliers
APPENDIX CHAPTER 4 | Gateway products and suppliers Note: gateways are often difficult to set up and POTS gateways in particular have shortcomings that are mainly limitations of POTS itself. While the hardware mentioned below is excellent and we’ve tested with all of it. Native SIP is always the best way to go. -
Page 79: Sip Information And Suggested Reading
APPENDIX CHAPTER 4 | SIP Information and suggested reading A Request for Comments (RFC) is a memorandum published by the Internet Engineering Task Force (IETF) describing methods, behaviors, research, or innovations applicable to the working of the Internet and Internet-connected systems. The IETF adopts some of the proposals published as RFCs as Internet standards. -
Page 80: Specifications
Maximum on-air calls on one fader: 12 ♦ One rack unit - 1.75”H x 19”W x 15.5”D (44 x 483 x 394 mm) ♦ Analog Inputs (with Telos Alliance xNode) Input Impedance: >40 k Ohms, balanced ♦ Nominal Level Range: Selectable, +4 dBu or -10dBv ♦... -
Page 81: Frequency Response
APPENDIX CHAPTER 4 | Frequency Response Any input to any output: +0.5 / -0.5 dB, 20 Hz to 20 kHz ♦ Dynamic Range Analog Input to Analog Output: 102 dB referenced to 0 dBFS, 105 dB “A” weighted to 0 dBFS ♦... -
Page 82: Power Supply Ac Input
Each Acoustic Echo Canceller has two inputs (signal and reference) and one output ♦ Livewire+™ AES67 equipped studios may take and supply audio directly to/from the network. Telos Alliance xNodes are ♦ available for pro analog and AES3 (AES/EBU) breakout. -
Page 83: Telos Vx Tech Quick Reference Pages
APPENDIX CHAPTER 4 | Telos VX Tech Quick Reference Pages Default Passwords: (There are no default passwords, so leave the password fields blank) VX Engine username = user , password = VSet Telephone username = user , password = Default IP Addresses: VX Engine ‘Network’... -
Page 84: Vset Phone Set
APPENDIX CHAPTER 4 | VSet Phone Set VSet Telephone default IP address: 192.168.0.201 (front panel settable) Default username and password: username = user password = telnet requires no password Websocket Ports and protocols used by the VSet: 80 HTTP (TCP) 23 Telnet (TCP) 20518 (TCP) Livewire Control protocol port 40000-40050 (UDP) Vset Audio... -
Page 85: Telos Alliance Warranty
Telos Alliance Warranty Telos Alliance Limited Warranty For the latest Telos Alliance warranty, visit: telosalliance.com/warranty. - Page 86 1241 Superior Ave. • Cleveland, Ohio, 44114, USA • +1.216.241.7225 • TelosAlliance.com © 2019 TLS Corp., All Rights Reserved. C19/17050 • P/N: 1490-00210-001 USER MANUAL: VX Enterprise/VX Prime+...
Need help?
Do you have a question about the VX Prime+ and is the answer not in the manual?
Questions and answers