Table of Contents
Advertisement
Owner's Manual and Assembly Instructions
Model W446AL
Read and understand the entire manual before assembly and operation. The vehicle must be
assembled by an adult who has read and understands the instructions.
Made in China.
Save this manual with your sales receipt.
MINI COOPER S manufactured by Paragon Child Products Co.Ltd,(Goodbaby Group),
No.20 Lufeng East Road, Lujia Town, Kunshan City, Jiangsu Province, China.
The MINI trademarks are used under license from BMW AG. MINI name and associated
logos are trademarks of BMW AG.
Advertisement
Table of Contents

Related Manuals for Goodbaby Mini Cooper S W446AL

Summary of Contents for Goodbaby Mini Cooper S W446AL
- Page 1 Made in China. Save this manual with your sales receipt. MINI COOPER S manufactured by Paragon Child Products Co.Ltd,(Goodbaby Group), No.20 Lufeng East Road, Lujia Town, Kunshan City, Jiangsu Province, China. The MINI trademarks are used under license from BMW AG. MINI name and associated...
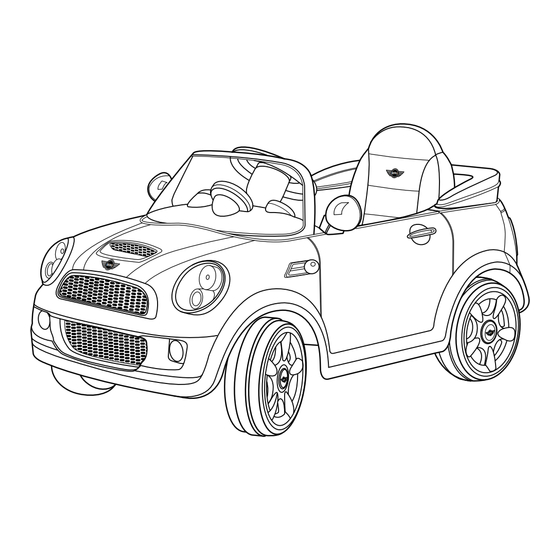
- Page 2 Thank You Thank you for purchasing the Mini Cooper S. With the Mini Cooper S your child will have fun and enjoyment for years to come. Some of the features on the Mini Cooper S include: forward and reverse switch, lights and engine sounds. Please contact Hunter Products Pty Ltd at www.electricrideon.com.au oe Call at 1800 224 094 (local call cost) with comments or questions.
-
Page 3: Table Of Contents
Contents Safety........1 User Requirements . -
Page 4: Safety
Safety WARNING! The following safety hazards may result in serious injury or death to the user of the MINI Cooper S: • This product contains small parts that are for adult assembly only. Keep small children away when assembling. Remove and dispose of all protective material and poly bags before assembly. -
Page 5: User Requirements
User Requirements Age Range 3 and 7 years Weight Range No more than 77 lbs (35kg) Before using the MINI Cooper S the child should understand the vehicle controls and safety issues. They must also demonstrate the capability to handle the vehicle and operate its controls. It is the responsibility of the adult to educate the child and supervise the vehicles use. -
Page 6: Charging The Battery: Warnings
Charging the Battery: Warnings WARNING! The following safety hazards may result in serious injury or death to the user of the MINI Cooper S: • Use of a battery or charger other than the supplied 6v rechargeable battery and charger may cause a fire or explosion. Only use the supplied 6v rechargeable battery and charger with the vehicle. - Page 7 WARNING! Battery posts, terminals and related accessories contain lead and • lead compounds (acid), chemicals and are toxic and corrosive. Never open the battery. • Tampering or modifying the electric circuit system may cause a shock, or explosion and permanently damage the system. Exposed wiring, circuitry in the charger may cause electric shock.
-
Page 8: Parts
Parts windshield seat soft top mirrors (L & R) speedometer battery Please note: Battery is already installed in sealed remote controller rear compartment. steering wheel body charger front wheel x2 rear wheel x2 wheel cover x4 hub cap x4... -
Page 9: Assembly
Charge Battery Before Assembly ONLY AN ADULT CAN CHARGE AND RECHARGE THE BATTERY. NOTE: It is not necessary to remove the battery from the vehicle for charging. However, if the adapter cord will not safely reach a 240-volt wall outlet, the battery can be removed for charging. Connect Charger to Battery 1. -
Page 10: Install The Front Wheels
Install the Front Wheels 1. Slide large washer onto axle as shown. 2. Locate a wheel marked front. Slide the wheel onto the axle with the word front facing in, towards the vehicle. 3. Align the posts on the back of the wheel cover with the holes in the wheel and slide the wheel cover into the wheel. -
Page 11: Install The Rear Wheels
Install the Rear Wheels 1. Locate a wheel (marked “rear” with gear shaped protrusion). 2. Slide the wheel onto the axle with protrusion facing toward the vehicle. 3. Fit the gear shape protrusion into the gear box. 4. Align the locating pins on the inside of the wheel cover into the wheel holes, and push the wheel cover into place. -
Page 12: Attaching The Steering Wheel
Attaching the Steering Wheel 1. Remove the battery compartment cover and insert (2) AA batteries into the top of the steering wheel. Place and screw the cover back on. 2. Place the steering wheel onto the steering column and line up the screw holes. -
Page 13: Assemble The Speedometer And Windshield
Assemble the Speedometer Align the speedometer with the slot of the dashboard. Push it slightly until you hear the “click” to complete the assembly. Speedometer Assemble the Windshield Align the windshield with the two side slots between the dashboard and the body and push it at the same time. NOTE: the two sides of the windshield must be inserted evenly. -
Page 14: Assemble Soft Roof And Mirror
Assemble Soft Top Align the clip of the soft top with the slot of the rear body, push it slightly until you hear a “click” to complete the assembly. soft top Assemble the Mirror Insert the clip of the mirror into the slot of the body, push it into the slot until you hear a “click”... -
Page 15: Attach The Remote Control Batteries
Attach the Remote Control batteries Open the battery cover. Take out Battery cover the old batteries and replace with new one. Then close the battery cover. Please change the battery following step above when the red light off on R/C found. WARNING! DO NOT mix old and new batteries. -
Page 16: Remote Control Operation
Remote Control Operation Matching the code : Press the match code button on the remote Forward/Reverse lever control until the LED is blinking, then release Left/Right lever the code button and press only the match code button on the drive board until the Led stops blinking and keeps in light on status in just 1 seconds then it will be off, the recod- ing is Successful you can release your... -
Page 17: Maintenance
Maintenance General The vehicle should be checked for damage, missing or badly worn parts before use. • Check the tightness of the fasteners before each use. • Check the tightness of the wheel nuts. Use a flat head screw driver to Note: gently pry off the hub caps. - Page 18 WARNING! The following safety hazards may result in serious injury or death to the user of the MINI Cooper S: • Use of a battery or charger other than the supplied Avigo 6V rechargeable battery and charger may cause a fire or explosion. Only use the supplied 6V rechargeable battery and charger with the vehicle.
- Page 19 WARNING! The following safety hazards may result in serious injury or death to the user of the MINI Cooper S: • Battery posts, terminals and related accessories contain lead and lead compounds (acid), chemicals that are toxic and corrosive. Never open the battery. •...
- Page 20 Battery Storage Do not leave the battery connected in the vehicle for long period of times while not being used. This may drain the battery completely and cause permanent damage. Disconnect the battery connectors from the battery when the vehicle is not going to be used for a long period of time.
- Page 21 7. Replace the battery with an 6V battery and reconnect the connectors. 8. Replace the metal battery bracket. 9. Replace the rear cover. 10. Replace the seat. Battery Fuse y features a thermal fuse with a reset fuse that will automatically trip and cut all power to the vehicle if the motor, electric system or battery is overloaded.
-
Page 22: Troubleshooting Guide
Troubleshooting Guide The following are examples of potential problems. Completely read through this manual and the troubleshooting guide table before calling Hunter Products Service. If you still need help resolving the problem please contact Customer Service at www.electricrideon.com.au or call 1800224094 Problem Possible Cause Remedy... - Page 23 Problem Possible Cause Remedy Vehicle runs Vehicle is overloaded Reduce weight on vehicle sluggishly or (see User Requirements beeping occurs and Safety Warnings) Vehicle is being used in Operate the vehicle level harsh conditions ground and firm surfaces (see User Requirements and Safety Warnings) Vehicle needs a Poor contact of wires or...
-
Page 24: Services Repairs And Parts
Services, Repairs and Parts If your MINI Cooper S needs service, repairs or replacement parts, call: Hunter Products Pty Ltd Hours: 8:30am – 4:30pm (AEST) Monday - Friday Service Phone: 1800224094 Web: www.electricrideon.com.au... -
Page 25: Warranty
Warranty One-Year Limited Warranty Hunter Products warrants that your MINI COOPER S 6v will be free from defects in materials and workmanship for the vehicle (except for the 6-volt battery) for a period of 12 months, from the date of purchase. This warranty only applies where the product is completely and correctly assembled and used in accordance with all accompanying recommendations and users instructions. - Page 26 Contact Information If you have any questions or comments please contact us at: Hunter Products Pty Ltd Level 2, 424 Warrigal Road Moorabbin VIC 3189, Australia Web: www.electricrideon.com.au Phone: 1800224094 (local call cost)
Need help?
Do you have a question about the Mini Cooper S W446AL and is the answer not in the manual?
Questions and answers