
Summary of Contents for Micro Matic MTC3-1991
- Page 1 67564 05/16 (JRK) MTC3-1991 User Manual WWW.MICRO-MATIC.NO © 2016 OJ Electronics A/S...
-
Page 2: Table Of Contents
Contents Contents PWM : Pulse Width Modulation . . . . . . . . . . . . . . . . . . . . . . . . . . . . . . . . . . . . . -
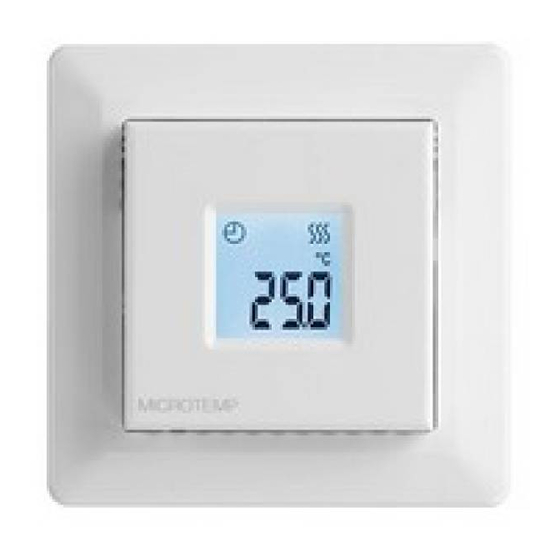
Page 3: Introduction
Introduction Thank you for buying our MTC3 thermostat . The front cover can be flipped down . We hope you will enjoy the ease of use offered by the well-known user interface and design . Behind the front cover, on the left side of the front, there This high-quality thermostat is designed to have a is an on/off switch, up = on / down = off . -
Page 4: Menu Overview
Menu Overview Menu Setting Options Factory Setting Menu Setting Options Factory Setting APP: A; F; C; AF; AE oFF; on; AUt SChi: SCLo - 40 .0°C 40°C diF: 0 .3-10 .0 0 .4 SCLo: 0 .0°C - SChi 0°C CYHi: 10-60 Lihi: LiLo - 40°C 28°C CYLo: 10-30... -
Page 5: App : Sensor Application 1/2
APP : Sensor Application 1/2 This option allows you to choose which sensor is used to control the heating system . If a factory reset is performed, the thermostat will autodetect an external sensor . • A: With this setting, the internal room sensor inside the thermostat controls the heating system . -
Page 6: App: Sensor Application 2/2
APP: Sensor Application 2/2 • AE: With this setting, an optional external room sensor (connected to the floor sensor terminals) controls the heating system . How to execute it: • Access the menu . • Scroll through the menu to APP . •... -
Page 7: Sca : Temperature Scale
SCA : Temperature Scale This option allows you to set the minimum and maximum temperatures to which the thermostat can be set . Operating temperatures: • SChi: Maximum Temperature Scale can be set to between the Minimum Temperature and 40°C . •... -
Page 8: Li : Floor Temperature Limit
Li : Floor Temperature Limit This option allows you to set the minimum and maximum limits for floor temperature . Floor limit temperatures: Floor limit temperatures allow you to set the highest (Lihi) and lowest (LiLo) permissible floor temperature during room temperature control with the sensor application AF . -
Page 9: Tp : Temperature Readout
TP : Temperature Readout Depends on which sensors are connected and which sensor application is chosen . Temperatures from the floor sensor and the internal room sensor can be monitored here . Display settings are not applicable if the sensor applica- tion is set to C . -
Page 10: Lcd : Display Settings
LCD : Display Settings This option allows you to select what data you want to be shown in the idle display . SCA = Temperature scale setting: = Celsius (nU = numerical 0-100%) DiS = Displayed in idle display: = Setpoint temperature = Measured temperature Display settings are not applicable if the sensor applica- tion is set to C . -
Page 11: Adj : Adjust
ADJ : Adjust This option allows you to calibrate the measured room temperature . You should calibrate the sensor if the temperature reading differs from the actual temperature . The measured temperature has to be entered . Note that with sensor application F, the temperature is measured in the floor, this temperature would be higher than the ambient temperature . -
Page 12: Nsb : Night Setback
NSB : Night Setback This option allows you to set the value by which the tem- perature should be reduced when NSB is activated . NSB is activated either by the event schedule or with a signal from an external timer connected to terminal S . When the NSB signal is active, a half-moon icon is shown in the display together with the lowered setpoint temperature . -
Page 13: Def : Frost Protection
DEF : Frost Protection This option allows you to set the parameters for any pos- sible frost protection function . An external signal can activate the frost protection, the thermostat will then maintain a fixed floor/room temper- ature . The function is factory-set to 8°C but can be set to values from 5-10°... -
Page 14: Pwm : Pulse Width Modulation
PWM : Pulse Width Modulation With this setting, you can change the duration of the heating periods . Off: Simple “on/off” regulation, where the relay is closed when the measured temperature is below the setpoint, and opened when the measured temperature is above the setpoint . -
Page 15: Pli : Power Limit 1/2
PLI : Power Limit 1/2 This thermostat complies with EN 50559 (VDE 0705-559) for electrical floor heating . The regulation applies to electrical floor heating with a maximum floor weight of 4 kN/m² . To ensure that hotspots due to unintentionally covering up part of the surface are avoided, the heating function can be time-limited as per EN/DIN . -
Page 16: Pli : Power Limit 2/2
PLI : Power Limit 2/2 Equation to calculate number of minutes that could be entered in the PLI menu - when an average heating effect is desired: Average desired heating effect per m ∗ 60 min . Floor heating element effect per m Note! If the result of the equation is negative, then nothing should be entered . -
Page 17: Time : Time And Event Setting 1/2
TIME : Time and Event Setting 1/2 The MTC3 has a timer function that keeps track of the current weekday and time of the day . It is possible to select different event schedules for the MTC3 . The events differ in the number of days that are using 4 events (with a setback period during both night and daytime) and 2 events (only using a setback period for the night) . -
Page 18: Time : Time And Event Setting 2/2
TIME : Time and Event Setting 2/2 Time schedule for the events: 4-event: Time: Temperature: Morning 06:00-08:00 Setpoint Daytime 08:00-16:00 Setpoint - NSB Evening 16:00-23:00 Setpoint Night 23:00-06:00 Setpoint - NSB 2-event: Time: Temperature: How to execute it: 08:00-23:00 Setpoint •... -
Page 19: Sw : Software Version
SW : Software Version This function provides a readout containing the software version number . How to execute it: • Access the menu . • Scroll through the menu to SU . • Press the centre button to enter the software readout . Menu structure: •... -
Page 20: Done : Exiting The Menu
Done : Exiting the Menu This is the exit from the menu . Note there is a timeout function . If no button is pressed for 30 seconds, the thermostat will return to the main screen . Note the settings are saved when the menu is exited . How to execute it: When in the menu: •... -
Page 21: Troubleshooting And Additional Information
Troubleshooting and Additional Information Error codes Child Lock E0: Internal fault . The child lock can be activated directly if the thermostat Heating is shut off . is idle or if the thermostat’s backlight is activated but never from within the menu . E1: Built-in sensor fault . -
Page 22: Changing The Front Cover
Changing the Front Cover • Open the front cover • Grasp the front cover with the index, middle and ring finger on the upper side of the front cover, as close as possible to the thermostat . • Pull the front cover downwards . •... -
Page 23: Contact : Help And Support
Contact : Help and Support MICRO MATIC NORGE AS Postboks 264, Nye Vakåsvei 28, N - 1379 Nesbru Tlf: +47 66 77 57 50 · Faks: +47 66 77 57 90 firmapost@micro-matic .no · www .micro-matic .no The OJ trademark is a registered trademark belonging to OJ Electronics A/S · © 2016 OJ Electronics A/S...
Need help?
Do you have a question about the MTC3-1991 and is the answer not in the manual?
Questions and answers
How do you adjust/set up the sensors
To adjust the sensors on the Micro Matic MTC3-1991:
1. Access the menu by pressing any of the three buttons.
2. Scroll through the menu using the upper or lower button until you reach "ADJ".
3. Press the centre button to select "ADJ".
4. Use the upper or lower button to calibrate the sensor within ±10°C in 0.1°C steps.
Note: Adjustment is not applicable if the sensor application is set to C.
This answer is automatically generated