
Subscribe to Our Youtube Channel
Summary of Contents for Arris Ruckus ICX 7850 Series
- Page 1 CONFIGURATION GUIDE Ruckus FastIron Stacking Configuration Guide, 08.0.90 Supporting FastIron Software Release 08.0.90 Part Number: 53-1005572-01 Publication Date: 20 February 2019...
- Page 2 Materials in terms of their completeness, correctness, accuracy, adequacy, usefulness, timeliness, reliability or otherwise. As a condition of your use of the Materials, you warrant to ARRIS that you will not make use thereof for any purpose that is unlawful or prohibited by their associated terms of use.
-
Page 3: Table Of Contents
Contents Preface........................................9 Document Conventions....................................9 Notes, Cautions, and Warnings................................9 Command Syntax Conventions................................10 Document Feedback....................................10 Ruckus Product Documentation Resources............................10 Online Training Resources..................................11 Contacting Ruckus Customer Services and Support..........................11 What Support Do I Need?................................. 11 Open a Case......................................11 Self-Service Resources..................................11 About This Guide.................................... - Page 4 Changing a live two-unit stack to a linear-topology trunk......................45 Changing a live linear-topology trunk to a ring..........................46 Building a Stack....................................49 Planning to build a stack...................................49 Software requirements..................................49 Stack requirements....................................49 Ruckus stacking topologies................................49 FastIron stacking distances and optics by device.......................... 50 Stacking configuration guidelines..............................
- Page 5 Restoring a data port from an ICX 7750 trunk in a live stack..................... 150 ICX 7850 stack configuration overview..............................150 ICX 7850 stacking topologies................................151 ICX 7850 configuration notes................................. 154 Creating a two-unit ICX 7850 stack with a linear-topology trunk using stack interactive-setup..........155 Using stack zero-touch provisioning to create a two-unit ICX 7850 stack with a ring topology..........157 Creating a linear-topology trunk on a two-unit ICX 7850 stack in a live environment............
- Page 6 Active controller and standby controller resets........................... 199 Standby controller selection based on priority configuration....................200 Standby controller election criteria............................... 200 Stack unit priority....................................200 Changing the priority of a stack unit............................. 202 Stack software images.................................... 202 Confirming stack software versions.............................. 202 Stack mismatches....................................202 Advanced feature privilege mismatch............................203 Minor mismatch for stack units..............................
- Page 7 Problems commonly diagnosed with stack formation........................237 Manually triggering stack diagnosis..............................237 Troubleshooting an unsuccessful stack build............................238 Troubleshooting stack interactive-setup.............................. 240 Troubleshooting unit replacement issues............................241 Checking hardware after an upgrade failure............................242 Troubleshooting image copy issues..............................243 Configuration, startup configuration files, and stacking flash......................243 Stacking unit role transition considerations............................
- Page 8 Ruckus FastIron Stacking Configuration Guide, 08.0.90 Part Number: 53-1005572-01...
-
Page 9: Preface
Preface • Document Conventions..............................9 • Command Syntax Conventions..........................10 • Document Feedback..............................10 • Ruckus Product Documentation Resources......................10 • Online Training Resources............................11 • Contacting Ruckus Customer Services and Support....................11 Document Conventions The following table lists the text conventions that are used throughout this guide. TABLE 1 Text Conventions Convention Description... -
Page 10: Command Syntax Conventions
Document Feedback Ruckus is interested in improving its documentation and welcomes your comments and suggestions. You can email your comments to Ruckus at ruckus-docs@arris.com. When contacting us, include the following information: •... -
Page 11: Online Training Resources
Preface Contacting Ruckus Customer Services and Support Online Training Resources To access a variety of online Ruckus training modules, including free introductory courses to wireless networking essentials, site surveys, and Ruckus products, visit the Ruckus Training Portal at https://training.ruckuswireless.com. Contacting Ruckus Customer Services and Support The Customer Services and Support (CSS) organization is available to provide assistance to customers with active warranties on their Ruckus products, and customers and partners with active support contracts. - Page 12 Preface Contacting Ruckus Customer Services and Support • Community Forums—https://forums.ruckuswireless.com/ruckuswireless/categories • Knowledge Base Articles—https://support.ruckuswireless.com/answers • Software Downloads and Release Notes—https://support.ruckuswireless.com/#products_grid • Security Bulletins—https://support.ruckuswireless.com/security Using these resources will help you to resolve some issues, and will provide TAC with additional data from your troubleshooting analysis if you still require assistance through a support case or RMA.
-
Page 13: About This Guide
• Supported hardware..............................13 • What’s new in this document.............................13 Supported hardware This guide supports the following Ruckus products: • Ruckus ICX 7850 Series • Ruckus ICX 7750 Series • Ruckus ICX 7650 Series • Ruckus ICX 7450 Series •... - Page 14 About This Guide What’s new in this document TABLE 2 Summary of enhancements in FastIron release 08.0.90 (continued) Feature Description Location New configuration rules for stacking ports Using the stack-port and stack-trunk Refer to Changes to stack-port and stack- and trunks commands is more intuitive, and some previous trunk configuration on page 25 for more...
-
Page 15: Stacking Overview
Stacking Overview • Stacking..................................15 • Campus Fabric................................16 • Ruckus stackable models............................18 • Stacking terminology..............................19 Stacking A stack is a group of devices that operate as a single chassis. A Ruckus stack contains from two to 12 units configured in a ring or linear topology. The units in a stack are from the same model family;... -
Page 16: Network Management And Stack Configuration
Stacking Overview Campus Fabric Network management and stack configuration Even when all the switches within a stack are physically distributed, you can manage them as a single entity, enabling one-touch configuration changes via a single IP address. The active controller manages the other stack units. It maintains the information database for all stack members and downloads software images as needed to all stack units. - Page 17 Stacking Overview Campus Fabric FIGURE 2 Campus Fabric domain build-out from an ICX 7750 or ICX 7650 CB stack The following figure depicts three separate campuses, each with its own Campus Fabric domain, interconnected with a high- speed backbone. Ruckus FastIron Stacking Configuration Guide, 08.0.90 Part Number: 53-1005572-01...
-
Page 18: Ruckus Stackable Models
Stacking Overview Ruckus stackable models FIGURE 3 Distributed campus network formed from connected Campus Fabric domains Ruckus stackable models All ICX 7450, ICX 7650, ICX 7750, and ICX 7850 devices and some ICX 7250 and ICX 7150 devices can be members of a Ruckus ICX stack. -
Page 19: Stacking Terminology
Stacking Overview Stacking terminology Refer to the following sections for information on ICX 7750 stacking: • ICX 7750 stack configuration overview on page 136 • ICX 7750 stacking topologies on page 138 • Planning to build a stack with 802.1br switch port extender capability on page 55. - Page 20 Stacking Overview Stacking terminology • Control path: A path across stacking links dedicated to carrying control traffic such as commands to program hardware or software image data for upgrades. A stack unit must join the control path to operate fully in the stack. •...
- Page 21 Stacking Overview Stacking terminology • Stacking port: A physical interface on a stack unit that connects a stacking link. Stacking ports are point-to-point links that exchange proprietary packets. Stacking ports cannot be configured for any other purpose while operating as stacking ports.
- Page 22 Ruckus FastIron Stacking Configuration Guide, 08.0.90 Part Number: 53-1005572-01...
-
Page 23: Changes To Stacking In Fastiron Release 08.0.90
Changes to Stacking in FastIron Release 08.0.90 • Valid-stack-port sets..............................23 • No more stack default-ports configuration......................24 • Stacking ports displayed even when stacking is not enabled................24 • Changes to stack-port and stack-trunk configuration.................... 25 • Changes to upgrade and downgrade for stacking from FastIron release 08.0.90..........29 •... -
Page 24: No More Stack Default-Ports Configuration
Changes to Stacking in FastIron Release 08.0.90 No more stack default-ports configuration stack-port 1/2/4 and keeps 1/2/1 because port 1/2/1 and port 1/3/1 satisfy the valid-stack-port set (1/2/1, 1/3/1, 6). If you configure stack-port 1/3/4, the system removes both old stack-ports because no valid-stack-port set contains both the ports in the new configuration, 1/2/x and 1/3/4. -
Page 25: Changes To Stack-Port And Stack-Trunk Configuration
Changes to Stacking in FastIron Release 08.0.90 Changes to stack-port and stack-trunk configuration In all releases, when you enter the stack enable command, the system checks all stacking ports to make sure they contain no configuration. If any configuration is present, the stack enable command is denied. Changes to stack-port and stack-trunk configuration Beginning with FastIron 08.0.90, using the stack-port and stack-trunk commands to configure stacking ports and trunks... -
Page 26: Comparison Of Configuration Changes That Use Non-Factory Valid-Stack-Port Sets
Changes to Stacking in FastIron Release 08.0.90 Changes to stack-port and stack-trunk configuration Comparison of configuration changes that use non-factory valid- stack-port sets The following table provides a side-by-side comparison of new and old configuration command behaviors for stack configurations that use stack-ports other than the factory-set default ports. In the table, an ICX 7750 stack serves as the example, and configuration changes use stack-ports other than the factory-set combination (ports 1/2/1 and 1/2/4). - Page 27 Changes to Stacking in FastIron Release 08.0.90 Changes to stack-port and stack-trunk configuration TABLE 6 Changing a stacking port to a stacking trunk New behavior Old behavior Initial configuration stack-port 1/2/1 stack-port 1/2/1 1/2/4 stack-port 1/2/4 Change stack-port 1/2/4 to stack-trunk 1/2/4 to 1/2/6 stack-trunk 1/2/4 to 1/2/6 stack-trunk 1/2/4 to 1/2/6...
- Page 28 Changes to Stacking in FastIron Release 08.0.90 Changes to stack-port and stack-trunk configuration NOTE Completely removing a stacking trunk in the old behavior requires two steps. The first command, no stack-trunk, changes the trunk to a stacking port. The second command, no stack-port, is required to remove the trunk completely. Another option is to enter the command no stack-port 1/2/1, which removes both the stack-trunk and the stack-port configuration.
-
Page 29: Changes To Upgrade And Downgrade For Stacking From Fastiron Release 08.0.90
Changes to Stacking in FastIron Release 08.0.90 Changes to upgrade and downgrade for stacking from FastIron release 08.0.90 Changes to upgrade and downgrade for stacking from FastIron release 08.0.90 The stacking port format is different beginning with FastIron 08.0.90. The change in format creates upgrade and downgrade issues. -
Page 30: Downgrading From Fastiron 08.0.90 To Earlier Releases
Changes to Stacking in FastIron Release 08.0.90 Changes to upgrade and downgrade for stacking from FastIron release 08.0.90 module 2 icx7400-xgf-4port-40g-module module 3 icx7400-qsfp-1port-40g-module module 4 icx7400-qsfp-1port-40g-module priority 128 stack-trunk 2/2/1 to 2/2/2 stack-port 2/2/3 stack enable stack mac 609c.9f2a.97e0 Downgrading from FastIron 08.0.90 to earlier releases A standalone or active controller parses the startup-config flash to read the stacking ports for the entire stack. -
Page 31: Stack Interactive-Setup
Changes to Stacking in FastIron Release 08.0.90 Stack interactive-setup TABLE 13 Downgrade scenarios Situation Result The user never uses a write memory command when running The downgrade is seamless. FastIron 08.0.90. The user does not change any configuration but uses the write The downgrade is fine. -
Page 32: Differences In Stack Unit Replacement
Changes to Stacking in FastIron Release 08.0.90 Stack interactive-setup NOTE If a discovered standalone unit is password protected, stack interactive-setup prompts you to enter the password. Stack interactive-setup checks for enable super-user password and ignores all other passwords. Ruckus recommends that you make all physical connections and run stack interactive-setup on the active controller of a stack or on a standalone unit that will become the active controller. -
Page 33: Stack Zero-Touch Provisioning
Changes to Stacking in FastIron Release 08.0.90 Stack zero-touch provisioning NOTE Unit replacement cannot be performed when stack zero-touch provisioning is enabled. Stack zero-touch provisioning is a superset of unit replacement and can handle single or multiple unit replacements. NOTE If the unit replacement process cannot handle particular cases due to ambiguity, Ruckus recommends using stack interactive-setup. -
Page 34: Stacking Deployment Guidelines
Changes to Stacking in FastIron Release 08.0.90 Stacking deployment guidelines Stacking deployment guidelines This section provides guidance for constructing a new stack, adding new members, replacing members, or adding new links within a stack. These tasks can be performed in several different ways. This section describes the most common methods. Other methods are discussed in more detail in later sections. -
Page 35: Replacing Stack Units
Changes to Stacking in FastIron Release 08.0.90 Stacking deployment guidelines Replacing stack units Consider the following points when replacing stack members. • To replace a unit with a clean unit containing the same modules, simply disconnect the old unit and replace it with a clean unit using the same links. -
Page 36: Support For Two-Unit Stack Linear-Topology Trunks
Changes to Stacking in FastIron Release 08.0.90 Support for two-unit stack linear-topology trunks To enlarge the connections between two units, configure the multi-stack-trunk command to change both ends of a live link at the same time. Then connect the new links. The links won't cause loops because they have proper stack- trunk configuration. - Page 37 Changes to Stacking in FastIron Release 08.0.90 Support for two-unit stack linear-topology trunks FIGURE 4 ICX 7250-24P two-unit stack with linear-topology trunk as configured in example NOTE If you configure an ICX 7750 two-unit stack, you would have the choice of two linear-topology trunks. You can configure stack-trunk 1/2/1 to 1/2/6 1/3/1 to 1/3/6 or stack-trunk 1/2/5 to 1/2/6 1/3/5 to 1/3/6.
- Page 38 Changes to Stacking in FastIron Release 08.0.90 Support for two-unit stack linear-topology trunks The following example shows the manual formation of a two-unit ICX 7250 linear-topology stack. ====================Unit 1 Log============================ ICX7250-48P Router# configure terminal ICX7250-48P Router(config)# stack unit 1 ICX7250-48P Router(config-unit-1)# stack-trunk 1/2/1 to 1/2/4 stack-trunk 1/2/1 to 1/2/4 replaces stack-port 1/2/1 and stack-port 1/2/3 ICX7250-48P Router(config-unit-1)# stack enable Enable stacking.
- Page 39 Changes to Stacking in FastIron Release 08.0.90 Support for two-unit stack linear-topology trunks en, , My assigned ID is 2, but my bootup ID is 1, need reload T=2m29.1: Boot request from u1 mac=609c.9f99.1988, reason: u2 bootup-id=1, flash: Primary, jumbo=0, Unmounting the External USB We are in system reset ####...
-
Page 40: Building A Two-Unit Stack With A Linear-Topology Trunk Using Stack Interactive-Setup
Changes to Stacking in FastIron Release 08.0.90 Support for two-unit stack linear-topology trunks Building a two-unit stack with a linear-topology trunk using stack interactive-setup The interactive-setup utility generates the linear-topology trunk option only when either of the following conditions is met: •... - Page 41 Changes to Stacking in FastIron Release 08.0.90 Support for two-unit stack linear-topology trunks The following example shows the creation of a two-unit ICX 7250 stack with a linear-topology trunk using stack interactive-setup. ICX7250-48P Router> en No password has been assigned yet... ICX7250-48P Router# show running-config Current configuration: ver 08.0.90...
-
Page 42: Creating A Two-Unit Linear-Topology Stack Using Stack Zero-Touch Provisioning
Changes to Stacking in FastIron Release 08.0.90 Support for two-unit stack linear-topology trunks ICX7250-48P Router# The other units reloads, becomes a member, and joins the stack. T=6m9.2: Election, was alone --> active, ID=1, pri=128, 2U(1-2), A=u1, nbr#=1 0, reason: u2: enable, , T:6m11.3: Done hot swap: active controller u1 sets u2 to Ready. - Page 43 Changes to Stacking in FastIron Release 08.0.90 Support for two-unit stack linear-topology trunks NOTE Neither stack interactive-setup nor stack zero-touch provisioning can convert a live two-unit stack to a linear-topology trunk. If you are working with a live system, you can enter the multi-stack-trunk 1/2/1 to 1/2/4 and 2/2/1 to 2/2/4 command to change the configuration on both units simultaneously.
- Page 44 Changes to Stacking in FastIron Release 08.0.90 Support for two-unit stack linear-topology trunks The following example shows the discovery of a two-unit ICX 7250 linear-topology stack using stack zero-touch provisioning. ICX7250-48P Router# show running-config Current configuration: ver 08.0.90 stack unit 1 module 1 icx7250-48p-poe-port-management-module module 2 icx7250-sfp-plus-8port-80g-module stack-port 1/2/1...
-
Page 45: Changing A Live Two-Unit Stack To A Linear-Topology Trunk
Changes to Stacking in FastIron Release 08.0.90 Support for two-unit stack linear-topology trunks ICX7250-48P Router# show running-config Current configuration: ver 08.0.90 stack unit 1 module 1 icx7250-48p-poe-port-management-module module 2 icx7250-sfp-plus-8port-80g-module priority 128 stack-trunk 1/2/1 to 1/2/4 stack unit 2 module 1 icx7250-48p-poe-port-management-module module 2 icx7250-sfp-plus-8port-80g-module stack-trunk 2/2/1 to 2/2/4 stack enable... -
Page 46: Changing A Live Linear-Topology Trunk To A Ring
Changes to Stacking in FastIron Release 08.0.90 Support for two-unit stack linear-topology trunks Enter stack unit configuration sub-mode on the active controller. ICX 7250(config)# stack unit 1 Configure the desired trunk on each unit. Based on existing connections, specify one of the available trunk combinations. For example, in an ICX 7250 two-unit stack, based on connections, specify one of the following choices for each side of the trunk when entering the multi-stack-trunk command: •... - Page 47 Changes to Stacking in FastIron Release 08.0.90 Support for two-unit stack linear-topology trunks Suppose the physical connections displayed only two-port trunk connections on each unit, for example, ports 1/2/3 to 1/2/4 and 2/2/3 to 2/2/4. To change the existing live configuration to a stacking ring, the multi-stack-trunk 1/2/3 to 1/2/4 and 2/2/3 to 2/2/4 command is required.
- Page 48 Changes to Stacking in FastIron Release 08.0.90 Support for two-unit stack linear-topology trunks NOTE The preceding steps require the operator to enter commands to form trunks from data ports in steps 6 and 7. The following example summarizes the conversion of a two-unit stack linear-topology ring to a stacking ring topology and includes system output.
-
Page 49: Building A Stack
Building a Stack • Planning to build a stack............................49 • Planning to build a stack with 802.1br switch port extender capability...............55 • Stack construction methods............................56 • Verifying a stack configuration...........................84 • Displaying information on stack connections......................86 Planning to build a stack Before you begin to build a stack, you should be familiar with supported stacking software requirements, topologies, and recommendations. -
Page 50: Fastiron Stacking Distances And Optics By Device
Building a Stack Planning to build a stack FastIron stacking distances and optics by device Because Ruckus devices use Ethernet for the inter-switch stack connections, the deployment options are greatly increased. If standard copper stacking cables are used, the inter-switch connections can be up to 5 meters, which is usually sufficient for locally distributed stacks, such as in Top-of-Rack (ToR) applications. - Page 51 Building a Stack Planning to build a stack TABLE 15 Copper and fiber-optic options and stacking distances (continued) Device Stacking port Copper options Fiber-optic options Fiber-optic maximum stacking distance ICX 7450 (rear) 1 X 40-Gbps stacking 0.5- or 1-meter SFP+ passive 40G-QSFP-SR4 100 meters and uplink on slots 3...
- Page 52 Building a Stack Planning to build a stack TABLE 16 FastIron long-distance 100-Gbps ports (continued) Product and model Ports that support 1 X 100-Gbps optics Long-distance stacking ports ICX 7850-32Q 1/2/1 through 1/2/12, 1/3/1 through 1/3/8 1/3/1 through 1/3/8 ICX 7850-48F/48FS 1/2/1 through 1/2/8 1/2/1 through 1/2/8 NOTE...
- Page 53 Building a Stack Planning to build a stack TABLE 18 FastIron long-distance 2X10-Gbps and 4X10-Gbps ports (continued) Product and model 10-Gbps ports that support LR optics Long-distance stacking ports ICX 7450 back (all models, with 4X10GF 1/3/1 through 1/3/4 and 1/4/1 through 1/4/4 (data only) 1/3/1 through 1/3/4 and 1/4/1 through module) 1/4/4...
-
Page 54: Stacking Configuration Guidelines
Building a Stack Planning to build a stack Port 1/2/1 : Type : 10GE SR 300m (SFP +) Port 1/2/2 : Type : EMPTY Port 1/2/3 : Type : 1G Twinax 1m (SFP) Port 1/2/4 : Type : 1G Twinax 1m (SFP) The following example shows output for the specified stack. -
Page 55: Planning To Build A Stack With 802.1Br Switch Port Extender Capability
Building a Stack Planning to build a stack with 802.1br switch port extender capability NOTE If STP is not enabled, there may be a loop issue when multiple cables are used to connect a standalone unit to a stack. The loop does not affect stack formation. The loop issue disappears after the multiple links are converted to stacking trunks when the standalone unit is integrated to the stack. -
Page 56: Stack Construction Methods
Building a Stack Stack construction methods Stack construction methods NOTE The principles outlined in stack construction scenarios apply to all ICX devices. Figures used to illustrate a certain stack topology are not necessarily representative of other devices. For illustrations specific to a particular device, refer to the stack configuration section for that device, which also contains device-specific stacking considerations. -
Page 57: Scenario 1 - Using Stack Interactive-Setup To Create A Stack
Building a Stack Stack construction methods Stack interactive-setup and the active controller When the stack interactive-setup command is issued on a unit that is not already the active controller, the unit becomes the active controller. If this unit does not already have an assigned priority and if no other unit in the stack has a priority higher than 128, stack interactive-setup assigns the unit a priority of 128 by default. - Page 58 Building a Stack Stack construction methods (Optional) Enter the show running-config command to check the current configuration of the standalone from which you plan to construct the stack. The configuration must include stack enable. ICX7750-48F Router# show running-config Current configuration: ver 08.0.90 stack unit 1 module 1 icx7750-48-xgf-port-management-module...
- Page 59 Building a Stack Stack construction methods Select from the available options as shown in the following example. If you are building a stack for the first time and the attached units are clean units with no startup configuration, select 2. NOTE Units with any startup configuration in flash memory are not discovered by option 2.
- Page 60 Building a Stack Stack construction methods 1/2/4 +---+ |#1 | +---+ Chain #1: ================================================================== #2: icx7750-48-xgc-port-management cc4e.2439.1a00 1/2/1 +---+ |#2 | +---+ Discovered units and their connections to the standalone (unit 1 at top) are displayed. In the example, two connected units are discovered. The first is connected to the standalone through standalone port 1/2/4 and discovered device port x/2/1.
- Page 61 Building a Stack Stack construction methods As each discovered unit connection is re-displayed, enter y when prompted to accept the connection as shown in the following example (or enter n to decline the connection). Discovered 2 chain/ring, display chain #0 for processing Chain #0: ================================================================== #1: icx7750-20-qxg-port-management cc4e.2439.3700 1/2/4...
- Page 62 Building a Stack Stack construction methods 10. As the full topology is re-displayed for confirmation, enter y when prompted to confirm the topology (or n to decline the topology and terminate the process). After you accept the topology, the active controller is confirmed, the stack is formed, and a standby controller is designated.
- Page 63 Building a Stack Stack construction methods 11. After the units reload and join the stack, the system displays information on the synchronization activities performed for each stack member as shown in the following example. After units reload and join: T=1h12m4.5: Election, was alone --> active, ID=1, pri=128, 2U(1,3), A=u1, nbr#=1 0, reason: u3: port- up, , Detect stack unit 3 has different startup config flash, will synchronize it T=1h12m0.7: Synchronize webauth files to u3...
- Page 64 Building a Stack Stack construction methods NOTE The system reminds you to save configuration changes with the write memory command. Before saving the changes to stack members, you can check the stack configuration as shown in subsequent optional steps. (Optional) Enter the show stack command to check the stack topology and the roles assigned to each stack unit and to verify that all units are in the Ready state.
- Page 65 Building a Stack Stack construction methods 13. (Optional) Enter the show running-config command to verify additional information, such as the software version running on the stack, the module configuration of each stack unit, and the stacking connections for each unit. ICX7750-48F Router# show running-config Current configuration: ver 08.0.90...
- Page 66 Building a Stack Stack construction methods The following example includes the full stack interactive-setup process described in the previous task steps. ICX7750-48F Router# show running-config Current configuration: ver 08.0.90 stack unit 1 module 1 icx7750-48-xgf-port-management-module module 2 icx7750-qsfp-6port-qsfp-240g-module module 3 icx7750-6q-6port-qsfp-240g-module stack-port 1/2/1 stack-port 1/2/4 stack enable...
- Page 67 Building a Stack Stack construction methods 1/2/4 +---+ |#1 | +---+ Chain #0: Do you want to select this chain? (enter 'y' or 'n'): y #1: icx7750-20-qxg-port cc4e.2439.3700, type an ID (No: 0, default: 2): Chain #1: ================================================================== #2: icx7750-48-xgc-port-management cc4e.2439.1a00 1/2/1 +---+ |#2 |...
- Page 68 Building a Stack Stack construction methods chg, , T:1h12m31.4: Done hot swap: active controller u1 sets u2 to Ready. T=1h12m31.4: Synchronize startup config to u2 Flash Memory Write (8192 bytes per dot) Write startup-config done. Config changed due to add/del units. Do write mem if you want to keep it Stack unit 2 Power supply 1 is up Stack unit 2 Power supply 2 is not present T=1h12m40.2: Synchronize secondary sig key to u2...
- Page 69 Building a Stack Stack construction methods Automatic copy to member units: <-- System saves the configuration back to the stack members. Flash Memory Write (8192 bytes per dot) Copy Done. Unit 2 Logs: <-- Unit 2 records stack formation activity. Unit 3 and any other stack units record similar information.
- Page 70 Building a Stack Stack construction methods Stack interactive-setup example with ring topology The following stack interactive-setup example creates a stack in a ring formation. The process is similar to the linear stack example. Option 2 is used to join clean units (with no start-up configuration in flash) to a stack. Please type your selection: 2 Sending probes to ports: u1: 1/2/1 to 1/2/6 1/3/1 to 1/3/6, Existing stack: ============================================================...
- Page 71 Building a Stack Stack construction methods the stack formation with the show stack command as shown in the following example. Additional show commands are available for checking stack status and configuration as described in Verifying a stack configuration on page 84. ICX7750-48F Router# show stack T=10m0.7: alone: standalone, D: dynamic cfg, S: static Type...
- Page 72 Building a Stack Stack construction methods Chain #0: ================================================================== #1: icx7750-48-xgc-port-management cc4e.2439.1a00 #2: icx7750-20-qxg-port-management cc4e.2439.3700 1/2/1 1/2/4 +---+ +---+ |#1 |2/4--2/4|#2 | +---+ +---+ Discovered 1 chain/ring Chain #0: Do you want to select this chain? (enter 'y' or 'n'): y #1: icx7750-48-xgc-port cc4e.2439.1a00, type an ID (No: 0, default: 3): #2: icx7750-20-qxg-port cc4e.2439.3700, type an ID (No: 0, default: 2): You selected 2 unit(s): #1: ID=3, #2: ID=2,...
- Page 73 Building a Stack Stack construction methods active standby +---+ +---+ +---+ =2/1| 1 |2/4--2/1| 2 |2/4--2/4| 3 |2/1= +---+ +---+ +---+ |-------------------------------------| Standby u2 - Learn other units for 7 sec, protocols may not be ready in 63 s. Role history: N: standalone, A: active, S: standby, M: member U1: N->A Current stack management MAC is cc4e.246d.9e00 ICX7750-48F Router#...
- Page 74 Building a Stack Stack construction methods Auto-trunking new links or converting a linear stack to a ring with stack interactive-setup NOTE The stack interactive-setup utility cannot detect mismatched live stack-trunks. For example, if one end of the trunk is stack-trunk 1/2/1 to 1/2/3 and the other end is stack-trunk 2/2/1 to 2/2/2, stack interactive-setup cannot detect the link 1/2/3 to 2/2/3 and enlarge the stack-trunk 2/2/1 to 2/2/2.
- Page 75 Building a Stack Stack construction methods Logical Link #0: U1--U2: 1 link(s): 1/2/3--2/2/3 It will enlarge (stack-trunk 1/2/1 to 1/2/2) to (stack-trunk 1/2/1 to 1/2/3) and enlarge (stack-trunk 2/2/1 to 2/2/2) to (stack-trunk 2/2/1 to 2/2/3) Logical Link #1: U1--U3: 2 link(s): 1/2/5--3/2/2 1/2/6--3/2/3 It will enlarge (stack-port 1/2/4) to (stack-trunk 1/2/4 to 1/2/6) and enlarge (stack-port 3/2/1) to (stack-trunk 3/2/1 to 3/2/3) Logical Link #2: U2--U3: 3 link(s): 2/2/4--3/2/4 2/2/5--3/2/5 2/2/6--3/2/6...
- Page 76 Building a Stack Stack construction methods NOTE The system does not change the configuration of a unit when its ID is changed. For example, if the ID for unit 2 is changed to be unit 3, the configuration of unit 2 ports does not change. The following example uses stack interactive-setup option 1 to change unit IDs.
-
Page 77: Scenario 2 - Using Zero-Touch Provisioning To Configure A Stack
Building a Stack Stack construction methods Config changed due to add/del units. Do write mem if you want to keep it T=1d17h53m21.5: Election, was active, no change, ID=1, pri=128, 3U(1-2,5), A=u1, nbr#=2 2, reason: u2: port- up, , Config changed due to add/del units. Do write mem if you want to keep it ICX7750-26Q Router# show stack T=1d17h49m48.5: alone: standalone, D: dynamic cfg, S: static Type... - Page 78 Building a Stack Stack construction methods (Optional) Enter the show running-config command to check the current configuration of the standalone from which you plan to construct the stack. The configuration must include stack enable. ICX7750-48F Router# show running-config Current configuration: ver 08.0.90_b139T203 stack unit 1 module 1 icx7750-48-xgf-port-management-module...
- Page 79 Building a Stack Stack construction methods (Optional) Enter the show stack command to verify the units in the entire stack. ICX7750-48F Router# show stack T=15m2.5: alone: standalone, D: dynamic cfg, S: static Type Role Mac Address Pri State Comment S ICX7750-48XGF active cc4e.246d.9e00 128 local Ready D ICX7750-26QXG standby cc4e.2439.3700...
- Page 80 Building a Stack Stack construction methods 12. Enter the write memory command to save the stack configuration. ICX7750-26Q Router(config)# write memory Zero-touch provisioning example of new link and new unit discovery The following example shows that a linear two-unit stack can learn new units as well as detect new links between existing units. The example first checks the running configuration before stack zero-touch provisioning is enabled.
- Page 81 Building a Stack Stack construction methods T:1h11m31.3: Done hot swap: active controller u1 sets u3 to Ready. T=1h11m39.1: Election, was active, no change, ID=1, pri=128, 3U(1-3), A=u1, nbr#=1 1, reason: u1: stk-po- chg, , T=1h11m32.3: Synchronize startup config to u3 Flash Memory Write (8192 bytes per dot) Write startup-config done.
- Page 82 Building a Stack Stack construction methods stack-trunk 3/2/1 to 3/2/3 stack-trunk 3/2/4 to 3/2/6 stack enable stack zero-touch-enable stack mac cc4e.2438.7280 Unit 3 (new unit) log =============== ICX7750-26Q Router> Creating certificate, please wait... SSL Client Certificate is successfully created Power supply 1 detected.
-
Page 83: Scenario 3 - Manually Configuring A Three Member Stack In A Ring Topology
Building a Stack Stack construction methods Scenario 3 - Manually configuring a three member stack in a ring topology If you are connecting units that have been individually configured for stacking and want unit IDs to be assigned based on physical sequence, you may want to configure the stack manually. -
Page 84: Verifying A Stack Configuration
Building a Stack Verifying a stack configuration Connect the devices in a stack topology. The active controller retains its ID. The rest of the units are assigned unique ID numbers depending on the sequence in which you connected them. For more information about cabling the devices, refer to the stacking overview for the device and the appropriate hardware installation guide. - Page 85 Building a Stack Verifying a stack configuration stack-trunk 2/2/1 to 2/2/3 stack-trunk 2/2/4 to 2/2/6 stack unit 3 module 1 icx7750-20-qxg-port-management-module module 2 icx7750-qsfp-6port-qsfp-240g-module module 3 icx7750-6q-6port-qsfp-240g-module stack-trunk 3/2/1 to 3/2/3 stack-trunk 3/2/4 to 3/2/6 stack enable stack mac 609c.9f7f.9400 The output from the show stack command contains a visual diagram of the stack.
-
Page 86: Displaying Information On Stack Connections
Building a Stack Displaying information on stack connections To check the software version installed on each stack unit, enter the show version command. The software versions should match. If they do not match, refer to "Stack mismatches." Copyright (c) Ruckus Networks, Inc. All rights reserved. UNIT 1: compiled on Dec 20 2018 at 10:49:04 labeled as SWR08090dev (30070372 bytes) from Primary SWR08090dev.bin SW: Version 08.0.90devT203... - Page 87 Building a Stack Displaying information on stack connections In the following example, the show stack connection command output indicates that CPU-to-CPU connections are working properly between all 12 members of the stack. ICX7750-48F Router# show stack connection Probing the topology. Please wait ... ICX7750-48F Router# active +---+...
- Page 88 Ruckus FastIron Stacking Configuration Guide, 08.0.90 Part Number: 53-1005572-01...
-
Page 89: Stacking By Device
Stacking by Device • ICX 7150 stack configuration overview........................89 • ICX 7250 stack configuration overview........................102 • ICX 7450 stack configuration overview........................107 • ICX 7650 stack configuration overview........................117 • ICX 7750 stack configuration overview........................136 • ICX 7850 stack configuration overview........................150 ICX 7150 stack configuration overview The following table provides an overview of ICX 7150 stacking capabilities. -
Page 90: Icx 7150 Stacking Ports
Stacking by Device ICX 7150 stack configuration overview TABLE 19 ICX 7150 stacking capabilities (continued) Stacking capability ICX 7150 Additional information Reconfigurable ports Supported Use the no stack-port command to reconfigure one stack port as a data uplink port. Once licensed, stacking ports will come up automatically as 10-Gbps. - Page 91 Stacking by Device ICX 7150 stack configuration overview FIGURE 5 ICX 7150-C12P stacking ports ICX 7150-24 and ICX 7150-24P devices have four stacking ports on the front panel as shown in the following figure. FIGURE 6 ICX 7150 stacking port location on 24-port and some 48-port models ICX 7150-48, ICX 7150-48P, and ICX 7150-48PF devices have four stacking ports in the same location on the front panel as ICX 7150 24-port models.
-
Page 92: Icx 7150 Stacking Topologies
Stacking by Device ICX 7150 stack configuration overview The exception among 48-port models is the ICX 7150-48ZP, which has eight SPF+ ports on the front panel as shown in the following figure. Four of these ports, ports 1/2/1 through 1/2/4, can be used as stacking or data uplink ports. The remaining four, 1/2/5 through 1/2/8, can be used only as data uplink ports. - Page 93 Stacking by Device ICX 7150 stack configuration overview FIGURE 9 ICX 7150-C12P stack ring topology The following figures show examples of supported topologies for ICX 7150 24-port models. FIGURE 10 ICX 7150 24-port model, linear stack Ruckus FastIron Stacking Configuration Guide, 08.0.90 Part Number: 53-1005572-01...
- Page 94 Stacking by Device ICX 7150 stack configuration overview FIGURE 11 ICX 7150 24-port stack ring topology The following figures show examples of supported topologies for the ICX 7150-48ZP. FIGURE 12 ICX 7150-48ZP linear stack Ruckus FastIron Stacking Configuration Guide, 08.0.90 Part Number: 53-1005572-01...
-
Page 95: Icx 7150 Configuration Notes
Stacking by Device ICX 7150 stack configuration overview FIGURE 13 ICX 7150-48ZP stack ring topology The following figure depicts a two-unit stack linear-topology trunk. All ICX 7150 models except for ICX 7150-12C devices support this type of trunk, which improves redundancy and bandwidth. For more information, refer to Support for two-unit stack linear- topology trunks on page 36. -
Page 96: Icx 7150 Stacking Trunks
Stacking by Device ICX 7150 stack configuration overview ICX 7150 stacking trunks All ports on both ends of a trunk must be configured at the same speed. The lead port in a stacking trunk must be a valid-stack- port. The default valid-stack-ports come up automatically as 10-Gbps ports (assuming they are licensed). Additional 10-Gbps ports require a license. - Page 97 Stacking by Device ICX 7150 stack configuration overview Enter stack unit configuration mode on the active controller. ICX7150-24 Router(config)# stack unit 1 ICX7150-24 Router(config-unit-1)# Enter the stack-trunk command followed by the range of ports to include in the trunk. ICX7150-24 Router(config-unit-1)# stack-trunk 1/3/3 to 1/3/4 The example creates a two-port stacking trunk containing ports 1/3/3 and 1/3/4.
- Page 98 Stacking by Device ICX 7150 stack configuration overview The following example creates a trunk on stack unit 1 while the link is down. ICX7150-24 Router(config)# configure terminal ICX7150-24 Router(config)# show stack T=36m46.7: alone: standalone, D: dynamic cfg, S: static Type Role Mac Address Pri State...
- Page 99 Stacking by Device ICX 7150 stack configuration overview NOTE Use the multi-stack-port command to remove stacking trunks and restore stacking ports on a live system. Enter global configuration mode. ICX7150-24 Router(config)# configure terminal (Optional) Use the show stack command to check the stack topology and status. ICX7150-24 Router(config-unit-1)# show stack T=35m51.5: alone: standalone, D: dynamic cfg, S: static Type...
- Page 100 Stacking by Device ICX 7150 stack configuration overview (Optional) Enter the show stack command and the show stack connection command to check the configuration. ICX7150-24 Router(config-unit-1)# show stack T=35m51.5: alone: standalone, D: dynamic cfg, S: static Type Role Mac Address Pri State Comment S ICX7150-24...
-
Page 101: Converting Stacking Ports To Data Ports On Icx 7150 Devices
Stacking by Device ICX 7150 stack configuration overview The following example creates a trunk on a live link. ICX7150-24 Router# configure terminal ICX7150-24 Router(config)# stack unit 1 ICX7150-24 Router(config-unit-1)# multi-stack-trunk 1/3/1 to 1/3/2 and 2/3/1 to 2/3/2 ICX7150-24 Router(config-unit-1)# show stack T=35m51.5: alone: standalone, D: dynamic cfg, S: static Type Role... -
Page 102: Icx 7250 Stack Configuration Overview
Stacking by Device ICX 7250 stack configuration overview The following example converts stacking port 1/3/3 to a data port. ICX7150-24 Router# configure terminal ICX7150-24 Router(config)# stack unit 1 ICX7150-24 Router(config-unit-1)# no stack-port 1/3/3 stack-port 1/3/3 is removed. ICX7150-24 Router(config-unit-1)# show stack T=41m15.7: alone: standalone, D: dynamic cfg, S: static Type Role... -
Page 103: Icx 7250 Stacking Topologies
Stacking by Device ICX 7250 stack configuration overview TABLE 21 ICX 7250 stacking capability (continued) Stacking capability ICX 7250 Additional information Reconfigurable ports Supported Use the stack-port command to reconfigure one stack port as a data uplink port. Once licensed, stacking ports come up as 10- Gbps ports automatically. - Page 104 Stacking by Device ICX 7250 stack configuration overview FIGURE 15 ICX 7250 stacking ports The following figures show ICX 7250 units connected in a linear stack and a ring stack. FIGURE 16 ICX 7250-24P linear stack Ruckus FastIron Stacking Configuration Guide, 08.0.90 Part Number: 53-1005572-01...
-
Page 105: Icx 7250 Stacking Configuration Notes
Stacking by Device ICX 7250 stack configuration overview FIGURE 17 ICX 7250-24P ring stack The following figure depicts a two-unit stack linear-topology trunk. All ICX 7250 models support this type of trunk, which improves redundancy and bandwidth. For more information, refer to Support for two-unit stack linear-topology trunks on page FIGURE 18 ICX 7250-24P two-unit stack with linear-topology trunk... -
Page 106: Reconfiguring Icx 7250 1-Gbps Ports As 10-Gbps Ports
Stacking by Device ICX 7250 stack configuration overview ICX 7250 trunk configuration on page 106 for more information. All eight ports are available as uplink data ports when not used for stacking. When stacking is configured, all stack ports and trunks must be either in the port range of 1/2/1 through 1/2/4 or in the port range 1/2/5 through 1/2/8. -
Page 107: Icx 7450 Stack Configuration Overview
Stacking by Device ICX 7450 stack configuration overview The following example uses the other valid-stack-port set (1/2/5, 1/2/7). ICX7250-24P Router(config)# stack unit 1 ICX7250-24P Router(config-unit-1)# stack-trunk 1/2/5 to 1/2/6 ICX7250-24P Router(config-unit-1)# stack-trunk 1/2/7 to 1/2/8 The following example creates a linear-topology trunk containing ports 1/2/1 through 1/2/4: ICX7250-24P Router(config)# stack unit 1 ICX7250-24P Router(config-unit-1)# stack-trunk 1/2/1 to 1/2/4 The following example creates a linear-topology trunk containing ports 1/2/5 through 1/2/8:... - Page 108 Stacking by Device ICX 7450 stack configuration overview TABLE 22 ICX 7450 stacking capability (continued) Stacking capability ICX 7450 Additional information Maximum stack size 12 units Stacking and SPX configurations. Any combination of ICX 7450 devices may be stacked. When a stand-alone ICX 7450 is configured as a PE unit attached to a control bridge in an 802.1br SPX configuration, scaling is increased.
-
Page 109: Icx 7450 Stacking Topologies
Stacking by Device ICX 7450 stack configuration overview TABLE 22 ICX 7450 stacking capability (continued) Stacking capability ICX 7450 Additional information License requirements No license required for stack-port Premium feature requires trust-based license. configuration Refer to the Ruckus FastIron Software Licensing Guide for information. - Page 110 Stacking by Device ICX 7450 stack configuration overview FIGURE 20 ICX 7450 module 2 ports available for stacking The following figure shows ICX 7450 units connected from 1 X 40-Gbps ports on the rear in a linear stack. FIGURE 21 ICX 7450 1 X 40-Gbps linear stack The following figure shows ICX 7450 units connected from 1 X 40-Gbps ports on the rear in a ring stack.
- Page 111 Stacking by Device ICX 7450 stack configuration overview FIGURE 22 ICX 7450 1 X 40-Gbps ring stack The following figure shows the ICX 7450 connected from the front in a ring using stacking trunks. FIGURE 23 ICX 7450 4 X 10-Gbps ring using stacking trunks The following figure shows the ICX 7450 connected from the front in a linear stack using stacking trunks.
- Page 112 Stacking by Device ICX 7450 stack configuration overview FIGURE 24 ICX 7450 4 X 10-Gbps linear stack using stacking trunks The following figures depict two-unit stacks with linear-topology trunks on the front and rear panel. ICX 7450-24P devices support this type of trunk, which improves redundancy and bandwidth. For more information, refer to Support for two-unit stack linear-topology trunks on page 36.
-
Page 113: Icx 7450 Stacking Configuration Notes
Stacking by Device ICX 7450 stack configuration overview ICX 7450 stacking configuration notes • The 1 X 40-Gbps module supports stacking only when installed in rear panel slot 3 or 4. • The ICX 7450 supports 10-Gbps stacking when a 4X10GF module is present in slot 2. Refer to Configuring 10-Gbps stacking ports on ICX 7450 devices on page 113 for more information on 4 X 10-Gbps ports. - Page 114 Stacking by Device ICX 7450 stack configuration overview module 3 icx7400-qsfp-1port-40g-module module 4 icx7400-qsfp-1port-40g-module stack-port 1/2/1 stack-port 1/2/3 ICX7450-48P Router(config)# write memory | | <-- Required if stack-port or stack-trunk ICX7450-48P Router(config)# end configuration changes on prospective ICX7450-48P Router# reload active controller Once the stack-ports are configured, enter the write memory and then the reload command, after which the unit is ready to join an existing stack or to be configured for stacking using stack interactive-setup or manual stack construction.
-
Page 115: Creating Stacking Trunks On The Icx 7450
Stacking by Device ICX 7450 stack configuration overview The following error message is displayed if stacking is configured on these ports and you enter the enable-mka ethernet command for any of the ports. Error: MACsec is not allowed when 4x10GF module is used for stacking. Please configure “stack-port”... - Page 116 Stacking by Device ICX 7450 stack configuration overview NOTE Valid-stack-ports 1/3/1 and 1/4/1, which are 40-Gbps ports on the rear panel of the ICX 7450, do not support stacking trunks. NOTE ICX 7450-24P devices support linear-topology trunks in a two-unit stack. In an ICX 7450-24P linear-topology trunk, you can configure ports 1/2/1 to 1/2/4 or ports 1/3/1 and 1/4/1 in one trunk.
-
Page 117: Icx 7650 Stack Configuration Overview
Stacking by Device ICX 7650 stack configuration overview Creating stacking trunks on live stacks Use the multi-stack trunk or multi-stack port command to add or remove a stacking trunk on a live ICX 7450 stack. The following example creates two stacking trunks. device# configure terminal device(config)# stack unit 1 device(config-unit-1)# multi-stack-trunk 1/2/1 to 1/2/2 and 2/2/1 to 2/2/2... - Page 118 Stacking by Device ICX 7650 stack configuration overview TABLE 23 ICX 7650 stacking capabilities (continued) Stacking capability ICX 7650 Additional information Valid-stack-port sets For 100-Gbps stacking: (x/3/1, x/3/2, 1) Refer to the definition of valid-stack-port set Stacking terminology on page 19 and Valid- For 40-Gbps stacking: (x/3/1, x/3/3, 2) stack-port sets...
-
Page 119: Icx 7650 Stacking Ports
Stacking by Device ICX 7650 stack configuration overview ICX 7650 stacking ports ICX 7650 devices support stacking through Module 3 on the rear panel, shown in the following figure. FIGURE 27 ICX 7650 rear-module 40-Gbps stacking ports The rear module is fixed, and its ports can be configured for stacking or uplink. By default, the rear module supports 100-Gbps stacking on ports 1 and 2 (1/3/1 and 1/3/2). - Page 120 Stacking by Device ICX 7650 stack configuration overview FIGURE 28 ICX 7650 100-Gbps linear stack ICX 7650 100-Gbps ring stack The following figure depicts a three-unit stack of ICX 7650 devices configured in a 100-Gbps ring stack. FIGURE 29 ICX 7650 100-Gbps ring stack ICX 7650 40-Gbps linear stack The following figure depicts a three-unit stack of ICX 7650 devices configured in a 40-Gbps linear stack.
- Page 121 Stacking by Device ICX 7650 stack configuration overview FIGURE 30 ICX 7650 40-Gbps linear stack ICX 7650 40-Gbps ring stack The following figure depicts a three-unit stack of ICX 7650 devices configured in a 40-Gbps ring stack. FIGURE 31 ICX 7650 40-Gbps ring stack ICX 7650 40-Gbps trunk The following figure depicts a three-unit stack of ICX 7650 devices configured in a 40-Gbps stack with a trunk.
- Page 122 Stacking by Device ICX 7650 stack configuration overview ICX 7650 two-unit stack with linear-topology trunk The following figures depict a two-unit stack linear-topology trunk for a 40-Gbps connection and for a 100-Gbps connection. All ICX 7650 models support this type of trunk, which improves redundancy and bandwidth. For more information, refer to Support for two-unit stack linear-topology trunks on page 36.
-
Page 123: Icx 7650 Configuration Notes
Stacking by Device ICX 7650 stack configuration overview ICX 7650 configuration notes Consider these items when configuring an ICX 7650 stack: • On ICX 7650 devices, "rear module" refers to Module 3. • Stacking ports operate in 100-Gbps stacking mode by default when an ICX 7650 device has no rear-module configuration. - Page 124 Stacking by Device ICX 7650 stack configuration overview Changing ICX 7650 stacking speed Be sure to connect stacking ports using optics that are compatible with the planned port speed. Be sure that the correct ports are connected. Be sure that speeds match on both ends of the stacking connection. To change the rear-module stacking speed from 100 Gbps to 40 Gbps, enter the following commands on each affected unit.
- Page 125 Stacking by Device ICX 7650 stack configuration overview Follow these steps to convert the rear module (Module 3) of an ICX 7650 device from stacking to uplink mode. (Optional) Enter the show stack command to check for active stack configuration. ICX7650-48F Router# show stack T=7m25.5: alone: standalone, D: dynamic cfg, S: static ID Type Role Mac Address Pri State Comment...
- Page 126 Stacking by Device ICX 7650 stack configuration overview The following example unconfigures the stack and configures one ICX 7650 rear module for data uplink at 100 Gbps on ports 1/3/1 and 1/3/2. (Ports 1/3/3 and 1/3/4 are not used.) ICX7650-48F Router# stack unconfigure all Will dismantle the entire stack and recover pre-stacking startup config.
-
Page 127: Forming An Icx 7650 Stack
Stacking by Device ICX 7650 stack configuration overview Reload the unit to put the mode change into effect. ICX7650-48P Router(config)# exit ICX7650-48P Router# reload The following example removes the data uplink configuration from an ICX 7650 device, restores the default (100-Gbps stacking), saves the configuration, and reloads the unit so that it operates in 100-Gbps stacking mode. - Page 128 Stacking by Device ICX 7650 stack configuration overview Configuring an ICX 7650 trunk manually on a non-production system Stacking trunks can be configured on ICX 7650 devices operating in 40-Gbps stacking mode. The stack interactive-setup process includes the option to form trunks when multiple links are possible. You may also opt to configure a trunk manually.
- Page 129 Stacking by Device ICX 7650 stack configuration overview Enter stack unit configuration mode to configure trunks. ICX7650-48P Router# configure terminal ICX7650-48P Router(config)# stack unit 1 ICX7650-48P Router(config-unit-1)# ICX7650-48P Router(config-unit-1)# stack-trunk 1/3/1 to 1/3/2 ICX7650-48P Router(config-unit-1)# stack-trunk 1/3/3 to 1/3/4 ICX7650-48P Router(config-unit-1)# exit The example configures two stacking trunks on stack unit 1.
- Page 130 Stacking by Device ICX 7650 stack configuration overview Configuring an ICX 7650 stacking trunk on a live system Follow these steps to convert stacking ports on both ends of a link to a stacking trunk on an ICX 7650 production stack. (Optional) Enter the show stack command to verify stack configuration.
- Page 131 Stacking by Device ICX 7650 stack configuration overview Enter the multi-stack-trunk command followed by the set of ports on either end of the live connection to include in the stacking trunk. ICX7650-48ZP Router(config-unit-1)# multi-stack-trunk 1/3/1 to 1/3/2 and 2/3/1 to 2/3/2 SYSLOG: <14>...
- Page 132 Stacking by Device ICX 7650 stack configuration overview Removing an ICX 7650 trunk on a live system Follow these steps to remove a stacking trunk and convert connections to individual links at both ends of the connection on an ICX 7650 production stack. (Optional) Enter the show stack command to verify the stack configuration.
- Page 133 Stacking by Device ICX 7650 stack configuration overview Enter stack unit configuration mode. ICX7650-48ZP Router# configure terminal ICX7650-48ZP Router(config)# stack unit 1 ICX7650-48ZP Router(config-unit-1)# Enter the multi-stack-port command followed by the set of ports on either end of the live trunk to convert to stacking ports.
- Page 134 Stacking by Device ICX 7650 stack configuration overview Enter the write memory command in privileged EXEC mode to save the configuration. ICX7650-48ZP Router# write memory Automatic copy to member units: SYSLOG: <14> Sep 7 19:10:05 System: Interface ethernet 1/3/4, state down SYSLOG: <14>...
- Page 135 Stacking by Device ICX 7650 stack configuration overview Resolving Module 2 mismatches in an ICX 7650 stack When an ICX 7650 stack unit rejoins a stack with a different module type installed as Module 2, a configuration mismatch occurs, and the active controller places the stack unit in non-operational mode. Follow these steps to correct a module configuration mismatch in an ICX 7650 stack.
-
Page 136: Icx 7750 Stack Configuration Overview
Stacking by Device ICX 7750 stack configuration overview (Optional) Enter the show module command to verify that the new configuration for Module 2 has been learned. ICX7650-48P Router(config-unit-3)# show module Module Status Ports Starting MAC U1:M1 ICX7650-48P POE 48-port Management Module 609c.9f52.6353 U1:M2 ICX7600-2X40GQ 2-port 80G Module 609c.9f52.6384... - Page 137 Stacking by Device ICX 7750 stack configuration overview TABLE 24 ICX 7750 stacking capability (continued) Stacking capability ICX 7750 Additional information Stacking ports 12 total ports available simultaneously: Refer to "Valid-stack-port sets" in this table for information on using Module 2 (right Six 40-Gbps ports, Module 2: 1/2/1 to 1/2/6 front) and Module 3 (rear) simultaneously for (Front)
-
Page 138: Icx 7750 Stacking Topologies
Stacking by Device ICX 7750 stack configuration overview TABLE 24 ICX 7750 stacking capability (continued) Stacking capability ICX 7750 Additional information Stacking commands All stacking CLI is supported on ICX 7750 devices unless otherwise stated on the command reference page. ICX 7750 stacking topologies The following figures show available ICX 7750 stacking ports on the front and rear panel. - Page 139 Stacking by Device ICX 7750 stack configuration overview FIGURE 35 ICX 7750-26Q front panel stacking ports Available stacking ports on the ICX 7750 rear panel are ports 1/3/1 through 1/3/6. FIGURE 36 ICX 7750 stacking ports on rear panel The following figure shows an ICX 7750 linear stack. Ruckus FastIron Stacking Configuration Guide, 08.0.90 Part Number: 53-1005572-01...
- Page 140 Stacking by Device ICX 7750 stack configuration overview FIGURE 37 ICX 7750 linear stack from rear panel The following figures show ICX 7750 ring stacks from the front and rear panels. Default valid-stack-ports are located on the front panel, but they can be changed to the rear panel using the stack-port or stack-trunk command. FIGURE 38 ICX 7750 ring stack from front panel FIGURE 39 ICX 7750 ring stack from rear panel Ruckus FastIron Stacking Configuration Guide, 08.0.90...
- Page 141 Stacking by Device ICX 7750 stack configuration overview FIGURE 40 ICX 7750 fully populated ring stack from rear panel with three-port stacking trunks ICX 7750 two-unit stacks with linear-topology trunks The following figures depict ICX 7750 two-unit stacks with linear-topology trunks, for a four-port trunk configuration and a twelve-port trunk configuration.
- Page 142 Stacking by Device ICX 7750 stack configuration overview FIGURE 41 ICX 7750-48C two-unit stack with linear-topology trunk (four-port trunk) Ruckus FastIron Stacking Configuration Guide, 08.0.90 Part Number: 53-1005572-01...
-
Page 143: Installing The Icx 7750 In A Remote Stack
Stacking by Device ICX 7750 stack configuration overview FIGURE 42 ICX 7750-48C two-unit stack with linear-topology trunk (twelve-port trunk) Installing the ICX 7750 in a remote stack The ICX 7750-26Q, ICX 7750-48C, and ICX 7750-48F can support stacking distances of 10 kilometers. To achieve maximum stacking distance, these ICX 7750 models must use Ruckus LR4 fiber optics. - Page 144 Stacking by Device ICX 7750 stack configuration overview FIGURE 43 Module 2 front panel stacking ports (ICX 7750-26Q) FIGURE 44 Module 2 front panel stacking ports (ICX 7750-48C) Ruckus FastIron Stacking Configuration Guide, 08.0.90 Part Number: 53-1005572-01...
-
Page 145: Icx 7750 Stacking Configuration Notes
Stacking by Device ICX 7750 stack configuration overview FIGURE 45 Module 3 rear panel stacking ports (ICX 7750-48C) Refer to FastIron stacking distances and optics by device on page 50 for information on Ruckus cable options and distances supported by different FastIron models. ICX 7750 stacking configuration notes •... -
Page 146: Icx 7750 Trunk Formation During Interactive-Setup
Stacking by Device ICX 7750 stack configuration overview ICX 7750 trunk formation during interactive-setup Stack interactive-setup can discover links between existing units and enlarge stacking trunks. It can detect new links between two end units and change the topology from a chain to a ring. You cannot select partial links. Stack interactive-setup allows only an all-or-none selection. -
Page 147: Removing Stacking Ports From An Icx 7750
Stacking by Device ICX 7750 stack configuration overview S ICX7750-48XGF active 609c.9f7f.9400 128 local Ready S ICX7750-20QXG standby cc4e.2438.7280 0 remote Ready S ICX7750-20QXG member 748e.f8f9.6300 0 remote Ready active standby +---+ +---+ +---+ =2/1| 1 |2/4==2/4| 3 |2/1==2/4| 2 |2/1= +---+ +---+ +---+... -
Page 148: Converting An Icx 7750 Trunk To A Port Connection In A Live Stack
Stacking by Device ICX 7750 stack configuration overview In the following example, a port connection is converted to a two-port trunk connection between stack unit 4 and stack unit 5. ICX7750-48F Router# configure terminal ICX7750-48F Router(config)# stack unit 4 ICX7750-48F Router(config-unit-4)# multi-stack-trunk 4/2/1 to 4/2/2 and 5/2/4 to 5/2/5 stack unit 4 module 1 icx7750-48-xgf-port-management-module... -
Page 149: Converting An Icx 7750 Ring To A Linear Stack In A Live Environment
Stacking by Device ICX 7750 stack configuration overview NOTE Only primary ports (stack module ports 1 and 4) can be designated in the multi-stack-port command. The following code excerpt displays configuration information for stack units 6 and 7. stack unit 6 module 1 icx7750-20-qxg-port-management-module module 2 icx7750-qsfp-6port-qsfp-240g-module stack-trunk 6/2/1 to 6/2/3... -
Page 150: Restoring A Data Port From An Icx 7750 Trunk In A Live Stack
Stacking by Device ICX 7850 stack configuration overview Restoring a data port from an ICX 7750 trunk in a live stack The multi-stack-trunk command can be used to remove a stacking port for configuration as a data port. Use the following procedure in a production environment to reduce the size of a trunk and make an end port in the trunk available for configuration as a data port. -
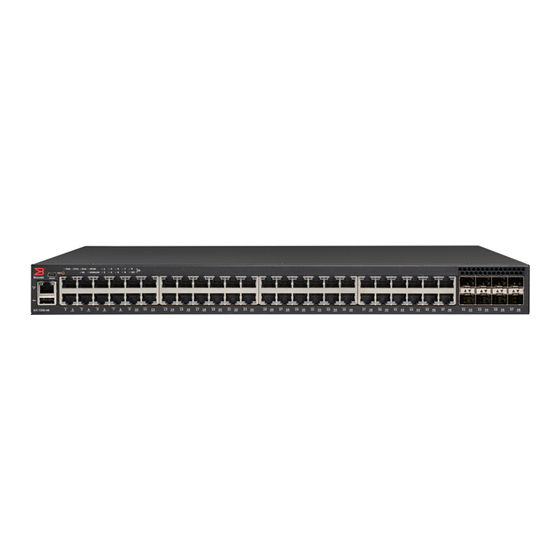
Page 151: Icx 7850 Stacking Topologies
Stacking by Device ICX 7850 stack configuration overview TABLE 25 ICX 7850 stacking capability (continued) Stacking capability ICX 7850 Additional information Valid-stack-port sets ICX 7850-32Q: (x/3/1, x/3/5, 4) Refer to the definition of valid-stack-port set Stacking terminology on page 19 and Valid- ICX 7850-48FS/48F: (x/2/1, x/2/5, 4) stack-port sets... - Page 152 Stacking by Device ICX 7850 stack configuration overview FIGURE 46 ICX 7850-32Q stacking ports FIGURE 47 ICX 7850-48F/48FS stacking ports The following figure shows an ICX 7850 linear stack. Ruckus FastIron Stacking Configuration Guide, 08.0.90 Part Number: 53-1005572-01...
- Page 153 Stacking by Device ICX 7850 stack configuration overview FIGURE 48 ICX 7850-48F/48FS linear topology The following figure shows an ICX 7850-48F/48FS stack connected in a ring topology. FIGURE 49 ICX 7850-48F/48FS ring topology ICX 7850 two-unit stacks with linear-topology trunks The following figure depicts a two-unit stack linear-topology trunk in an ICX 7850-48FS stack.
-
Page 154: Icx 7850 Configuration Notes
Stacking by Device ICX 7850 stack configuration overview FIGURE 50 ICX 7850-48FS two-unit stack with linear-topology trunk (eight ports) ICX 7850 configuration notes Keep the following points in mind when configuring ICX 7850 stack units. • If an ICX 7850 unit has any port configured for breakout into sub-ports, attempts to enable the unit for stacking will fail. Remove the breakout configuration before enabling stacking on the unit. -
Page 155: Creating A Two-Unit Icx 7850 Stack With A Linear-Topology Trunk Using Stack Interactive-Setup
Stacking by Device ICX 7850 stack configuration overview Warning: inconsistent stacking trunk port speed was found in: stack-trunk 1/3/1 to 1/3/4 has different speed 100Gbit/40Gbit : 1/3/1 in speed 100Gbit 1/3/2 in speed 100Gbit 1/3/3 in speed 40Gb Creating a two-unit ICX 7850 stack with a linear-topology trunk using stack interactive-setup Complete the following steps to use stack interactive-setup to create a two-unit ICX 7850 stack with a linear-topology trunk. - Page 156 Stacking by Device ICX 7850 stack configuration overview Press Enter to accept the default ID, or type an alternative ID. In the following example, the user elected to use the default ID. 1: icx7850-48fs-port d4c1.9e18.8dd9, type an ID (No: 0, default: 2): You selected 1 unit(s): #1: ID=2, Links U1--U2, #=8: 3/1--2/1, 3/2--2/2, 3/3--2/3, 3/4--2/4, 3/5--2/5, 3/6--2/6, 3/7--2/7, 3/8--2/8, If the topology qualifies as a linear-topology trunk, you are given the option of selecting the linear-topology chain (enter...
-
Page 157: Using Stack Zero-Touch Provisioning To Create A Two-Unit Icx 7850 Stack With A Ring Topology
Stacking by Device ICX 7850 stack configuration overview (Optional) Enter the show stack command and the show running-config command to check the stack configuration. ICX7850-32Q Router# show stack T=12m52.2: alone: standalone, D: dynamic cfg, S: static Type Role Mac Address Pri State Comment S ICX7850-32Q... - Page 158 Stacking by Device ICX 7850 stack configuration overview Complete the following steps to create a two-unit ICX 7850 ring using stack zero-touch provisioning. (Optional) Enter the show running-config command to check unit configuration on the proposed active controller unit. ICX7850-32Q Router# show running-config Current configuration: ver 08.0.90_b313T233 stack unit 1...
- Page 159 Stacking by Device ICX 7850 stack configuration overview (Optional) Enter the show stack zero-touch status command to check the available configuration options. ICX7850-32Q Router# show stack zero-touch status I cannot be discovered by stack zero-touch or interactive-setup option 2. reason: has stack enable configuration I can be discovered by stack interactive-setup option 3.
- Page 160 Stacking by Device ICX 7850 stack configuration overview (Optional) Enter the show stack command and the show running-config command to check the stack configuration. ICX7850-32Q Router# show stack T=14m59.3: alone: standalone, D: dynamic cfg, S: static Type Role Mac Address Pri State Comment S ICX7850-32Q...
-
Page 161: Creating A Linear-Topology Trunk On A Two-Unit Icx 7850 Stack In A Live Environment
Stacking by Device ICX 7850 stack configuration overview Creating a linear-topology trunk on a two-unit ICX 7850 stack in a live environment NOTE If you try to expand a four-port trunk to an eight-port linear-topology trunk using stack interactive-setup, the default result would be a ring topology with two four-port trunks. - Page 162 Stacking by Device ICX 7850 stack configuration overview Complete the following steps to create a two-unit ICX 7850 stack with a linear-trunk topology in a production environment. (Optional) Enter the show stack command and the show running-config command to check the stack configuration. ICX7850-32Q Router# stack interactive-setup You can abort stack interactive-setup at any stage by <ctrl-c>...
- Page 163 Stacking by Device ICX 7850 stack configuration overview enable aaa console no telnet server username super password ..hitless-failover enable sz registrar In stack unit configuration sub-mode, enter the multi-stack-trunk command followed by the range of ports on both ends of a connection to form the desired stacking trunk. To create a full linear-topology trunk, enter the full range of eight ports on both end as shown in the following example.
- Page 164 Stacking by Device ICX 7850 stack configuration overview (Optional) Enter the show stack command and the show running-config command to check that the topology has changed from a four-port trunk to an eight-port linear-topology trunk. ICX7850-32Q Router# show stack T=19m38.6: alone: standalone, D: dynamic cfg, S: static Type Role Mac Address...
-
Page 165: Manually Creating A Two-Unit Icx 7850 Stack With A Ring Topology
Stacking by Device ICX 7850 stack configuration overview Manually creating a two-unit ICX 7850 stack with a ring topology Perform the following steps to manually create a two-unit ICX 7850 stack with a ring topology. (Optional) Enter the show running-config command on each stack unit to check its current configuration. The following example shows two stacking units each with stacking ports configured. - Page 166 Stacking by Device ICX 7850 stack configuration overview Manually configure the desired stack-ports or stack-trunks on the two candidate stack units. To configure a ring, configure two potential connections on each unit. The following example creates two four-port stacking trunks on each stacking candidate. Unit 1: ICX7850-32Q Router# configure terminal ICX7850-32Q Router(config)# stack unit 1...
- Page 167 Stacking by Device ICX 7850 stack configuration overview Enter the stack enable command on both the units to enable stacking. Unit 1: ICX7850-32Q Router# configure terminal ICX7850-32Q Router(config)# stack enable Enable stacking. This unit actively participates in stacking Unit 2: ICX7850-48FS Router# configure terminal ICX7850-48FS Router(config)# stack enable Enable stacking.
- Page 168 Stacking by Device ICX 7850 stack configuration overview Enter the write memory command to save the configuration after the two units have synchronized and the standby controller assignment is complete. ICX7850-32Q Router# write memory There is no startup config file, unable to save legacy config Flash Memory Write (8192 bytes per dot) Write startup-config done.
- Page 169 Stacking by Device ICX 7850 stack configuration overview (Optional) Enter the show stack command and the show running-config command to verify stack formation. ICX7850-32Q Router# show stack T=31m6.8: alone: standalone, D: dynamic cfg, S: static Type Role Mac Address Pri State Comment S ICX7850-32Q active...
- Page 170 Ruckus FastIron Stacking Configuration Guide, 08.0.90 Part Number: 53-1005572-01...
-
Page 171: Hitless Stacking
Hitless Stacking • Hitless stacking overview............................171 • Hitless stacking behavior............................171 • Supported hitless stacking events ..........................173 • Non-supported hitless stacking events........................173 • Supported hitless stacking protocols and services....................173 • Hitless stacking configuration notes and feature limitations................176 • What happens during a hitless stacking switchover or failover................ - Page 172 Hitless Stacking Hitless stacking behavior If you install a FastIron 08.0.20 or later image on a new system with no previous configuration, the hitless-failover command is enabled by default. If you upgrade to FastIron release 08.0.20 or later from a previous version that has hitless-failover enabled, hitless-failover is retained as the default.
-
Page 173: Supported Hitless Stacking Events
Hitless Stacking Supported hitless stacking protocols and services • If hitless-failover enable is not configured, the following is displayed: Standby u2 - No hitless failover. Reason: hitless-failover not configured NOTE Whether or not hitless-failover is enabled, if the entire stack reloads, and the active controller does not come up, the bootup standby takes over in four minutes or longer, depending on the size of the startup-config file, to allow the active controller sufficient time to process a very larg startup-config file during bootup. - Page 174 Hitless Stacking Supported hitless stacking protocols and services NOTE Services and protocols that are not listed in the following table encounter disruptions, but resume normal operation once the new active controller is back up and running. TABLE 26 Supported hitless stacking protocols and services Traffic type Supported protocols and services Impact...
- Page 175 Hitless Stacking Supported hitless stacking protocols and services TABLE 26 Supported hitless stacking protocols and services (continued) Traffic type Supported protocols and services Impact Management traffic All existing management sessions (SNMP, Telnet, HTTP, HTTPS, FTP, TFTP, SSH, and so on) are interrupted during the switchover process. Sessions are terminated and can be re-established after the new active controller takes over.
-
Page 176: Hitless Stacking Configuration Notes And Feature Limitations
Hitless Stacking Hitless stacking configuration notes and feature limitations Hitless stacking configuration notes and feature limitations • Layer 3 multicast traffic is supported by hitless stacking. • After a switchover or failover, the syslog may contain invalid (non-existent) port numbers in messages such as “Interface portnum state up.”... -
Page 177: Standby Controller Role In Hitless Stacking
Hitless Stacking Standby controller role in hitless stacking and a new set of routes is relearned. The new set of routes will be the same as the old routes, unless the network has changed. • OSPFv2 and OSPFv3 non-stop routing support - For more information, refer to the Ruckus FastIron Layer 3 Routing Configuration Guide. -
Page 178: Runtime Configuration Mismatch
Hitless Stacking Support during stack formation, stack merge, and stack split • The runtime configuration matches that of the active controller. If more than one unit in the stack meets these criteria, the standby controller is chosen according to the following criteria, in the order shown: •... - Page 179 Hitless Stacking Support during stack formation, stack merge, and stack split FIGURE 51 Hitless stacking support during stack formation The following figure illustrates hitless stacking support during a stack merge. Ruckus FastIron Stacking Configuration Guide, 08.0.90 Part Number: 53-1005572-01...
- Page 180 Hitless Stacking Support during stack formation, stack merge, and stack split FIGURE 52 Hitless stacking support during a stack merge The following figure illustrates hitless stacking support in a stack split. Ruckus FastIron Stacking Configuration Guide, 08.0.90 Part Number: 53-1005572-01...
-
Page 181: Hitless Stacking Failover
Hitless Stacking Hitless stacking failover FIGURE 53 Hitless stacking support in a stack split Hitless stacking failover Hitless stacking failover provides automatic failover from the active controller to the standby controller without resetting any of the units in the stack and with little or no packet loss to hitless stacking-supported services and protocols. For a description of the events that occur during a hitless failover, refer to What happens during a hitless stacking switchover or failover... -
Page 182: Hitless Stacking Failover Example
Hitless Stacking Hitless stacking switchover NOTE Use the no form of the hitless-failover enable command to disable hitless stacking failover once it has been enabled. Hitless stacking failover example FIGURE 54 Hitless stacking failover when the active controller fails Hitless stacking switchover Hitless stacking switchover is a manually-controlled (CLI-driven) or automatic switchover of the active controller and standby controller without reloading the stack and without any packet loss to the services and protocols that are supported by hitless stacking. -
Page 183: Executing A Hitless Stacking Switchover
Hitless Stacking Hitless stacking switchover For examples of hitless stacking switchover operation, refer to Hitless stacking switchover examples on page 183. Executing a hitless stacking switchover The following must be in effect before a hitless switchover (to the standby controller) is allowed: •... - Page 184 Hitless Stacking Hitless stacking switchover FIGURE 55 Manual switchover The following figure illustrates a hitless stacking switchover when the active controller goes down and then comes back up. The stack in this example has user-configured priorities. Ruckus FastIron Stacking Configuration Guide, 08.0.90 Part Number: 53-1005572-01...
- Page 185 Hitless Stacking Hitless stacking switchover FIGURE 56 Hitless stacking switchover when the active controller comes back up The following figure illustrates a hitless stacking switchover after the network administrator increases the priority value of the standby controller. Ruckus FastIron Stacking Configuration Guide, 08.0.90 Part Number: 53-1005572-01...
- Page 186 Hitless Stacking Hitless stacking switchover FIGURE 57 Scenario 1 - Hitless stacking switchover after a priority change The following figure illustrates a hitless stacking switchover after the network administrator increases the priority value of one of the stack members. FIGURE 58 Scenario 2 - Hitless stacking switchover after a priority change The following figure illustrates a hitless stacking switchover after the network administrator increases the priority value for two of the stack members.
-
Page 187: Displaying Information About Hitless Stacking
Hitless Stacking Displaying information about hitless stacking FIGURE 59 Scenario 3 - Hitless stacking switchover after a priority change Displaying information about hitless stacking Use the show stack command to view information pertinent to a hitless stacking switchover or failover. The command output illustrates the active controller and standby controller, as well as the readiness of the standby controller to take over the role of active controller, if needed. -
Page 188: Displaying Information About Stack Failover
Hitless Stacking Displaying information about hitless stacking +---+ +---+ +---+ -2/1| 1 |2/4--2/1| 3 |2/4--2/1| 2 |2/4- +---+ +---+ +---+ |-------------------------------------| Standby u2 - protocols ready, can failover Current stack management MAC is 748e.f8f9.6300 Displaying information about stack failover Use the show stack failover command to view information about rapid failover.The show stack failover command provides information on the current standby controller and its status as shown in the following example. -
Page 189: Syslog Messages For Hitless Stacking Failover And Switchover
Hitless Stacking Syslog messages for hitless stacking failover and switchover STACKING_POE_SCTRL messages sent: 0, received: 0 STACKING_POE_STATUS messages sent: 0, received: 0 global_ctrl_dest: 0 individual_ctrl_dest: 0 status_dest: 2 Syslog messages for hitless stacking failover and switchover Syslog messages are generated for the following events: •... - Page 190 Hitless Stacking Syslog messages for hitless stacking failover and switchover 0d00h04m08s:I:STP: VLAN 1 Port 8/1/1 STP State -> DISABLED (PortDown) 0d00h04m08s:I:STP: VLAN 1 Port 8/1/1 STP State -> FORWARDING (PortDown) 0d00h04m08s:I:System: Interface ethernet 1/2/2, state down 0d00h04m06s:I:System: Interface ethernet 8/2/2, state down Ruckus FastIron Stacking Configuration Guide, 08.0.90 Part Number: 53-1005572-01...
-
Page 191: Stack Management
Stack Management • Managing a stack through one IP address......................191 • Enabling or disabling stacking mode........................191 • Controlling the stack through the CLI........................192 • Stack unit identification ............................193 • Naming a stack unit..............................194 • Stack management MAC address........................... 195 •... -
Page 192: Disabling Stacking Mode
Stack Management Controlling the stack through the CLI Disabling stacking mode To remove stacking capability, enter the no stack enable command. This prevents the unit from actively sending out probe messages; however, the unit could still be called to join a stack by an active controller. To prevent this, enter the stack disable command in device configuration mode. -
Page 193: Cli Command Syntax For Stack Units
Stack Management Stack unit identification To establish a remote console session on a stack unit, enter the rconsole command followed by the stack unit ID as shown in the following example. device# rconsole 1 You can terminate a session between stack members in any of these ways: •... -
Page 194: Naming A Stack Unit
Stack Management Naming a stack unit Stack units must each have a unique identification number. Every stack member, including any standalone units, retains its stack unit number unless that number is already being used in the stack, or until you manually renumber the unit using stack interactive-setup. -
Page 195: Stack Management Mac Address
Stack Management Stack management MAC address The following example assigns names to the members of a three-unit stack, based on the building they support. device# configure terminal device(config)# stack unit 1 device(config-unit-1)# unit-name building1 device(config-unit-1)# stack unit 2 device(config-unit-2)# unit-name building2 device(config-unit-2)# stack unit 3 device(config-unit-3)# unit-name building3 device(config-unit-3)# end... -
Page 196: Manually Allocating The Stack Mac Address
Stack Management Stack management MAC address When you are configuring Layer 2 protocols, such as STP, RSTP, and MSTP, on stack units, the management MAC address of the active controller acts as the Bridge ID. Manually allocating the stack MAC address When a stack is enabled, “hitless-failover enable”... -
Page 197: Stack Device Roles And Elections
Stack Management Stack device roles and elections Fan 1 ok, speed (auto): [[1]]<->2 Fan 2 ok, speed (auto): [[1]]<->2 Fan controlled temperature: 62.5 deg-C Fan speed switching temperature thresholds: Speed 1: NM<----->63 deg-C Speed 2: 53<-----> 80 deg-C (shutdown) Fan 1 Air Flow Direction: Front to Back Fan 2 Air Flow Direction: Front to Back... -
Page 198: Standby Controller
Stack Management Stack device roles and elections Standby controller In addition to the active controller, another stack member is elected as the standby controller. If the active controller fails, the standby controller takes over based on the following criteria: If hitless-failover enable is not configured, the standby reloads all units, including itself. It reloads to become the active controller. -
Page 199: Active Controller And Standby Controller Resets
Stack Management Stack device roles and elections • Longer up time - The unit with the longest up time if the up time is at least 30 seconds longer than for any other unit. When up times are compared, there is no effect if the difference is less than 30 seconds. •... -
Page 200: Standby Controller Selection Based On Priority Configuration
Stack Management Stack unit priority Standby controller selection based on priority configuration You can choose a standby controller by configuring a stack unit with the second highest priority or with the same priority as the active controller. The standby controller takes over when the active controller fails. If the original active controller becomes active again, it does not win back its active role, which helps to minimize traffic interruption on the stack. - Page 201 Stack Management Stack unit priority You can assign the highest priority value to the stack unit you want to function as the active controller. When you enter a new priority value for a stack unit, that value takes effect immediately but does not affect the current active controller until the next reset.
-
Page 202: Changing The Priority Of A Stack Unit
Stack Management Stack software images Changing the priority of a stack unit To change the priority value for a stack unit, enter the priority command at the stack unit configuration level. The priority can be a value from 0 through 255, where 255 is the highest priority. device# configure terminal device(config)# stack unit 1 device(config-unit-1)# priority 128... -
Page 203: Advanced Feature Privilege Mismatch
Stack Management Stack mismatches The active controller generates a log message whenever it puts a stack unit into a non-operational state. The following examples describe the types of mismatches and the related log message: • Advanced feature mismatch - The active controller is enabled for advanced features (such as BGP), and the stack unit is not enabled. -
Page 204: Major Mismatch For Stack Units
Stack Management Stack mismatches Major mismatch for stack units A major mismatch indicates an Interprocessor Communications (IPC)-related data structure change, an election algorithm change, or a version of the software that does not support stacking. This can happen when the software undergoes a major change (such as a change from 08.0.80 to 08.0.90). -
Page 205: Memory Allocation Failure
Stack Management Stack mismatches Complete the following steps to recover from a configuration mismatch. Enter the show stack command to see the status of the stack, and the show running-config command to see the configurations of the stack units. ICX7750-26Q Router# show stack T=1h38m40.5: alone: standalone, D: dynamic cfg, S: static Type Role... -
Page 206: Auto Image Copy For Stack Units
Stack Management Stack mismatches Auto Image Copy for stack units The Auto Image Copy feature ensures that all units in a stack are running the same flash image after a stack merge. This feature also enables automatic reload of the stack units. It prevents the image mismatch that occurs when one or more member units join the stack with a different running image and signature than the active controller and standby controller. -
Page 207: Copying The Flash Image To A Stack Unit From The Active Controller
Stack Management Configuring stacking trunks in a live environment Copying the flash image to a stack unit from the active controller You can replace a bad image on a stack unit or an image that does not match the active controller's image by copying the correct flash image from the active controller. -
Page 208: Displaying Multi-Trunk Stacking Configuration
Stack Management Configuring stacking trunks in a live environment Displaying multi-trunk stacking configuration The multi-stack-trunk command is used on live stacks and is effectively a combination of two stack-trunk commands to ensure that a trunk-to-trunk connection is created on both ends of a stack link simultaneously. When the multi-stack trunk command is used to create a trunk, the configuration is saved as stack trunk ports, and the running configuration displays the stack trunk details on both ends under the heading stack unit <unit>... -
Page 209: Configuring Stacking Ports In A Live Environment
Stack Management Configuring stacking ports in a live environment • You cannot enter the stack switch-over command until the stack election is completed or until the multi-stack-trunk command configuration is complete. If you enter the stack switch-over command too early, the following warning message is displayed. -
Page 210: Adding, Removing, Or Replacing Units In A Stack
Stack Management Adding, removing, or replacing units in a stack NOTE Both the multi-stack-trunk and the multi-stack-port commands perform numerous checks to make sure no unit would become unreachable. However, the checks have limitations. Verify the physical connections with the show stack connection command, and make sure that reducing or removing stack-ports or stack-trunks will not break the stack. - Page 211 Stack Management Adding, removing, or replacing units in a stack • The physical modules of the replacement unit must match one and only one provisional configuration, that is, a stored configuration without a physical unit present. • The replacement unit must be a clean unit. You can convert a unit to a clean unit using the erase startup-config command followed by the reload command without saving any configuration.
- Page 212 Stack Management Adding, removing, or replacing units in a stack If the configuration is not static, enter the write memory command to change all dynamic configurations to static. A static configuration remains after the unit is removed. After the configuration is saved with the write memory command, all unit IDs are followed by an "S" as shown in the following example.
- Page 213 Stack Management Adding, removing, or replacing units in a stack NOTE You can return a configuration-mismatched unit to operation by configuring the no stack unit command for the nonoperational unit from the active controller. This removes the entire stack configuration so the active controller can learn the configuration-mismatched unit as a new unit.
- Page 214 Stack Management Adding, removing, or replacing units in a stack If you connect two clean units matching the physical modules of the units you removed, you can use the stack interactive- setup command. ICX7750-26Q Router# stack interactive-setup You can abort stack interactive-setup at any stage by <ctrl-c> 0: quit 1: change stack unit IDs 2: discover and convert new units (no startup-config flash) to members...
-
Page 215: Moving A Unit To Another Stack
Stack Management Reloading a stack unit !!! Temperature is over warning level on stack unit 1 !!! Detect stack unit 3 has different startup config flash, will synchronize it Detect stack unit 3 has different ssh rsahost key, will synchronize it T:3h49m7.9: Done hot swap: active controller u1 sets u3 to Ready. -
Page 216: Managing Stack Partitioning
Stack Management Managing stack partitioning When the reload command is entered on the active controller without the unit-id parameter as shown in the following example, the entire stack reloads. device# reload NOTE If you need to reload the active controller, use the stack switch-over command. When switchover occurs, the original active controller can be reloaded using the reload unit-id command. -
Page 217: Unconfiguring A Stack
Stack Management Unconfiguring a stack NOTE You can use interactive-setup to renumber the members in the newly merged stack. Refer to Changing stack unit IDs with stack interactive-setup on page 75 for more information. The following examples show how stack merging works: •... -
Page 218: Syslog, Snmp, And Traps For Stack Units
Stack Management Syslog, SNMP, and traps for stack units NOTE The stack unconfigure me command can be entered from any unit; however, stack unconfigure all and stack unconfigure stack-unit commands can be issued only on the active controller. The following example shows a session where stack unit 2 is unconfigured. ICX7750-48XGC# show stack alone: standalone, D: dynamic config, S: static config Type... -
Page 219: Displaying Stack Information
Stack Management Displaying stack information new engine ID at bootup. To prevent this from happening, create a new engine ID or a new stack MAC address to save the engine ID to the startup configuration. This should be done before the SNMPv3 user is created. If a new active controller is elected (for example, the standby controller becomes the active controller), you will see the following results: •... -
Page 220: Displaying Running Configuration Information
Stack Management Displaying stack information 1: 10/2/1 (T0) <---> 11/2/4 (T1) 2: 10/2/2 (T0) <---> 11/2/5 (T1) Link 12: u11 -- u12, num=2 1: 11/2/1 (T0) <---> 12/3/4 (T1) 2: 11/2/2 (T0) <---> 12/3/5 (T1) CPU to CPU packets are fine between 12 units. TABLE 28 Field definitions for the show stack connection command Field Description... -
Page 221: Displaying Software Version Information
Stack Management Displaying stack information TABLE 29 Field descriptions for the show running-config command Field Description Software version the stack is running stack unit # The stack identification number for this unit module # Identifies the configuration for each module installed in the stack unit priority Indicates the priority assigned to the stack unit stack-port... - Page 222 Stack Management Displaying stack information Compressed Primary Boot Code size = 1835520, Version:10.1.15T205 (swz10115b3) HW: Stackable ICX7750-26Q Internal USB: Serial #: 40D60C003CF90180 Vendor: UNIGEN, Total size = 1910 MB ========================================================================== UNIT 1: SL 1: ICX7750-48XGF 48-port Management Module Serial #:CRH3330M012 Software Package: ICX7750_L3_SOFT_PACKAGE Current License: l3-prem ==========================================================================...
-
Page 223: Displaying Stack Flash Information
Stack Management Displaying stack information Displaying stack flash information Use the show flash command to display flash memory information for all members of a stack or for a specified stack member. The following example shows output from the active controller for the entire stack (the stack has three members). ICX7750-26Q Router# show flash Stack unit 1: Compressed Pri Code size = 30097250, Version:08.0.90dT203 (SWR08090.bin) -
Page 224: Displaying Stack Chassis Information
Stack Management Displaying stack information TABLE 31 Field definitions for the show memory command Field Description Total DRAM The size (in bytes) of DRAM Dynamic memory The total number of bytes in dynamic memory, including the number of bytes that are available (free or unused) and the percentage of memory used. -
Page 225: Displaying Stack Module Information
Stack Management Displaying stack information TABLE 32 Field definitions for the show chassis command Field Description Power supply 1 The status of the primary power supply Power supply 2 The status of the secondary power supply, if present Fan 1 through Fan 4 The status of the cooling fans, including speed, temperature reading, temperature range, and airflow direction Fan controlled temperature... - Page 226 Stack Management Displaying stack information The show stack command displays general information about a stack, for all members, for a specified member, or for all members with additional detail. The following output covers the entire stack and includes role history for each unit, beginning with the initial role the unit held. ICX7750-26Q Router# show stack T=29m36.7: alone: standalone, D: dynamic cfg, S: static ID Type...
-
Page 227: Displaying Information About Stack Neighbors
Stack Management Displaying stack information Unit# System uptime 18 minute(s) 33 second(s) 17 minute(s) 30 second(s) 18 minute(s) 46 second(s) TABLE 34 Field descriptions for the show stack command Field Description alone: Standalone This device is operating as a standalone device. S: static configuration The configuration for this unit is static (has been saved with a write memory command). -
Page 228: Displaying Stack Port Information
Stack Management Displaying stack information TABLE 36 Field descriptions for the show stack neighbors command Field Description The stack identification number for this unit Stack-port1 Identifies the neighbor stack unit for stack-port1 for this unit ID Stack-port2 Identifies the neighbor stack unit for stack-port2 for this unit ID Displaying stack port information The show stack stack-ports command displays information about stack port status. -
Page 229: Displaying Stacking Port Interface Information
Stack Management Displaying stack information TABLE 38 Field definitions for the show statistics stack-ports command Field Description Port The stack identification number for this unit In Packets The number of incoming packets on this port Out Packets The number of outgoing packets on this port In Errors The number of incoming errors on this port Out Errors... - Page 230 Stack Management Displaying stack information Message types have callbacks: Send message types: [1]=9086, [5]=10922, [6]=3, [7]=809, [9]=630, [13]=209, [22]=17, [24]=644, [28]=29, [31]=1880, [40]=15, [60]=4, [77]=130, Recv message types: [1]= 0:3295, 1:4896, [5]= 0:5269, 1:5622, [6]= 0:1, 1:2, [7]= 0:398, 1:411, [9]= 0:996, 1:1139, [13]= 0:544, 1:559, [23]= 0:319, 1:325,...
-
Page 231: Displaying Reliable Ipc Statistics For Stack Units
Stack Management Displaying stack information Output field Description send_delay_msg Number of delay messages sent send_delay_pkt Number of delay packets sent fwd_stby_msg Number of standby messages forwarded fwd_stby_pkt Number of standby packets forwarded Reliable mail Reliable-mail messages are used for essential communications, for example, to assign PE IDs or reload the system. - Page 232 Stack Management Displaying stack information Remote resets: Reset packets sent: Connection statistics (for current connection, if established): Msgs sent: 291, Msgs rcvd: Atomic batches sent: Atomic batches rcvd: Pkts sent: 681, Pkts rcvd: Msg bytes sent: 277656, Msg bytes rcvd: 82128 Pkt bytes sent: 349288,...
-
Page 233: Displaying Information On Stack Zero-Touch Configuration
Stack Management Displaying stack information Displaying information on stack zero-touch configuration Enter the show stack zero-touch ipc command in Privileged EXEC mode to display information on zero-touch IPC statistics. ICX7750-48F Router# show stack zero-touch ipc V3, , src=cc4e.246d.9e00, max_pkt_size=1468, recv 168, send 204 Message types have callbacks: 3: ZTP-probe 4: ZTP-request... - Page 234 Stack Management Displaying stack information Output field Description Reliable mail Reliable-mail messages are used for essential communications, for example, to assign PE IDs or reload the system. Reliable-mail message statistics for specified target types: • send: number of reliable-mail messages sent •...
-
Page 235: Mib Support For Icx Stack Configurations
Stack Management MIB support for ICX stack configurations Enter the show stack zero-touch log command in Privileged EXEC mode to display the system log for the stack zero- touch and interactive-setup processes. SPX zero-touch and interactive-setup information is also included in the log. ICX7750-48F Router# show stack zero-touch log Note: The logs are shared by Spx and Stack ZTP/interactive-setup. - Page 236 Ruckus FastIron Stacking Configuration Guide, 08.0.90 Part Number: 53-1005572-01...
-
Page 237: Icx Stack Troubleshooting
ICX Stack Troubleshooting • Problems commonly diagnosed with stack formation..................237 • Manually triggering stack diagnosis........................237 • Troubleshooting an unsuccessful stack build......................238 • Troubleshooting stack interactive-setup........................ 240 • Troubleshooting unit replacement issues......................241 • Checking hardware after an upgrade failure......................242 • Troubleshooting image copy issues........................243 •... -
Page 238: Troubleshooting An Unsuccessful Stack Build
ICX Stack Troubleshooting Troubleshooting an unsuccessful stack build Troubleshooting an unsuccessful stack build If you are unable to build a stack (for example, the show stack command does not display any members), perform the following steps. Enter the show running-config command on each unit to make sure the configuration contains “stack enable.” If it does not, enter the stack enable command on the unit. - Page 239 ICX Stack Troubleshooting Troubleshooting an unsuccessful stack build Use the show stack ipc command to see if any traffic has been sent or received. Enter clear stack ipc to clear the traffic statistics and then enter show stack ipc again so you can easily see differences in traffic flow. ICX7750-26Q Router# show stack ipc V80, G4, src=748e.f8f9.6300, max_pkt_size=10264, delay_buf=10264 Recv: SkP0: 13788, P1: 16488, sum: 30276, since t=3028.1 ago...
-
Page 240: Troubleshooting Stack Interactive-Setup
ICX Stack Troubleshooting Troubleshooting stack interactive-setup Check to be sure you do not have any stacking to non-stacking connections. All platforms use proprietary link negotiation to detect whether a stacking port's neighbors are also stacking ports. The platforms then convert both sides from IEEE mode (used in data ports) to HiGig mode (used in internal ports). -
Page 241: Troubleshooting Unit Replacement Issues
ICX Stack Troubleshooting Troubleshooting unit replacement issues If stack interactive-setup does not detect all the units that should be detected, perform the following checks: • Make sure that all the cables are properly connected. • Make sure that all the relevant ports are in the UP state. •... -
Page 242: Checking Hardware After An Upgrade Failure
ICX Stack Troubleshooting Checking hardware after an upgrade failure Checking hardware after an upgrade failure You can perform a few basic checks if you suspect a hardware failure. When the system resets as the result of an upgrade failure, you may see output similar to the following example. ###### LOGS #################### Sent SIGTERM to all processes Sent SIGKILL to all processes... -
Page 243: Troubleshooting Image Copy Issues
ICX Stack Troubleshooting Configuration, startup configuration files, and stacking flash To reset hardware and memory, enter the powercycle command at the boot prompt. This causes the system to execute a cold boot as shown in the following example. ICX77xx-Boot> powercycle Bootloader Version: 10.1.01T205 (Jun 11 2014 - 16:29:55) SVR: 0x82180111, PVR: 0x80230022 Sidewinder:48C,A1... -
Page 244: Stacking Unit Role Transition Considerations
ICX Stack Troubleshooting Stacking unit role transition considerations If you do not use the write memory command but reset the stack, the stack units continue to operate in their roles as defined by the stacking.boot file. After the reset, each unit readjusts based on the current runtime configuration. However, you may observe different results depending on what has not been saved. - Page 245 © 2019 ARRIS Enterprises LLC. All rights reserved. Ruckus Wireless, Inc., a wholly owned subsidiary of ARRIS International plc. 350 West Java Dr., Sunnyvale, CA 94089 USA www.ruckuswireless.com...
Need help?
Do you have a question about the Ruckus ICX 7850 Series and is the answer not in the manual?
Questions and answers