Table of Contents
Advertisement
Please also pay attention to road safety at all times as you should not attempt to operate any
equipment while driving as this can be a dangerous distraction. A moment's lapse of attention on
your part could cost lives – so drive safely, always.
We want you to enjoy using your dash cam, not to wind up recording an accident you caused!
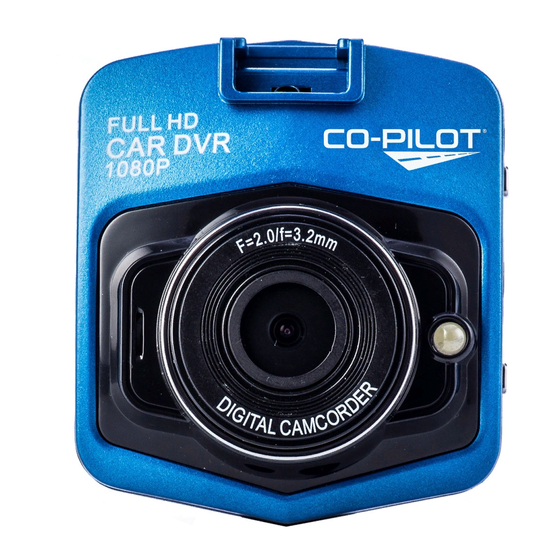
CPDVR2 HD Dash Cam
User Manual
Thank you for buying our CPDVR2 dash
cam. To get you started, we've written this
manual with the first-time dash camera
user in mind. This means we have given
instructions to help anyone who is new to
video recording.
Please read this manual before using your
new dash cam. The words we use will
become more familiar to you as you go
through the manual, and you set up and
operate your camera.
1 |
P a g e
Advertisement
Table of Contents

Subscribe to Our Youtube Channel
Related Manuals for CoPilot CPDVR2

Summary of Contents for CoPilot CPDVR2
- Page 1 CPDVR2 HD Dash Cam User Manual Thank you for buying our CPDVR2 dash cam. To get you started, we’ve written this manual with the first-time dash camera user in mind. This means we have given instructions to help anyone who is new to video recording.
-
Page 2: Table Of Contents
Contents Introduction ............................4 Battery Operation: ..........................7 To charge the battery: ........................7 With a computer or USB Charger: ....................7 With your vehicle cigarette lighter: ....................7 Suction Cup installation .......................... 8 Memory card installation ........................9 Notes about Memory Cards........................9 Settings Menu ............................ - Page 3 Capture mode: ..........................15 ▪ Video: ............................ 15 Photo: ............................15 Lens: ..............................15 Focus Range: ............................. 15 Storage media: ..........................15 File format: ............................15 Power Source: ........................... 15 I/O Port: ............................15 Screen: .............................. 15 Microphone:............................15 Speaker: ............................15 Accessories: ............................
-
Page 4: Introduction
Introduction The CPDVR2 is a self-contained compact portable dash cam / DVR (Digital Video Recorder). It is charged by your vehicle’s 12-volt electrical outlet. When operating in video record mode it records and saves video files to a Class 10 memory card. - Page 5 P a g e...
- Page 6 P a g e...
-
Page 7: Battery Operation
Battery Operation: Your dash cam has a 3.7V Li-ion rechargeable battery built-in. This battery allows for short-term use (approximately 2.5 minutes for video recording or 4 minutes for video play back). Be sure to fully charge the battery before use. To charge the battery: With a computer or USB Charger: Plug the USB cable into the mini USB port on... -
Page 8: Suction Cup Installation
Suction Cup installation 1. Connect the suction cup mount to your dash cam like this: 2. Press the suction cup firmly onto your windscreen, pressing the knob to secure it like this: 3. Adjust to the desire angle like this: 4. -
Page 9: Memory Card Installation
Memory card installation ▲/ When recording video, press the button to capture the video without audio. Press it again to record with audio once again. Notes about Memory Cards. Memory cards can be from 4GB to 32 GB in size. Obviously the larger the capacity the more video time you can record. -
Page 10: Settings Menu
Settings Menu Video 1. Recharge the built-in battery, as instructed earlier. To wake the unit from standby mode, press the button or connect the cigarette lighter power adapter or powered USB cable. Your dash cam will automatically enter video recording mode, the blue indicator will light up and will appear on the display. -
Page 11: Video Settings
Video Settings: Resolution: 1080P FHD = 1920 x 1080 @ 30 fps; 720P = 1280 x 720; WVGA = 848 x 480; VGA = 848 x 480 pixels @ 30 fps; Date Time Stamp: On or Off. If on is selected, the date and time will imprint and record on the video. -
Page 12: System Settings
System Settings: Format: This will format the memory card. NOTE: All files will be erased, so please take steps to save your video files to your PC or other backup if you wish to preserve your recordings. Language: Sets the language of the OSD (on screen display) Auto Power Off: Set and activate the Auto Power Off timer. -
Page 13: Playback
Playback Enter playback mode, as instructed earlier Press the MENU button to enter the settings menu. Use the ▼ or ▲ buttons to select and highlight the function you would like to adjust. Press the MENU button to enter the subsequent menus and to exit the menu interface. Press the “OK”... -
Page 14: Webcam
Webcam 1. Connect your USB cable to the mini USB port on the side of your dash cam. 2. Connect the full-size USB end of the cable to a USB port on your Computer 3. Wait a few moments, there will be two options on the screen: ▪... -
Page 15: Specifications
SPECIFICATIONS: Sensor: 300k pixel CMOS Capture mode: ▪ Video: o 1920 x 1080 pixels/30 fps o 1440 x 1080 pixels/30 fps o 1280 x 720 pixels/30 fps o 848 x 480 pixels/30 fps o VGA 640 x 480 pixels/30 fps Photo: ▪... -
Page 16: Accessories
Accessories: 1 x User’s Manual ▪ ▪ 1 x Car Charger (input: DC 12V, 400 Ma Max; Output: DC 1000mA Max; Built in Fuse: F2AL, 250V) ▪ 1 x USB Cable ▪ 1 x Suction Cup Note: Specifications and accessories are subject to change without notice. Computer System requirement: Operating System Microsoft Windows XP, Vista, 7,8,10... -
Page 17: About Co Pilot
About Co Pilot Co Pilot is one of the UK’s leading names for dash cams, and vehicle accessories. We combine high specification, high quality products with value for money. Our focus is on the safety and comfort of drivers and passengers, and provide a full range of products to keep you safe and fully operational on the road. -
Page 18: Fcc Information
FCC INFORMATION: This equipment has been tested and found to comply with the limits for a Class B digital device, pursuant to part 15 of the FCC Rules. These limits are designed to provide residential protection against harmful interference in a residential installation. This equipment generates, uses and can radiate radio frequency energy and, if not installed and used in accordance with the instructions, may interfere with radio communications. -
Page 19: User Information
USER INFORMATION Changes or modifications not expressly approved by the party responsible for compliance could void the user’s authority to operate this equipment. Safe Driving Motorists, as well as operators of emergency or service vehicles, are expected to exercise all due caution while using this product, and to obey all applicable traffic laws. Never try to take pictures when operating a motor vehicle or while walking.
Need help?
Do you have a question about the CPDVR2 and is the answer not in the manual?
Questions and answers