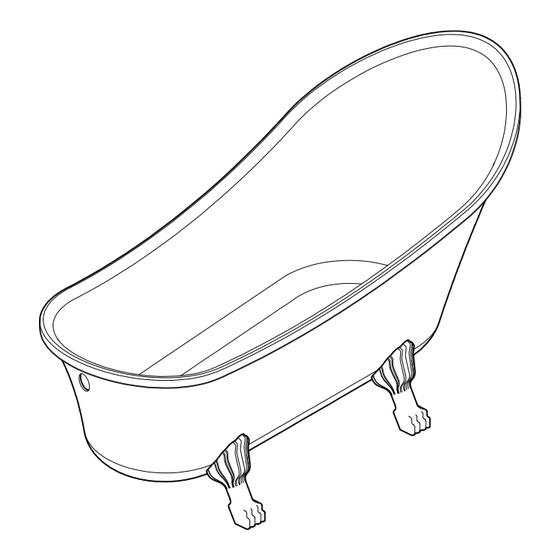
Summary of Contents for A&E BT-830
- Page 1 A&E Bath & Shower Bain et Douche Owner Manual and Installation Guide Manuel du propriétaire et guide d’installation Clawfoot bathtub Baignoire sur pattes 21MA2013...
- Page 2 INFORMATION / INFORMATION Before you begin carefully read all instructions. Avant d'entreprendre les travaux, lire attentive- ment les instructions de montage. Consult local building codes to ensure that ins- tallation complies with standards in your area. Consulter le code du bâtiment de votre région, afin que l'installation respecte les normes en vigueur.
- Page 3 TOOLS AND MATERIAL REQUIRED / OUTILS ET MATÉRIAUX REQUIS METRIC METRIQUE METRIC METRIQUE Drillbits / Forets Wrenches / Clés Allen Key Set / Clés Allen Screwdriver / Tournevis Measuring Tape / Ruban à mesurer Level / Niveau Lead Pencil / Crayon à mine de plomb Utility Knife / Couteau à...
- Page 4 BATHTUB DIAGRAM / SCHÉMA DE BAIGNOIRE The dimensions shown are for reference only. It is impor- 28" tant to validate the dimen- 710 mm sions with the physical unit prior to installation. 69¼" Les dimensions sont à titre 1760 mm de référence seulement.
- Page 5 PREPARATION PRÉPARATION This manual covers the installation and maintenance of your new bathtub. Read it through before proceeding to the installation. Carefully inspect unit upon arrival. Any damage or missing parts should be noted on the bill of landing and the distributor notified. It is recommended to keep the unit in its cardboard box until installation.
- Page 6 LEGS INSTALLATION INSTALLATION DES PATTES ❶ Determine the location of the bathtub, taking the position for the faucets, drain and other components into accounts. Déterminer l’emplacement de la baignoire, en tenant compte de l’emplacement de la robinetterie, du tuyau d'évacuation et des différents composants. ❷...
- Page 7 LEGS INSTALLATION INSTALLATION DES PATTES ❸ Attach the legs to the brackets using the M12 screws (item 4) with washers and lock washers (item 7 & 5). Afterwards, make sure the leveling pads are attached to the legs. Fixer les pattes sur les supports à l'aide des vis mécaniques, des rondelles frein et des rondelles plates (item 4, 7 et 5).
- Page 8 LEGS INSTALLATION INSTALLATION DES PATTES ❹ Place the bathtub in its position and proceed with the levelling of the tub. Make sure the bathtub is stable and that all legs rest perfectly on the floor, if not, ad- just the levelling pads. Placer la baignoire dans son emplacement et procéder à...
- Page 9 DRAIN/OVERFLOW PARTS LIST LISTE DES PIÈCES DU DRAIN/TROP-PLEIN Minimu 1" 25 mm ITEM DESCRIPTION Qté/Qty Ovreflow plate screw / Vis de la plaque du trop-plein Overflow plate / Plaque de trop-plein Beveled gasket / Joint d'étanchéité à angle Overflow pipe / Tuyau du trop-plein T union nut / Écrou du raccord en T T union seal / Rondelle de scellement du raccord en T 1"...
- Page 10 DRAIN/OVERFLOW INSTALLATION INSTALLATION DRAIN/TROP-PLEIN ❺ Assemble the overflow and drain pipes to the T union. Attach the assembly to the bathtub as shown above. If the pipes are too long, cut them to the proper length making sure they overlap by about 1" (25mm) inside the T union. Assembler le tuyau du trop-plein et du drain avec le raccord en T.
- Page 11 DRAIN/OVERFLOW INSTALLATION INSTALLATION DRAIN/TROP-PLEIN ❻ Screw the waste pipe to the T union. Slide the plastic washer,nut and pipe cover onto the waste pipe. Make sure all the pipes are properly attached to the bathtub. Slowly drop the bathtub in place. Make sure the waste pipe overlaps 1" (25mm) inside the P-trap.
- Page 12 A&E Bath & Shower Bain et Douche 9181 Boivin Tel. : 514.367.1741 LaSalle, Québec 800.667.9506 (Toll Free / Sans frais) Canada Fax : 514.363.4753 H8R 2E8 @ : renwil@renwil.com Web : www.renwil.com WARRANTY / GARANTIE A&E Shower and Baths inc. (hereafter ‘‘ A&E ‘‘) offers the A&E Shower &...


Need help?
Do you have a question about the BT-830 and is the answer not in the manual?
Questions and answers