Table of Contents
Advertisement
Quick Links
Advertisement
Table of Contents

Summary of Contents for Janus 250 Series
- Page 1 JANUS 250 SERIES OWNER’S HANDBOOK...
- Page 3 JANUS 250 SERIES OWNER’S HANDBOOK...
-
Page 5: Foreword
Janus is the Roman god of beginnings and ends, of war and peace, and in a sense, also the god of the road. He represents the idea of looking simultaneously to the past and the future. -
Page 7: Table Of Contents
TABLE OF CONTENTS FOREWORD............5 Optional Rear Rack......32 Suspension Pre-load Adj.....71 Optional Saddle Bags....32 Tires ............72 KNOWING YOUR MOTORCYCLE.......9 Optional Passenger Seat....33 Battery ..........76 Safety First..........11 Fuse ............78 RIDING YOUR MOTORCYCLE......35 Warning Labels........14 Lighting: Headlight......79 Models ............16 Break-in..........36 Lighting: Taillight......80 Specifications ........17 Safe Operation........37 Lighting: Turn Indicators..81... -
Page 9: Knowing Your Motorcycle
KNOWING YOUR MOTORCYCLE... -
Page 11: Safety First
SAFETY FIRST MOTORCYCLE WARNING: This motorcycle is designed for on-road use only. It is not designed or suitable for off road use. Off-road use may lead to loss of control and an accident. WARNING: This motorcycle is designed for use as a two-wheeled vehicle capable of carrying a rider on his/her own, or a rider and one passenger (only if fitted with optional double or pillion seat). - Page 12 A brightly colored helmet will increase the rider and passenger’s visibility to other motorists. There are a multitude of styles and types of helmets and Janus recommends that you take special care with the selection of...
- Page 13 SAFETY FIRST, CON’T RIDING This motorcycle requires proper registration and licensing for road use. Operation of the motorcycle without appropriate registration and license or endorsement is illegal and could lead to prosecution. Check with your local department of motor vehicle for license and registration information before operating. ...
-
Page 14: Warning Labels
WARNING LABELS 1. Daily Safety Checks 2. Daily Chain Information 3. Tire and Load Data 4. Passenger Caution... - Page 15 WARNING LABELS, CON’T. 7. Brake Fluid 8. Gear Position...
-
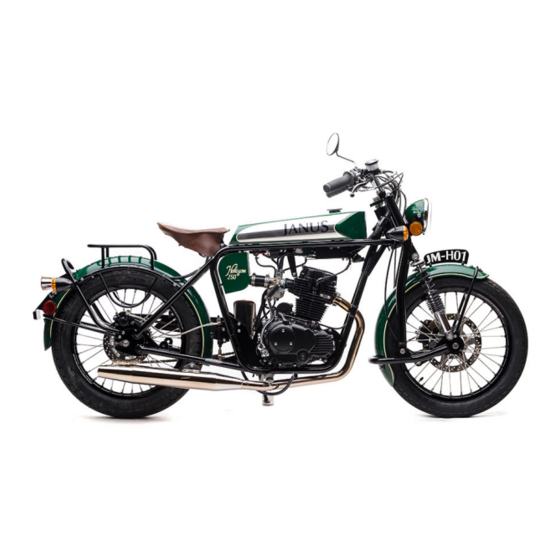
Page 16: Models
MODELS PHOENIX 250 HALCYON 250... -
Page 17: Specifications
SPECIFICATIONS ENGINE & TRANSMISSION FRAME, RUNNING GEAR, & DISPLAYS Type: Air-cooled, 4-stroke overhead valve single cylinder engine Frame: DOM tubular steel cradle Displacement: 229 cubic centimeters Wheels: CNC machined aluminum hubs with alloy rims and 32 stainless Bore/Stroke: 67 x 65 millimeters steel straight-pull spokes Compression ratio: 9.2:1 Tires: Front 3.00 x 18, Back 3.50 x 18... -
Page 18: Serial Numbers
SERIAL NUMBERS MOTORCYCLE VIN PLATE ENGINE SERIAL NUMBER The location of your motorcycle’s VIN number is located behind the Your motorcycle’s engine is assigned an additional serial number. It is front forks, on the main section of the triple tree. The plate is placed located on the gear-shift side of the engine, along the bottom of the vertically. -
Page 19: Instruments
INSTRUMENTS SPEEDOMETER The speedometer indicates the road speed of the motorcycle. ODOMETER The odometer is in the speedometer face. The odometer indicates the total distance the motorcycle has traveled. TRIP METER The trip meter is located below the odometer in the speedometer face. -
Page 20: Warning Lights
WARNING LIGHTS TURN INDICATOR When the turn indicator is switched on, the indicator warning light will flash in sequence with the lights. HIGH BEAM When the high beam is switched on, the blue high beam light will illuminate on the speedometer face. A separate blue light will also illuminate on the left hand control. -
Page 21: Ignition Switch
IGNITION SWITCH IGNITION LOCATION The ignition switch is located next to the Speedometer on the fork top plate. OFF POSITION The key can only be removed in the OFF position. PARK POSITION It is required by law that your headlight be on at all times, however, with the key in the first position, the motorcycle may be parked with just the taillight on for roadside emergencies. -
Page 22: Left Handlebar Controls
LEFT HANDLEBAR CONTROLS 4. TURN INDICATOR SWITCH When the turn indicator switch is pushed to left or right, the respective turn signal light flashes on and off. The turn indicator is canceled by pressing in on the switch. WARNING: Failing to cancel the turn indictor after a turn is dangerous and may lead to an accident as other motorists may turn or pull out in front of you. -
Page 23: Right Handlebar Controls
Pulling the front brake lever will actuate the front brake. WARNING: If the brake lever feels spongy, do not operate the motorcycle. Contact Janus Motorcycles or a repair shop immediately. WARNING: When stopping, always apply both brakes at the same time. -
Page 24: Gear Shift Pedal
GEAR SHIFT PEDAL LOCATION The gear shift pedal is located on the left side of the bike close to the footrest and is operated with the foot. PATTERN The 5-speed shift pattern, from neutral, is 1-down, 4-up. The transmission is a positive-stop mechanism, meaning that only one sequential gear change can occur with each movement of the pedal. -
Page 25: Rear Brake Pedal
The rear brake pedal is located on the right side of the bike close to the footrest and is operated with the foot. WARNING: If the brake pedal feels spongy, do not operate the motorcycle. Contact Janus Motorcycles or a repair shop immediately. WARNING: When stopping, always apply both brakes at the same time. -
Page 26: Kickstarter
KICKSTARTER To operate the kick starter, fold out to start position and press down on the lever quickly and forcefully with foot. Fold the kick start lever back into riding position (up) before operating the motorcycle. NOTE: the transmission must be in neutral to operate the kick starter. -
Page 27: Fuel
FUEL GRADE Your Janus engine is intended for use with unleaded fuel and operates best with a minimum octane rating of 91 RON. FUEL FILLER CAP To open the fuel filler cap, rotate the cap counter-clockwise until the machined threads are clear of the filler tube. -
Page 28: Refueling
REFUELING FILLING THE FUEL TANK WARNING: Contaminated fuel may cause damage to the engine. It is best to avoid refueling in dusty or r ainy conditions as f oreign material can contaminate the fuel. When refilling, have a clean rag handy in case of drips or spills. Fill the fuel tank slowly observing the change in fuel level to prevent spills. -
Page 29: Petcock
PETCOCK The fuel petcock has three positions: ON, RES (reserve), and OFF. For regular use, turn petcock to the ON position. If you run out of fuel in the ON position, a small amount of reserve fuel can be accessed by turning the petcock to the RES position. WARNING: Before riding, always check to make sure that your fuel petcock is turned to the ON position. With the fuel valve closed, your motorcycle may start with just the fuel that is still in the carburetor, but will stall once the lines are empty, leading to loss of control... -
Page 30: Engine Oil Filter
ENGINE OIL FILLER The engine oil filler cap is located on the right side of the bike above the kick start lever. The oil filler cap is made of plastic and should only be hand-tightened. ENGINE OIL LEVEL VIEWPORT The engine oil level viewport is located on the right side of the engine above the rear brake pedal. -
Page 31: Side Stand
SIDE STAND Your Janus is equipped with a side stand. When using the side stand, ensure that the motorcycle is on level ground and that the stand foot will not sink into a loose or moist surface. Once down, turn the handlebars to all the way to the left and put the motorcycle in first gear. For further information on parking, refer to the “How to Ride a Motorcycle”... -
Page 32: Optional Rear Rack
OPTIONAL REAR RACK An optional rear rack is available for the Halcyon model. The rear rack has a 20lb capacity when used for carrying cargo. WARNING: Overloading the motorcycle and failure to adjust speed for additional cargo can result in loss of control and an accident resulting in injury or death. -
Page 33: Optional Passenger Seat
OPTIONAL PASSENGER SEAT An optional passenger double or pillion seat is available for both WARNING: Your passenger must be instructed that they may Halcyon and Phoenix models. Both options come with passenger foot cause loss of control by making sudden movements or using an peg kits. -
Page 35: Riding Your Motorcycle
RIDING YOUR MOTORCYCLE... -
Page 36: Break-In
BREAK-IN The first 500 miles that is ridden is designated as the break-in period. In addition to the listed guidelines, it is extremely important to have the During this period it is important not to overload or over rev the engine. initial break-in service performed by a competent mechanic. -
Page 37: Safe Operation
SAFE OPERATION Daily Safety Checks - check the following items each day before you ride. 5. Brakes - Check for proper brake function and fluid level. Make sure The time required is minimal and regular checks will help ensure that that the brakes feel firm and do not have excessive travel. - Page 38 SAFE OPERATION CON’T. 9. Nuts, Bolts, Fasteners - Check the axles, steering head, suspension, and all controls are properly tightened or fastened. Please refer to “Torque Specifications” section of this handbook for more information. 10. Steering - Check that the steering action is smooth and free of play from full left to full right.
-
Page 39: How To Ride The Motorcycle
HOW TO RIDE THE MOTORCYCLE Before operating the motorcycle, it is important that you carefully 4. Make sure the transmission is in neutral (see note below). read and familiarize yourself with this handbook. 5. Pull up the carburetor choke lever to the ON position. 6. - Page 40 HOW TO RIDE THE MOTORCYCLE, CON’T. CLUTCH/CHANGING GEARS NOTE: During the break-in period the transmission and clutch 1. Check that the side stand is up. plates may take some time to wear in. Be careful to make sure the 2. Pull in the clutch lever. transmission is in neutral by gently letting out on the clutch, as 3.
- Page 41 Motorcycle accidents can be the result of events outside of the control Janus Strongly recommends that all riders take an approved rider of the rider. Although full protection is not possible, wearing correct safety course such as those offered by the Motorcycle Safety protective clothing and regularly taking approved motorcycle safety Foundation.
- Page 42 It is not intended for longer trips on the highway or 9. Your Janus is lighter than most motorcycles and is therefore easier sustained high speeds. Use of the motorcycle under these conditions to pick up and steal, even with a disc brake or wheel lock. If you will...
- Page 43 NOTE: This Janus motorcycle is not fitted with spark arresters. Operation in forests, brush, or grass areas may violate state and WARNING: The handling and braking capabilities of a motorcycle local laws and regulations.
-
Page 45: Maintaining Your Motorcycle
MAINTAINING YOUR MOTORCYCLE... -
Page 46: Maintenance Schedule
Periodic Maintenance damage resulting from incorrect adjustment performed by the Schedule to keep your Janus in proper running condition. The initial owner. maintenance is crucially important to the safe operation of the motorcycle and must not be neglected. - Page 47 PERIODIC MAINTENANCE SCHEDULE FREQUENCY FREQUENCY WHICHEVER COMES 1ST ▶ ODOMETER (MILES) WHICHEVER COMES 1ST ▶ ODOMETER (MILES) ▼ ▼ OPERATION EVERY @ DELIVERY OPERATION EVERY @ DELIVERY ENGINE OIL - CHECK MONTH • • • • • • DRIVE CHAIN - CHECK/LUBRICATE 250 MILES •...
-
Page 48: Warranty Maint. Schedule
RECORDING SCHEDULED MAINTENANCE Each time you have scheduled maintenance performed on your Janus, always present your handbook for the work to be recorded. The handbook is your record that the scheduled maintenance has been performed under the terms of the motorcycle warranty. When the work is complete always ensure that the work is recorded with the date it was performed. -
Page 49: Engine Oil
ENGINE OIL level, oil should be visible in the oil level viewport at the midpoint between the “H” (High) and “L” (Low) marks. If it is necessary to top up the oil level, remove the oil filler cap, add the required oil as appropriate until the level visible in the oil level viewport is correct. - Page 50 ENGINE OIL (CON’T) OIL AND OIL FILTER CHANGE 1. Warm up the engine thoroughly and then stop the engine. 2. Place an oil pan directly beneath the engine oil drain plug located at the bottom of the cases. 3. Remove the engine oil drain plug, taking care not to drop it into the oil pan.
- Page 51 Janus engines are designed to be used with: SPECTRO GOLDEN 4 SAE 10W30 CAUTION: Ensure that no foreign matter enters the crankcase during SEMI-SYNTHETIC MOTORCYCLE ENGINE OIL. ...
-
Page 52: Engine Valve Clearances
0.05-0.06mm at the exhaust. Valve checking and adjustment takes some mechanical knowledge and ability. If you are not confident in your ability, valve adjustment should be completed by a qualified technician. Note: Janus Motorcycles cannot assume any responsibility for damage resulting from incorrect adjustment performed by the owner. SPARK PLUG... - Page 53 SPARK PLUG CLEANING THE SPARK PLUG Remove the carbon accumulated on the spark plug with a metallic wire brush or spark plug cleaner. Measure and, if necessary, re-adjust the spark plug electrode clearance with spark plug clearance shim. Spark plug clearance should be 0.6 - 0.8mm. Replace spark plug, being careful not to over-tighten.
-
Page 54: Throttle
THROTTLE THROTTLE INSPECTION Check the throttle grip play in accordance with the periodic maintenance schedule and adjust if necessary. The throttle grip controls the throttle valve in the carburetor. If the throttle grip has excessive play due to cable stretch or improper adjustment, it may cause throttle delay or prevent the throttle from opening completely. - Page 55 5. If the throttle cannot be adjusted at the throttle grip end of the cable, Janus recommends that you have the adjustment performed by a qualified motorcycle mechanic as the throttle is a split cable that controls both the throttle and accelerator pump and proper adjustment can be difficult.
-
Page 56: Clutch
CLUTCH Your Janus is equipped with a cable actuated clutch. Due to friction plate wear and cable stretch, the clutch operation should be checked each day prior to riding the motorcycle and in accordance with the periodic maintenance schedule. CLUTCH INSPECTION 1. -
Page 57: Idle Speed
IDLE SPEED The idle speed should be checked in accordance with the periodic maintenance schedule, or whenever the idle speed is disturbed. The idle speed is changed by turning the idle speed screw located on the side of the carburetor. Idle speed should not race the engine, but run just above any chance of stalling. ... -
Page 58: Drive Chain
DRIVE CHAIN For safety and to prevent excessive wear, the drive chain should be checked, adjusted and lubricated in accordance with the Periodic Maintenance Schedule. Checking, adjustment, and lubrication must be performed more frequently in extremed conditions such as dusty or salty roads. The drive chain slack and lubrication must be checked every day before riding the motorcycle and in accordance ... - Page 59 PHOENIX 250 CHAIN PLAY Chain play measured from the top of the chain should be 44mm (1.125 in.) HALCYON 250 CHAIN PLAY Chain play measured from the top of the chain should be 13mm (0.50 in.)
- Page 60 DRIVE CHAIN, CON’T. CHAIN PLAY ADJUSTMENT 1. Loosen the rear axle. 2. Loosen the left and right chain adjuster locknuts located off the rear axle. 3. If the chain is too loose, tighten the right and left chain adjuster nuts evenly. 4.
- Page 61 DRIVE CHAIN WEAR Remove the chain guard. Stretch the chain taut by suspending a 20 lb weight on the lower run of the chain. Measure the length of 20 links on the straight run of the chain from the center of the 1st pin to the center of the 21st pin. Since the chain may wear unevenly, take measurements at several points.
- Page 62 DRIVE CHAIN, CON’T. CHECKING SPROCKET WEAR 1. Remove the engine sprocket cover. 2. Rotate the rear wheel checking the sprockets for damaged or broken teeth. GOOD CONDITION 3. If there are any irregularities or if the sprocket is worn, replace the sprocket. ...
- Page 63 The drive chain should be lubricated every 250 miles and after riding through rain, on wet roads, or any time the chain appears dry. Janus recommends the use of Spectro® Super Clean Chain Lube. Apply chain lubricant to to the sides of the rollers. This allows the lubricant to penetrate the to chain rollers and bushings.
-
Page 64: Brakes
BRAKES BRAKE PAD WEAR INSPECTION Inspect the brakes for wear. For each brake caliper, if the thickness of brake pads is less than 2 mm (0.08 in), replace both brake pads in the caliper as a set. Pad replacement should be performed by a qualified motorcycle mechanic. ... - Page 65 BRAKE PAD WEAR COMPENSATION Disc and brake pad wear is automatically compensated for by the caliper and no mechanical adjustment is necessary. However, the brake fluid level may lower slightly over time. Check and top up brake fluid in accordance with the periodic maintenance schedule. BRAKE LIGHT SWITCHES The brake light is activated independently by operation of either the front or rear brake.
- Page 66 BRAKES, CON’T. ADJUSTING FRONT BRAKE FLUID LEVEL 1. Carefully clean the reservoir cap and sides. 2. Remove the cap retaining screws, carefully noting the position of the sealing diaphragm. 3. Fill the reservoir to the “UPPER” level line, using only DOT3 or DOT4 brake fluid from an unopened container.
- Page 67 ADJUSTING REAR BRAKE FLUID LEVEL 1. Carefully clean the reservoir cap and sides. 2. Unscrew the twist cap. 3. Fill the reservoir to the “UPPER” level line, using only DOT3 or DOT4 brake fluid from an unopened container. 4. Refit the cover, ensuring that the diaphragm seal is correctly positioned.
-
Page 68: Air Filter
AIR FILTER A clogged air filter restricts the engines air intake, increasing fuel consumption, reducing engine performance, and leading to spark plug fouling. The air filter must be inspected, cleaned, and replaced in accordance with the periodic maintenance schedule. In dusty environments and riding conditions, the air filter should be cleaned more frequently than the recommended interval. -
Page 69: Steering & Wheel Bearings
STEERING & WHEEL BEARINGS WHEEL BEARING INSPECTION WARNING: When checking bearings, make sure to stabilize and secure the motorcycle to prevent injury or damage from the Inspect the condition of the wheel bearings in accordance with the motorcycle falling. Take care not to support the motorcycle on periodic maintenance schedule. -
Page 70: Front & Rear Suspension
FRONT & REAR SUSPENSION FRONT FORK INSPECTION REAR SWING-ARM INSPECTION (PHOENIX MODEL ONLY) Inspect the front forks for play or loose fasteners in accordance with the periodic maintenance schedule. Inspect the swing arm for play or loose fasteners in accordance with • Check the shock absorbers for any fluid leaks or visual i rregularities. the periodic maintenance schedule. -
Page 71: Suspension Pre-Load Adj
Consult Your Janus features adjustable pre-load settings for both front and the suspension pre-load chart for suggested settings. rear suspension. There are three available settings. The motorcycle SUGGESTED PRELOAD SETTINGS will arrive with the standard setting in the lowest (1st) pre-load setting. -
Page 72: Tires
WARNING: Failure to use an inner tube in a spoked wheel will result in tire deflation and loss of control and an accident. WARNING: Only use tube type tires on your Janus. Tubeless tires are not designed for use with an inner tube or with spoked wheels and may cause sudden tire deflation resulting in loss control and... - Page 73 TIRE INFLATION PRESSURES TIRE TREAD WEAR Correct tire inflation pressure will provide maximum stability, As the tire accumulates miles, the tread wears down and becomes comfort, and tire life. Always check tire pressure before operating the more susceptible to punctures. It is estimated that 90% of all tire motorcycle when the tires are cold. ...
- Page 74 TIRES, CON’T. TIRE REPLACEMENT TIRE & INNER TUBE DATA Janus motorcycles are designed for use with a specific make and TIRE DATA model of tire. It is essential that the approved tires are fitted in the FRONT TIRE Duro HF317 3.00 X 18 correct combinations.
- Page 75 TIRE BREAK-IN WARNING: If tire damage is suspected, such as after striking an object or curb, have the tire and wheel inspected by a qualified When tires or inner tubes are replaced allow time for the tires and motorcycle mechanic as the damage may not be visible. Operation inner tubes to “seat”...
-
Page 76: Battery
Do not puncture, rupture, submerge in liquid, or expose to direct heat. Puncture, rupture, exposure to direct Your Janus motorcycle is equipped with a Lithium Ferrous (LiFePO4) heat or submerging in liquid will damage the battery and in extreme battery. - Page 77 0°F (-18°C) to 140°F (60°C). STORAGE DISCHARGE The lithium ferrous battery in your Janus will not discharge like a Do not allow the battery to become discharged below 9.0 volts. traditional lead-acid battery, so unless you have a parasitic draw like an...
-
Page 78: Fuse
FUSE FUSE LOCATION FUSE REPLACEMENT Your Janus is equipped with a fuse located beneath the tank, on the 1. To replace the fuse, loosen the electrical pan screws and remove starter relay. the electrical pan. 2. Locate the starter relay and remove the bad fuse and replace. -
Page 79: Lighting: Headlight
LIGHTING: HEADLIGHT HEADLIGHT (see left) Your Janus is equipped with a headlight that uses a 12 volt 60/55w H4 bulb. WARNING: The bulb and lens become hot during operation. Always allow sufficient time for the headlight to cool before servicing. HEADLIGHT BULB REPLACEMENT (see lower left): 1. -
Page 80: Lighting: Taillight
LIGHTING: TAILLIGHT TAILLIGHT (see left) Your Janus is equipped with a taillight that uses a 12 volt p21/5w incandescent bulb. WARNING: The bulb and lens become hot during operation. Always allow sufficient time for the light to cool before servicing. TAILLIGHT BULB REPLACEMENT 1. -
Page 81: Lighting: Turn Indicators
LIGHTING: TURN INDICATORS TURN INDICATORS (see left) Your Janus is equipped with turn indicators that use a 12 volt RY10w incandescent bulb. WARNING: The bulb and lens become hot during operation. Always allow sufficient time for the light to cool before servicing. -
Page 82: General Lubrication
Apply oil to the following pivots (Janus recommends the use of Spectro aerosol “101” Lubricant and Penetrant): 1. Rear brake pedal pivot 2. -
Page 83: Torque Specifications
TORQUE SPECIFICATIONS Torque Specifications Chart Front Axle 40-47 lb. ft. Rear Axle 58-71 lb. ft. Handlebar Clamps 7 lb. ft. Front Fork Pivot Bolts 17 lb. ft. Rear Swing-arm Pivot Bolt Exhaust Header Nuts 7 lb. ft. Exhaust Rear Mount Bolt 7 lb. -
Page 84: Cleaning
Storing your washing, precautions should be taken to keep water off the certain Janus out of the elements in a garage is the best way to maintain areas of the motorcycle. Cover the following areas (a small plastic bag &... - Page 85 1. Do not let the motorcycle air dry as this can damage the finish. 2. Remove the plastic bags and rubber bands. 3. Use a soft cloth (Janus recommends a brand new microfiber cloth) to dry your motorcycle, working from the top to the bottom.
- Page 86 CLEANING, CON’T. LEATHER, VINYL AND RUBBER CARE taken with any hand-painting such as the Janus logo on the deluxe tank If your motorcycle has leather accessories, special care must be taken. as metal cleaners or polish can damage the paint.
-
Page 87: Storage
STORAGE PREPARATION AFTER STORAGE 1. Clean the entire motorcycle thoroughly. • If the motorcycle has been stored for more than 4 months, change 2. Change the engine oil and clean the engine oil filter. the engine oil. 3. Remove the spark plug and put several drops of engine oil into the •... -
Page 88: Troubleshooting
TROUBLESHOOTING ENGINE DOES NOT START ENGINE STALLS (WITH KEY IN ON POSITION) Only when shifting into first gear: • If the starter motor won’t turn over: Clutch is not properly disengaging • Transmission not in neutral • Fuse blown While riding: •... -
Page 89: Parts
PARTS TO ORDER PARTS FOR YOUR JANUS MOTORCYCLE, PLEASE CONTACT: Janus Motorcycles 211 S. 5th Street Goshen, IN 46528 574-538-1350 contact@janusmotorcycles.com... -
Page 90: Warranty
WARRANTY OWNER’S WARRANTY RESPONSIBILITIES - As the owner of a Janus motorcycle, you are responsible for the performance of the required maintenance listed in your Owner’s CALIFORNIA EMISSION CONTROL SYSTEM Handbook. Janus recommends that you retain all receipts covering WARRANTY STATEMENT... - Page 91 30 (thirty) days, or a repair is not complete within 30 Board (for California motorcycles only); and days. Any replacement part can be used in an emergency repair. Janus (b) is free from defects in material and workmanship which cause...
- Page 92 Janus shall not be liable or repairs. However, Janus is not liable for these parts. The owner for any other expenses, loss or damage, whether direct, incidental, is responsible for the performance of all required maintenance.
- Page 93 • Any part of the motorcycle found to be defective during the specified 400 7th Street SW, (NSA-11) period will berepaired or replaced at the discretion of Janus or by an Washington, DC 20590 authorized repair shop, subject to the below warranty conditions.
- Page 94 WARRANTY, CON’T. 9. The motorcycle must have been serviced by a qualified* motorcycle or scooter repair shop, at the intervals specified in the Janus Owner’s warranty. Handbook and the service log completed accordingly. • Whenever service, repair, or warranty work is undertaken the 10.
- Page 95 “proper riding technique” section of the Owner’s 20. Should a warranty claim become necessary, Janus shall not be Handbook and any use contrary to the warnings given in that same liable for loss of use, inconvenience, lost time, commercial losses or handbook.
- Page 96 © Copyright 2016 Janus Motorcycles & Paragon Motorcycles, LLC 211 South 5th St. • Goshen, IN 46528 574-538-1350 • www.janusmotorcycles.com...
Need help?
Do you have a question about the 250 Series and is the answer not in the manual?
Questions and answers
main fuse location
The main fuse in the Janus 250 Series is located in a slot at the back of the starter relay.
This answer is automatically generated