Advertisement
Advertisement
Table of Contents

Summary of Contents for Full Speed Ahead K-Force WE
- Page 1 USER’S MANUAL AND INSTRUCTIONS...
-
Page 3: Table Of Contents
Index 1. Introduction 2. Drivetrain Parts 3. Tools and Supplies 4. Frame Preparation 4.1.RD Cable Routing 4.2.FD Cable Routing 4.3.Bottom Bracket Mounting 5. Drivetrain Installation 5.1.FD Installation 5.2.RD Installation 5.3.Shifter Installation 5.4.Battery Installation 5.5.Chain Installation 6. Pairing 7. Usage and Adjustments 7.1.Power ON 7.2.Power OFF 7.3.Rear Derailleur Alignment... -
Page 4: Introduction
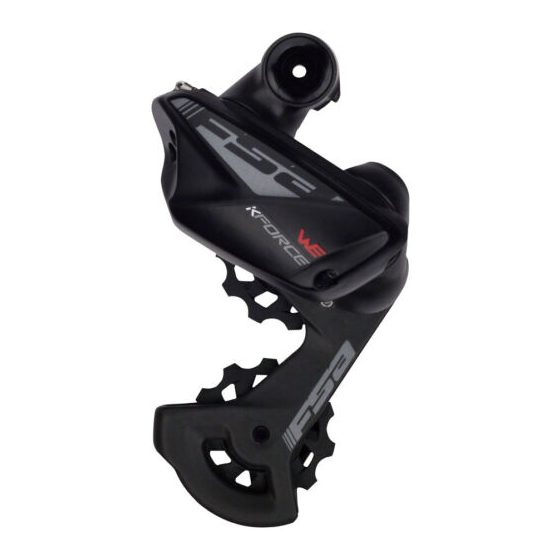
2. Drivetrain Parts FSA K-Force WE is an electronic hybrid drivetrain. It is defined as hybrid because is not completely wireless. Indeed, there are no wires from shifters to derailleurs but the communication between the two derailleurs is still effectuated using wires. -
Page 5: Tools And Supplies
3. Tools and Supplies FSA recommends installation of WE Drivetrain to be performed by a highly experienced bicycle mechanic. The following tools and supplies are needed for correct installation of FSA WE Drivetrain. See tool list below: • Hex wrench sizes (1.5 mm, 2 mm, 5 mm) •... -
Page 6: Drivetrain Installation
FD Wire Routing Slide the wire guide tool through the FD Connect the FD wire and pull up through routing hole into the seat tube. the seat tube. Bottom Bracket and Crankset mounting For BB and crankset mounting, check the dedicated FSA instructions. 5. -
Page 7: Rd Installation
RD Installation Rear derailleur must not be forced out of position during installation. Install RD in it set position. Avoid interference between pulleys or B-tension screw and the dropout during installation. Apply a small amount of grease on Using a 5 mm hex wrench, screw the derailleur hanger threads the derailleur in to the hanger. -
Page 8: Battery Installation
Battery Installation Insert battery in the battery Fully insert the battery and adaptor Plug the derailleur wires in to the adaptor. in the seatpost and check that it is battery terminal leads. Either lead secure. can work for either wire. Chain Installation Follow below instruction depending on which cage you use on rear derailleur. -
Page 9: Pairing
To unlock the chain for replacement or other operation, follow below instructions: 1. To disconnect the Drive link, isolate the link. (Fig.4) 2. Firmly squeeze the link bushings together so that the pins and plates decouple. (Fig.5) 3. Pull the plates apart. (Fig.6) Drive Link cannot be reused if removed. -
Page 10: Usage And Adjustments
When pairing is complete, the red LED on the shifter will blink and turn off. The pairing is complete. Repeat the procedure for the other shifter. With the shifter in SET mode, press the Power button on the FD until both the LEDs illuminate blue. -
Page 11: Front Derailleur Alignment
Front Derailleur Alignment 1. Shift the rear derailleur to the center (6th) cog. 2. Enter set mode by pushing and holding the SET button for 2 seconds. Both LEDs will blink green. 3. Press either front shifter button to enter the front derailleur adjustment mode (by factory default is the left one but you can change it in the WE Dashboard Software). -
Page 12: B-Tension Screw Adjustment
B-Tension Screw Adjustment B-tension screw adjustment must be set after all derailleur and limit screw adjustments. B-tension screw adjustment optimizes the distance between the upper jockey pulley and cassette cogs. To adjust the B-tension, shift the rear derailleur to the largest cog. - Page 13 Shifter battery The shift batteries are CR2032 coin cell batteries and are not rechargeable. When the battery level is low, they must be replaced. It is not necessary to replace both batteries at the same time if they are not both showing a low charge. Each time a shift button is pressed a corresponding LED will blink on the main controller.
-
Page 14: Battery Diagnostic
9. Battery Charging Turn WE off before charging the battery. 1. Use 1.5mm hex wrench to unscrew the rear derailleur wire clamp. 2. Unplug the wire from the rear derailleur. 3. Plug the wire in to the WE charger, then plug the charger in to outlet. The charger light will be red while charging and turn to green at full charge. -
Page 15: Diagnostics
Once the cover is partially open insert the screw Remove the coin cell battery from the holder and driver from the side to completely remove the install new battery. cover. Make sure to respect correct polarity. Reinstall the cover and reposition the hood on the housing. -
Page 16: Battery Warning
11. Battery Warning Battery 1. Be sure to use only with FSA charger and follow charging instructions. 2. Do not crush and/or do not puncture the battery. 3. If the battery pack is stored for a long time, the battery pack’s storage should be 7.8V~8.0V. 4. - Page 17 Instructions for “long term storage”: a. Long-term storage can accelerate battery self-discharge and lead to the deactivation of the batteries. To minimize the deactivationt, store battery packs in a temperature range of -10°C~45°C (14°-113°F). b. When charging for the first time after long-term storage, deactivation of the packs may have led to decreased capacity.
-
Page 18: Important Information
12. Important Information Risk of explosion if battery is replaced by an incorrect type. Dispose of used batteries according to the instructions If your device endures electrostatic discharge, it may automatically reboot and disconnect current wireless transmission. You will need to manually reset the wireless connection when this happens. Use your device in temperature between -5˚C ~ 40˚C. - Page 19 Le présent appareil est conforme aux CNR d'Industrie Canada applicables aux appareils radio exempts de licence. L'exploitation est autorisée aux deux conditions suivantes: (1) l'appareil ne doit pas produire de brouillage, et (2) l'utilisateur de l'appareil doit accepter tout brouillage radioélectrique subi, même si le brouillage est susceptible d'en compromettre le fonctionnement."...
Need help?
Do you have a question about the K-Force WE and is the answer not in the manual?
Questions and answers