
Related Manuals for SUR-RON Light Bee


Summary of Contents for SUR-RON Light Bee
- Page 1 SUR-RON LIGHT BEE SERVICE MANUAL...
- Page 2 The power source of LIGHT BEE must be cut off before any operation on the bike. failure to cut off its power source may cause serious injury and even death through electric shock or disassembly and assembly of parts.
- Page 3 2.2 Torque specifications of important screws 2.3 The top speeds under different battery capacities 2.4 Bike composition 3. Bike operation 4. LIGHT BEE repair tools and preparation work 4.1 LIGHT BEE repair tools 4.2 LIGHT BEE fixing 5. Battery dismount and mount 6.
- Page 4 11.6 Disassemble left pedal assembly 11.7 Disassemble and assemble right pedal assembly 11.8 Disassemble pedal assembly 11.9 Disassemble and assemble guard plate under electrical machine 11.10 Disassemble and assemble guard plate under controller 11.11 Disassemble and assemble air switch combination 11.12 Disassemble air switch combination 11.13 Disassemble and assemble USB and electric control lock combination 11.14 Disassemble USB and electric control lock...
- Page 5 17.2 Maintenance and storage of battery 17.3 Battery charging 18. Checking and maintenance of controller 18.1 Disassembly and assembly of controller 18.2 Checking of controller 19. Electrical failure checking and removal 20. Failure diagnosis...
- Page 6 • Accidents and serious injuries. Please read local provisions about electrombile and motor vehicle before using Qingfeng bike. According to the certification of Ll2-B electric moped Sur-Ron bike has passed, its highest speed is 45km/h, so it is not allowed on expressway or the road segment with the minimum speed of more than 45km/h.
- Page 7 1900wh charger The special high-performance portable charger for LIGHT BEE power battery Power: 600 W Input: 110V AC or 240V DC (according to local voltage) Output: 67.2V DC/10A charging time 0%-100% - 3.5 hours...
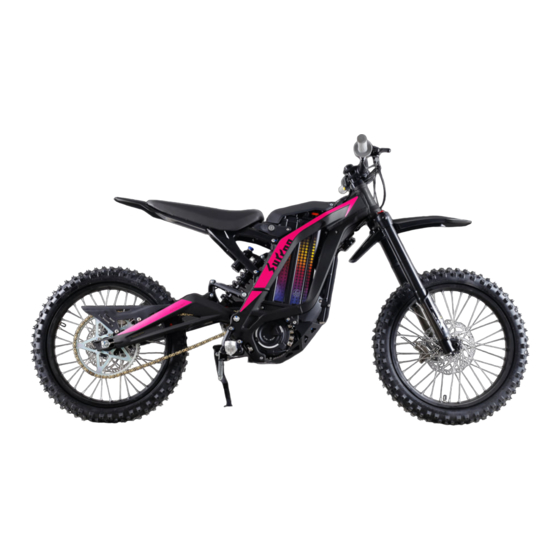
- Page 8 wheel base 1,230mm height vehicle 815 mm seat front rake of seat 26° tube ground clearance 270 mm total length 1860 mm width 780 mm height 1,050 mm weight no battery 42Kg bicycle 50 Kg load capacity 100 Kg 2.2 Torque specification of important screws serial numbe item...
- Page 9 20、 fasten rear wheel and axle 55~60N•m 21、 fasten rear disk brake 12N•m 22、 fasten electrical machine 25N•m fasten controller and support of 23、 8-10N•m controller 24、 fasten pedal and bicycle frame 25-30N•m 25、 fasten guard bolt under controller 20N•m 2.3 The highest speeds under different battery capacities (reference) serial numb...
- Page 10 7. Three-phase brushless DC motor 8. Ternary power lithium battery 9. Control system 10. Headlight 11. Front shock absorber 2.3.2 Position of head parts Fig 2 1. LCD Speedometer 2. Front brake handle 3. Rear brake handle 4. Throttle grip 5.
- Page 11 8. Trip distance in total 9. Buttons for function selections 3. Vehicle operation This chapter includes all necessary knowledge related to Light Bee operation you need to learn about: When stop using SUR-RON light bee, cut off main switch. Just to move the bike, turn off on/off switch.
- Page 12 7、lubricating grease 4.2 Fix Light Bee In terms of some maintenance operation of Light Bee, we suggest to fix Light Bee according to the step. In an open area, turn off power source, open Light Bee’s side stand on floor.
- Page 13 5. Disassemble and assemble battery (see Fig 4) 5.1After closing electric door lock, plug key into cover of ① battery compartment, then turn key anticlockwise to open cover of battery compartment Fig 4 Fig 5 .Cut off air switch, power source and output power line and signal line of battery③ ,④ .Hold the lifting handle of battery, lift it, then take battery out(see Fig 5) 5.1.1 Assembly Assemble battery according to the inverse disassembly steps.
- Page 14 Adjust rebound damping (right shock absorber) turn to + restrain increase (slower) turn to - restrain decrease (faster) preload adjustment (left shock absorber) turn to + increase of spring preload turn to - reduction of spring preload Fig 7 6.2.2 Tune rear shock absorber (see Fig 8) regulating valve of compression damping force turn to +, compression pressure increases(harden) turn to -.
- Page 15 • clean the dust on breeches pipe (mud and old lubricating oil) • Smear a layer of special lubricating oil for Light Bee on the pillar between fixed mount of • dustproof ring and breeches pipe. Tighten dustproof ring to keep lubricating oil inside it.
- Page 16 6.4.2.1 Assembly Assemble headlight and turn light according to reverse disassembly steps and fasten • them with the torque force of 10~12N.m. Fig 11 6.4.3 Disassemble front wheel assembly Loosen fastening bolts of wheel and axle of lower support of front shock absorber① •...
- Page 17 glue (Loctite 243) on bolt, fasten it with the torque force of 8-10N.m. Pay attention to rotation and install direction of brake disk, avoid contaminating brake disk, use absolute ethyl alcohol in cleaning • Ensure disk is at a correct position (see the following figure) 13Fig 13 14Fig 14 6.4.5Dismount front shock absorber (see Fig 15)
- Page 18 Put LIGHT BEE on platform or support platwise at bottom bracket area • Unscrew the bolts of connector at the upper part of shock absorber② : fix rear wheel and • dismount bolts. Put the bicycle on floor. Unscrew the bolts of connector at the lower part of shock absorber②...
- Page 19 In the case, you must use new head parts. 7.2 Disassemble head parts Disassemble the head parts of Light Bee according to the following steps: Put Light Bee on support at bracket area •...
- Page 20 Fig 20 8 Disassemble and assemble shifter assembly (Fig 21) Disassemble head parts of Light Bee according to the following steps: Put Light Bee on support at bracket area •...
- Page 21 Deformation examination for wheel rim should be conducted according to the following steps: • Put Light Bee on support at bracket area • Confirm wheels rotate automatically. Check whether wheels swing transversely (see Fig 22). If they swing transversely, measure their transverse motion through indicator. If transverse motion exceeds 1.5mm, check whether wheel rim is deformed or bearing is...
- Page 22 Put LIGHT BEE on central support. Rotate wheel and observe disk passing by pad to check whether disk has indentation or is bended. If disk doesn’t have friction with neighboring parts, slight transverse motion is acceptable.
- Page 23 10.2 Maintenance 10.2.1 Deflate brake Deflate the brake on LIGHT BEE according to the following steps: • Arrange necessary tools for deflation: • short needle cylinder for pump • long needle cylinder for brake caliper •...
- Page 24 • Put it down slowly. When oil flows out from the hole of brake caliper, put deflation plug back. • Dampen brake caliper. • Take needle cylinder down from brake pump carefully and place plastic bolts at the corresponding positions. (maximum torque 40Nm, prevent damages). •...
- Page 25 • Dismount brake caliper② 10.5.1Assembly • Put LIGHT BEE on support at bracket area. • Put brake caliper② at a correct position and fasten bolts. Don’t tighten bolts for future adjustment of position of brake caliper. Use thread lock glue (Loctite 243) on bolts.
- Page 26 • Dismount rear brake caliper (see “dismount brake caliper”) Remarks: a few drops of brake fluid may flow out of flexible brake pipe in the operation. The brake fluid in LIGHT BEE is mineral oil and nor corrosive. Brake fluid can be wiped with duster cloth.
- Page 27 Use thread lock glue (Loctite 243) on fastening bolts and fasten bolts with torque force of 10-12N.m. Fig 31 11.2 Dismount side cover of electrical machine (see Fig 32) Dismount side cover of electrical machine from LIGHT BEE according to the following...
- Page 28 • Assemble side cover of electrical machine according to the inverse disassembly steps. Fig 33 11.4 Disassemble and assemble first level transmission belt ismount first level transmission belt from LIGHT BEE according to the following steps: • Dismount side cover of electrical machine from bicycle (see “dismount side cover of electrical machine”) •...
- Page 29 Fig 35 11.7 Dismount right pedal assembly (see Fig 36) Dismount right pedal assembly from LIGHT BEE according to the following steps: • Put cork base of bicycle down on platform with rear wheel suspended, lift side stand. • Dismount fastening bolts of right pedal assembly① and right pedal assembly② from bicycle.
- Page 30 Fig 36 11.8 Disassemble pedal assembly (see Fig 37) Disassemble pedal assembly according to the following steps: • Use tools to dismount pedal-linked pin on platform, take return spring of pedal down and separate pedal and adapter bracket of pedal① ② . •...
- Page 31 • Dismount protective guard under electrical machine (see “dismount protective cover under electrical machine”) • Dismount fastening bolts of protective cover under controller① ② , take protective guard under controller down③ . 11.10.1 Assembly • Assemble guard plate under controller according to the inverse disassembly steps. Tightening torque of fastening bolts of M6 protective guard 5N.m Fig 39 11.11 Dismount air switch combination (see Fig 40)
- Page 32 • Assemble air switch combination according to the inverse disassembly steps. Tightening torque of M6 fastening bolts 10N.m. Generally, pack PE foam of front buffer doesn’t have to be replaced. It contains mucilage glue and can’t be used repeatedly. If you need to to replace it, sticking is suggested.
- Page 33 11.15 Disassemble electrical machine assembly (see Fig 44) Dismount electrical machine assembly according to the following steps: • Put LIGHT BEE on support. Reinforce rear wheel. Suspend cock base at electrical machine area or use mobile lifting tool to support it.
- Page 34 taillight and GPS interface (), avoid damaging electrical interfaces. • Dismount power battery (see “dismount power battery”) • Dismount support④ connecting to seat of battery lock and fastening bolts of bicycle frame⑥ • Dismount fastening bolts of trim cover of seat of battery lock① . •...
- Page 35 • Assemble back shield of battery according to the inverse disassembly steps. Fig 49 11.21 Dismount back wheel assembly (see Fig 30) Disassemble back wheel assembly according to the following steps: Put LIGHT BEE on support at bottom bracket area •...
- Page 36 Take belting of taillight line of rear fender down and disconnect taillight line • Dismount fastening bolts of brake caliper of rear disk brake, take brake caliper of rear disk • brake⑤ and put plastic piece with the thickness of 2mm between brake pads adjust adjustment bolts of rear wheel, shorten bolts to take chains down, loosen shaft of •...
- Page 37 torque wrench: Bolts of rear brake disk: 12N.m • Bolts of chain wheel of rear wheel: 20-25N.m • Fig 51 11.23Dismount rear fork (see Fig 52) Dismount rear fork according to the following steps: • Dismount rear shock absorber, cocket centring, belt and chain of electrical machine (refer to the disassembly method of rear shock absorber, cocket centring, belt and chain of electrical machine) •...
- Page 38 Fig 53 11.25 Disassemble rear fender assembly(see Fig 54) Disassemble rear fender assembly according to the following steps: • Dismount fastening bolts of cover plate of seat of taillight⑤ , take cover plate, disconnect interface of taillight line, dismount belting of wiring harness and separate connecting line and rear fender.
- Page 39 11.27 Disassemble and assemble cover of battery compartment (see Fig 56) Use keys to open cover of battery compartment. And use long flat nose pliers to take • spring clip down from shaft of flat head pin① ② and draw shaft of pin out① ② Dismount cover of batter compartment •...
- Page 40 When bicycle is energized, don’t touch wheel or drive system. • Put LIGHT BEE on a central worktable and and turn on it. • Operate a brake, twist handle of accelerator slightly. If rear wheel accelerates, that means system has faults.
- Page 41 these bolts alternatively until torque reaches 5-6 N.m. The angle of handlebar must be adjusted in order to make users feel comfortable and safe in riding. As you change the angle of handlebar, the position of control device and brake handle will change and needs to be adjusted again.
- Page 42 • pass stay wire of accelerator through shell of seat of accelerator and screw shell and threaded rod of accelerator cable • Pull core of accelerator cable out and cover handlebar with handle of accelerator. • Connect core of stay wire to handle of accelerator. Cover handlebar with seat of fueler and fueler of accelerator.
- Page 43 Fig 63 15.3 Dismount chiains LIGHT BEE has 420 chains, which is a fast and simple system connecting to chain links (see Fig 64). Dismount chains from LIGHT BEE according to the following steps: • Put LIGHT BEE on central worktable •...
- Page 44 Fig 64 15.3.1 Install chains (see Fig 65) Install chains according to the inverse dismounting steps. After chain links return their original positions, pull chains to fix chain links. Adjust chains and length of bolts. Adjust the tension degree of chains by adjusting the position of rear wheel. Ensure the vertical oscillating quantity is 10-15mm Fig 65 In installation, the opening end direction of chain lock is contrary to the...
- Page 45 Users must check the state of connectors of battery, controller and bicycle cable, especially the largely exposed or frequently operated parts. Before any operation on the electrical system of LIGHT BEE, take battery out or stop other operations in case of damaging electrical elements.
- Page 46 Users can’t dismount battery by themselves in case of damages and dangers. Don’t throw LIGHT BEE battery in any case. If your battery needs to be replaced or discarded, send it to the designated dealers or after-sale service providers for appropriate handling.
- Page 47 18 Checking and maintenance of controller 18.1 Disassembly of controller (see Fig 70) Take controller down from LIGHT BEE according to the following steps: • Turn off and disconnect air switch. • Disconnect battery.
- Page 48 18.1.1Assembly of controller • Assemble controller according to the inverse disassembly steps. Tightening torque of fastening bolts of power source of controller 8-10N.m. Remarks: the fastening bolts of input line and output line of power source of controller must be tightened according to the required torque. Because binding post and circuit board adopt electrical welding process, excessively high tightening torque will damage binding post of controller and lead to the falling of binding post.
- Page 49 air switch in front of battery has not check air switch turn on air switch been opened turn off air switch, use multimeter to check low battery whether output voltage of protection of charge battery discharge interface of battery battery is normal (DC45V-67.2V) battery enters check whether ambient...
- Page 50 be solved by charging with charger, that means battery is damaged switch protection lift side stand lift side stand of side stand After confirming the Ausschalter disconnect plug of position of braking point protection of brake switching line of brake of handle, adjust the position of Ausschalter protection for...
- Page 51 changes between 0.8V and 3.4V. insert and pull plug and plug of controller insert and pull signal plug check whether terminal is has bad contact of controller normal Plug of Hoare line insert and pull plug and of electrical insert and pull Hoare plug check whether terminal is machine has bad of electrical machine...
- Page 52 work battery If electricity meter doesn’t display, battery may enter protection mode owing to low electric quantity 060when teh temperature battery charge it after battery charger is lower than 0℃ or higher temperature is too temperature becomes doesn’t than 60℃, charging can’t low or too high normal work...
- Page 53 /wrong setting of reset status of km/mile reset state of km/mile km/mile speed is modification of gear train or displayed check gear train and restore original gear train transmission leads correctly transmission ratio and transmission ratio to changes o reduction ratio insert and pull plug and plug of instrument replace plug or terminal...
- Page 54 Failure codes and corresponding definition of failure are shown in the following table: failure definition solution code Er-102 MOSMOS temperature sensor repair or replace battery at designated of battery after-sale shop Er-103 soft start failure of battery repair or replace battery at designated after-sale shop Er-105 preliminary over discharge...
- Page 55 machine Er-205 open-phase protection of check wiring of controller or replace controller controller Er-206 overcurrent protection of check wiring of controller or replace controller software of controller Er-207 overcurrent protection of check wiring of controller or replace controller hardware of controller Er-208 power tube failure of replace controller...
Need help?
Do you have a question about the Light Bee and is the answer not in the manual?
Questions and answers