Advertisement
Quick Links
7
QVC D I R E C T I O N D E C K — CO N F I D E N T I A L — For information purposes only, not for distribution, all rights expressly reserved.
Cook's Essentials
G
Full Color
A | For use from 13 pixels / 2 inches and above
Owner's Manual
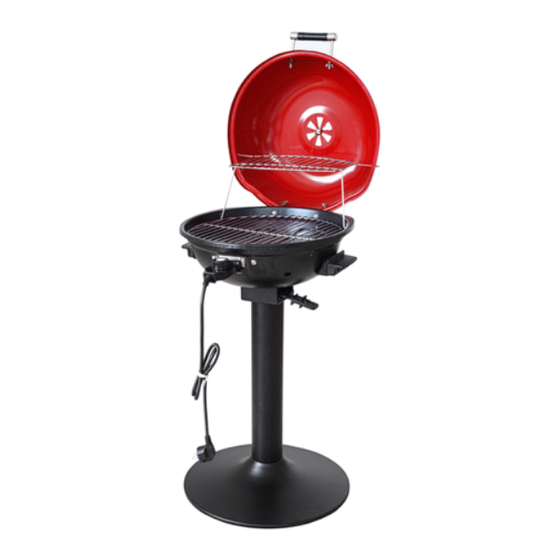
Electric BBQ Grill Model: CM-GR103SA
FOR HOUSEHOLD USE ONLY
Reverse
A reverse | For use from 13 pixels / 2 i
Advertisement

Related Manuals for Cook's essentials CM-GR103SA


Summary of Contents for Cook's essentials CM-GR103SA
- Page 1 QVC D I R E C T I O N D E C K — CO N F I D E N T I A L — For information purposes only, not for distribution, all rights expressly reserved. Cook’s Essentials Owner’s Manual Electric BBQ Grill Model: CM-GR103SA FOR HOUSEHOLD USE ONLY...
-
Page 2: Table Of Contents
Index Topic Page Important Safeguards ........................1 - 3 Parts & Accessories ........................4 - 5 Assembly Instructions ........................6 - 11 Using the Temperature Control ...................... 12 General Operating Instructions ....................... 13 Cleaning & Storage ........................13 - 14 Troubleshooting .......................... -
Page 3: Important Safeguards
Important Safeguards When using electrical appliances, basic safety precautions should always be followed, including the following: • READ AND FOLLOW all instructions carefully and • EXTREME CAUTION must be used when moving thoroughly, before assembly, installation, use or an appliance, hot racks, pans and other cooking service. - Page 4 Important Safeguards… • DO NOT USE fuel, such as charcoal or lava rocks • THIS APPLIANCE IS NOT DESIGNED for tabletop with this appliance. Do not use barbecue lighter use. Do not set this appliance on a table. fluid, gasoline, kerosene or alcohol with this •...
-
Page 5: Important Safeguards
Important Safeguards… C A U T I O N • Always unplug the appliance after use. • Always operate the appliance on a horizontal surface that is level, stable and noncombustible. • Let the appliance cool completely before Use caution when operating on wood decks. Do handling, removing parts, cleaning or storing not use in or on boats or recreation vehicles. -
Page 6: Parts & Accessories
Electric Barbecue Grill Parts IMPORTANT: Your Electric Barbecue Grill has been shipped with the components shown below. Check everything carefully before assembly or use. If any part is missing or damaged do not use this product and contact shipper using the customer service number located in the back of this owner’s manual. PRODUCT DIAGRAM 1. - Page 7 Electric Barbecue Grill Parts… HARDWARE COMPONENTS (Screws, Nuts, Washers) 17. Small Screw M5*12 (7 pcs) 18. Medium Screw M6*20 (13 pcs) 19. Long Screw M6*45 (4 pcs) (Affixed to Bowl Handles) 20. Small Wing Nut M5 (6 pcs) 21. Large Wing Nut M6 (11 pcs) 22.
-
Page 8: Assembly Instructions
Assembly Instructions NOTE: In each step described below, tighten all connections by hand first. Once assembly is complete, tighten all connections fully. Step 1 – Attach Pillar (part #13) to Base (part #14) Hardware: M6*20 medium screws (part #18) – 4 pcs flat washers (part #23) –... - Page 9 Assembly Instructions… Step 3 – Attach the Bowl (part #2) Hardware: M6 large wing nuts (part #21) – 5 pcs M6*20 medium screws (part #18) – 5 pcs flat washers (part #23) – 5 pcs lock washers (part #22) – 5 pcs Ensure the assembled Base is on flat ground.
- Page 10 Assembly Instructions… Step 5 – Lower Hinge Bracket (part #10b) Hardware: M5*12 small screws (part #17) – 2 pcs flat washers (part #23) – 2 pcs lock washers (part #22) – 2 pcs flat nuts (part #24) – 2 pcs Locate the Lower Hinge Bracket.
- Page 11 Assembly Instructions… Step 7 – M5*123 Locking Pin (part #15) Hardware: M5 small wing nut (part #20) – 1 pc flat washer (part #23) – 1 pc lock washer (part #22) – 1 pc Locate the M5*123 Locking Pin, and set aside one (1) flat washer, one (1) lock washer, and one (1) M5 small wing nut.
- Page 12 Assembly Instructions… Step 9 – Lid Handle (part #8) Hardware: M6 large wing nuts (part #21) – 2 pcs flat washers (part #23) – 2 pcs lock washers (part #22) – 2 pcs Locate the Lid Handle and remove the cardboard from the Handle screws, careful not to let the short tube and washer come off, Set aside two (2) M6 large wing nuts, two (2) flat washers, and two (2) lock washers.
- Page 13 Assembly Instructions… Step 11 – Cooking Grill (part #3) Locate the Cooking Grill and place in the Bowl on top of the Heating Element, as shown here. Step 12 – Foldable Warming Rack (part #16) Locate the Foldable Warming Rack and unfold the legs. Insert the Foldable Warming Rack by placing the four (4) prongs into the side holes of the Lid and Bowl, as shown here.
-
Page 14: Using The Temperature Control
Using the Temperature Control Powering Up the Barbecue 1. Make sure the OFF symbol on the Temperature Control Dial (part #7b) is fully turned to the light Indicator location. (Fig. 1, page 12). The light should not be illuminated. Fig. 1 2. -
Page 15: General Operating Instructions
General Operating Instructions Before using the Electric Barbecue Grill for the first time... Remove all packaging materials from the exterior and interior of the Barbecue Grill. Follow all assembly instructions. Before cooking any food on this appliance, operate the grill for about 15 minutes with the lid closed and the power turned to “HIGH”. - Page 16 Cleaning and Care… Cleaning Outsides of Appliance and Cooking Grill 1. Remove the power cord from the wall socket and be certain the appliance is thoroughly cooled before cleaning the appliance. 2. Remove the Temperature Control from the appliance before cleaning, and set aside. 3.
-
Page 17: Troubleshooting
Troubleshooting PROBLEM POSSIBLE CAUSE SOLUTION The Barbecue Grill does The appliance is not plugged in. Plug power cord into wall socket. not work. The appliance is not turned on. Re-insert the Temperature Control The Temperature Control Prong is not Prong into the Heating Element’s inserted properly into the Heating Front Bracket. - Page 18 Graphic Toolkit: Logo - Primary Full Color Reverse Electric Barbecue Grill Should you have any problem, our friendly customer service staff is here to help you. A | For use from 13 pixels / 2 inches and above A reverse | For use from 13 pixels / 2 i 1-866-533-1184.
Need help?
Do you have a question about the CM-GR103SA and is the answer not in the manual?
Questions and answers
Is there a drip pan or tray? If not what happens to the grease dripping from food