I-gotU GT-120 Manual

I-gotU GT-120 Manual

Gps logger

Advertisement

GPS Logger

GPS Logger package comes in two specifications, GPS Logger (USB) & GPS Logger (Bluetooth). Please check the package contents as
shown below before getting started.
Package contents & specifications
The GPS Logger package comes with 1 @trip PC CD-ROM, 1 GPS data logger, 1 GPS Logger Dock/ USB Cable, and 1 color jelly case.
GT-120 package contents
GT-200e package contents
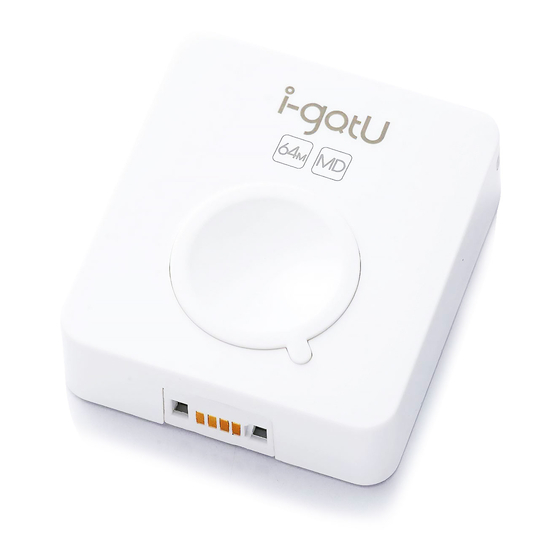
GT-120
Dimension
44.5 x 28.5 x 13mm
Weight
20g
Built-in SiRF StarIII
Chipset
low-power chipset
Antenna
Built-in GPS patch antenna
Built-in 230mAh Lithium-ion
Battery
battery
LED indicators
Blue & Red
Cold start
< 35 seconds
Warm start
< 35 seconds
Connection
USB 1.1
interface
Operation
-10 °C to + 50 °C
temperature
Water-resistant
Yes
GT-200e
Dimension
46 x 41.5 x 14 mm
Weight
37g
Built-in SiRF StarIII
Chipset
low-power chipset
Antenna
Built-in GPS patch antenna
Built-in 750 mAh Lithium-ion
Battery
battery
LED indicators
Blue & Red
Cold start
< 35 seconds
Warm start
< 35 seconds
USB 1.1 for PC connection;
Connection
Bluetooth V2.0 EDR Class 2
interface
for PDA & mobile phones
Operation
-10 °C to + 50 °C
temperature
Water-resistant
Yes

Advertisement

Table of Contents
loading

Summary of Contents for I-gotU GT-120

  • Page 1: Gps Logger

    Warm start < 35 seconds Connection USB 1.1 interface Operation -10 °C to + 50 °C temperature Water-resistant GT-120 package contents GT-200e Dimension 46 x 41.5 x 14 mm Weight Built-in SiRF StarIII Chipset low-power chipset Antenna Built-in GPS patch antenna...
  • Page 2 GT-600 Dimension 46 x 41.5 x 14 mm Weight Chipset Built-in SiRF StarIII low-power chipset Antenna Built-in GPS patch antenna Battery Built-in 750 mAh Lithium-ion battery LED indicators Blue & Red Cold start < 35 seconds Warm start < 35 seconds Connection USB 1.1 for PC connection;...
  • Page 3 GPS Logger Dock works both as GT-100 built-in battery charger and data transfer medium for GT-100. GPS Logger USB Cable GPS Logger Cable works both as GT-600 / GT-200 / GT-200e / GT-120 built-in battery charger and data transfer medium for GT-600 / GT-200 / GT-200e / GT-120.
  • Page 4: Getting Started With Gps Logger

    Getting Started with GPS Logger The following demonstrates how to get started with your GPS Logger and @trip PC: 1. Install @trip PC 2. Charge GPS Logger 3. Power on 4. Get first GPS fix 5. Connect PC to import data 1.
  • Page 5 Install & Charge GPS Logger 3. Power on/off your GPS Logger Long press the button to power on/off your GPS Logger. The blue LED indicator blinks once upon power-on, and the red LED indicator blinks upon power-off. Tip: Go to GPS Logger indicators to familiarize yourself with the LED indicators.
  • Page 6: Gps Logger Led Indicators

    GPS Logger LED Indicators The following lists various LED indications of GPS Logger: Main indication: Power On blue LED indicator blinks once. Operation: Long press (1.5 seconds) the button to power on GPS Logger. Note: When the device is powered on and starts tracking, the blue LED indicator blinks every 4 seconds.
  • Page 7 Operation: While Bluetooth GPS Logger is turned off, long press (5 seconds) to enter pairing mode. (Please refer to the user manual of your handset or bluetooth device for details on bluetooth pairing.) Note: 1. If necessary, enter the passcode " 0000 " to complete pairing. 2.
  • Page 8: Essentials For Beginners

    Essentials For Beginners Before hitting on the road with your GPS Logger , please read the following information thoroughly to ensure the GPS Logger to work properly, lest any incorrect operation ruin your precious travel memories. GPS Logger wear & attachment When taking GPS Logger from indoors to outdoors, it usually takes longer to get a GPS fix.
  • Page 9 GPS Classroom What is GPS: Global Position System (GPS) is developed and operated by the Department of Defense (DOD) of the United States, on which the accuracy and maintenance of this system fully depends. Any change made by the authorities might influence the accuracy and performance of the GPS equipments.
  • Page 10: Use Gps Logger As Gps Receiver

    Use GPS Logger as GPS Receiver A GPS Logger serves not only as a GPS data logger that records all the GPS data on your journey but also works as a GPS receiver for many navigation software by third parties. Connect it to any PC installed with navigation software to work both together as a GPS navigation system.
  • Page 11 @trip PC @trip PC is a specialized software that can auto-add GPS information on the photos taken on your journey and present your journey lively on 3D map. Besides, @trip PC offers great functionality that allows you to create, customize and export your trips in various file formats, in order to share many traveling fun times with your family and friends.
  • Page 12: Start Using @Trip Pc

    Start Using @trip PC Easy-to-use interface. Let @trip PC do all the hard work for you! Main menu bar Main menu bar provides you with quick accesses to the main functions and information concerned. Import GPS Track : Click to to launch Import Wizard to import GPS log data. Share Trip: Click to share your trip by uploading to @trip server (including an option to make it public), exporting to file, or any advanced options.
  • Page 13 Note: For correct mapping of track data and photos, please make sure your camera time is adjusted prior to starting a track. Or click Sync. Time with Server to obtain the correct time from server. Hardware Settings: Click to customize the tracking modes of your GPS Logger . Clear Device Data: Click to clear the GPS logs saved on your GPS Logger.
  • Page 14 Trip information window gives a clear view of all the imported trips in selected trip folder. Right-click on a trip to see more options: Copy: The selected trip will be duplicated.  Delete: The selected trip will be deleted from the list. ...
  • Page 15: Start A Trip

    Start A trip Try one of the methods below to start a trip: A. Start A Trip by Launching @trip PC Launch @trip PC, and you'll be prompted to download log data from your GPS device if connected to PC. Make sure your GPS device is connected to PC, and click Yes to start downloading logged track data.
  • Page 16 Click Add to add photos to the map of your trip. Click Next to continue. Import Wizard is now processing track data. Finally, a trip is com pleted. Page 17...
  • Page 17 *If added photos failed to match imported track data, click to launch Trip Composer to map the unmatched photos. B. Start A Trip by Creating A New Trip Click on the main menu bar, and you'll be prompted to select from imported tracks to start a new trip. See Method A for the rest of data import process.
  • Page 18: Compose Trip

    Compose Trip Select a trip from the trip information window, and click on the main menu bar to launch Trip Composer. Function Menu Bar Save & Exit: Click to either save changes and exit Trip Composer, exit without saving changes, or return to composer without saving. Import GPS Track: Click to import track(s).
  • Page 19 Content Editor: Click to quickly edit Cover Page or photos of the trip. Edit Cover Page: Enter a trip name and its brief description, or click Change Photo to select a different photo as the Cover Page of the  trip.
  • Page 20 Set Runner: Click to set up a Runner image to play the track animation on the map. Help: Click to bring up @trip PC Help file. Track information window At the track information window, right-click a selected track to see more options: Delete: The selected track will be deleted.
  • Page 21 Export to GPX...: The selected track can be exported to a .gpx file.  Show Detailed Info...: The detailed waypoints information of the selected track will be displayed in a pop-up window.  For each individual waypoint of the track, you can: Split: Split the selected waypoint into two.
  • Page 22 Note: To avoid unexpected security loophole, landmarks configured with embedded code will not be displayed on @trip Service at this moment. Attributes...: The attributes of the selected track can be edited in a pop-up dialog. Click Change Photo to select a different photo as ...
  • Page 23 Right-click any landmark/photo in the upper window to see more options: Select All: All landmark(s) and photo(s) in this window will be selected. Remove from Map: The selected landmark/photo will be removed from the map. Attributes...: Attributes of the selected landmark/photo can be edited. Locate Photos...: Time of the selected photo(s) can be adjusted in Photo Locator.
  • Page 24 On the other hand, right-click any photo not yet matching any track in the lower window to see more options: Select All: All photo(s) in this window will be selected. Rotate Left: The selected photo will rotate 90 degree to the left. Rotate Right : The selected photo will rotate 90 degree to the right.
  • Page 25 Switch between Map Mode and Slideshow Mode Backward by one auto-selected waypoint Forward by one auto-selected waypoint Progress bar of the current track Stop playing back the current track Start playing back the current track Pause the currently played back track Speed up the playback Slow down the playback Current auto-selected waypoint/total auto-selected waypoints...
  • Page 26: Share A Trip

    Share A Trip On the main menu bar of @trip PC, click to share your trip in different options. Note: Please make sure GPS Logger device is connected to PC in order to use Export to file and Advanced options. 1.
  • Page 27 Choose a destination to upload the photos of your trip to. If you choose to upload photos to @trip server, the Share Wizard will immediately upload your trip along with the photos directly to your account on @trip server. If you choose to upload photos to either Picasa or Flickr web album, you'll be prompted to login to your account at Picasa or Flickr first,...
  • Page 28 Export to MHT file  Export to KML file  Export to KMZ file  Backup to local folder  The Advanced option allows you to export your entire trip content (including track data, map, photos, etc.) to different file formats, such as *.mht, *.kml, and *.kmz.
  • Page 29 Tutorial This page includes a collection of software tutorials and related documents to get registered travelers started on various products/service. Next...
  • Page 30: Photo Locator

    Photo Locator Photo Locator allows you to re-position any of your photos on the track that has been inaccurately located on the map due to incorrect camera time. On the function menu bar of Trip Composer, click to launch Photo Locator. Select one of the options to adjust the time of all or unmatched photos.
  • Page 31 Next...
  • Page 32: Hardware Settings

    Hardware & Software Settings Please follow the instructions below to configure your GPS device with @trip PC. Hardware Settings On the main menu bar of @trip PC, click to configure your GPS device. Configuration: By checking the option Enable password check, @trip PC will prompt you to enter a password for verification, whenever your GPS device is connected to PC prior to downloading GPS log data.
  • Page 33: Software Settings

    Circular Logging: When this option is enabled, the GPS logger will keep on recording trips even if the memory has reached its limits. When the memory is full, the oldest records will be overwritten as the GPS logger records on. (This feature is available in firmware version 3.05 and up.) Enable button control: Button control is available on GPS Logger if enabled.
  • Page 34 Next...
  • Page 35: Track Management

    Track Management On the main menu bar of @trip PC, click to manage all imported tracks. Export to GPX: Export selected track(s) to a GPX file by clicking the icon or right-clicking any of the listed tracks. Export to CSV: Export selected track(s) to a CSV file by clicking the icon or right-clicking any of the listed tracks. Delete: Delete selected track(s) by clicking the icon or right-clicking any of the listed tracks.
  • Page 36: Compatible Hardware

    Compatible Hardware @trip PC is compatible with most of the GPS logging devices in current markets. As long as your GPS logging device is capable of generating standard gpx files, you can upload and share every trip logged in your GPS device to @trip Service through @trip PC program easily and hassle-free.
  • Page 37: Sports Analyzer

    Sports Analyzer With the advancement of global positioning system network, you can now take your current sports activity to the next level. Sports Analyzer is a small and handy tool that can be utilized to analyze all sorts of sports and outdoor activities. Next...
  • Page 38: Getting Started

    Getting Started Easy-to-use interface. Let Sports Analyzer do all the hard work for you! Main menu bar Main menu bar provides you with quick accesses to the main functions and information concerned. Import GPS Track : Click to to launch Import Wizard to import GPS log data. Activity: Click to add a new activity.
  • Page 39 The calendar gives a clear view of all the activities you've participated in the month indicated. Move your mouse over the activity icon shown on the calendar, and a description bubble will pop up displaying the activity details. Click on the activity icon, and the activity track/route will be highlighted on the map at the right. Click on the arrows to see more activities in one day.
  • Page 40: Analyze Sports Activity

    Personal Information: Enter your personal information, including name, birthday, gender, and etc. Update Reminder: Select the option of Enable Update Reminder to determine how often you would like to check the latest updates about i-gotU Suite. Measurement: Select either Imperial or Metric as your measurement unit for GPS logging.
  • Page 41 Anytime during your travels and activities, or whenever you want to identify where you are geographically on the map, Where I Am could be of much help to quickly locate you. Simply call upon Where I Am from the i-gotU Suite, and you'll be spotted on a chosen digital map in no time.
  • Page 42 Note: Map options will not be available for selection if your device is not correctly connected to the PC . The two light indications shown on the menu must appear as described below, in order for the map options to be available: : The connection light appears white indicating GPS Logger is correctly...

This manual is also suitable for:

Gt-200eGt-600Gt-200Gt-100

Table of Contents