Table of Contents

Related Manuals for Smart Dedicated Design STR7202

Summary of Contents for Smart Dedicated Design STR7202
- Page 1 Installation Manual STR7202 TAG3 & SFM7704 TAG1 DBCI-0512-0052-V008 STR7202 2-Side Trimmer & SFM7704 Square Fold Module 2-SIDE TRIMMER STR7202 & SQUARE FOLD MODULE SFM7704 INSTALLATION MANUAL V008 RI01 13-09-2012 DBCI-0512-0052-V008 1 - 48...
-
Page 2: About This Manual
Installation Manual STR7202 TAG3 & SFM7704 TAG1 DBCI-0512-0052-V008 STR7202 2-Side Trimmer & SFM7704 Square Fold Module About this manual Machines have much in common but there are differences because they can be mirrored, have different colours or additional options. Therefore the machine on the pictures in this manual may be different. -
Page 3: Table Of Contents
Installation Manual STR7202 TAG3 & SFM7704 TAG1 DBCI-0512-0052-V008 STR7202 2-Side Trimmer & SFM7704 Square Fold Module Contents TITLE PAGE ABOUT THIS MANUAL ............................ 2 CONTENTS ............................... 3 SAFETY ..............................4 GENERAL .............................. 5 BASIC INFORMATION .......................... 6 INSTALLATION ............................7 4.1 R... -
Page 4: Safety
Installation Manual STR7202 TAG3 & SFM7704 TAG1 DBCI-0512-0052-V008 STR7202 2-Side Trimmer & SFM7704 Square Fold Module Contents 1. Safety Carefully read the Safety Instruction Document (DBCH-0512-0000-V000) before installing, operating or servicing your equipment. V008 RI01 13-09-2012 DBCI-0512-0052-V008 4 - 48... -
Page 5: General
Installation Manual STR7202 TAG3 & SFM7704 TAG1 DBCI-0512-0052-V008 STR7202 2-Side Trimmer & SFM7704 Square Fold Module Contents 2. General With the addition of the 2-Side Trimmer STR to the SDD product range, a cost effective full-bleed solution is available which has a small footprint and is easily to operate. This machine is designed with high reliability in mind resulting in cost effective operation due to long production with minimal service requirements. -
Page 6: Basic Information
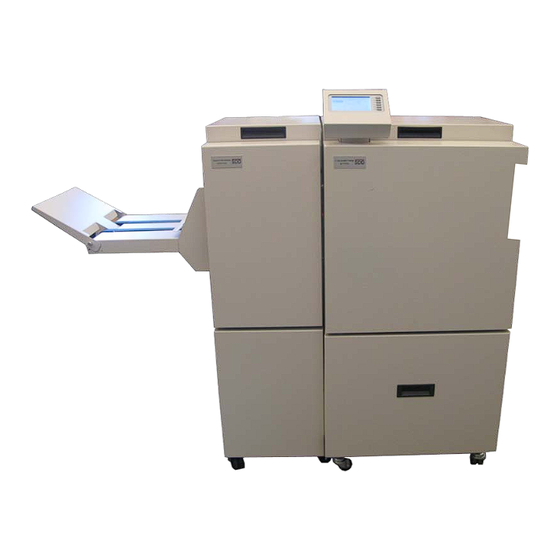
Installation Manual STR7202 TAG3 & SFM7704 TAG1 DBCI-0512-0052-V008 STR7202 2-Side Trimmer & SFM7704 Square Fold Module Contents 3. Basic information Study the picture below to become familiar with the main components. Orientation is based on the paper flow direction. Rear... -
Page 7: Installation
Installation Manual STR7202 TAG3 & SFM7704 TAG1 DBCI-0512-0052-V008 STR7202 2-Side Trimmer & SFM7704 Square Fold Module Contents 4. Installation 4.1 Requirements 4.1.1 Tools Description Wrench 7mm Wrench 24mm Allen key 5mm Cutting plier Screwdriver PZ1 Software Loading Cable 4.1.2 Parts... -
Page 8: Belt Stacker
Installation Manual STR7202 TAG3 & SFM7704 TAG1 DBCI-0512-0052-V008 STR7202 2-Side Trimmer & SFM7704 Square Fold Module Contents 4. Installation (continued) 4.2 Preparing Canon Booklet Trimmer C1 & D1 Fig. 4.2.1 Fig. 4.2.2 Fig. 4.2.3 Fig. 4.2.4 Step Action Remarks Disconnect Canon Belt Stacker. -
Page 9: Contents
Installation Manual STR7202 TAG3 & SFM7704 TAG1 DBCI-0512-0052-V008 STR7202 2-Side Trimmer & SFM7704 Square Fold Module Contents 4. Installation (continued) 4.2 Preparing Canon Booklet Trimmer C1 & D1 (continued) Fig. 4.2.5 Step Action Remarks Remove two Plastic Bolts [E]. (Fig. 4.2.5) -
Page 10: P Reparing The Str
Installation Manual STR7202 TAG3 & SFM7704 TAG1 DBCI-0512-0052-V008 STR7202 2-Side Trimmer & SFM7704 Square Fold Module Contents 4. Installation (continued) 4.3 Preparing the STR Fig. 4.3.1 Fig. 4.3.2 Fig. 4.3.3 Fig. 4.3.4 Step Action Remarks Loosen Upper Covers. Open Top Cover, loosen Hex Bolts [A] and close Top Cover (Fig. -
Page 11: Contents
Installation Manual STR7202 TAG3 & SFM7704 TAG1 DBCI-0512-0052-V008 STR7202 2-Side Trimmer & SFM7704 Square Fold Module Contents 4. Installation (continued) (continued) 4.3 Preparing the STR Fig. 4.3.5 Fig. 4.3.6 ≈ 86cm Fig. 4.3.7 Step Action Remarks Loosen Upper Nuts. Loosen nut [C] on the left and right front wheel (Fig. 4.3.5 &... -
Page 12: Contents
Installation Manual STR7202 TAG3 & SFM7704 TAG1 DBCI-0512-0052-V008 STR7202 2-Side Trimmer & SFM7704 Square Fold Module Contents 4. Installation (continued) (continued) 4.3 Preparing the STR Inside - right Inside - left Fig. 4.3.8 Fig. 4.3.9 Outside - right Outside - left Fig. -
Page 13: P Reparing The Sfm
Installation Manual STR7202 TAG3 & SFM7704 TAG1 DBCI-0512-0052-V008 STR7202 2-Side Trimmer & SFM7704 Square Fold Module Contents 4. Installation (continued) 4.4 Preparing the SFM Fig. 4.4.1 Fig. 4.4.2 Fig. 4.4.3 Fig. 4.4.4 Step Action Remarks Loosen Upper Nuts Loosen Upper Nuts [B] of all wheel bolts (Fig. 4.4.1). -
Page 14: P Reparing The B Elt S Tacker
Installation Manual STR7202 TAG3 & SFM7704 TAG1 DBCI-0512-0052-V008 STR7202 2-Side Trimmer & SFM7704 Square Fold Module Contents 4. Installation (continued) 4.5 Preparing the Belt Stacker Fig. 4.5.1 Fig. 4.5.2 Step Action Remarks Unpacking Belt Stacker (Fig. 4.5.1) Remove tiewraps Remove the tiewraps (A) with a cutting plier. (Fig. 4.5.2) -
Page 15: M Echanical I Nstallation
Installation Manual STR7202 TAG3 & SFM7704 TAG1 DBCI-0512-0052-V008 STR7202 2-Side Trimmer & SFM7704 Square Fold Module Contents 4. Installation (continued) 4.6 Mechanical Installation 4.6.1 STR behind Canon Booklet Trimmer C1/D1 Fig. 4.6.1 C1/D1 Fig. 4.6.2 Step Action Remarks Positioning STR. -
Page 16: Contents
Installation Manual STR7202 TAG3 & SFM7704 TAG1 DBCI-0512-0052-V008 STR7202 2-Side Trimmer & SFM7704 Square Fold Module Contents 4. Installation (continued) 4.6 Mechanical Installation (continued) 4.6.1 STR behind Canon Booklet Trimmer C1/D1 (continued) Fig. 4.6.3 Fig. 4.6.4 Fig. 4.6.5 Step Action... -
Page 17: Fig.
Installation Manual STR7202 TAG3 & SFM7704 TAG1 DBCI-0512-0052-V008 STR7202 2-Side Trimmer & SFM7704 Square Fold Module Contents 4. Installation (continued) 4.6 Mechanical Installation (continued) 4.6.1 STR behind Canon Booklet Trimmer C1/D1 (continued) Fig. 4.6.6 Fig. 4.6.7 Fig. 4.6.8 Fig. 4.6.9... -
Page 18: Fig.
Installation Manual STR7202 TAG3 & SFM7704 TAG1 DBCI-0512-0052-V008 STR7202 2-Side Trimmer & SFM7704 Square Fold Module Contents 4. Installation (continued) 4.6 Mechanical Installation (continued) 4.6.1 STR behind Canon Booklet Trimmer C1/D1 (continued) Fig. 4.6.10 Fig. 4.6.11 Fig. 4.6.12 Fig. 4.6.13... -
Page 19: Sfm Behind Str
Installation Manual STR7202 TAG3 & SFM7704 TAG1 DBCI-0512-0052-V008 STR7202 2-Side Trimmer & SFM7704 Square Fold Module Contents 4. Installation (continued) 4.6 Mechanical Installation (continued) 4.6.2 SFM behind STR Fig. 4.6.14 Fig. 4.6.15 Fig. 4.6.16 Fig. 4.6.17 Step Action Remarks Positioning SFM Open the SFM Top cover and lower the Locking Bracket [A] by loosening Hex Nuts [B] (Fig. -
Page 20: Fig.
Installation Manual STR7202 TAG3 & SFM7704 TAG1 DBCI-0512-0052-V008 STR7202 2-Side Trimmer & SFM7704 Square Fold Module Contents 4. Installation (continued) 4.6 Mechanical Installation (continued) 4.6.2. SFM behind STR (continued) Fig. 4.6.18 Fig. 4.6.19 Step Action Remarks Check height SFM. The top cover of the SFM is at the same height as the STR and both units are level (Fig. -
Page 21: Belt Stacker On Str
Installation Manual STR7202 TAG3 & SFM7704 TAG1 DBCI-0512-0052-V008 STR7202 2-Side Trimmer & SFM7704 Square Fold Module Contents 4. Installation (continued) 4.6 Mechanical Installation (continued) 4.6.3. Belt Stacker on STR Fig. 4.6.20 Fig. 4.6.21 Step Action Remarks Mount Belt Stacker. Mount the Belt Stacker on the Studs (A) and [B] on the STR Upper Outfeed cover (Fig. -
Page 22: Belt Stacker On Sfm
Installation Manual STR7202 TAG3 & SFM7704 TAG1 DBCI-0512-0052-V008 STR7202 2-Side Trimmer & SFM7704 Square Fold Module Contents 4. Installation (continued) 4.6 Mechanical Installation (continued) 4.6.4. Belt Stacker on SFM Fig. 4.6.22 Fig. 4.6.23 Fig. 4.6.24 Step Action Remarks Mount Belt Stacker Mount the Belt Stacker on the Studs (A) on the Outfeed side of the SFM (Fig. -
Page 23: E Lectrical I Nstallation
Installation Manual STR7202 TAG3 & SFM7704 TAG1 DBCI-0512-0052-V008 STR7202 2-Side Trimmer & SFM7704 Square Fold Module 4. Installation (continued) 4.7 Electrical Installation • The STR and SFM should only be connected to an approved electrical system which is rated at a maximum of 16A and protected by circuit breakers •... -
Page 24: Tapping Sfm Transformer
Installation Manual STR7202 TAG3 & SFM7704 TAG1 DBCI-0512-0052-V008 STR7202 2-Side Trimmer & SFM7704 Square Fold Module Contents 4. Installation (continued) 4.7 Electrical Installation (continued) 4.7.2 Tapping SFM Transformer Fig.4.7.5 Fig.4.7.6 Fig. 4.7.7 Step. Action Remarks Fig.4.7.5 shows a transformer tapped for 230V.Check to which Check terminal setting. -
Page 25: Connecting Str To Canon Booklet Trimmer C1
Installation Manual STR7202 TAG3 & SFM7704 TAG1 DBCI-0512-0052-V008 STR7202 2-Side Trimmer & SFM7704 Square Fold Module Contents 4. Installation (continued) 4.7 Electrical Installation (continued) 4.7.3 Connecting STR to Canon Booklet Trimmer C1 Fig. 4.7.8 Fig. Fig. 4.7.9 4.7.10 Step Action... -
Page 26: Installing Start/Stop Interface In Canon Booklet Trimmer D1
Installation Manual STR7202 TAG3 & SFM7704 TAG1 DBCI-0512-0052-V008 STR7202 2-Side Trimmer & SFM7704 Square Fold Module Contents 4. Installation (continued) 4.7 Electrical Installation (continued) 4.7.4 Installing Start/Stop Interface in Canon Booklet Trimmer D1 Fig. 4.7.11 Fig. 4.7.12 Fig. 4.7.13 Fig. 4.7.14... -
Page 27: Fig.
Installation Manual STR7202 TAG3 & SFM7704 TAG1 DBCI-0512-0052-V008 STR7202 2-Side Trimmer & SFM7704 Square Fold Module Contents 4. Installation (continued) 4.7 Electrical Installation (continued) 4.7.4 Installing Start/Stop Interface in Canon D1 (continued) CON3 CON4 Fig. 4.7.15 Fig. 4.7.16 CON1 CON2 Fig. -
Page 28: Contents
Installation Manual STR7202 TAG3 & SFM7704 TAG1 DBCI-0512-0052-V008 STR7202 2-Side Trimmer & SFM7704 Square Fold Module Contents 4. Installation (continued) 4.7 Electrical Installation (continued) 4.7.4 Installing Start/Stop Interface in Canon D1 (continued) Fig. 4.7.19 Fig. 4.7.20 Fig. 4.7.21 Fig. 4.7.22... -
Page 29: Contents
Installation Manual STR7202 TAG3 & SFM7704 TAG1 DBCI-0512-0052-V008 STR7202 2-Side Trimmer & SFM7704 Square Fold Module Contents 4. Installation (continued) 4.7 Electrical Installation (continued) 4.7.4 Installing Start/Stop Interface in Canon D1 (continued) Fig. 4.7.23 Step Action Remarks Mount Replacement cover Place Grommet of Interface Cable in slot in Cover and mount Replacement Cover on the D1 Rear Cover (Fig. -
Page 30: Connecting Str To Canon Booklet Trimmer D1
Installation Manual STR7202 TAG3 & SFM7704 TAG1 DBCI-0512-0052-V008 STR7202 2-Side Trimmer & SFM7704 Square Fold Module Contents 4. Installation (continued) 4.7 Electrical Installation (continued) 4.7.5 Connecting STR to Canon Booklet Trimmer D1 Fig. 4.7.24 Fig. 4.7.25 Step Action Remarks Connect Power Cable Lead the Power cable through the slot on the front right side into the STR and connect in socket U1 at [A] (Fig. -
Page 31: Connecting Sfm To Str
Installation Manual STR7202 TAG3 & SFM7704 TAG1 DBCI-0512-0052-V008 STR7202 2-Side Trimmer & SFM7704 Square Fold Module Contents 4. Installation (continued) 4.7 Electrical Installation (continued) 4.7.6 Connecting SFM to STR Fig. 4.7.26 Fig. 4.7.27 Fig. 4.7.28 Fig. 4.7.29 Step Action Remarks Move XCan Terminator Plug Move XCan Terminator [A] from STR (Fig. -
Page 32: Contents
Installation Manual STR7202 TAG3 & SFM7704 TAG1 DBCI-0512-0052-V008 STR7202 2-Side Trimmer & SFM7704 Square Fold Module Contents 4. Installation (continued) 4.7 Electrical Installation (continued) 4.7.6 Connecting SFM to STR (continued) Fig. 4.7.30 Step Action Remarks Connect Power Cable in STR. -
Page 33: Connecting Belt Stacker To Str
Installation Manual STR7202 TAG3 & SFM7704 TAG1 DBCI-0512-0052-V008 STR7202 2-Side Trimmer & SFM7704 Square Fold Module Contents 4. Installation (continued) 4.7 Electrical Installation (continued) 4.7.7 Connecting Belt Stacker to STR Fig. 4.7.31 Step Action Remarks Connect Belt Stacker Connect the Communication cable of the Belt Stacker to Communication Cable. -
Page 34: Connecting Belt Stacker To Sfm
Installation Manual STR7202 TAG3 & SFM7704 TAG1 DBCI-0512-0052-V008 STR7202 2-Side Trimmer & SFM7704 Square Fold Module Contents 4. Installation (continued) 4.7 Electrical Installation (continued) 4.7.8 Connecting Belt Stacker to SFM Fig .4.7.32 Fig. 4.7.33 Step Action Remarks Connect Belt Stacker Connect the Communication cable of the Belt Stacker to Communication Cable. -
Page 35: S Ecuring Cables In Str & Sfm
Installation Manual STR7202 TAG3 & SFM7704 TAG1 DBCI-0512-0052-V008 STR7202 2-Side Trimmer & SFM7704 Square Fold Module Contents 4. Installation (continued) 4.8 Securing cables in STR & SFM Fig. 4.8.1 Fig. 4.8.2 Fig. 4.8.3 Fig. 4.8.4 Step Action Remarks Secure Power and Start/Stop Secure the Power and Start/Stop Interface cable with a Interface cable. -
Page 36: F Inalizing I Nstallation
Installation Manual STR7202 TAG3 & SFM7704 TAG1 DBCI-0512-0052-V008 STR7202 2-Side Trimmer & SFM7704 Square Fold Module Contents 4. Installation (continued) 4.9 Finalizing Installation 4.9.1 With Canon Booklet Trimmer C1 Fig. 4.9.1 Fig. 4.9.2 Fig. 4.9.3 Fig. 4.9.4 Step Action Remarks Locking SFM. -
Page 37: With Canon Booklet Trimmer D1
Installation Manual STR7202 TAG3 & SFM7704 TAG1 DBCI-0512-0052-V008 STR7202 2-Side Trimmer & SFM7704 Square Fold Module Contents 4. Installation (continued) 4.9 Finalizing Installation (continued) 4.9.2 With Canon Booklet Trimmer D1 Fig. 4.9.5 Fig. 4.9.6 Step Action Remarks Locking SFM. Open the SFM Top Cover and pull the Docking Bracket upwards in the outer slot [A] of the Stud. -
Page 38: Belt Stacker Outfeed Cover Setting
Installation Manual STR7202 TAG3 & SFM7704 TAG1 DBCI-0512-0052-V008 STR7202 2-Side Trimmer & SFM7704 Square Fold Module Contents 4. Installation (continued) 4.9 Finalizing Installation (continued) 4.9.3 Belt Stacker Outfeed Cover setting Fig. 4.9.7 Fig. 4.9.8 Fig. 4.9.9 Fig. 4.9.10 Fig.4.9.11 Step... -
Page 39: Str On External Power
Installation Manual STR7202 TAG3 & SFM7704 TAG1 DBCI-0512-0052-V008 STR7202 2-Side Trimmer & SFM7704 Square Fold Module Contents 4. Installation (continued) 4.9 Finalizing Installation (continued) 4.9.4 STR on External Power Fig.4.9.12 Fig.4.9.13 Step Action Remarks Open Top Cover. Check Power Switch Make sure the STR power Switch is OFF.(4.9.12). -
Page 40: System Setup
Installation Manual STR7202 TAG3 & SFM7704 TAG1 DBCI-0512-0052-V008 STR7202 2-Side Trimmer & SFM7704 Square Fold Module Contents 5. System Setup 5.1 System Setup Fig. 5.1.1 Fig. 5.1.2 Fig. 5.1.3 Fig. 5.1.4 Step Action Remarks Open the STR Top cover. Turn on the STR. -
Page 41: L Anguage
Installation Manual STR7202 TAG3 & SFM7704 TAG1 DBCI-0512-0052-V008 STR7202 2-Side Trimmer & SFM7704 Square Fold Module Contents 5. System Setup (continued) 5.2 Language Fig. 5.2.1 Fig. 5.2.2 Fig. 5.2.3 Step Action Remarks Enter ‘Admin’ menu Press the [Admin] button (Fig. 5.2.1) Use the ‘▲... -
Page 42: T Hickness D Etection S Etup
Installation Manual STR7202 TAG3 & SFM7704 TAG1 DBCI-0512-0052-V008 STR7202 2-Side Trimmer & SFM7704 Square Fold Module Contents 5. System Setup (continued) 5.3 Thickness Detection Setup NVM ‘Stop if booklet too thick’ is a value set to warn the Operator that a booklet is to thick to trim. -
Page 43: Contents
Installation Manual STR7202 TAG3 & SFM7704 TAG1 DBCI-0512-0052-V008 STR7202 2-Side Trimmer & SFM7704 Square Fold Module Contents 5. System Setup (continued) 5.3 Thickness Detection Setup (continued) Fig. 5.3.5 Fig. 5.3.6 Fig. 5.3.7 Step Action Remarks Use the ‘▲ / ▼ buttons’ to select NVM no. 6 [Stop if Select [Booklet too thick] setting. -
Page 44: Job Testing
Installation Manual STR7202 TAG3 & SFM7704 TAG1 DBCI-0512-0052-V008 STR7202 2-Side Trimmer & SFM7704 Square Fold Module 6. Job Testing Refer to the Operator manual to run a job for testing purposes. Refer to the Service Manual in case of errors when running a (test)job. -
Page 45: Technical Information
Installation Manual STR7202 TAG3 & SFM7704 TAG1 DBCI-0512-0052-V008 STR7202 2-Side Trimmer & SFM7704 Square Fold Module Contents 7. Technical Information 7.1 STR7202 2-Side Trimmer Capabilities: Compatibility: Canon Booklet Trimmer C1/D1 Physical: Operational On Pallet in box Height 1300 mm 1570 mm... -
Page 46: Contents
Installation Manual STR7202 TAG3 & SFM7704 TAG1 DBCI-0512-0052-V008 STR7202 2-Side Trimmer & SFM7704 Square Fold Module Contents 7. Technical Information (continued) 7.1 STR7202 2-Side Trimmer (continued) Electrical: Power Source; External 50Hz: 220/230V, 2.0A 60Hz: 220/230V, 2.0A 60Hz: 100/110/120/127V, 4.0A (upon request) -
Page 47: Sfm7704 S Quare F Old M Odule
Installation Manual STR7202 TAG3 & SFM7704 TAG1 DBCI-0512-0052-V008 STR7202 2-Side Trimmer & SFM7704 Square Fold Module Contents 7. Technical Information (continued) 7.2 SFM7704 Square Fold Module Capabilities: Compatibility: Online: STR7202 Physical: Operational On Pallet in box Height 1300mm 720mm Width... -
Page 48: Dbci-0512-0052-V008
Installation Manual STR7202 TAG3 & SFM7704 TAG1 DBCI-0512-0052-V008 STR7202 2-Side Trimmer & SFM7704 Square Fold Module SDD Productions B.V. SDD B.V. Your Partner in Short Term, Turnkey Solutions. Your Partner in Short Term, Turnkey Solutions. Your Partner in Turnkey Solutions.
Need help?
Do you have a question about the STR7202 and is the answer not in the manual?
Questions and answers